29 June 2009

Sleeping mats: less is more?

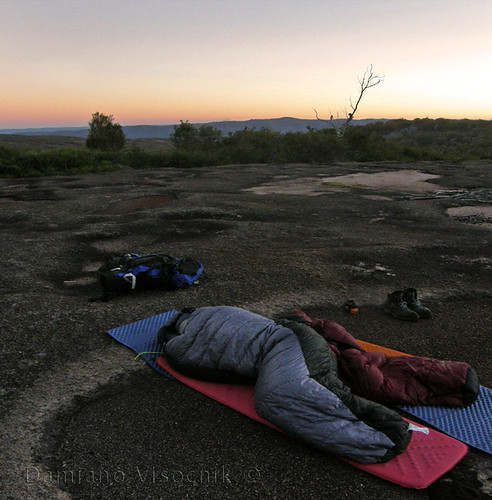
One of my favorite aspects of sea kayaking is that I can travel under my own steam to remote places.
Often to reach pristine beaches I need to paddle for several days.
I am not interested in staying in resorts on my trips and camping from a kayak is the obvious solution.
I was a backpacker before becoming a kayaker and I learned to pack light and efficiently.
I can go away for a weekend in my kayak and fit all of my kit in one hatch and still have a lot of spare room.
Other kayakers are often amazed at how light my kayak is on a camping trip.
How do you do it? they ask me.
Well, I travel light, is my answer.
Travelling light means packing only really necessary items and/or using the lightest and most compact gear that fits the purpose.
If your camping experiences are limited at once a year affair it makes no sense to invest in light gear.
Light and compact gear usually costs a lot more than generic camping gear.
There are some real weight and size savings to be done with some of the most common camping items.
I have mentioned (in a previous post) that occasionally I like to take the bear minimum gear but here I would rather look at just one item of the kit: the sleeping mat.
Open air bivvy (C)
ultralight sleeping mats, a bit less comfortable...

A sleeping mat is an essential item for me. Without one I sleep badly being uncomfortable and cold.
Without proper rest my body suffers and I don’t paddle or hike properly the next day.
Unfortunately often a sleeping mat to be comfortable can be heavy and bulky. But not always.
Let’s take 3 types of sleeping mats: the self inflating one, the closed cell foam one and the air mattress.
I dislike the closed cell foam ones: too bulky and not enough cush for my liking.
I dislike the air mattress if it comes in the shape of a conventional car camping type (li-lo).
I like the self inflating ones. I also like air mattresses if properly engineered.

For this review I have used 3 mats that offer great comfort and similar in size when inflated (the Camplite slightly wider and longer however thinner).
All 3 mats are regarded as light and compact, in their class. I have not included generic type self inflating mats since they are often too bulky for the limited comfort they offer.
left to right: Thermarest NeoAir, Exped Downmat7, Thermarest Camplite_replaced by TrailPro

NeoAir 6.3 cm, Downmat 7 cm, Camplite 3.5 cm

The self inflating ones:
I purchased my first Thermarest in 1988 and immediately loved it.
It was a marked improvement over the closed cell foam.
Despite being a bit bulky and heavy I used it a lot. I eventually got an additional one in ¾ length because it was lighter and more compact: my feet could rest on my backpack if needed (cold ground). So far I have owned probably 14 Thermarest. I have upgraded throughout the years as they became more compact and lighter. I have also bought some generic brand ones but I have regretted buying each non Thermarest self inflating mat.
They just delaminated after a while.
I had one Thermarest (the very first ultra light ones) that was faulty but it was replaced on the spot without questions. I can not say the same for the generic brand ones!

The air mattress ones:
Years ago I tried to sleep on an air mattress. While in theory it should have given me a very cushioned rest I was very cold during the night.
In a common air mattress the movement of a person’s body will circulate the air that is cooled by the ground the mat is laying on.
In a very short time the sleeper will chill by the cold air under his/her body: a very uncomfortable result.
In the dead of the summer heat such feature might be desirable but any other time of the year it is not.
There are a couple of air mat manufacturers that have addressed this problem by filling the air chambers with light material to stop air circulating.
In the Exped mats there is synthetic or down as filler.
Thermarest has addressed the problem with creating very small baffled air chambers to stop the cold air moving around.
The advantages of the new Thermarest Neo Air mat are evident: compact, light and no pump needed for inflation (mouth inflation can destroy some fillers, like down).

In the picture below you can see that the Neo Air packs incredibly small despite being generous in size and thickness when inflated.
I used a $50 bill for size comparison (greenback and OZ money, to cover all bases :-)
this top view really shows bulk savings:
NeoAir 410 g., Downmat7 880 g., Camplite 1220 g.

If your kayak is busting at the seams (no pun intended) maybe your sleeping mat could be reduced in size.
After all less is more.
(That’s not what she told me ;-)

22 June 2009

Solar panel battery charger

There is in increasing number of gadgets available for outdoors activities.
The most common seem to be digital cameras, GPS and communication devices (radios, cell phones).
Most of these gadgets are operated by rechargeable batteries with only a few having the option of running on disposable batteries.
A few years ago, one of my criteria for buying a new digital camera was that it should be able to run on AA batteries. I wanted my camera to perform for lengthy amounts of times between locations where I would be able to recharge batteries.
Occasional trips into remote areas would see me away from power outlets.
The camera works great and I pack several sets of AA batteries with me.
But the camera is not waterproof.
My Olympus waterproof camera needs to be recharged (can not run on disposable batteries).
I needed to be able to recharge my camera's battery.
The obvious choice for a mobile power source available in the remote locations I would visit is the sun.
In Australia we have plenty of it.
A solar panel to harness the sun's energy was my next item.
While simple in concept a solar panel proved a bit more complex than first envisioned.
I needed an inexpensive solar panel that would generate enough power for my needs.
While some expeditioners equip themselves with large solar panels to be able to supply very power hungry devices (laptops) I just needed enough juice for my little camera.
I found a small solar panel that would supply enough power for my battery charger: a 12 Volt 4.5 Watt solar panel.

The panel would supply power to my charger while the sun shines (duh) but that’s when I would be using my camera.
I needed a large battery to store the power during the day and then “transfer” that power to my camera battery.
I chose a 12V Sealed Leaded Acid (SLA) 1.3 Ah unit (the same type of battery that I use for my bilge pump). Not too heavy but with enough capacity to recharge my 1200 mA camera battery.
Once I purchased the solar panel I tested the voltage output in bright sun: a whopping 20V! too much for my battery.
I solved the problem with a voltage regulator that would reduce the output from my solar panel and charge my SLA battery at the desired level.
The voltage regulator
would also prevent the current from my battery flow back to the panel when the sunny conditions would not be happening (overcast, shadow over panel, left plugged in overnight).

components wired up
The solar panel was removed from it’s original plastic casing to reduce bulk and placed into a waterproof map pouch: WXtex map case.
The pouch has clips on the corners that I can secure to the perimeter lines of my kayak.

slim profile and removable
I usually place my solar panel towards the stern while paddling but I can easily remove the panel and place it in a more sunny place if the kayak happens to be resting in the shade when ashore.


WXtex waterproof map case
At night, I disconnect the SLA battery from the solar panel and connect it to the camera battery charger.
Obviously the SLA battery can be used to recharge many other devices (VHF radio, music players etc.) as long as the device charger is compatible with 12V power source (many after market chargers are).

An advantage of the removable pouch is that at times, on long trips, real estate on the deck of the kayak can be scarce and the pouch can sit on top of other items (paddles, bags etc).

PS Matt Bezzina has told me of his version of solar panel charger: here


PPS AUG09:
One reader's email prompted me to test the voltage output from the solar panel. He was under the impression that no harm would occur if the battery would be charged unregulated.
The below picture shows voltage readings at different states.


1) a reading of 18V. was achieved in full sun. The battery was connected to the regulator.
2) a reading of almost 20V. was with the regulator and no battery connected.
3) a reading of 13.6V. with the battery getting charged without the regulator.
(A reading of 22V. was given with panel alone, no regulator).
The reading of 13.6V. means that a lot of the load is getting to the battery that eventually in time will overcharge once full ruining the battery in the long run.
With the regulator the battery is charged slower and once it reaches full charge will not continue to receive current and become overcharged.
In conclusion: the addition of the regulator will extend the life of the battery substantially especially if the battery is left charging once full (unattended).

15 June 2009

Sea kayak grab handles


source *: http://www.kayaking.com.au/brochurefiles/Ocean.pdf
A sea kayak to be safe must have grab handles.
Just like its perimeter lines, the grab handles are used to hold onto the kayak when out of the boat.
While perimeter lines are essential to perform an assisted rescue and vital for hanging onto your vessel in rough waters, the grab handles perform also other duties.
They are needed in towing situations but most often are used by the paddler in a wet exit in the surf zone.
When paddling in ocean conditions chances are you might need to land on a beach where surf is encountered. Most paddlers have been dumped at some stage out of their kayak (some more than others) and probably had to hang onto the boat to prevent their vessel being smashed onto shore by the following waves.
The best location to hold onto your kayak is the bow or stern where you can point the vessel into the incoming force of the wave and minimize the impact (less surface area).
Unfortunately not all kayaks have stern grab handles because of rudders.
The waves don't even have to be that big to surf your kayak away from you if not held tight.
Often the wave will twist your kayak when you hanging onto it by the grab handle.
Most likely you will have your full hand holding onto the grab handle trying to stay together with your kayak.
Let's analyze the different types of handle, their merit, shortcomings and potential dangerous features.

(Explanations to comments at the bottom)
Eco Bezhig:
-great carry handle
-no grab handle
not safe in the surf zone (1)

Mirage grab/carry handle:
-average carry handle (too small)
- dangerous as grab handle in the surf (2)

Guillemont Petrel custom made kayak and handles:
- good anchor for towing
- dangerous handle in the surf (3)
Raider grab and carry handle:
- OK carry handle
- dangerous grab handle in surf (4)
Impex grab handle:
-very good handle for surf (5)
-carry handle is separate (same as Eco Bezhig)

SeaBird carry handle and grab handle (retrofit)
- good carry handle
- excellent grab handle for surf (6)

Valley (VCP) grab/carry handle:
- average carry handle (too small)
- very good surf handle (7)
SKUK (Nigel Dennis)
-one word: brilliant
The simplest design seems to be the best.
There is no chance to get your fingers caught or your wrist injured in the surf.
The stern handle is offset (handle of left) to balance the kayak when carried.
While this handle might look like the obvious solution it took the genius of Nigel Dennis to perfect this simple design.
.
By dangerous I mean:
if the kayak is held by this handle chances are that your wrist or fingers will be injured if the kayak twists/rolls.
Analysis by numbers:

(1) this kayak has no grab handle, only a carry handle. Holding the kayak in the surf by the grab handle there is a good chance of injuring/braking your wrist when the kayak gets rolled by the wave

(2) this grab handle allows for fingers to be slipped between the two ropes of the handle. Documented cases of severed fingers are the result of this type of handle. If the kayak is rolled by the wave possible wrist injury.

(3) this handle is excellent for towing (low centre of gravity that lifts the bow under tow) but is even more dangerous than handle (2). Not be used in surf at all as grab handle.

(4) this handle is soft on the hand for carrying an unloaded kayak but has similar potential of injury as handle (2). Just slightly better because the ropes join at the handle and less of chance of having fingers caught between the lines. Still potential wrist injury when boat rolls.

(5) this handle uses bungee cord as shock absorption when the waves yanks on your holding hand. The cords might still allow finger insertion however the bungee would be softer and less damaging. Not perfect but better than others.

(6) the SeaBird Desisg kayak came only with carry handle (bad); I retrofitted a decent grab handle by drilling the bow and threaded some heavy duty bungee cord. The bungees also have a sleeve that prevents the fingers being inserted between the two lines. Very safe grab handle.

(7) Valley has addressed the risk of severed fingers by sleeving the grab handle lines however the handles are a bit undersized for carrying an empty kayak.

After a few near misses with some of the types of handle described above I now will not hang onto a kayak in the surf that potentially will injure me.
There are some other handles that I have not reviewed yet but I might add them as I will have more photographs to post.
* used under COPYRIGHT ACT 1968 - SECT 41
PS 17JUN. It appears that my observations on the above grab handles have stirred some emotions from loyal kayak owners and manufacturers.
It seems that maybe one kayak manufacturer is prepared to redesign the grab handle on his kayaks.
However, today I had a strange call from a kayak instructor.
He sternly warned me against possible lawsuits from the "offended" kayak manufacturers. I am grateful to him for his concerns for my wellbeing however before posting the above I consulted with my legal advisor and cleared some points.
What I don't share with my concerned instructor is the fear that some individuals have towards manufacturers.
While I can't see any slandering in my review, just observations, I do understand that individuals might have been challenged with their design rationale.
My question is: how would a consumer truly find a non bias review?
I have tried a few times myself but the ones available on forums are often "doctored" or deleted. It seems that is not uncommon to have forum administrators not display an unfavourable review with the fear that an advertiser/sponsor might cancel their support.
I have also noticed that true unbiased reviews are only possible from users that have no ulterior motives.
Come on, how often have you read a review on a website that was just reeking of commission?
Unfortunately there are very few sources out there that are fully independent from any commercial agenda that will give you an honest opinion.
While some might advocate for "if you ain't got nothing nice to say, say nothing at all", I rather believe in an informed consumer.

12 June 2009

Werner paddles: modifying the release button

At http://www.wernerpaddles.com/ferrule.php
Werner says: We have redesigned our Adjustable Ferrule to make it even better! The NEW low profile button looks and feels like a one piece paddle. The button is flush with the shaft preventing snagging or unintended release.


I guess Werner has listened to their customers' feedback. If you like to have your paddle as a two piece job (for easier transport and for storing it on the deck of the kayak) you might have had the occasional odd incident where the paddle came apart in the heat of the battle (surf zone).

This hick up never happened to me but to some of my paddling buddies.

Werner has changed the release button on the new 2009 paddles but it is offering a retrofit solution for the older style button that protrudes from the shaft.
You can order for free a little rubber booth that will cover the button and prevent accidental release of the paddle.

booth installed (not needed here: button shaved already)
For ordering the part email: info.y07@wernerpaddles.com and they will pop one in the mail for you in no time.

I installed the rubber booth but was not totally satisfied with the result.
The paddle now had a big bump on the shaft.
Greg Schwarz, the eternal tinkerer, has showed me a better solution: shave the button.
The idea did come to mind but I was afraid to ruin the ferrule system.
Greg shaved the button and it worked.

He warned me to be careful and shave off only what the button will allow.
For some reason not all release buttons are the same.
Of the 3 Werner paddles that I have shaved, one had a shallow shoulder and care had to be taken not to reduce the button too much and ruin the part.
The button contains a spring that holds the catch mechanism in place.
If the button is shaved too much the spring might be exposed and pop out and ruin the mechanism.


I shaved the button progressively until I came close to the spring but still leaving enough material to keep the spring in place.
I used a Dremel® tool to shave the button until flush.
I have now two Werner paddles that have the button flush with the shaft.

On one paddle the button did not have enough shoulder (the spring was going to pop out).

For the one that the button still protrudes, I shaved the rubber booth and reduced the “bump” .
While shaving the button is a better solution than just installing the booth I am sure it is not endorsed by Werner.
Hack away at your own risk.

10 June 2009

freeze or thaw: a different point of view

Here Downunder we have fallen into the depths of winter while the northern hemisphere has now their summer.
This perception of summer and winter however is very relative.
Surely temperatures have changed and possibly the weather has turned but what might be winter to one person it could mean a heat wave to somebody else.
Lately I have noticed a marked decrease of paddling activity in my area.
We have officially entered winter but with water temperatures of 23C and air of 27C degrees I have a hard time considering that real winter.
Some paddlers around the world can only dream of conditions like our winter.
Obviously some might feel the cold more than others but you can’t expect to be paddling year round just in a T-shirt!
All that is really needed is a light spray jacket or the brilliant clothing from
Reed to “battle” our harsh winter.
Look at what some folks consider summer:


used with permission; photo Stan McKenzie
You should see what conditions they paddle in, in their real winter.
I have great respect for those kayakers.
Interestingly enough harsh environments usually will produce much tougher characters.
To my local hibernating paddling community I would like to say: get some cement (or better gear) and toughen up :-)

09 June 2009

destination: Sweden

I took the opportunity of the long week end to undertake a paddle a bit longer than just an overnighter.
I realize that I have a great place to paddle here in Moreton Bay and that the weather is so incredibly benign all year round.
But often I long for something different.
After all isn't variety the spice of life?
While browsing flickr for inspiration (photographically and as destination ideas) a while ago I came across
Erik's site.
He lives in Sweden and kayaks year round.
His images have been a great inspiration to me.
I admire his photographic skills (I do ignore his iPhone uploads: they are not good) but I love the images where he obviously has spent some time creating.

published under creative commons license from Eriksjo
Just looking at this scene I long to travel to Sweden (and not just to meet the Swedish Bikini Team :-).
Considering that probably the sun never sets this time of year and that there are thousand of islands to explore and camp I am surprised that Sweden is not considered a mainstream paddling destination.
Could it be that the living standard is so high that most other's countries currency exchange rate would make it rather expensive to travel there or maybe the locals want to keep a low profile on their secret paddling paradise.
If I only had that
folding kayak that I have been eyeing for some time...

PS I checked my letterbox today and in the freshly delivered Ocean Paddler magazine there is an outstanding pictorial article on Sweden.

03 June 2009

something different: mtb video

While lately I have been concentrating on sea kayaking in my previous life (living in the US and A) mountain biking used to consume most of my time.
For a while I worked at Chumba and during the racing season I would wrench on the sponsored racer's downhill rigs.
I have met some really incredible riders and witnessed some amazing stunts but the video below just blew me away.
Total balance, control and power is portrayed in the Inspired masterpiece of real action cinematography (non Hollywood).
Enjoy.

at more than 6 million views, chances are you might have seen it before

01 June 2009

SHOP: custom foot bilge pump

I have previously detailed the installation of an electric bilge pump.
Here I am depicting an alternative: a foot pump.

Greg Schwarz is a master in kayak modification (see his cockpit rim mods!) and he can create precision parts from fiberglass, carbon and epoxy.
After installing an electric bilge pump in his wife's Avocet LV he wanted to compare it to a foot bilge pump.
Not satisfied with the commercially available one he designed and fabricated his own one. The pump is a modified manual hand pump that was sourced at a marine chandlery.
The handle has been removed and a custom foot bracket made to optimize the action of the pump.
Greg's foot bilge pump (pc)
foot pump mounted in cockpit of a Nordkapp LV.
A reinforcing plate is mounted on the bulkhead. This version of a foot pump is mounted on the bulkhead instead of on a bracket off the foot pegs(http://www.hybridaustralia.com/).
Needless to say that a kayak must be just the right size for you with the forward bulkhead close enough to have this set up.
Greg's foot bilge pump_detail(pc)
Extensive modelling has been done to achieve the right pedal size and leverage.

The strum box is enlarged to allow wider pick up and increase water flow.


details of the pedal: a custom one-off (no mold) unit made from fiberglass, carbon and epoxy.

strum box detail
The pump works extremely well and empties a flooded cockpit almost as fast as a Rule 500 electric bilge pump.
If your idea for a bilge pump does not include electricity, this foot pump seems to be probably the best solution.
Unfortunately Greg Schwarz is not interested in producing these units commercially (they would cost almost as much as a kayak, if he had to charge for his time making one).
If you really are confident with your fibreglassing and have the time and patience, this pump could be the inspiration for your version.
Let me know how your project turns out.