Showing posts with label carbon. Show all posts

05 February 2013

DIY: repair a cracked paddle

It had to happen: I cracked the carbon fibre paddle.
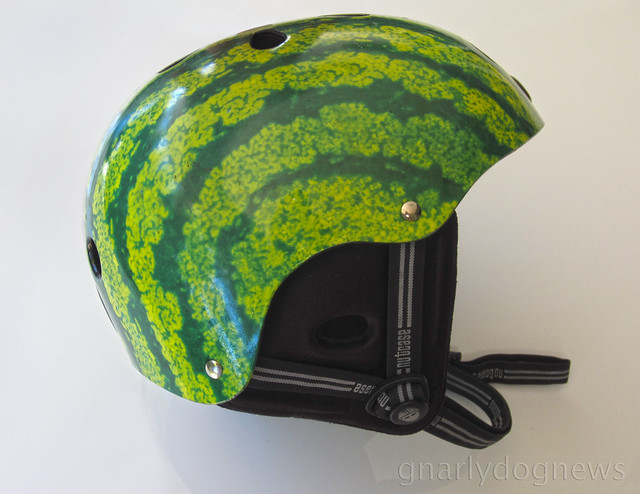
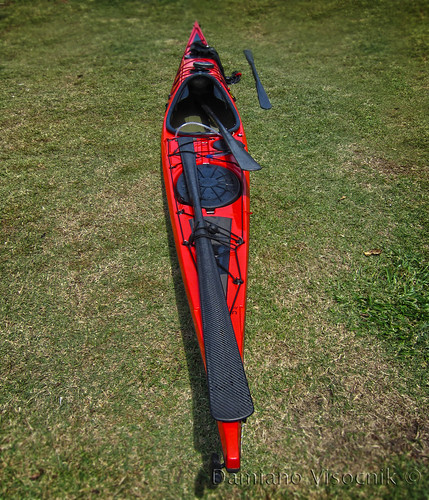
Since I have been appointed ambassador for Northern Light paddles I have trying hard to see what that paddle can take.
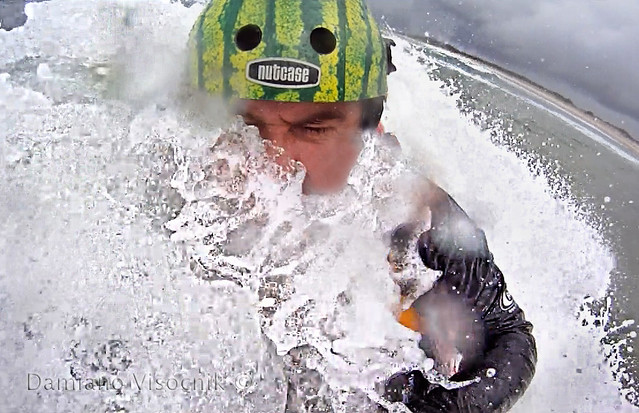
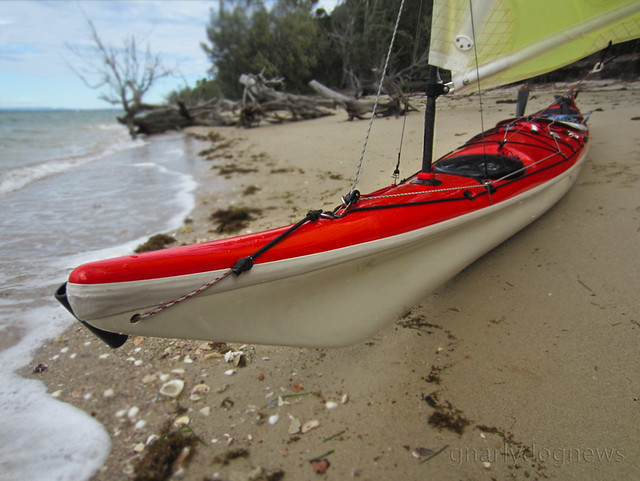
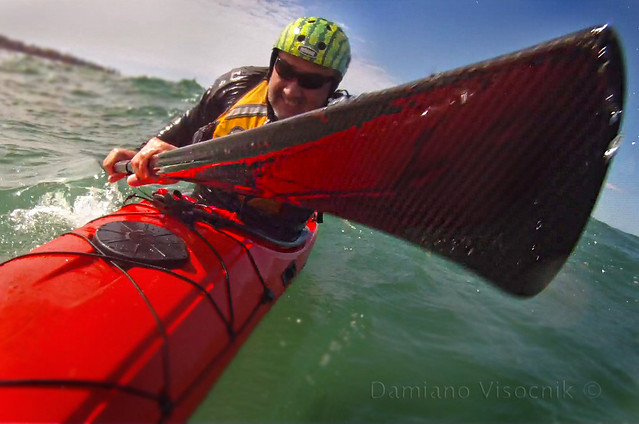
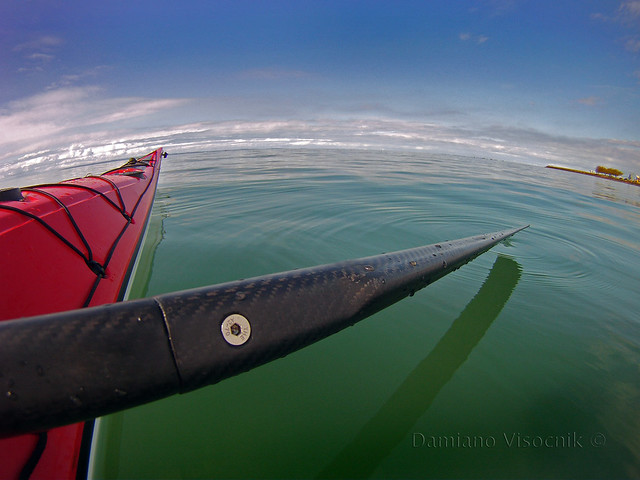
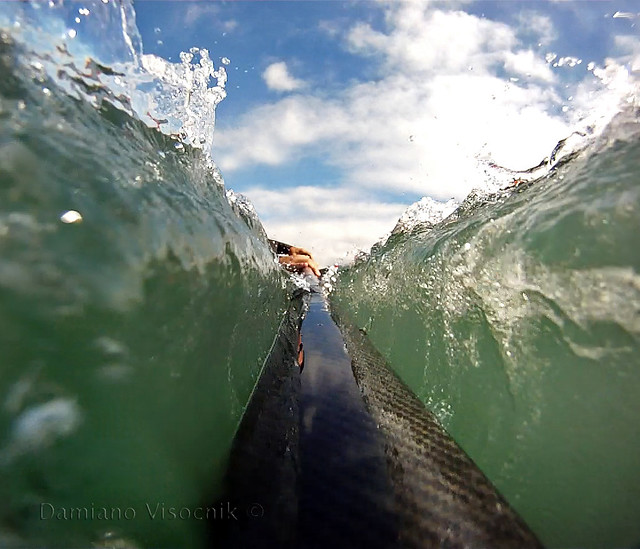
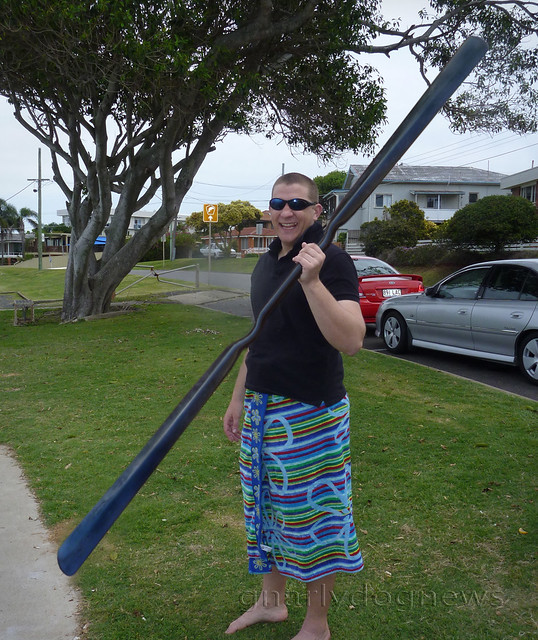
From gingerly taking off in textured waters in a sprint first to becoming more aggressive with my rolling, I eventually took the NLP Greenland in the surf. To me it feels the most comfortable blade when paddling in waves but I had my reservations that it could take the surf and my ungraceful tumbles when tossed in a kayak.
But no matter what I subjected my paddle to it always delivered with no sign of problems.
Paul from Northern Light Paddles said that there was no reason I should hold back with the 3-piece Greenland and he really wanted to see what his paddles could do when treated rough.

NLGP_2

I obliged.
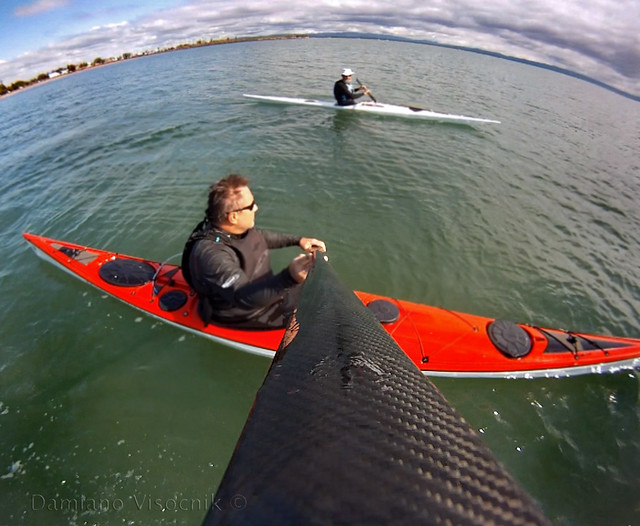
Pushing off from the shore when beach launching I would dig deep into the sand to propel myself before I hit the water. On rocky shores my timing would be out occasionally and I found myself pushing off rocks to prevent ending against them.
My previous wooden paddles were reinforced with epoxy to minimize tip damage but there was no way I could abused them like that.
Not to mention my high-end carbon foam-core Euro paddles where inserting them in the sand and then pry off would simply result in snapping the blade.

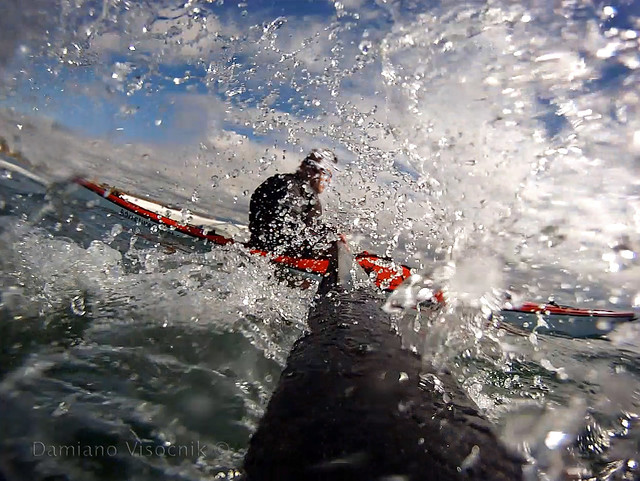
I was enjoying myself in shallow waters getting tossed around by the waves washing over a bank of sand. I was bracing to keep myself upright occasionally touching the bottom when suddenly a larger waves tossed me sideways and I instinctively braced and pushed down hard to keep myself upright.
My full body weight plus the force of the kayak sideways was leveraged on the Northern Light paddle.
I heard a creak and looked down. Nothing seemed to be wrong; paddle looked fine but I didn't want to push my luck and called it a day.
Later on at home I wanted to inspect the paddle and see what that noise was.
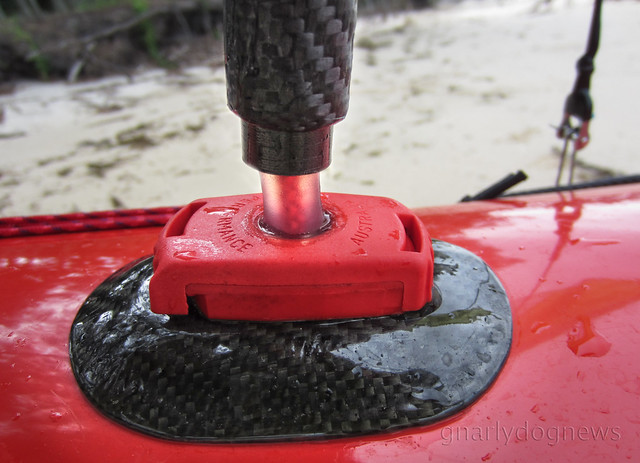
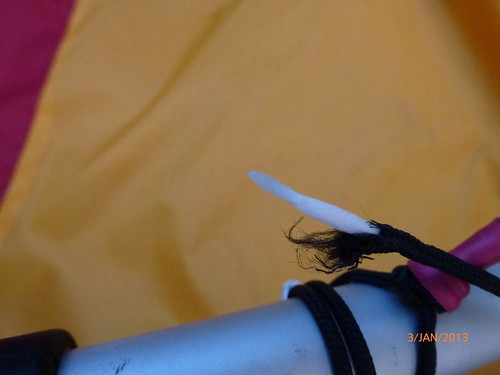
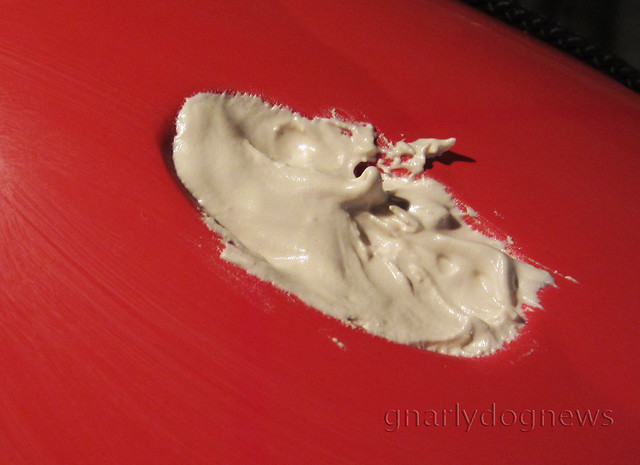
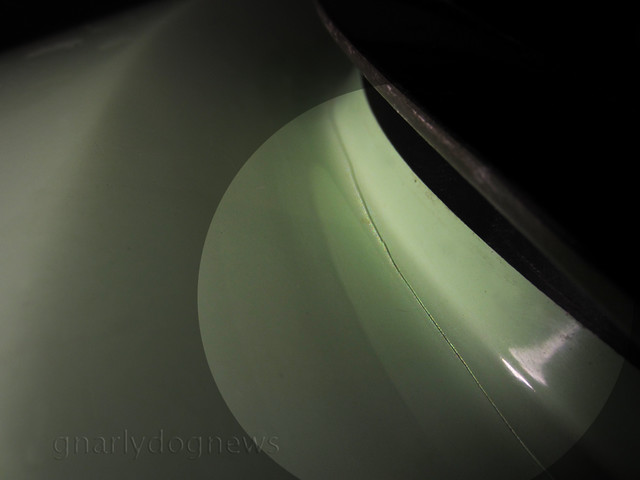
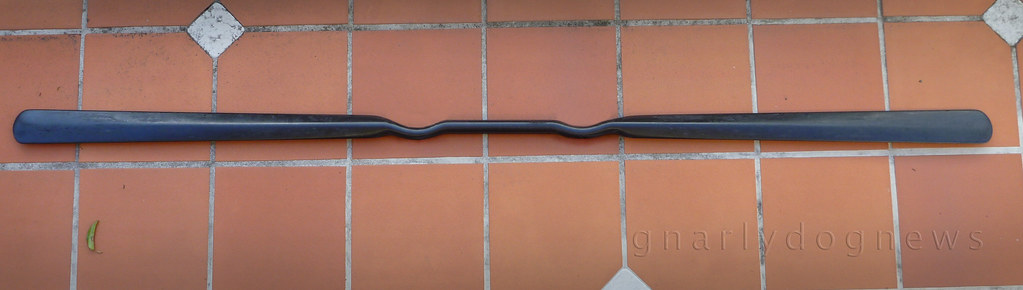
That's where I found the hairline crack.

NLP insert crack1_c

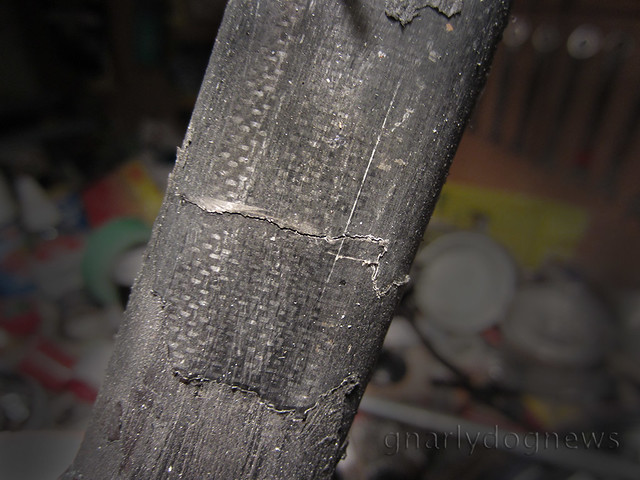
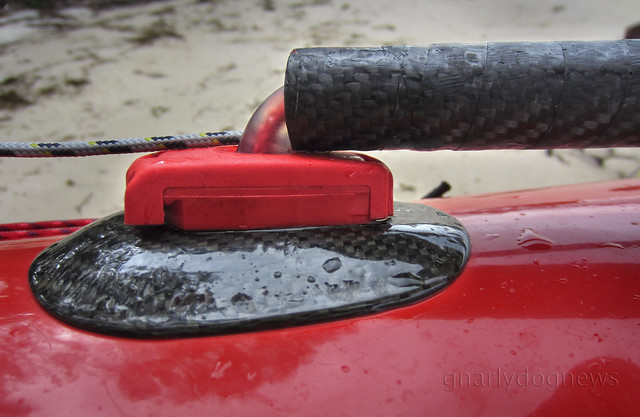
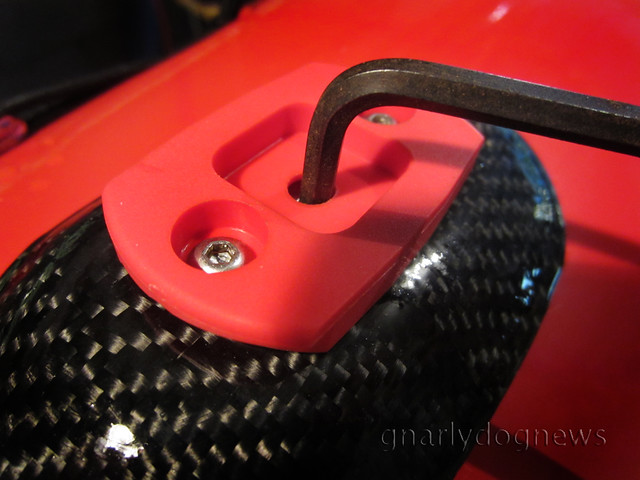
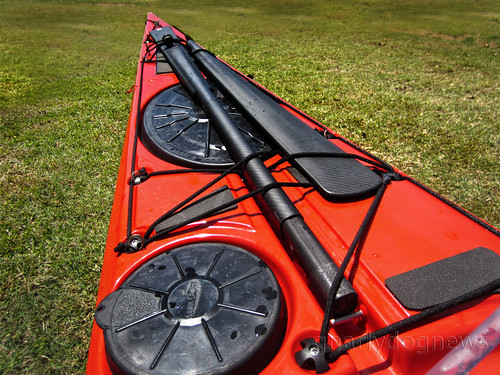
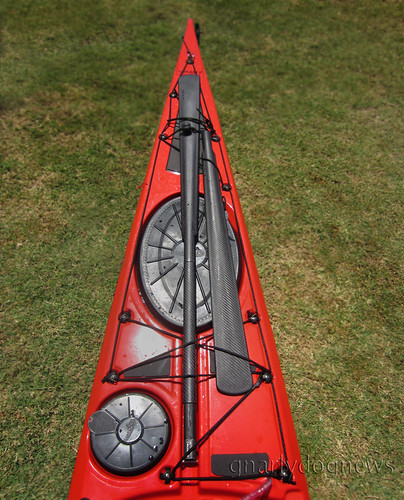
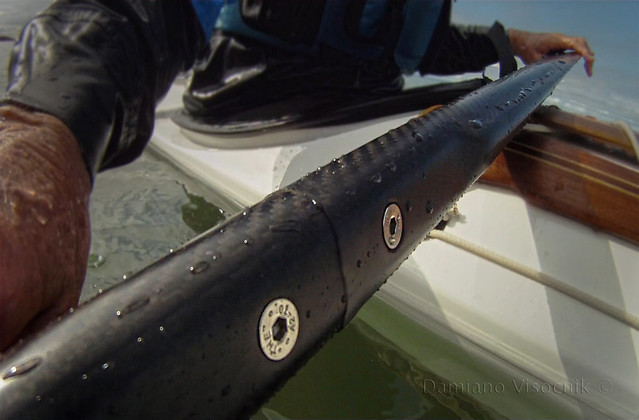
The insert on the loom of the 3 piece paddle had almost failed.
I was not too upset since a loom is fairly easy and inexpensive to replace but then I remembered the short insert that comes with every Northern Light paddle that transform it into a "storm" paddle.
It was the exact dimensions of the cracked insert bonded to the loom.
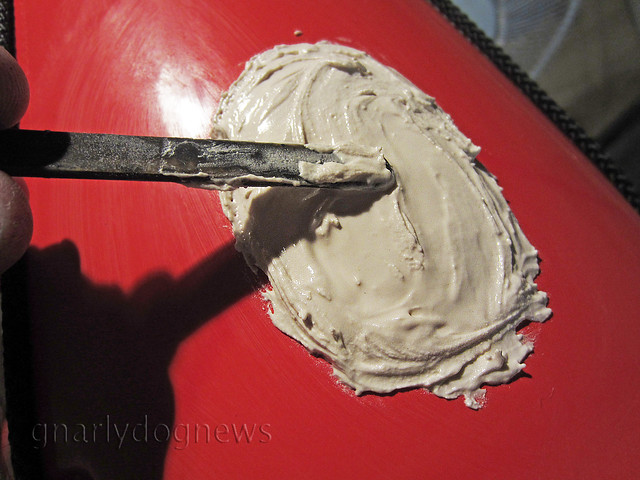
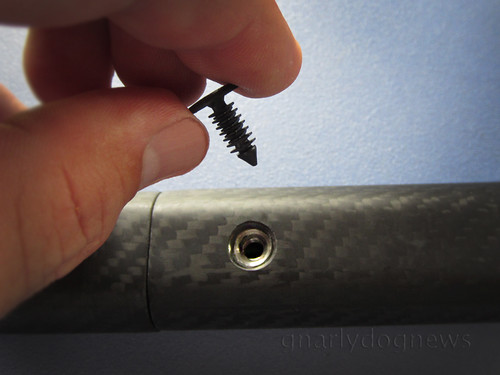
I knew that epoxy's melting point is not that high and a heat gun can soften the resin enough to make it loose its grip.
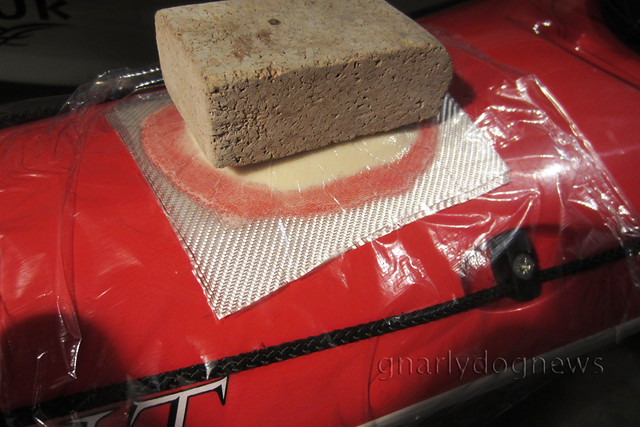
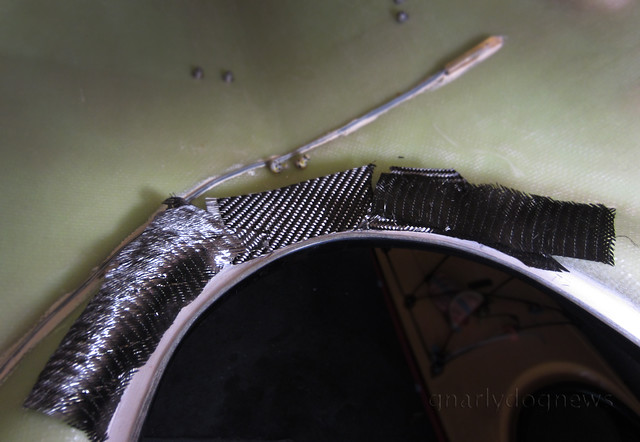
I would lie if I say that it was an easy job but 15 minutes later with the aid of the heat gun I managed to separate the insert from the loom tube.
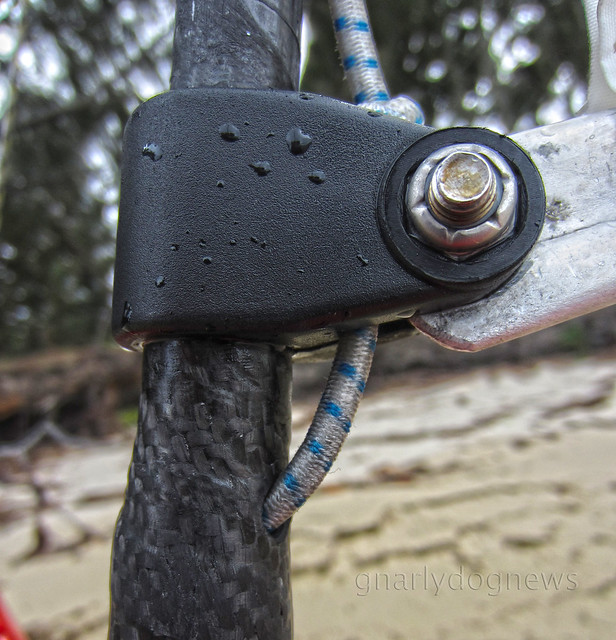
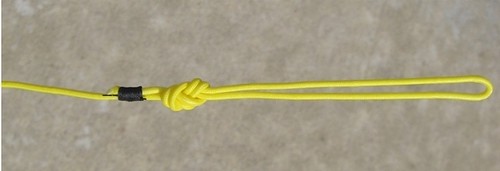
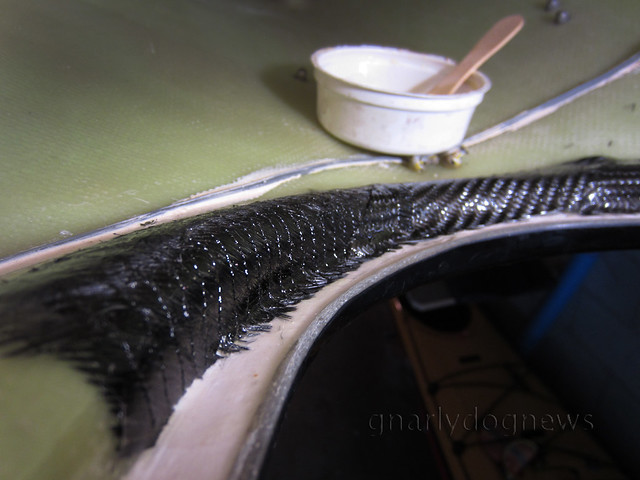
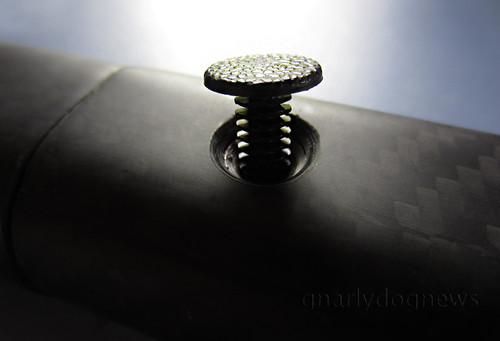
I cleaned up the residual resin and used a bit of epoxy glue (epoxy resin and microfibre) to bond the new insert into the loom. I bolted the blades together making sure things were aligned.
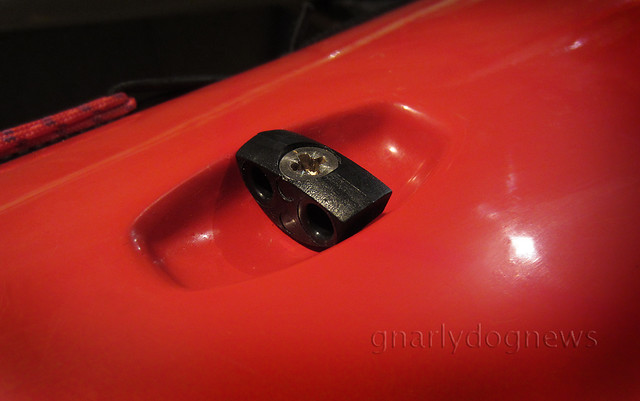
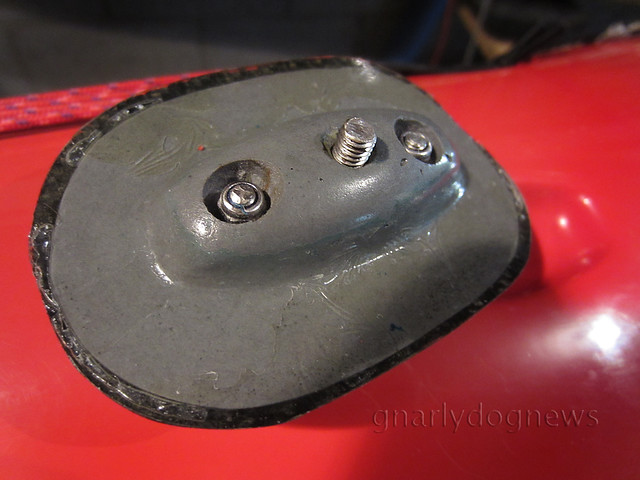
The next morning the paddle looked solid and after testing everything looked kosher.
I was paddling with the same paddle the next day not showing any signs of damage or mismatching.
One thing is sure: no Euro paddle of mine can be repaired at home with such incredible ease.
As for the Northern Light Greenland paddle, I now play in deeper waters.

07 August 2012

DIY: replacement carbon-fiber seat in Valley

.
Seats in kayaks seem to be often a deal breaker: some folk won't buy a kayak if the seat is not comfortable for them. Some kayak seats seem to fit more paddlers than others but there are also some seats that cause a lot of grief and paddlers go to great lengths to fix them.
The most common complaint I hear and read about from sea kayakers is the dreaded dead leg syndrome; after a while on the water (sometimes as brief as half an hour) some paddlers start to feel pins and needles or loose the feel of the legs altogether.
I am one of them: I find a lot of sea kayak seats not suitable for me. Maybe is my chunky thighs that force me to extend my legs lower to make them fit or something but I find most seats too short and too "peaked" (high up front) for my anatomy.
One seat that I have removed from more kayaks than any other one is the Valley plastic seat and the current model seems to be just as aggravating as the previous one.
In Adventuretess' Nordkapp LV I removed the seat and replaced it with a DIY fibreglass one removing the back band and replacing it with a foam block.
Steavatron recently borrowed Adventuretess's Nordkapp LV (Sialuk) and was amazed by the difference in feel and stability of the kayak.
Within half an hour of paddling Sialuk, he politely asked me if a similar seat was possible to be had in his own Nordkapp LV.
I agreed that with his help we could fabricate one for this kayak too, and we might as well go "bling".

carbon seat4

The plastic VCP seat is easy to remove: 4 bolts on the outside of the coaming hold the seat in place.
Once the fsteners were removed the seat came right out but revealed a little problem; the edge of the seat has been "shaving" the hull and a few layers of fibreglass have already been carved away by the motion of the seat slightly swinging when paddling. If not caught in time it would have holed the kayak from the inside out (the same problem occurred in Sialuk).
Patching that divot was dead easy and we restored the hull to full strength.

carbon seat2

The new seat is made from a laminate of glass fibre, double bias carbon under the sitting area and a veneer of the oh-so-sexy twill carbon fibre on top, for looks of course :-)
The edges of the seat have been reinforced with Kevlar to prevent the typical cracking that I have experienced in other factory chopped-mat kayak seats.

carbon seat1

The new seat does not hang on its own but I used "L" brackets to support it. The original VCP hardware was re-utilized and new stainless steel bolts are anchoring the carbon seat to the bracket.

carbon seat3

Stevatron was happy to reuse the original back band and hip pads. The back bands sling is attached to the seat with a short piece of webbing and a "D" ring. Existing straps firmly secure the back band to the rear bulkhead to prevent dislodgment when entering the cockpit.
After the maiden voyage Stevatron was happy with the position and height of the new seat and it was then finally secured to his kayak with a few dobs of polyurethane (Sikaflex) sealant to prevent any swinging and deliver a solid feel. In the event the seat would have to be removed for any reason a spatula will be inserted under the seat to break away those few spots of sealant.
Stevatorn finds the new seat a vast improvement on the stock VCP plastic one. The centre of gravity has been lowered and he finds that the Nordkapp LV has changed personality.
He is more confident on putting his kayak on edge and has gained stabilty when in textured waters.
Since the change and after a few paddles of several hours he no longer experiences the dead legs.

.

24 July 2012

REVIEW: Shred Ready and Nutcase helmets


Undeniably looking goofy, just like bike helmets were on cyclists when they first appeared, helmets for sea kayaking are not very popular in my part of the pond.
A helmet for sea kayaking? really? what will they think of next...
And that’s what I thought when I used to paddle the sheltered waters of the bay.
Admittedly I can’t see much use for a helmet in an sea that has no surf and where the chance of bumping you head is rather remote.
The game changed once I realized that for me the real fun in a sea kayak is in white water and luckily most of the shores in my area where the ocean meats land are sandy with rarely I rock in sight.
While the chance of banging my noggin on a reef is remote, I have made contact with the hull of my kayak, and that of others.
As wise paddlers say: "we are just in between swims", I regard my roll as proficient but not bombproof and, despite all the rolling training and play in the surf zone, I still come out of my boat.
Tossed out of my boat, my head and my kayak sometimes decide to be in the same place at the same time.
Just like I embraced bicycle helmets years ago (way before they became compulsory) I now don a helmet when going out in conditions that might see me contacting the head with something hard.
In sea kayaking the increased risk factor over bicycles is that a knock to the head, that would make me unconscious even for a very short time, would probably spell disaster.
I was lucky to not have drowned a few years ago when crashing my windsurfer I passed out. Maybe wearing a helmet would have prevented me seeing stars even tho not sure if it would have saved me from ending in hospital for shoulder reconstruction.

In my shed I have two helmets for sea kayak surfing: the Shred Ready Shensu carbon and a Nutcase Watermelon.

Shred Ready Shensu Helmet_c

The Shensu is a carbon fibre and Kevlar lid with closed cell foam interior padding. Unlike EPS foam in bicycle helmets this foam has a bit of flex and does not dimple if pressed hard but returns to its original shape. The helmet comes with pads of different thickness that attach to the bottom perimeter of the interior padding with small Velcro tabs. A fully customized fit can be achieved for a perfect feel with no pressure points.

Shred Ready Shensu_c


What sets this brain bucket apart form the rest is the extremely good retention strap system. The typical under-the-chin plastic buckled strap is complemented with HOG occipital lock: a tensioning system that grabs the back of the head and keeps the helmet perfectly in place even during the most head banging spills.
I have seen this type of ratchet system on bicycle helmets and shoes and they have proven to work well.


SR retention system_c

The Shensu fits my large head well. I have struggled to find a helmet that could offer me comfort and security at the same time. Most other helmets I have tried just felt like a bucket on my head often putting pressure on the temples. If however your head is shaped differently Shred Ready offers a more elongated style that fits smaller heads: the more budget-conscious Super Scrappy is injection molded ABS shell that won't break the bank.

The Nutcase has a more conventional helmet look with its shell shape shared with many other sport helmets for skateboarding and bike riding.
What sold me with this helmet was the funky graphics: it's not like I can hide wearing a helmet so I might as well stand out :-0
This water version has an ABS Shell with the same closed cell foam (EVA) lining that cradles the head but doesn't absorb water.

Nutcase melon_1_c

Additional comfort open-cell padding found on top of the head keeps this helmet comfortably seated.
There are removable heat molded foam ear flaps to protect me from lateral light impacts but I found those flaps pressing down on my non-Dumbo ears after a while. With some careful gentle heat-gun action I slightly reshaped the flaps and domed them to create the perfect fit.

Nutcase melon_3_c

Nutcase uses one size shell for their adult helmets but increase the inside EVA padding for the S-M size.
The Nutcase comes with additional small soft pads that can be used for a custom fit but I didn't need them in my L-XL one; the fit is smaller than the Shensu.
Nutcase melon_2_c

Now the question remains: does everybody need a helmet when paddling?
Probably not. The fat chance of banging one's  head while paddling on a Sunday morning millpond condition outing doesn't really warrant one but somehow I feel safer wearing my helmet when the waves get steeper and the surf traffic wanting to share the same space increases.

Zegul surf_5

PS: no shwag and no kick-backs for this review either. Bought the helmets with my own money and no prompts from the manufacturers. 
Heck, I don't even sell or monetise nothing on this website... 
One downside: I receive almost daily offers from totally unrelated Chinese manufactures asking me to become their agent for electronic parts , carbon  fibre or plastic goods. I even had offers from website design managers in USA and India offering me to maximize my "profitability" :-)
.

12 July 2012

GEAR: sea kayak sail_update

.
Several years of using sails on my sea kayaks has lead to refining my initial set up.
I no longer sew my sails but I still create my rigging, using custom made carbon masts.
On some narrower kayaks my sail set up was not as bombproof as I would like it to be where in a strong breeze (above 20 knots) the mast would not keep vertical and the little polymer base would deform under the lateral pressure of the wind. In a beam wind I would like to have my mast in a vertical position, making the sail more efficient and increase a bit of speed.
Mick at Flat Earth Kayak Sails has developed a brilliant way to reduce the down pressure on the flexible joint and is now shipping his sail with a new system where the mast contacts directly the removable fitting.
I want to use carbon fibre masts but I have been unable to find an off-the-shelf mast that would replicate Mick's system.
Not wanting to bond aluminum to carbon to create the oversize sleeve for the mast, the only way I could achieve what I wanted was to modify my existing masts to create the sliding foot sleeve.
mast base_sleeved_c
mast uphauled
Instead of having a larger diameter mast running the whole length, I just made a short sleeve out of glass fibre tape wound around a tube of slightly larger diameter than my carbon mast. Once cured I bonded a the sleeve section to the base of the existing mast and covered it with carbon cloth for strength, and looks :-)
The sleeve section slides over a stubby base with the flexible polymer allowing the mast touch the actual hard surface of the red plastic base.
No load is now exerted on the polymer so it will no longer deform when the mast is uphauled and cinched down hard.
mast base sleeve_c
mast lifted for demo purposes
Of course the mast can still be lowered as before and when the sail is folded onto the deck the mast slides back up just enough to allow the flexible polymer do its job.

mast folded_c

To prevent the sliding mast and the stubby base come apart I have used a short piece of shock cord threaded internally holding the two together.

boom junction_c

I have also improved my anchor point for the stays on the mast.
I no longer use a stainless steel ring riveted with a saddle to the carbon tube but I prefer the use of soft Dyneema core line bonded directly to the mast with a section of carbon fibre cloth.
The load is distributed better and there is no risk of cracking the thin carbon tube with the pressure of installing (pulling) a stainless steel rivet.
mast stays junction_c
mast rotated to show the carbon cloth anchor for the Dyneema cord
I have been using the new recessed anchors with great success, locating them right on the seam of the hull/deck to achieve a wider stance and a better load angle.
The stainless steel shackles are now heat shrunk (see warning below) to the Dyneema stays so they don't rotate when the sail is lowered on deck.

anchor and stays_c

The whole assembly, viewed from the bow.
on beach_c

WARNING:
update 04JAN13
Richard Sharp from SEQSK has this to say:
"I had the sail up in 20knots and got hit by a gust which tipped me in. It
was at that point that I noticed the sidestay had snapped. Finding it hard
to believe that this was possible given the breaking point of spectra, I
examined the break closely. It was then that I discovered that where it had
snapped the internal spectra cord was melted together. See the enclosed
photos."

P1010037

P1010038

It appears that the core has melted while the outer sheet remained OK.
Using a heat gun at close quarters causes the Dyneema/Spectra fibres to fuse and become very weak.
The melting point of Dyneema is much lower than the outer polyester (pictured here black) and no noticeable damage was visible from the outside.
He now prefers to use the heat shrink only over the loose end of the rope, not over the entire knot and apply very gentle heat for longer to allow the tube to shrink.

image001

03 April 2012

VIDEO: backsurfing with a stick

I am gaining confidence with my Northern Light Greenland paddle and slowly I have improved my maneuverability in small surf. From the small shore break I have progressed to something just a bit more challenging.


select 720p if you have fast Internet connection
I still have not had the opportunity (and the courage) to tackle large waves and I am working on edging my kayak when the world slides backwards.
In the meantime I am learning how to control my kayaks when surfed in reverse and avoid being broached too soon.
The thrill of not seeing where I am going and the fear of getting pitched stern deep into the water compensates for my lame technique. This play-boating teaches me timing and body-weight shift to maximize the free ride.
Would a rudder help me?
.

10 January 2012

SHOP: sail mast base on Valley kayak

Following Jim's set up for a sail mast base on a Valley sea kayak utilizing the compass recess, I want to detail here a fitting that requires no additional holes drilled to the deck.
On the Valley decks there is usually a fitting that holds bungee cords in place typically used for stowing split paddles on the foredeck.
I have a hard time placing a paddle under those bungee cords and prefer the paddle parks.
Actually these days I prefer to carry a Greenland style storm paddle on the rear deck.
So, that fitting on the deck is the perfect anchor for a sail mast base.

Valley deck fitting recess

I remove the fitting and grease up the cavity/recess with several layers of mold release. I find that a final layer of PVA mold release works best before I fill the cavity with epoxy paste (I mix epoxy, microfibre and filler to the consistency of peanut butter).

filling cavity

Working-in the paste ensures that there are no air bubbles. I build the base high sitting proud of the deck.

filling cavity_2

glass layer

I add a layer or two of fibreglass to keep the epoxy paste from running too much

flattening top

A final layer of kitchen cling wrap to be able to shape the paste into a neat bump and I place a square object to create a flat surface.
Once the epoxy cures overnight I pry the fitting out of the mold and smooth it with sandpaper. There will be a dimple where the original bolt held the deck fitting: that's where I drill through the sail base and countersink the top to accept a new longer bolt of the same thread pitch (M6, metric). I cover the mast base with a layer of carbon (just for looks) and UV stable epoxy (West System 105/207). I make sure I push the countersunk area down to maintain the recess for the bolt's head. Often I place a small greased-up plastic cap just of the right size with a tiny weight on it to keep the wet carbon cloth in place.
Once cured, I drill through the last thin carbon layer to insert the central bolt.

Central bolt

The base of the mast is carefully positioned onto the carbon base and holes drilled to accept the fasteners.
A recess is needed for the nuts underside making sure they clear the deck.

underside

I use M4 stainless steel Allen key button head fasteners and nylock nuts.

fastened to deck

The plastic red base is bolted to the carbon base which in term is secured to the original Valley factory anchor on deck.
The base does not rotate because of the recess. No holes were drilled into the deck for the mast base but I still needed to create some recessed anchors for the mast stays.
I also reinforced the underdeck area with a rib fabricated from foam-core, fibreglass, carbon and epoxy under the mast base since the deck is too flexible.
However I discovered that this location is not ideal on all Valley decks. The deck fitting is not located in the same place on the different model Valleys. One of my Valley kayaks tends to leecock when paddled at slow speeds.
Just like when I used to windsurf, where I tilted the mast back to turn into the wind, I have now tilted the mast of my Flat Earth Sail backwards to give the kayak a neutral direction in beam winds. 
Video of sailing with this kayak and the new Code ZERO Flat Earth Sail coming soon.


.

24 November 2011

SHOP: repair a cracking coaming

.

In a previous post I mentioned that I reinforced the under-deck thigh brace area surrounding the coaming where I had hairline cracks appear in the coaming-deck junction.
Adventuretess' kayak (and several other ones of the same make) had the crack develop at the front of the coaming.
It appears that the deck is a a bit weak there, where the tight radius of the laminate meets the coaming, flexes too much and the gel coat cracks because is not elastic enough.
A friend of mine repaired the same type of crack on his kayak by reinforcing the underdeck and inspired me to stiffen up  Adveturetess' kayak too.
cracking deck_coaming
crack in the deck along the front of the coaming
I suspended the kayak on slings from the ceiling, turned it upside down and brought it to shoulder height; it is much easier to work inside the cockpit of an elevated kayak than bending over on the floor.
I made sure that the area was first thoroughly washed with fresh water, dried and then cleaned with acetone. I inspected the laminate but it didn't show any cracks in the fabric.
For the reinforcement I used scraps of carbon fibre cloth (unidirectional and woven), but quality fibreglass cloth could have been used instead; carbon fibre is just a bit stiffer.
dry lay up
(wire and reed for magnetic switch showing)

I chopped the cloth into short strips so they were easier to lay around a curved shape. I used several layers of carbon cloth, overlapping. I exclusively use West System epoxy for my work and for this area, exposed to daylight, I mixed 105/207 since it's UV stabilized. Epoxy allows me to work in small batches, does not produce too many toxic fumes and has excellent adhesion to most composite laminates.
I often hear that paddlers are scared to use resins and do their own repairs. Mixing epoxy is dead easy and is feels like watery honey. If you clean the area to be repaired repair well and keep the work tidy a job like this one is not more difficult than smearing honey onto a cloth, really.

wetting out layer1

I saturated the carbon cloth making sure there was enough resin against the kayak deck, pushing the fabric into the tight curve of the under deck. I finished the repair with a top layer of fine fibreglass twill cloth to create a smooth surface while absorbing possible excess epoxy.
glass layer
Top layer of fine fibreglass. Resin only partially saturating the cloth.
After all the layers were saturated (white fibreglass becomes transparent) I cleaned up any spills on the exterior of the coaming with methylated spirits (alcohol).
clean up

I left the epoxy cure for 24 hours (25C temps) and then smoothed any fibreglass spikes with sandpaper.
sanding

I am not sure if I will repair the cosmetic hairline crack on the outside of the deck since I don't have the factory matching gel coat from Valley. It takes a fair amount of trial and error to mix up the perfect tint to match the color.
The deck now feels very solid and the hairline crack does not expand when pressure is applied.

.

20 October 2011

Photo: balanced brace

Balance brace with NLP_1
Adveturetess just floating and stretching her back.
The balanced brace is the foundation to many Greenland rolls.
Once a paddler masters the balance brace he/she can roll with so much more grace using the body to turn the boat, not the resistance or momentum offered by the paddle or hand.
Unfortunately I am not flexible enough to balance brace and  my Butterfly rolls are performed with force and momentum with plenty of support from the paddle.

.

18 October 2011

GEAR: Greenland spare paddle on rear deck

With the recent shipment from Northern Light  I now have a high quality spare paddle on the rear deck of my kayaks.
I paddle exclusively with traditional style paddles and so far I have been forced to carry a Euro paddle as a spare.
I rarely had to use my spare but it would be unwise to venture out at sea without one; after all if I lost/broke my main paddle I would be left using just my hands or having to be towed.
My DIY split Aleut paddle was never tested in rough waters but I am not sure if it would have held up.
Some paddlers (Greg Schwarz for example) carry a full size GP on the front deck of their kayak.
I tried to configure a way to carry a full size on my kayak but the deck is shaped differently and just would not work. A full size paddle would not sit flat and would protrude too far outside the deck risking to catch a wave in heavy seas and possibly dislodge.
My Zegul 520 doesn't lend itself to have a split paddle up front either; really the best place it the rear deck.
Northern Light sectional carbon paddles seem to almost have been designed in conjunction with that kayak; the split NLP sits incredibly well in the recess of the deck.
NLP on read deck_6

NLP on read deck_3

No other paddle that I have tried sits as secure and has such a low profile.
Retrieving the NLP is much easier than my Euro paddles, that must be secured by a tight bungee wrapped around the shaft to prevent dislodging in heavy seas.
While the carbon Greenland is a real strong paddle I was wondering what would happen if I had to retrieve and assemble one in bumpy conditions.
Would the inserted shaft really fit tightly enough to paddle for a while and, without being screwed together, not come apart?
Well, I never really tried it but I didn't want to find out by accident.
I kind of like things to be really secure and after discussing the idea with Paul from Northern Light I sourced a little plastic plug that can be just pushed into the metalthread instead of having to use the Allen key stainless steel screw.
Xmas tree plug_2_c
Of course I will remember to have a few of those nifty plugs handy in my PFD.

Xmas tree plug_3_c

After some testing, the plastic plug seems to really secure the paddle together and no amount of pulling managed to separate it.
The NLP approach to positively assemble the sections with fasteners instead of a snap-together style joiner is in my experience a better solution.
On my carbon Euro paddles the so beautiful tight joiner, that would fit perfectly together when new, soon developed a bit of slop; eventually the paddle would wobble so bad that it needed to be replaced, luckily under warranty.

An alternative to a full size paddle it to carry a Northern Light paddle in the "storm" format.
Every NLP comes with a joiner that transforms a full size paddle into a short one that has a very short loom. A storm paddle sits perfectly fully assembled on the back of my deck without much protrusion past the stern.
NLP on read deck_5
NLP on rear deck in "storm" configuration
 A storm paddle is a fully functional alternative to a full size GP but it takes a bit of practice to develop a solid sliding stroke.
A skilled paddler can use a storm GP as efficiently as a full sized one but for now I am not confident to use a storm paddle in the surf; my rolling however seems to be unaffected.

.

19 July 2011

REVIEW: Northern Light Greenland paddle

I have been looking for a sectional traditional paddle for a while now. My attempt to create one was OK for a “spare” paddle that I would use in emergency but somehow that short coupling was not going to cut it for demanding situations: I would not use that paddle in the surf. Recently Paul from Northern Light offered me one of his three piece carbon fibre paddles and asked me if I wanted to review it.
I was interested in the concept of a paddle that breaks down into a shorter length that could easily be stowed onto the deck of my kayak since full length paddles just don’t fit that well.
I used to carry around a split Euro paddle but I would hate to use it: these days I find paddling with a EP just weird :-)
NorthLight_8_c

I had the opportunity to use the Northern Light Greenland paddle recently and I put in a few miles with it.
My initial concern was: is this 3 sections paddle going to be strong and wobble free?
The paddle assembled easily but with a firm feel. Just a bit of force is needed to insert the central loom section into the reinforced blades.
Northern Lights idea here is to have a paddle that would be functional even without fitting the fastener, when in a hurry.
There are however very nice stainless steel countersunk metalthreads that firmly hold the paddle together. A metric hex key tool (Allen key) is supplied with the paddle. A few short turns of the key secure the sections into a very solid one-piece paddle with no play.
NorthLight_7_c

I don’t have an accurate scale to weight the paddle but Pauls told me that the test paddle supplied was 898 grams. To me it felt just a bit heavier than the one piece balsa cored carbon skin Black Stick but lighter than my super strong beefy laminated Vanstix “battle stick” I use for surfing.
When Paul and I started writing I showed him a picture of Greg Schwarz's Black Stick and Paul wrote back that it was absolutely gorgeous but was concerned with the comparison. He wanted to stress that his paddles were designed for travel and abuse and while Greg's shiny paddles were stunning, he wanted something different. He knew comparisons were inevitable, but he said we were really talking apples to oranges as one was a one piece paddle and the other a three piece.
Northern Light sectional paddles emphasis is on strength (the blades are reinforced internally with carbon fiber and Kevlar making for a nice stiff but not too stiff paddle). Paul told me that he definitively wanted overkill on the blades to ensure they were strong and tough.
My sample paddle might not have the absolute perfect mirror shiny surface of the Black Stick but I find the finish on the Northern Light impressive. It has a slightly pearl look to it.
There are no rough/sharp edges to cut my hands on when sliding the paddle around in an extended position.
The edge of the blade is thin but not excessively; it sits nicely in the hand and doesn’t hurt when sculling.
NLGP_s4

I found the paddle very quiet. I purposely tried to induce vortices of air in a forward stroke without canting. When looked in profile, the surface of the blade does have a small concave running most of the length of the surface.
Maybe that little detail makes the paddle so easy to use?
The loom however is not typical. It is ovalized but has two distinct flat surfaces. I thought that the unusual shape would be a concern. I found the position of my hand on the shaft very agreeable, not unlike my Vanstix Aleut shaped shaft. I found that the thumb rested nicely on the flat surface.
The fasteners were out of the way of the hand position and only when I extended the paddle I could feel the small seam on the joint. I could barely notice it and did not annoy me.
Speaking of looms: I asked for one that would match my overall existing GPs length. The looms can be custom ordered to suit paddlers' dimensions. I believe a 90" paddle can be ordered, down to a minimum of 83". Now that's custom sizing :-)

Paul also supplied a very small “loom”. Actually it’s just an insert that holds the two blades together.
It took only a minute to remove the standard loom and replace it with the joiner. I now had a storm paddle.
NorthLight_4r_c

Greg had a good rolling session with that short paddle and he liked it.
I am not sure if it was a slip of tongue but I might have heard him saying that the Northern Light felt very similar to his paddles, minus the loom :-)
Overall the carbon Greenland paddle felt very good.
There was no obligation on my part to keep the paddle if I didn’t like it but this one is not going back.
I am now interested in trying the Aleut paddle that Northern Light offers.
Next time I head out for a surf session I will take the Northern Light and see how it performs in the rough.
NorthLight_9_c


.

01 April 2011

GEAR: prototype neutral shaft Greenland paddle

After months of design, test, redesign and a few headaches finally we have produced the first working prototype of a "neutral shaft" (aka as bent shaft) Greenland paddle.
bent stick_1_c

I used to paddle with neutral shaft Werner paddles and I wanted to try the same concept with my new found love: the GP.
The idea and execution is a collaboration between myself and a few close friends of mine.
The paddle is a foam core carbon reinforced shell. Unfortunately the first prototype is not as light as we hoped tipping the scales at just over 990 grams.
Once we are happy with the performance and design we will consider creating a mould to craft a lighter model.
On water testing went without a problem. After the initial few minutes of adjustment needed to locate the hands in the "well" the paddle sat nicely and a dramatic improvement in speed was recorded (this time I had to use a GPS even if I don't like the gadget).
Dreamer with bent stick_c
Dreamer after testing the new neutral shaft GP
I didn't want to post any close up picture of the paddle since we have applied for a patent and we don't want the industry try to rip our design off (see the case of the electric bilge pump).

Anybody seriously interested in commercially manufacturing the paddle should contact me at gnarlydognews(at)gmail.com