
A few years back I would cherish the days when the forecast would call for little or no wind; these days I prefer a bit of breeze to ripple the waters of the bay and occasionally produce a few small waves. And there is nothing like popping the sail on a beam wind to make paddling so much easier.
A common misconception is to assume that a sail on a kayak is only good for downwind sailing.
With a well designed sail like the Flat Earth Sail I find that I can sail out and back with very little effort from my paddling; the wind does most of the work for me. When the breeze is not strong enough (below 10 knots) a few strokes often help to catch a wave.
.
29 August 2012
16 August 2012
REVIEW: SEA-LECT Designs footbraces
.
I paddle kayaks without rudders that use skegs for directional stability.
Most of the kayaks I own came with footbraces that are mounted on rails attached to the hull.
The footbrace pegs have sliding adjustment fore and aft to allow different paddlers' leg lengths fit correctly.
I find most footbraces' surface rather small offering me limited support for my feet, often creating a pressure spot. In trying to maintain a good paddle stroke I tend to have a positive pressure against the pegs, that after an hour or so results in discomfort.
Wiggling my feet around and repositioning them frequently indicates that the footbraces are under engineered for my requirements. In some of my kayaks I have modified the pegs where I have added a bar spanning from side to side creating a much larger platform with infinite foot positions.
The bar works very well for me but when it comes to adjust it for a different paddler it is pretty tricky.
The bar needs to have some adjustment in the mounting holes since the hull of the kayak is tapered.
Pulling back the bar for a closer fit usually requires a bit wiggling, hard pulling and occasionally cursing to get the corroded mechanism (aluminium against stainless steel fastens) to slide.
In my latest kayak I have not installed my modification since several people borrow that boat and adjustment of the brace would be a pain.
When SEA-LECT Designs offered me to test their footbraces I was very excited.
The design on their website looked good and I awaited the arrival of a set of replacement footbraces.

As described on their website the SEA-LECT Designs footbraces are a direct swap for most brands.
I removed my Yakima rails bolts and installed the new fasteners in the same existing holes, no modifications needed.
I was even very impressed with the detail of the fasteners; the bolt comes with a cupped washer that is backed by rubber to ensure a positive seal so no leaks will occur.

SEA-LECT Designs offers also footbraces that will mount on hull-bonded studs, not just through bolts.
There are a couple of fundamental differences with SEA-LECT Designs footbraces.
The adjusting mechanism is all corrosion free and is accessible from the cockpit, while seated in the kayak.

If I need adjustment (bring the pegs closer) I just grab the tab on the rotating rod, flick it 90 degrees upwards and relocate the peg, all on-the-fly, while on the water. I can do that with Yakima footpegs too, wiggling my foot behind the peg and hopefully finding the release tab, but only works when new. After a few months corrosion sets in and the adjusting mechanism becomes very sticky.
The surface area of the SEA-LECT Designs pegs is larger and gently curved to spread the load of the feet-pushing action.
Despite wearing paddling shoes I still find Yakima's sharp pegs edges dig into my feet a bit; SEA-LECT pegs are much nicer on my feet.
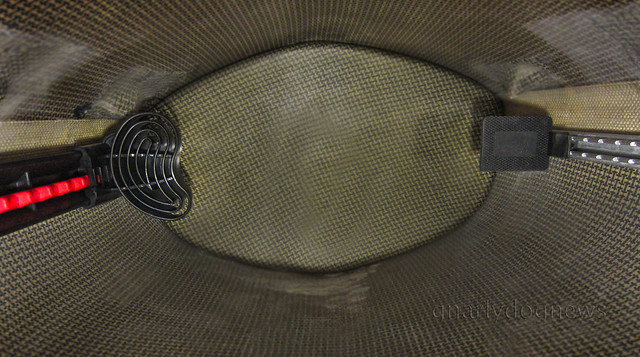
SEA-LECT Design on the left, Yakima on the right.
There is one thing I don't like about the SEA-LECT Designs pegs: the angle relative to my feet.
Maybe it's a personal taste but I found the pegs oriented too much forward: I kind of like them more square.
In the process to test them thoroughly and offer the manufacturer comparison feedback I added a little plate that I bolted onto the pegs surface, angling it backwards.
After an initial paddle of 10 miles I found the modified angle more to my liking.
.
I paddle kayaks without rudders that use skegs for directional stability.
Most of the kayaks I own came with footbraces that are mounted on rails attached to the hull.
The footbrace pegs have sliding adjustment fore and aft to allow different paddlers' leg lengths fit correctly.
I find most footbraces' surface rather small offering me limited support for my feet, often creating a pressure spot. In trying to maintain a good paddle stroke I tend to have a positive pressure against the pegs, that after an hour or so results in discomfort.
Wiggling my feet around and repositioning them frequently indicates that the footbraces are under engineered for my requirements. In some of my kayaks I have modified the pegs where I have added a bar spanning from side to side creating a much larger platform with infinite foot positions.
The bar works very well for me but when it comes to adjust it for a different paddler it is pretty tricky.
The bar needs to have some adjustment in the mounting holes since the hull of the kayak is tapered.
Pulling back the bar for a closer fit usually requires a bit wiggling, hard pulling and occasionally cursing to get the corroded mechanism (aluminium against stainless steel fastens) to slide.
In my latest kayak I have not installed my modification since several people borrow that boat and adjustment of the brace would be a pain.
When SEA-LECT Designs offered me to test their footbraces I was very excited.
The design on their website looked good and I awaited the arrival of a set of replacement footbraces.
As described on their website the SEA-LECT Designs footbraces are a direct swap for most brands.
I removed my Yakima rails bolts and installed the new fasteners in the same existing holes, no modifications needed.
I was even very impressed with the detail of the fasteners; the bolt comes with a cupped washer that is backed by rubber to ensure a positive seal so no leaks will occur.
SEA-LECT Designs offers also footbraces that will mount on hull-bonded studs, not just through bolts.
There are a couple of fundamental differences with SEA-LECT Designs footbraces.
The adjusting mechanism is all corrosion free and is accessible from the cockpit, while seated in the kayak.
If I need adjustment (bring the pegs closer) I just grab the tab on the rotating rod, flick it 90 degrees upwards and relocate the peg, all on-the-fly, while on the water. I can do that with Yakima footpegs too, wiggling my foot behind the peg and hopefully finding the release tab, but only works when new. After a few months corrosion sets in and the adjusting mechanism becomes very sticky.
The surface area of the SEA-LECT Designs pegs is larger and gently curved to spread the load of the feet-pushing action.
Despite wearing paddling shoes I still find Yakima's sharp pegs edges dig into my feet a bit; SEA-LECT pegs are much nicer on my feet.
SEA-LECT Design on the left, Yakima on the right.
There is one thing I don't like about the SEA-LECT Designs pegs: the angle relative to my feet.
Maybe it's a personal taste but I found the pegs oriented too much forward: I kind of like them more square.
In the process to test them thoroughly and offer the manufacturer comparison feedback I added a little plate that I bolted onto the pegs surface, angling it backwards.
After an initial paddle of 10 miles I found the modified angle more to my liking.
.
12 August 2012
Photo: sailing in rough waters
.
Sunday morning paddle in the warm Queensland winter sun... then suddenly got bumpy.
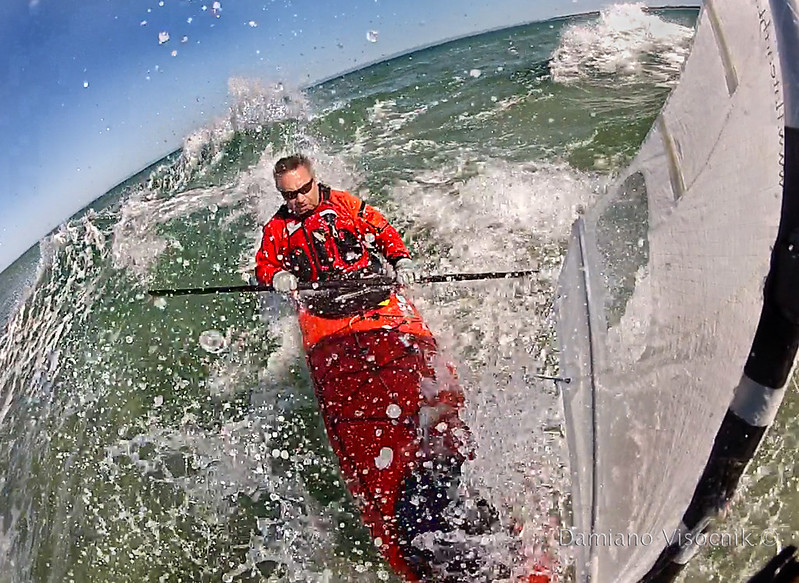
A fun outing with just 12 knots of wind.
Flat Earth sail with Northern Light Greenland paddle.
.
Sunday morning paddle in the warm Queensland winter sun... then suddenly got bumpy.
A fun outing with just 12 knots of wind.
Flat Earth sail with Northern Light Greenland paddle.
.
07 August 2012
DIY: replacement carbon-fiber seat in Valley
.
Seats in kayaks seem to be often a deal breaker: some folk won't buy a kayak if the seat is not comfortable for them. Some kayak seats seem to fit more paddlers than others but there are also some seats that cause a lot of grief and paddlers go to great lengths to fix them.
The most common complaint I hear and read about from sea kayakers is the dreaded dead leg syndrome; after a while on the water (sometimes as brief as half an hour) some paddlers start to feel pins and needles or loose the feel of the legs altogether.
I am one of them: I find a lot of sea kayak seats not suitable for me. Maybe is my chunky thighs that force me to extend my legs lower to make them fit or something but I find most seats too short and too "peaked" (high up front) for my anatomy.
One seat that I have removed from more kayaks than any other one is the Valley plastic seat and the current model seems to be just as aggravating as the previous one.
In Adventuretess' Nordkapp LV I removed the seat and replaced it with a DIY fibreglass one removing the back band and replacing it with a foam block.
Steavatron recently borrowed Adventuretess's Nordkapp LV (Sialuk) and was amazed by the difference in feel and stability of the kayak.
Within half an hour of paddling Sialuk, he politely asked me if a similar seat was possible to be had in his own Nordkapp LV.
I agreed that with his help we could fabricate one for this kayak too, and we might as well go "bling".
The plastic VCP seat is easy to remove: 4 bolts on the outside of the coaming hold the seat in place.
Once the fsteners were removed the seat came right out but revealed a little problem; the edge of the seat has been "shaving" the hull and a few layers of fibreglass have already been carved away by the motion of the seat slightly swinging when paddling. If not caught in time it would have holed the kayak from the inside out (the same problem occurred in Sialuk).
Patching that divot was dead easy and we restored the hull to full strength.
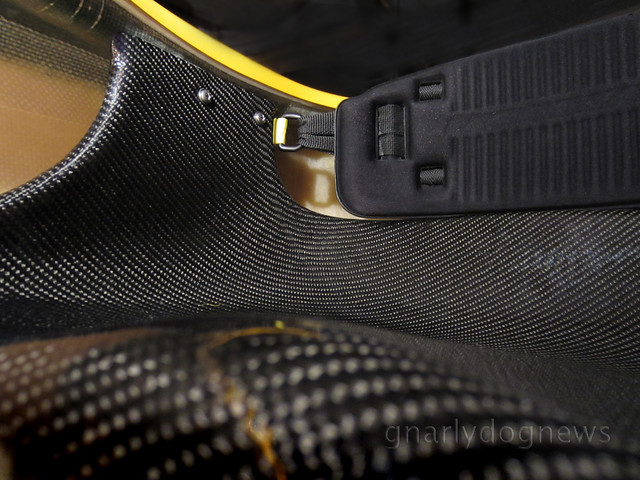
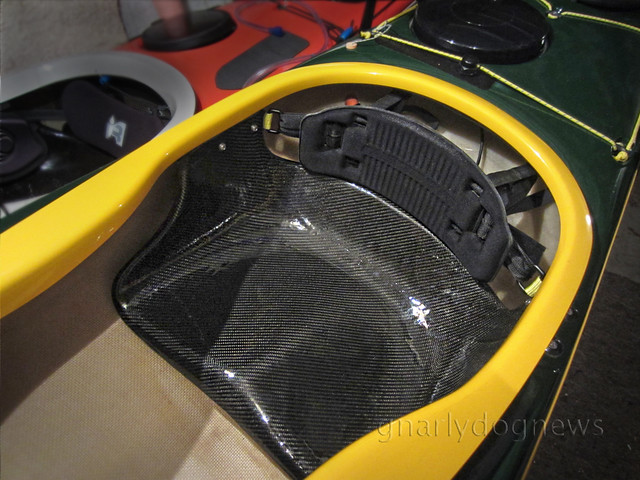
The new seat is made from a laminate of glass fibre, double bias carbon under the sitting area and a veneer of the oh-so-sexy twill carbon fibre on top, for looks of course :-)
The edges of the seat have been reinforced with Kevlar to prevent the typical cracking that I have experienced in other factory chopped-mat kayak seats.
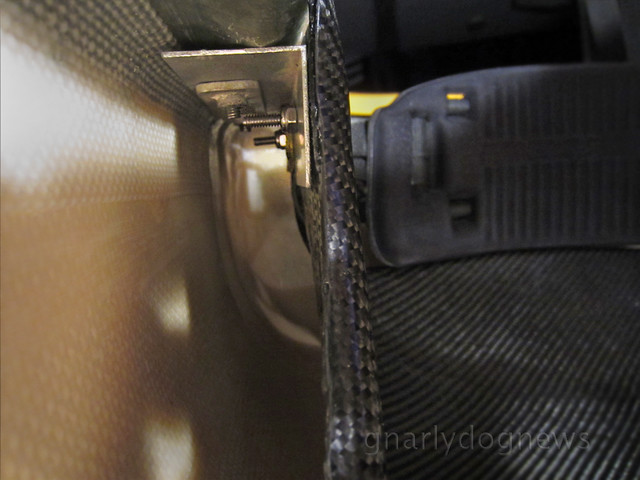
The new seat does not hang on its own but I used "L" brackets to support it. The original VCP hardware was re-utilized and new stainless steel bolts are anchoring the carbon seat to the bracket.

Stevatron was happy to reuse the original back band and hip pads. The back bands sling is attached to the seat with a short piece of webbing and a "D" ring. Existing straps firmly secure the back band to the rear bulkhead to prevent dislodgment when entering the cockpit.
After the maiden voyage Stevatron was happy with the position and height of the new seat and it was then finally secured to his kayak with a few dobs of polyurethane (Sikaflex) sealant to prevent any swinging and deliver a solid feel. In the event the seat would have to be removed for any reason a spatula will be inserted under the seat to break away those few spots of sealant.
Stevatorn finds the new seat a vast improvement on the stock VCP plastic one. The centre of gravity has been lowered and he finds that the Nordkapp LV has changed personality.
He is more confident on putting his kayak on edge and has gained stabilty when in textured waters.
Since the change and after a few paddles of several hours he no longer experiences the dead legs.
.
Seats in kayaks seem to be often a deal breaker: some folk won't buy a kayak if the seat is not comfortable for them. Some kayak seats seem to fit more paddlers than others but there are also some seats that cause a lot of grief and paddlers go to great lengths to fix them.
The most common complaint I hear and read about from sea kayakers is the dreaded dead leg syndrome; after a while on the water (sometimes as brief as half an hour) some paddlers start to feel pins and needles or loose the feel of the legs altogether.
I am one of them: I find a lot of sea kayak seats not suitable for me. Maybe is my chunky thighs that force me to extend my legs lower to make them fit or something but I find most seats too short and too "peaked" (high up front) for my anatomy.
One seat that I have removed from more kayaks than any other one is the Valley plastic seat and the current model seems to be just as aggravating as the previous one.
In Adventuretess' Nordkapp LV I removed the seat and replaced it with a DIY fibreglass one removing the back band and replacing it with a foam block.
Steavatron recently borrowed Adventuretess's Nordkapp LV (Sialuk) and was amazed by the difference in feel and stability of the kayak.
Within half an hour of paddling Sialuk, he politely asked me if a similar seat was possible to be had in his own Nordkapp LV.
I agreed that with his help we could fabricate one for this kayak too, and we might as well go "bling".
The plastic VCP seat is easy to remove: 4 bolts on the outside of the coaming hold the seat in place.
Once the fsteners were removed the seat came right out but revealed a little problem; the edge of the seat has been "shaving" the hull and a few layers of fibreglass have already been carved away by the motion of the seat slightly swinging when paddling. If not caught in time it would have holed the kayak from the inside out (the same problem occurred in Sialuk).
Patching that divot was dead easy and we restored the hull to full strength.
The new seat is made from a laminate of glass fibre, double bias carbon under the sitting area and a veneer of the oh-so-sexy twill carbon fibre on top, for looks of course :-)
The edges of the seat have been reinforced with Kevlar to prevent the typical cracking that I have experienced in other factory chopped-mat kayak seats.
The new seat does not hang on its own but I used "L" brackets to support it. The original VCP hardware was re-utilized and new stainless steel bolts are anchoring the carbon seat to the bracket.
Stevatron was happy to reuse the original back band and hip pads. The back bands sling is attached to the seat with a short piece of webbing and a "D" ring. Existing straps firmly secure the back band to the rear bulkhead to prevent dislodgment when entering the cockpit.
After the maiden voyage Stevatron was happy with the position and height of the new seat and it was then finally secured to his kayak with a few dobs of polyurethane (Sikaflex) sealant to prevent any swinging and deliver a solid feel. In the event the seat would have to be removed for any reason a spatula will be inserted under the seat to break away those few spots of sealant.
Stevatorn finds the new seat a vast improvement on the stock VCP plastic one. The centre of gravity has been lowered and he finds that the Nordkapp LV has changed personality.
He is more confident on putting his kayak on edge and has gained stabilty when in textured waters.
Since the change and after a few paddles of several hours he no longer experiences the dead legs.
.
Subscribe to:
Posts (Atom)


