Showing posts with label Valley kayaks. Show all posts

28 May 2013

Review: carbon-fibre skeg by Norbert Gancarz

A carbon-fibre skeg is the ultimate bling aftermarket accessory for any kayak.
If however one considers a kayak just a tool and has little affinity with his/her craft then I don't think this skeg blade would excite them.
Just as some consider a car just a car and see no point in retrofitting it with performance accessories I am sure that to some a carbon-fibre skeg might seem an unnecessary replacement.
I don't care that much about my car but I will not say the same for my kayaks.

As all of my kayaks are rudder-less and incorporate an adjustable skeg for directional stability, I often wondered if the deployment of my skeg had as much effect on drag as when I would lower a rudder (it has been a few year since I have paddled an over-stern ruddered kayak).
In my Impex Kayak the skeg is a rather chunky HDPE blade (same material as the common kitchen chopping board); if I fully lower that skeg my kayak seem to slow down a bit and become a tad sluggish.
When Norbert Gancarz ( norbertga@o2.pl from Poland) offered me to test his latest creation, a carbon-fibre blade to retrofit the Valley skeg, I was keen to try it.

Norbert skeg_1

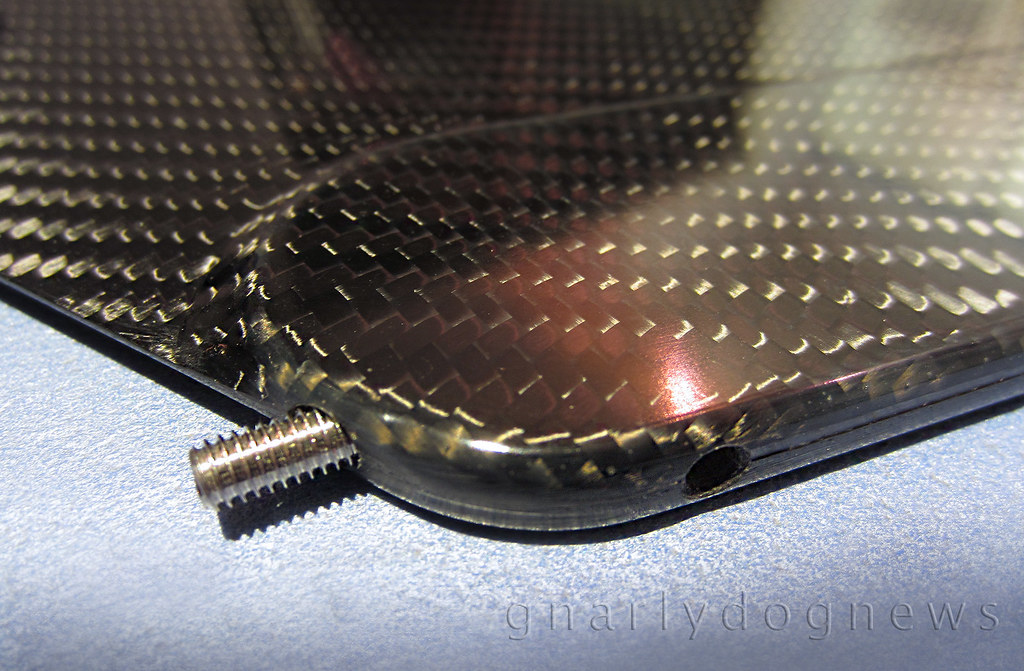
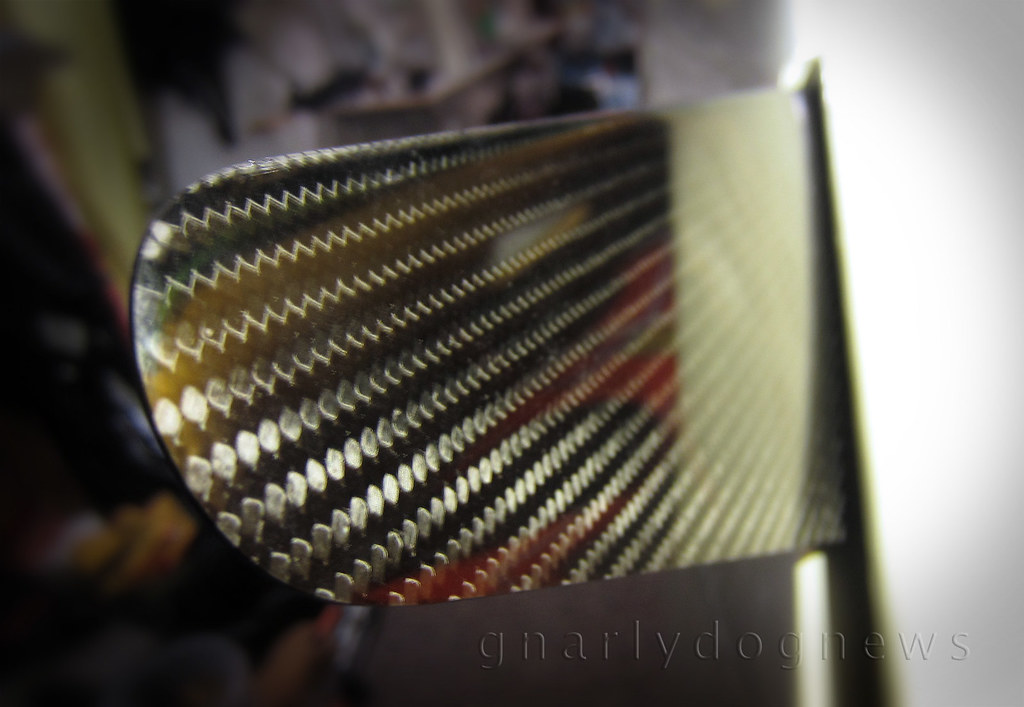
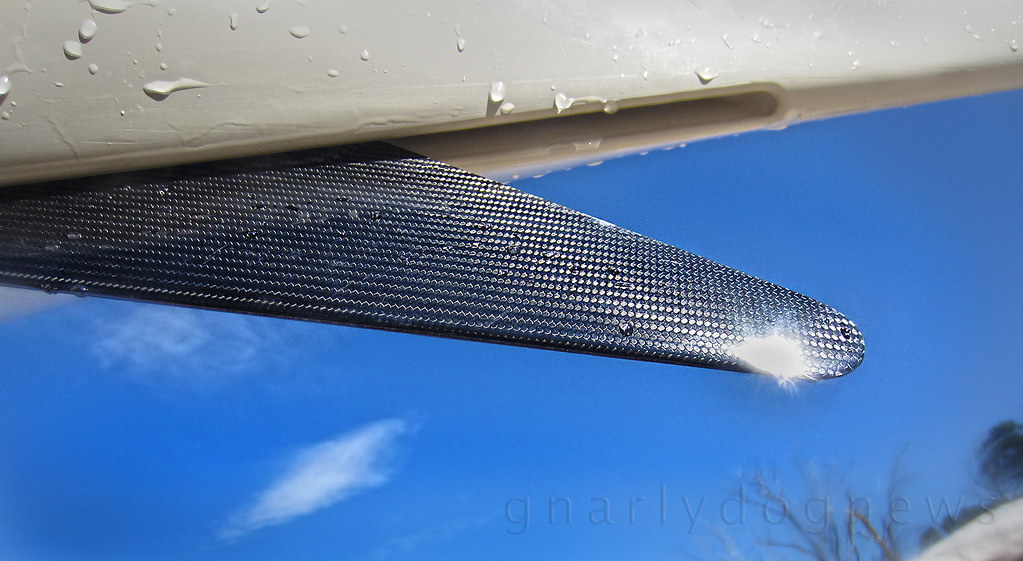
The skeg blade is of the exact outer shape as the VCP factory standard grey plastic one but this carbon skeg has features that the Valley skeg does not.
The blade is foil shaped like the wing of an aircraft with the leading edge thicker than the back of the blade. This shape minimizes turbulence and promotes an easy flow of water over the blade when the skeg is deployed. Less turbulence equals to less drag that leads to less effort and possibly more speed.
While speed has never been my goal, less effort is certainly welcome.

Norbert skeg_2

The skeg blade is a real work of art and the finish is incredible.
Somehow I felt that such a beautiful accessory looked out of place on the basic finish of the Nordkapp LV's skeg box but I was keen to find out if the blade would actually fit and how much effort the retrofit required. After all the existing skeg blade was still working fine...

Norbert skeg_5

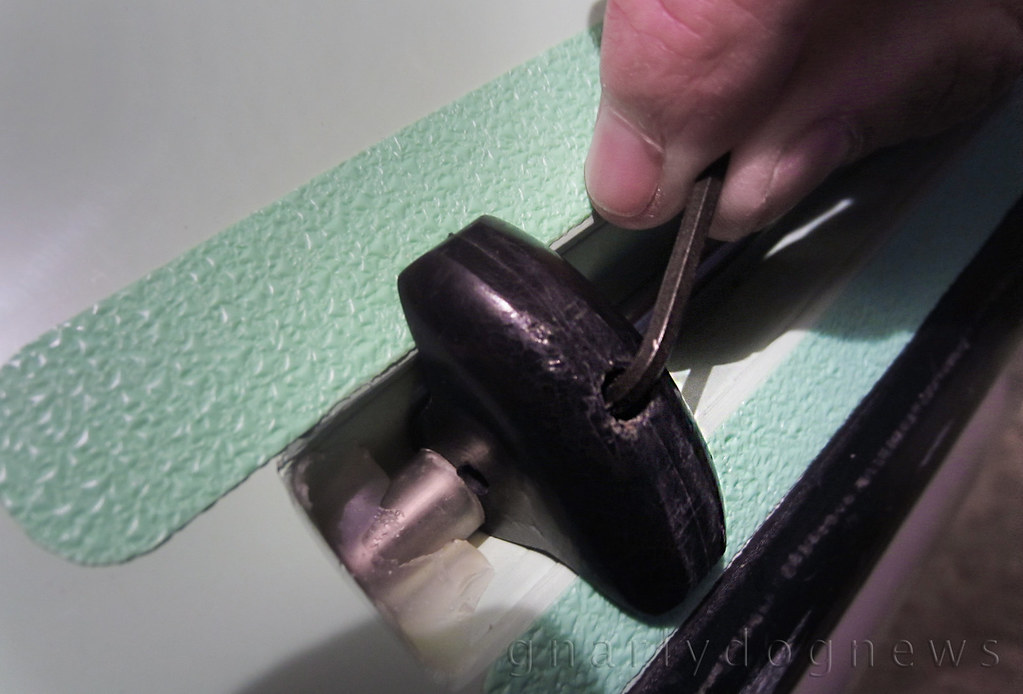
I inserted a 2.5mm Allen key (like the one you get with IKEA furniture, but smaller) into the skeg's control knob found next to the cockpit and tried to undo the grub screw. Initially it would not budge but a squirt of water dispersant (WD40) and a few minutes later the key turned and the pinch on the skeg cable was released.

Norbert skeg_6
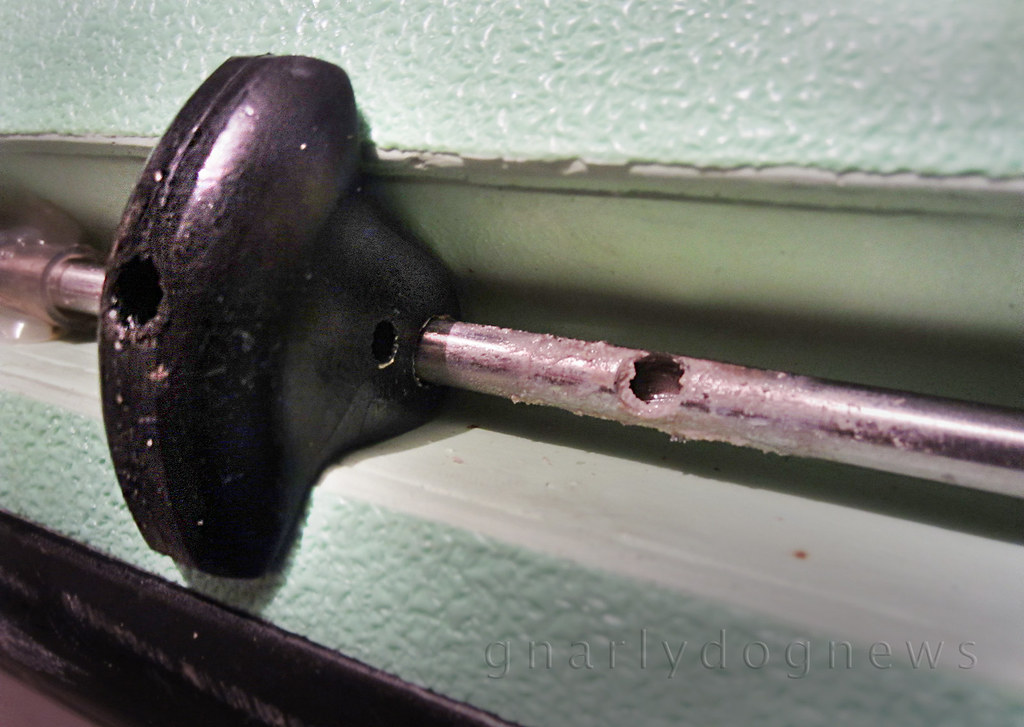
salt built up under the skeg control knob,washes away easily...
The knob was free and now I could pull out the skeg blade past its normal maximum deployed setting; the wire came out easily.

Norbert skeg_7
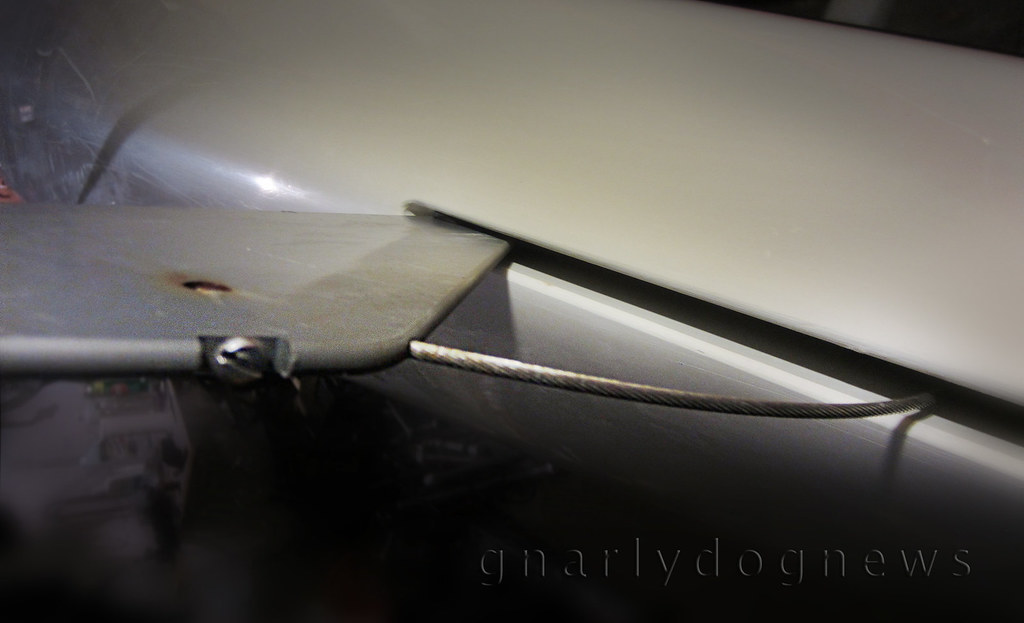
factory VCP skeg blade removal

Norbert skeg_3

Norbert supplied me with the stainless steel wire that I had to cut as each kayak model has a slightly different wire length .
The carbon skeg has a very neat grub screw that pinches the cable that is inserted into blade (not show here).  I measured the length of my existing Valley skeg wire and cut the new one to length with a pair of diagonal cutters (a decent pair of plier would have done the same job).
I fastened the grub screw on the carbon blade onto the wire, inserted the blade into the skeg box and easily wiggled the wire back into the housing all the way to the control knob. The skeg blade was sitting flush with the hull, all the way in the skeg box, before I aligned the knob over the hole in "slider tube" and secured it tightly with the Allen key. I made sure that the knob was in the "retracted" position or I would not be able to deploy that skeg all the way like before.

Norbert skeg_4

Norbert's skeg blade sits in the skeg box without any wiggle and the two little rubber washers on the pivot point offer just enough resistance to keep the blade in position preventing the skeg blade from creeping back up when the kayak is at speed (one of my kayaks does that and I am yet to fix it...).

But how does the skeg perform in the field, err water?
It seems to have a crisper feel with the lowering amount precisely translating to directional changes. There are no wobbles and no "skeg hum" as I have in some of my other kayaks when I speed down the face of a wave.

Norbert skeg_10

As for increased speed?
I can't attest to that as I don't have a GPS to measure precisely the speed of the kayak.
All I really want is to have the kayak on the beach, belly up, with the skeg standing up proud showing off that sexy carbon weave :-)

Norbert Gancarz can be contacted at norbertga@o2.pl
.

10 January 2012

SHOP: sail mast base on Valley kayak

Following Jim's set up for a sail mast base on a Valley sea kayak utilizing the compass recess, I want to detail here a fitting that requires no additional holes drilled to the deck.
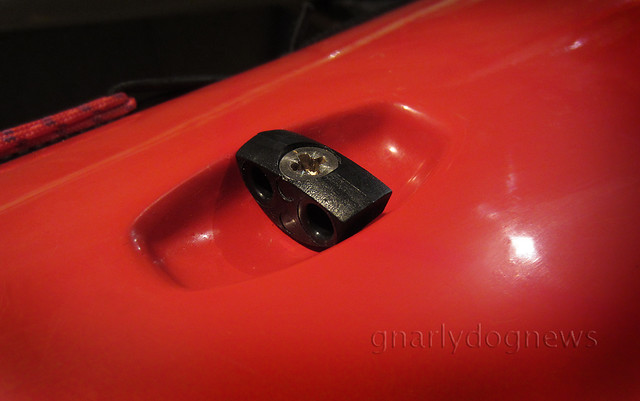
On the Valley decks there is usually a fitting that holds bungee cords in place typically used for stowing split paddles on the foredeck.
I have a hard time placing a paddle under those bungee cords and prefer the paddle parks.
Actually these days I prefer to carry a Greenland style storm paddle on the rear deck.
So, that fitting on the deck is the perfect anchor for a sail mast base.

Valley deck fitting recess

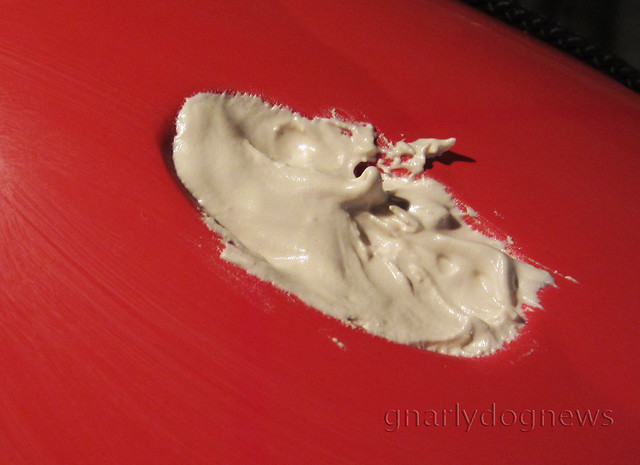
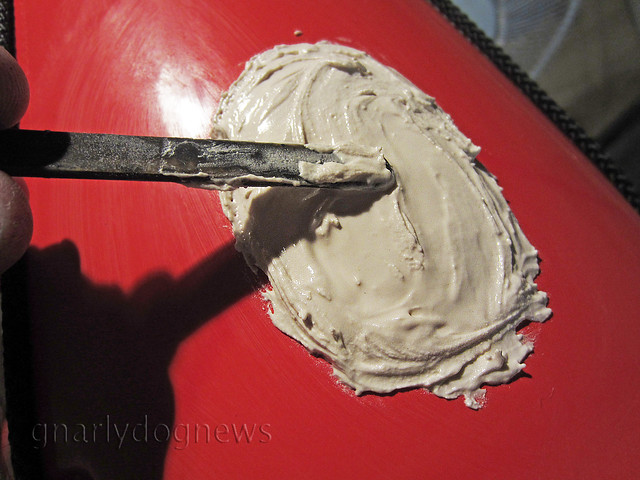
I remove the fitting and grease up the cavity/recess with several layers of mold release. I find that a final layer of PVA mold release works best before I fill the cavity with epoxy paste (I mix epoxy, microfibre and filler to the consistency of peanut butter).

filling cavity

Working-in the paste ensures that there are no air bubbles. I build the base high sitting proud of the deck.

filling cavity_2

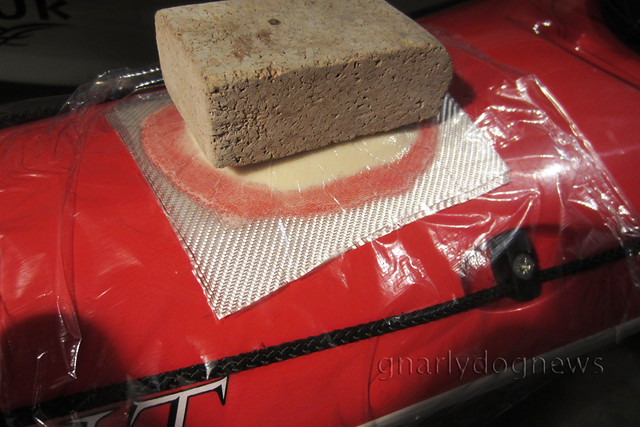
glass layer

I add a layer or two of fibreglass to keep the epoxy paste from running too much

flattening top

A final layer of kitchen cling wrap to be able to shape the paste into a neat bump and I place a square object to create a flat surface.
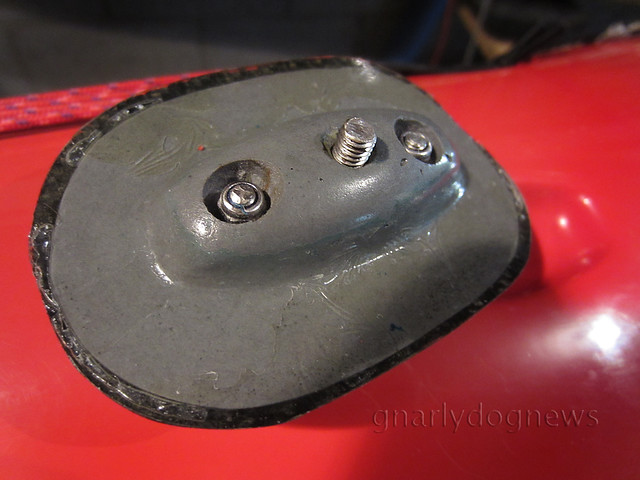
Once the epoxy cures overnight I pry the fitting out of the mold and smooth it with sandpaper. There will be a dimple where the original bolt held the deck fitting: that's where I drill through the sail base and countersink the top to accept a new longer bolt of the same thread pitch (M6, metric). I cover the mast base with a layer of carbon (just for looks) and UV stable epoxy (West System 105/207). I make sure I push the countersunk area down to maintain the recess for the bolt's head. Often I place a small greased-up plastic cap just of the right size with a tiny weight on it to keep the wet carbon cloth in place.
Once cured, I drill through the last thin carbon layer to insert the central bolt.

Central bolt

The base of the mast is carefully positioned onto the carbon base and holes drilled to accept the fasteners.
A recess is needed for the nuts underside making sure they clear the deck.

underside

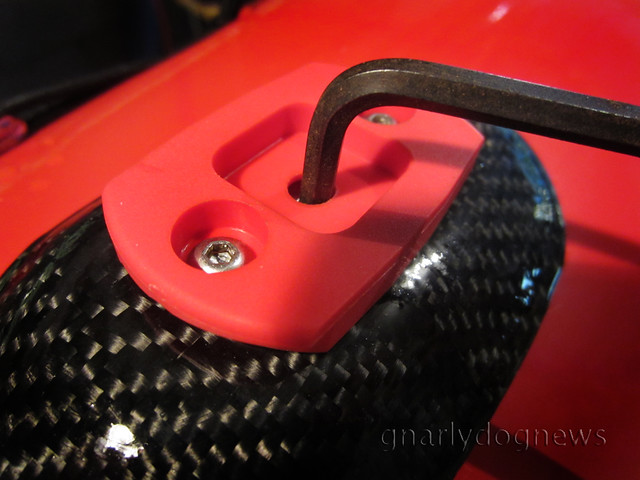
I use M4 stainless steel Allen key button head fasteners and nylock nuts.

fastened to deck

The plastic red base is bolted to the carbon base which in term is secured to the original Valley factory anchor on deck.
The base does not rotate because of the recess. No holes were drilled into the deck for the mast base but I still needed to create some recessed anchors for the mast stays.
I also reinforced the underdeck area with a rib fabricated from foam-core, fibreglass, carbon and epoxy under the mast base since the deck is too flexible.
However I discovered that this location is not ideal on all Valley decks. The deck fitting is not located in the same place on the different model Valleys. One of my Valley kayaks tends to leecock when paddled at slow speeds.
Just like when I used to windsurf, where I tilted the mast back to turn into the wind, I have now tilted the mast of my Flat Earth Sail backwards to give the kayak a neutral direction in beam winds. 
Video of sailing with this kayak and the new Code ZERO Flat Earth Sail coming soon.


.

24 November 2011

SHOP: repair a cracking coaming

.

In a previous post I mentioned that I reinforced the under-deck thigh brace area surrounding the coaming where I had hairline cracks appear in the coaming-deck junction.
Adventuretess' kayak (and several other ones of the same make) had the crack develop at the front of the coaming.
It appears that the deck is a a bit weak there, where the tight radius of the laminate meets the coaming, flexes too much and the gel coat cracks because is not elastic enough.
A friend of mine repaired the same type of crack on his kayak by reinforcing the underdeck and inspired me to stiffen up  Adveturetess' kayak too.
cracking deck_coaming
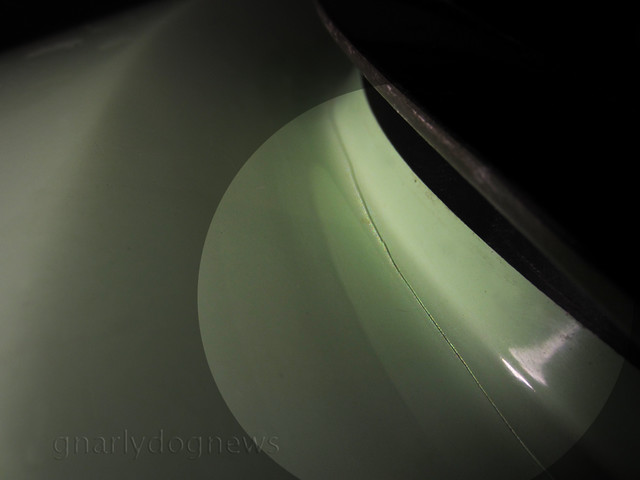
crack in the deck along the front of the coaming
I suspended the kayak on slings from the ceiling, turned it upside down and brought it to shoulder height; it is much easier to work inside the cockpit of an elevated kayak than bending over on the floor.
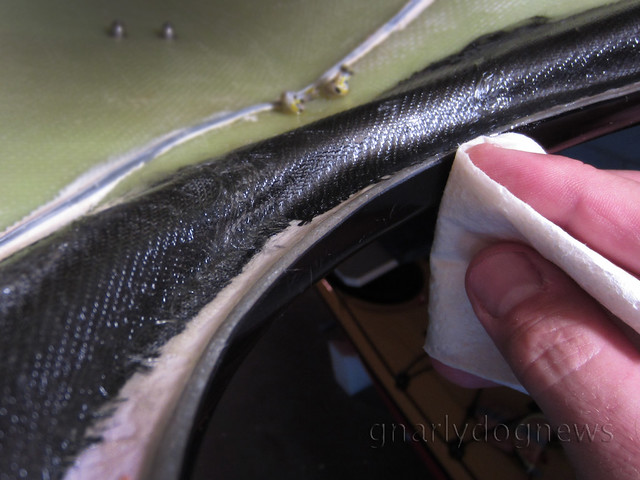
I made sure that the area was first thoroughly washed with fresh water, dried and then cleaned with acetone. I inspected the laminate but it didn't show any cracks in the fabric.
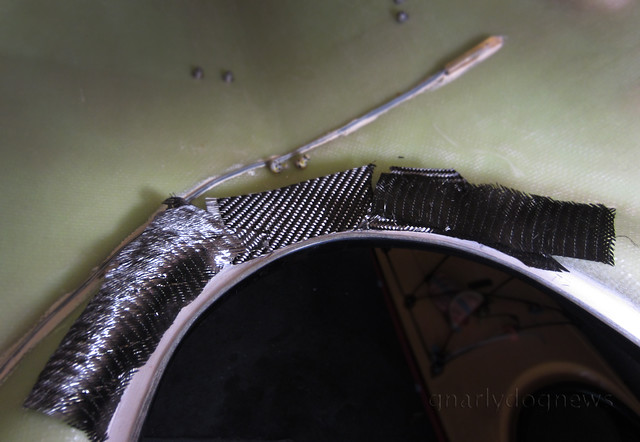
For the reinforcement I used scraps of carbon fibre cloth (unidirectional and woven), but quality fibreglass cloth could have been used instead; carbon fibre is just a bit stiffer.
dry lay up
(wire and reed for magnetic switch showing)

I chopped the cloth into short strips so they were easier to lay around a curved shape. I used several layers of carbon cloth, overlapping. I exclusively use West System epoxy for my work and for this area, exposed to daylight, I mixed 105/207 since it's UV stabilized. Epoxy allows me to work in small batches, does not produce too many toxic fumes and has excellent adhesion to most composite laminates.
I often hear that paddlers are scared to use resins and do their own repairs. Mixing epoxy is dead easy and is feels like watery honey. If you clean the area to be repaired repair well and keep the work tidy a job like this one is not more difficult than smearing honey onto a cloth, really.

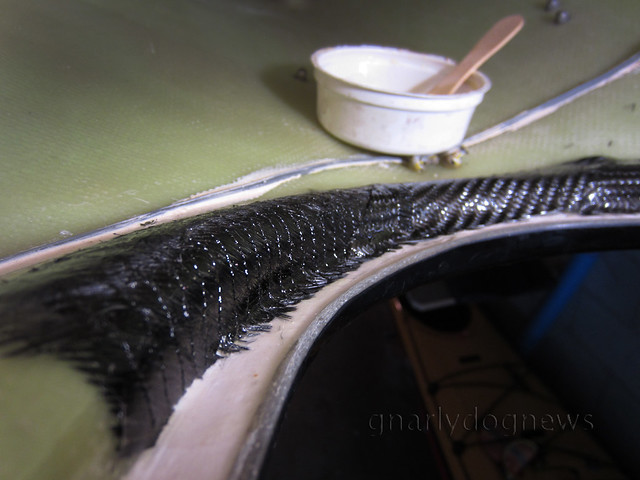
wetting out layer1

I saturated the carbon cloth making sure there was enough resin against the kayak deck, pushing the fabric into the tight curve of the under deck. I finished the repair with a top layer of fine fibreglass twill cloth to create a smooth surface while absorbing possible excess epoxy.
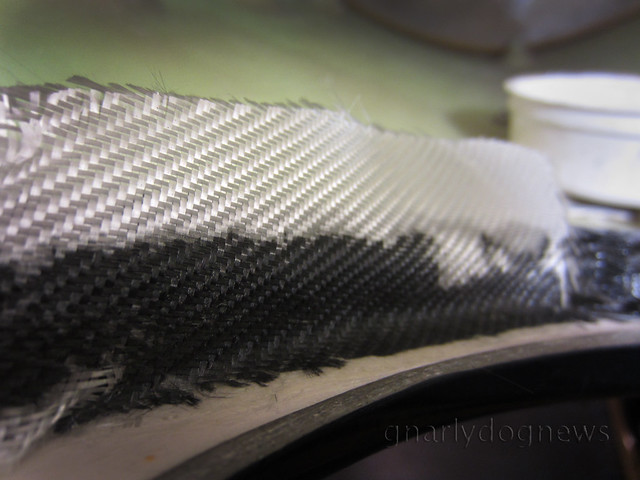
glass layer
Top layer of fine fibreglass. Resin only partially saturating the cloth.
After all the layers were saturated (white fibreglass becomes transparent) I cleaned up any spills on the exterior of the coaming with methylated spirits (alcohol).
clean up

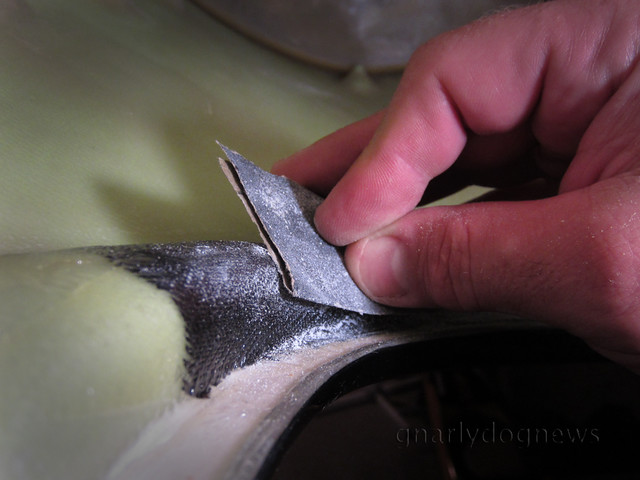
I left the epoxy cure for 24 hours (25C temps) and then smoothed any fibreglass spikes with sandpaper.
sanding

I am not sure if I will repair the cosmetic hairline crack on the outside of the deck since I don't have the factory matching gel coat from Valley. It takes a fair amount of trial and error to mix up the perfect tint to match the color.
The deck now feels very solid and the hairline crack does not expand when pressure is applied.

.

22 August 2011

Photo: surfing fun

Greg surfing_1_c
using a hollow core WRC Greenland paddle

Greg Schwarz all smiles in the breaking waves.


.

07 July 2011

FAIL: a list of problems

After a few years of sea kayaking and having owned nothing less than 13 sea kayaks and personally worked on 10 belonging to other people I have seen a few weaknesses in design and manufacture.
The list that follows is my personal experience of actual fails that I have observed up close. Fortunately not all on my kayaks J 

1) The most common failure I had on my composite sea kayaks (I have never owned a plastic one) is cracking of the laminate.
Occasionally the hull of my kayak hit a rock and produced damages of various degrees: on one occasion holing a thin laminated hull with surprisingly very little impact force.
Some other cracks in the hull have occurred from stressing the boat in heavy seas. The cockpit area is particularly prone to stress since there is no deck to create a solid monocoque structure.
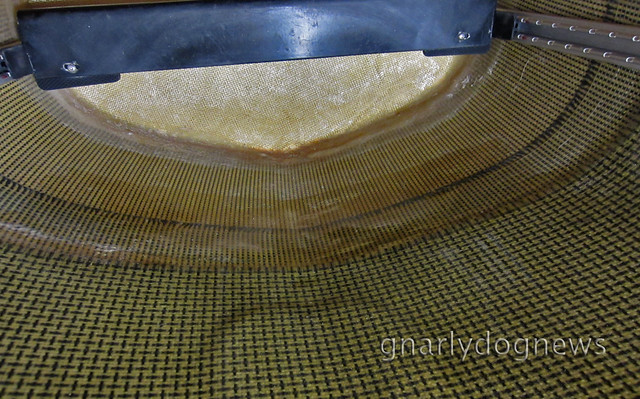
The hull under the seat is at its widest and flattest area: compression and flexing of the hull is common even on high-end kayaks. I have reinforced all of my current kayaks (apart from the hard chined Zegul) with a layer of carbon/Kevlar or double bias carbon to strengthen and stiffen a weak cockpit. 
reinforced hull_c
additional layers of carbon/Kevlar in cockpit area
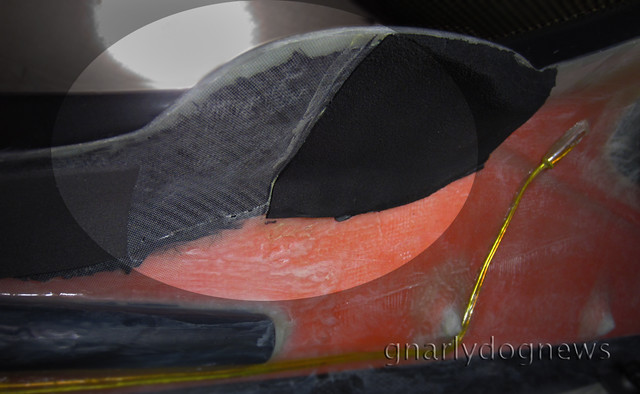
2) The cockpit coaming/deck joint has so far cracked in all my latest kayaks unless reinforced. These days I put a new boat on the “blocks” before it even hits the water. I remove any foam padding in the thigh braces and laminate the area with carbon.
In the boats I have not done so I have eventually stressed the deck enough to create hairline cracks in the deck. When rolling and edging in the surf, the kayak sees a lot of upward pressure from bracing with my thighs. Manufacturers rarely address/reinforce the coaming.  
reinforced thigh brace area
layers of carbon reinforcing the coaming/deck junction in thigh brace area
3) Speaking of junctions, the other common failure is the seam of the hull/deck. So far none of my kayaks have suffered a leak there but I have seen numerous kayaks without external seams develop a hairline crack that inevitably results in water entering the hatches. Adding a cosmetically acceptable external seam to a friend’s cracking kayak has been very time consuming. I only use epoxy for my work and I finished the seam with a coat of UV resistant black resin. A flow coat would have been easier tho… 


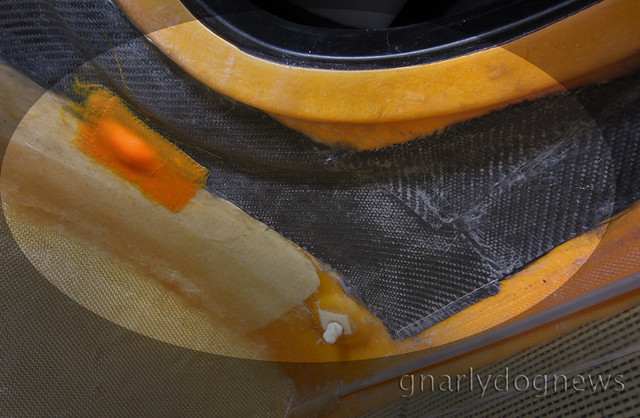
4) And while I talk about cracks I should mention that most kayak manufacturers skip on the design and strength of the deck. The inexperienced might be fooled by a thick lay-up but rarely does he/she realize that glass-poor chopped strand (chopper gun lay-up) is suitable for very tick laminates like in a motorboat but are very poor executions for a sea kayak. Problems start to occur when a person needs to climb on the deck of a kayak in a recovery. So far I have repaired and reinforced half a dozen decks that failed under the weight of paddlers. On the other hand, my very light Chinese kayak has a core laminated deck making it extremely resilient. Other kayaks I now own have fabric instead of just chopped stand in the deck lay-up, and so far have held up very well.  
deck reinforcement_c
underdeck hatch cover coaming area reinforced with carbon cloth
5) Leaks to the hatches are often lamented by sea kayakers that paddle in conditions that will see water wash over the deck or proficient rollers that submerge the hatch covers.
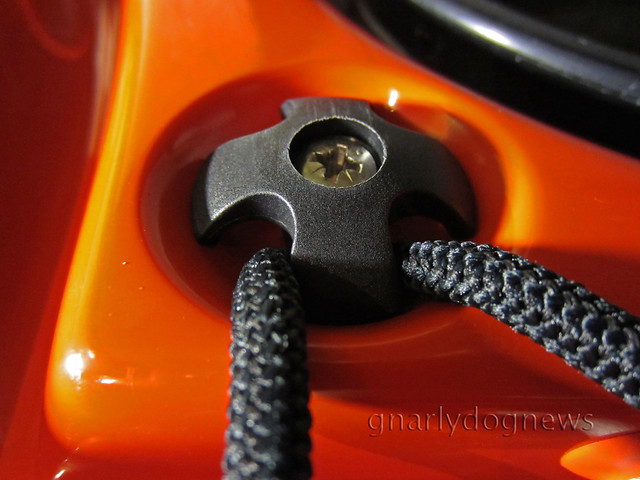
I have had a few hatches leak. The most common problem has been water ingress from fittings on the deck.
deck fitting_c
deck fitting "well" where water pools
The little well where the hardware is bolted to the fiberglass holds water that slowly seeps through to the inside if there is no proper sealing under the nut against the deck. Kayaks that have recessed deck anchors don’t have that problem.
I had leaks coming from the junction of the hatch’s rim where the bonding sealant was not completely encompassing the rim. All it takes is a small section left out and water will seep in.
I have removed poorly fitted hatch rims and resealed them with polyurethane or epoxy glue. 

6) Hatch covers are also prone to leak. So far only Valley and Kajak-Sport hatches have proven to be leak proof in my fleet. All other have leaked, even if often just minimally. Mind you, the Valley hatch covers have a reputation of deteriorating sometimes prematurely. Replacement of those is not cheap. Luckily there seems to be improvements on the quality of the Valley hatches and there are less reports for the need to replace them too soon. Excellent alternative/replacement hatch covers are available from SEA-LECT Designs.

7) While most leaks occur from the top of the deck I have repaired 3 kayaks with leaking bulkheads. On one occasion the seal around the fiberglass bulkhead was not that great: a small amount of epoxy glue fixed the little hole. In two other instances I had to fabricate new bulkheads since the factory ones were made out of closed cell foam. It is just a matter of time before a foam bulkhead will leak. If a kayak is used in waves the hull/deck will flex enough to separate the weak glue that bonds foam to fiberglass (things get really ugly in plastic kayaks). Lifting the kayak by the rear of the cockpit coaming will separate the foam too. To date I have not met anybody with dry hatches in a kayak with foam bulkheads. I would only choose a plastic kayak that has welded plastic bulkheads.

8) Small leaks to the cockpit area usually go unnoticed since water entering through the tunnel of the spray deck is greater than around the coaming junction. There have been however a few cases (not mine) where the rim was so poorly bonded that a low-deck kayak was flooding every half an hour. A large section was left out and not bonded at the factory. I have also observed a brand new, very high-end British kayaks, that had a visibly separating rim. It pays to inspect the new kayak before purchase.
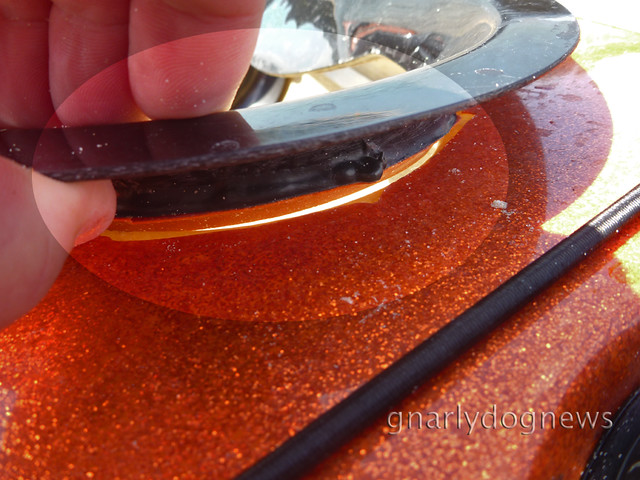
coaming separating_c
coaming separating from deck
9)  Last but not least leaks can occur from skeg cable housings or rudder lines. I had a badly glassed-in skeg box that leaked substantially. Gel coat concealed the cavity and only a small crack was visible inside the recess. Epoxy glue fixed the problem.
Rudder lines leaks can be a bit trickier. If the housing has worn out (result of constant abrasion of the stainless steel cable by operating the rudder) the water that enters the tube will leak into the hatch. Replacing the cable housing is often a pain. 

10) And while I am mentioning cables I also had a few rudder cables snap on me (that’s when I still used to paddle ruddered boats). The stainless steel wire fatigues and after a while (that depends on how often you paddle) it snaps. It was no fun trying to keep that kayak go where I wanted without a rudder. While I find skegs more reliable (never kinked one myself) I have seen several malfunction. Sloppy workmanship at the factory will create sticky cables. A skeg that has resistance can kink the cable when one forgets to retract it on landing. A smoothly operating skeg will usually just retract without the paddler even noticing. I find rudders on a kayak a weak tool to keep directional stability. While without doubt they are more efficient when one’s goal is to just eat miles, I had a few snap on me when in rough waters. Don’t try reversing in surf with one deployed. I also ruined one being retracted on deck since most retention systems for stowing it on deck are not secure enough for surf work. 

11)  An area of weakness and potential failure can be the carry-handle mounted to the deck. Some kayaks have simple bolt-on (in some cheap plastic kayaks it is just pop rivets) carry handles. Carry handles are not designed to pull a kayak loaded with heavy gear but some handles are secured to such thin laminates that struggle to lift the weight of the kayak alone. In one very bad case I have seen the whole handle rip out of the deck. Needless to say that reinforcing the deck so far in the bow or stern is really difficult. My preferred carry handles are positioned at the very ends of the kayak, with a line threaded through a hole at the seam of the hull/deck. More on grab handles safety issues here 

12)  Last but not least: the seat. I have cracked several seats in my kayaks. Incidentally the seats that failed were thick and heavy. So is there no seat strong enough for my paddling? Yes, there is: a decently laminated one!
I have noticed that most sea kayak seats are constructed with real cheap resin-rich chopped strand. As mentioned before this type of material is not suitable for light applications. The seats that have not failed on me are made from several layers of woven fiberglass, often reinforced in stress areas with Kevlar. Unless a weak hung seat is secured to the bottom of the hull to prevent it from swinging side to side the chopped strand will often not last too long before starting to crack in the corners. Repairing it involves removing the seat and reinforcing it with quality woven fabric. See this article for more info.

There are a couple of other  items that I have seen fail but they are accessories. I will write a separate article on those issues some other time.

18 January 2010

SHOP: replacing a Valley seat

Valley has recently changed the seat in their sea kayaks (2010).

The previous kayaks were shipped with the above seat.
Some paddlers found a problem with the shape of the seat and the configuration of the back band.
The seat shape did not suit a lot of kayakers that would spend long time on the water and the backband would hinder some rescues.

As shipped from factory the back band would tend to fold down under the paddlers bottom when a rescue (assisted or self) is performed.
Some kayakers have modified the retention system to make the back band more secure and prevent dislogment and nuisance when reentering the cockpit.
But the more important concern is that the shape of the seat seems to cause severe rubbing with some users.
The "slope" of the pan on the rear is too gentle and when the kayak is paddled efficiently with pressure on the footpegs and consequently the body of the paddlers pushed back, the seat would rub the tail bone.
On long crossing some kayakers would rub all the skin off of the end of the spine area and consequently be in pain.
Comparing the Valley seat to other sea kayaks' seat I notice the pronounced difference and tried to rectify the problem.
The Valley seat seems to be made from polyethylene and I tried to use a heat gun and reshape some of the seat and create a better pan.
Unfortunately such solution only alleviated the problem but did not really fix it.
A new seat pan had to be made.

I was lucky to borrow Greg Schwarz's mold that he has made for replacing an ill shaped seat on a different kayak.
In a conventional lay up of double bias glass and 4oz cloth, I used epoxy as resin.
In some areas of high stress I used additional layers of carbon/Kevlar cloth to reinforce possible weak spots (something I have learned by repairing other manufacturer's seats).
A hung seat sees a lot of stress in the "bracket" area.
I did not want to carve a simple but effective closed cell (minicell) foam seat because it prevents the flow of water to the electric bilge pump located behind the seat.
Foam seats are great: easy to fabricate, very comfortable but don't allow water flow to the rear bulkhead.

Greg's mold allows for a channel to let water flow though the middle, under the seat.
Visible in the image above is the front of the new seat installed in a Norkdkapp LV. Expanding polyurethane foam was used for supporting the front of the pan.
The new seat has a much longer pan and offers outstanding thigh support.
This is the second seat that I have fabricate from that mold and to date is the best sea kayak seat for me. While some other seats would offer reasonable comfort others would give me the dreaded "dead legs" on long outings.
This seat however addresses the compression of the sciatica nerve problem and eliminates discomfort that some seats bring.
seat installed in Nordkapp LV, rear bulkhead with electric bilge pump
I decide to remove the back band all together and go for a foam block instead.
A well shaped foam block offers support where needed but eliminates the problem of back bands falling under the paddlers bum in a rescue.
Fabricating a foam back block required the lamination of 4 pieces of coarse closed cell foam (type of foam used for industrial packaging) and carving the centre section to allow for the bilge pump.
foam sections laminated with contact adhesive _ underside of foam back block
The back block is shaped to the contour of the rear bulkhead and fits snugly behind the seat.
To prevent accidental dislogment I used a bungee retention cord (with olive) threaded through the block.
The section of the back block that contacts the body has a softer last layer of quality minicell.
Shown here before final the layer of neoprene that will cover the block.
The new seat installed.
I used a simple anodized aluminium bracket fashioned from a 2" L section.
Stainless steel nuts and bolts to secure the seat to the bracket.

26 October 2009

SHOP: leakproof through bulkhead hose

In a previous post I have described a solution for a hydration system.
The water bladder sits under the deck, on a “shelf”, and the drinking hose sits in front of me on the deck.
In the Nordkapp LV the deck is lower and less space is available in the foredeck.
Water bottles positioned under the bungees on deck just don’t cut it as they often end up in the sea, especially in rougher conditions.
While on short trips carrying water on the PFD is a possible solution (small amount of water) in the heat of summer in Queensland a liter of water does not get you far.
Hydration in a subtropical locale is a serious consideration.
The water bladder could not go behind the seat (Valley makes sure that the rear cockpit bulkhead is tight against the seat) so the best solution was to place it in the day hatch.
I wanted a positive seal between the drinking hose of the hydration system and the bulkhead.
A simple hole that is just undersized drilled in the deck might not do the job: small amounts of water could still get through and wet items that are otherwise totally dry in a Valley hatch.

I decided to position the drinking hose to the left of the cockpit.
On the right hand side there is the day hatch cover and the outlet spigot for the electric bilge pump.


After drilling a smaller hole with a high speed drill (Dremel_ I use high speed or gel coat chipping can occur) I enlarged it to a slightly undersized dimension for the clear PVC water hose.
I placed an “O” ring on the hose that is slightly constrictive and let it sit on the hose for a while.
The “O” ring would create a small indent in the hose making sure it will really seal well.


I roughened up a circle on the gel coat around the hole, clear off the “O” ring, cleaned the surface with acetone and inserted a slightly greased up (mold release) hose and “O” ring hard against the gel coat.

roughened-up circle on gel coat; hose and "O" ring inserted
I mixed up a small quantity of West System epoxy 105 with 207 hardener (UV stabilized), added some tint (I didn’t like the pale yellow color) and thickened it with microfiber (for strength and workability).
With a toothpick I carefully covered the “O” ring creating a full encasement of the ring.
After curing it overnight I removed the hose (it released easily since it was greased up) and shaved away the excess epoxy to make a smooth “fitting”
epoxy still needs polishing
The “O” ring is now encased in the resin with the rubber surface against the PVC hose making it really leak proof.

PS MAR'10 For a much simpler solution that does not require epoxy Kiwibird managed to source just the right size rubber grommet.
It apppears that her solution is just as effective as mine.
If you can get hold of a grommet that fits the hose tightly I suggest to follow her set up.

The hose can still be slid in-out to shorten or lengthen it according to the paddler's needs.
The hose end inside the day hatch has a quick release coupling that came with the bladder so removing and filling up the bladder is a breeze.
The hose is usually stashed under the deck bungees and can be easily reached when needed for a drink.

After trying different solutions for a drinking system this one seems to address all the shortcomings of the other(*) systems.

* other systems that I tried:

-1) water bottle on deck: not enough water, fall off and hinder some paddle strokes.
-2) water bladder on PFD: if enough water in bladder for a day’s supply PFD becomes rather heavy on the shoulders. Also hinders rolling.
-3) water bladder in cockpit and drinking hose threaded through tunnel of spray deck: bad idea in case of wet exit (rough waters) and inevitably pain in the butt when forgetting to remove before landing :-)
PS: Kiwibird simplified the drink hose system by using a rubber fitting that needs no epoxy work; details here

21 September 2009

Nordkapp LV stability


stix or Euro paddles: it's all good
On a recent paddle of 25 Km we had two Nordkapp LV in our pod.
Adventuretess and Greg Schwarz love those kayaks for different reasons.
Tess loves how it performs in rough waters (video here) and she prefers it to other kayaks for surfing.
She also can roll that kayak very well (although she admits a Tahe Marine Greenland would be the ultimate roller, for her) and finds it very reassuring.
Greg Schwarz on the other side does not seek out the surf.
His preferred game is rolling.
He is happy to spend a few hours just playing around in the bay in front of his house.
He does that regularly. He also has admitted to me that he gets "pumped" watching Dubsides's DVD and he learns a new way to roll just about every other week.
Needless to say I ask him to show me his new tricks every time I see him.
Greg also is very happy to teach other kayakers interested in Greenland rolling technique, not formally but from the pure joy of spreading this amazing feeling when rolling.
But what I find interesting is that both Greg and Tess deem the Nordkapp LV as a "stable" boat.
I have tried to paddle the Nordkapp LV once (had to shoehorn myself into that tight cockpit) and did not find it excessively tippy.
I often hear and read that the Nordkapp LV is a kayak that a lot of paddlers find "demanding".
So, when Greg suddenly got out of his seat and stood up in the LV, I was amazed.

Therefore, I understand that what might feel very tippy for one person obviously is not for an other.
When a paddler would praise a kayak (often his/her own ride) and discard another one (sometimes one that they have not even paddled) I now view their opinion with caution.
If I want to value their opinion I ask them what other boat they paddle and what is their skill level.
What might appear as rather "tippy" to a novice it could be regarded as "dead" (too stable) by other advanced paddlers.
On that note I have to admit that a kayak that I purchased (sight unseen) a few months back and found very "demanding", is now warming up to me.
Not sure if I will even have the balance to be able to stand in a narrow kayak but practice can only make me a better paddler.

PS: a very good article on understanding stability was found at Hunter Kayak Klan.
Article here

29 July 2009

DIY: towrope system for sea kayak

The club I used to paddle with required that we carry a towrope.
Before purchasing a towrope I obviously looked at what others were using.
It appeared that just about all the systems that I could find were the type that mounted on the kayak's deck and the tow ropes that attach to the body seem more popular for shorter tows (whitewater).
Here in Queensland a tow most times will be required when a fellow paddler's gear malfunctions (rudder failure), the kayaker is seasick (in heavy swell) or injured and occasionally too tired to keep up/continue to destination.
I did not like the look of the tow rope attached to the body: while jerking around the waist of the tower, in my opinion, it tires the paddler too much (and is dangerous in heavy seas).
I looked at what towing system was common with expedition paddlers in Great Britain and I often saw a towrope stashed away in a bag, secured on the deck of the kayak, usually behind the cockpit.


The commercially available (to me) towropes at the time were usually of poor quality and too bulky and there was not much thought given to those systems.
I believed that I could improve on those designs and come up with a better system myself: my first towrope system mimicked the British set up.
I found however that the deployment and retrieval of the towrope behhind my back was cumbersome to me (I am not very "bendy").
I thought that the same towrope could be attached in front of the cockpit where I could easily reach it without having to contort myself.
Soudkapp deck (c)
towrope system securely attached to the front deck of SeaBird Northsea.
The front of the bag has a little loop of Velcro® to keep the bag in place when deploying the tow line.

Velcro® that loops around a bungee cord, securing the bag
The remaining problems were:
1) quick release in case of trouble and
2) the towrope staying clear of paddling radius.
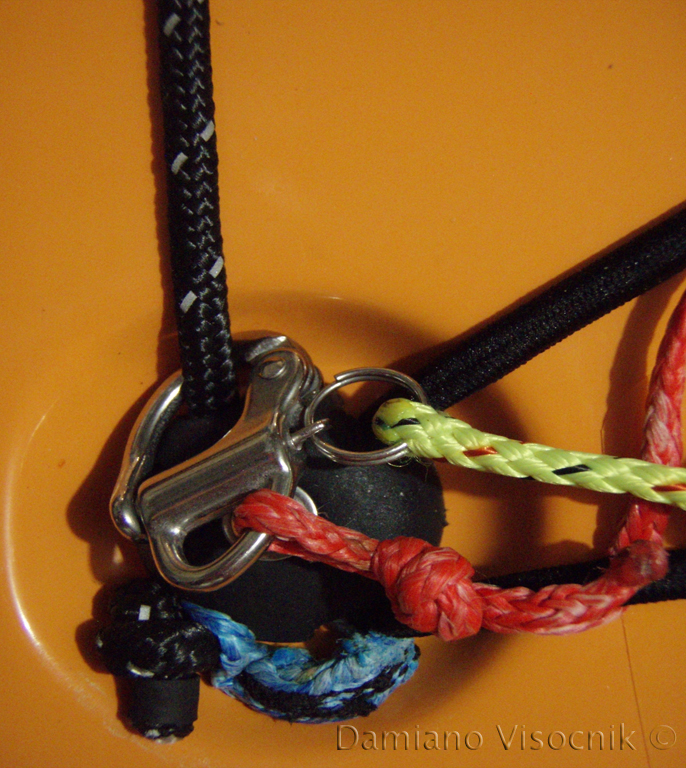
I solved the first with a different approach than the usual cam cleat and I use a quick release shackle.
tow line attachment (c)

quick release shackle attached to front deck lines

2) to maintain clearance off the towrope when deployed, the line is routed through a loop next to the cockpit and prevents the towrope interfering with my paddling (and getting tangled).


Dyneema® loop next to my cockpit

The towline bag: custom sewn heavy duty nylon (Cordura®) with reflective stripe.
The cover flap is looped around a second bungee when on deck and Velcroed down to itself to keep it secure.I used a towline that would float, be strong but still compact: 2mm Ă˜ Dyneema® is the perfect line. At a braking strength of more than 650 Kg I think there is more than sufficient strength (I have used lighter lines too and they seem to work as well).
I packs down way smaller than the typical polyester water-skiing tow-rope and it's easier for tying knots around the karabiners.


15 meters of 2mm Dyneema® core lineThe towing karabiner is a stainless steel one that has a little float attached to keep it from sinking if dropped in the water.

karabiner with float. Tow line is chained for easy deployment without entanglement.
I find nothing worse than passing the clip-on karabiner to somebody to see it drop and then have to pull-in all the line again to pick it up.
The Dyneema® line is bright orange for visibility.
The anchor point is not my deck’s bungee since I have seen some fail but my perimeter line deck fitting (in front of the cockpit).
The quick release shackle has a little toggle for emergency release, in case the towed kayak is putting myself in danger I can quickly just pull the toggle to release the line, even under load.


safety quick release in yellow
The towline has been tested in many towing situations and so far has worked great.
A couple of highly qualified sea kayak instructors have endorsed the system and asked me if I could manufacture the system for them.
For a commercially available product the closest one is the towrope from Valley (just a bit thicker line without the quick release shackle).

Needless to say that a rudderless boat works so much better for towing since there is no danger of the line catching on the rudder behind you.
I know that are countless arguments and counterarguments for towlines that are attached to the kayak versus the ones to the body.
This system of mine is working great for my paddling environment (quick rescues from turbulent waters around cliffs don’t apply) but I would not mind hearing from my readers if they see faults in this design.


edited DEC2011