
The anchors, cleats and mast base are permanently secured to the deck and require several holes to be drilled through the fibreglass deck to have the bolts secure the items.
Some people cringe at the idea of drilling holes in a brand new kayak especially when experimenting with equipment that they are not familiar with.
My early sail rigs had the cleats mounted too close to where my hand would occasionally brush when paddling in a low angle style.
A few hits of the knuckles on the sharp edges of the cleat made me relocate them and plug the holes left behind by the fasteners.
My friend Jim has not done a lot of kayak sailing before and was unsure if he would like it on his Nordkapp LV.
He decided to minimize the damage that an ill fitting sail rig would do to the deck and devised a system that would keep his deck clean when he did not want to use a sail.
For the mast he used the existing recess where normally a 70P compass would be fitted. He fabricated a base out of fibreglass that has the identical hole location as a compass. He does not use that type of compass but he believes the recess and the complex fibreglass profile of the deck in that area is a very solid location for the mast base. He did not need to reinforce the deck since no flex is detected when the sail is deployed, even in heavy winds.
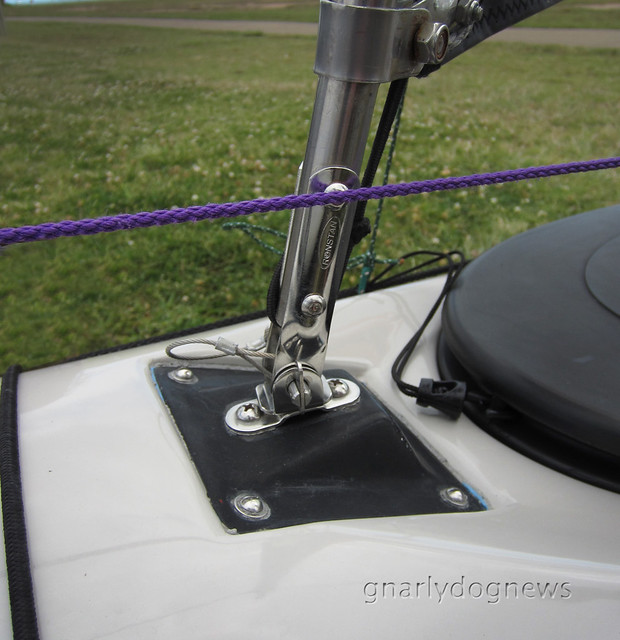
Jim had to drill holes for the stay anchors; unfortunately a Nordkapp LV does not have perimeter-line anchors suitably located to double as stay anchors.
The rest of the cleats and pulleys (blocks) are mounted on a custom made piece of fibreglass that contours the deck of the kayak.

He simply waxed the deck of his kayak with mould release compound (even grease would work in a pinch) and laid up several layers of glass cloth and resin. Once the laminate cured he padded the underside with a thin layer of closed cell foam to prevent scuffing of the deck and installed the necessary hardware to secure the uphaul and trim the main sheet. He used sections of stainless steel welding rods embedded into the laminate to create guides for his lines but stainless steel saddles could be used as alternative.
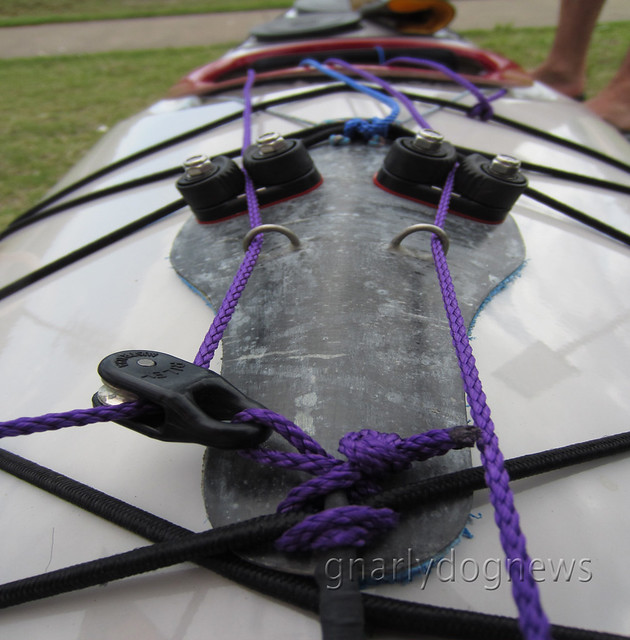
His "plate" is held back by a thin line that loops around the coaming of the kayak, and in the front, under the deck bungee cord. The coaming line takes most of the load, the front bungee just keeps the plate close to the deck.
Jim's system can be removed in seconds when he does not use his sail. The base for the mast remains attached up front but there are no cleats and pulleys to clutter his deck.
PS 02DEC
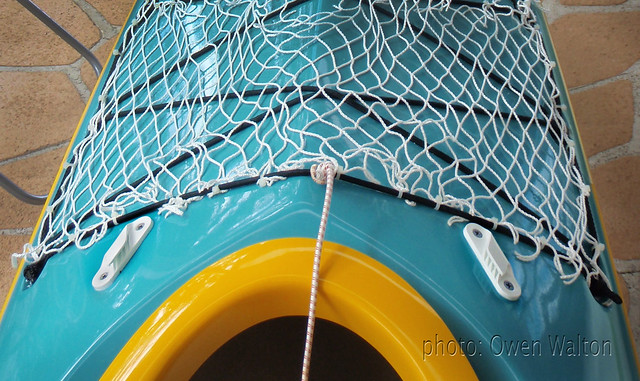
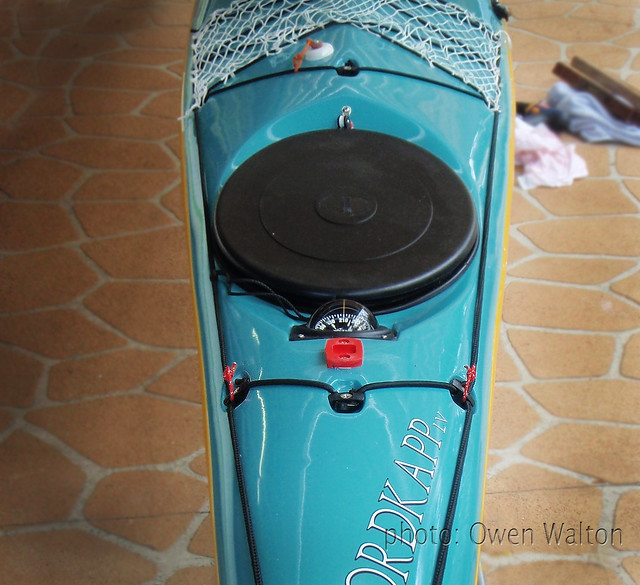
Owen Walton has sent me these images of his sail set up.
It requires one more stay (back stay) but the sail can rotate freely 360 degrees.
The plastic cleats are low profile.


Hi gnarlydog,
ReplyDeleteI have an RM and know virtually nothing about sailing so share Jim's trepidation. I love his concept and I'll look forward to hearing how it goes on the water. Any chance of a follow up after sea trials ?
John, the removable sail rig has been tested in 15knots and Jim was very pleased with the performance. He used a 1 m² sail with Dyneema stays.
ReplyDeleteI believe a similar rig could be fabricated for a RM kayak.
I realy like the reses mount, I can see it yoused on numerous boats realy easily
ReplyDeleteMick MacRobb
FEKS
GD - I have fitted one of Mick's sails to my Nordkapp LV, using almost identical set-up that Douglas Wilcox used on his. The mast step (plastic Riley type) is mounted in front of the compass mount in line with the lifeline fittings. No additional deck strengthening was needed due to the deck strength in this position. The shroud (side stay) fittings are simply Spectra loops through these lifeline fittings. The cleats for the mainsheet and mast haul are flat type that are used on sail leaches (for the leech cords). I have been using this set-up now for over 6 months and am satisfied this is the simplest/best solution.
ReplyDeleteOwen, thank you for your comment. I would love to publish an image of your set up; if you send me a picture I will post it here for others to see.
ReplyDeleteJust for info, liberal amounts of cheap hairspray work as mold release, adtr a good three coats of car wax polish.
ReplyDeleteOwen, thank you for your images. They are now included in the post.
ReplyDeleteHola gnarlydog, yo tambien estoy experimentando con velas de kayak del tipo "delta invertido", iguales a las que vende Prijon en Europa pero con diversos anclajes y posiciones en las drizas. De momento el invento funciona aunque no he probado la vela en condiciones muy extremas.
ReplyDeleteSaludos desde España.
Hi Gnarlydog,
ReplyDeleteSorry to revive an old topic here... but i was wondering if Jim ever provided measurements/layout for the mast base that goes into the Valley compass recess (i.e. the bit that is flat/even for the mast)?
If he didn't, do you think he would be so kind?
I have a Valley Etain 17-7 and am thinking that a removable sail setup would be perfect and i'm willing to remove the compass to have a rig like that.
Cheers from Tassie
Steve, Jim did not provide the measurements for the mast base plate but it should be identical to the compass recess outline (square). However,from pix on the net, it seems that the Etain has just a dimple and no “frame” recess.
ReplyDeleteIn that case the plate could be of any size you deem suitable (not real advantage having a big flange) as long as you still have room for fasteners.