Showing posts with label epoxy. Show all posts

05 February 2013

DIY: repair a cracked paddle

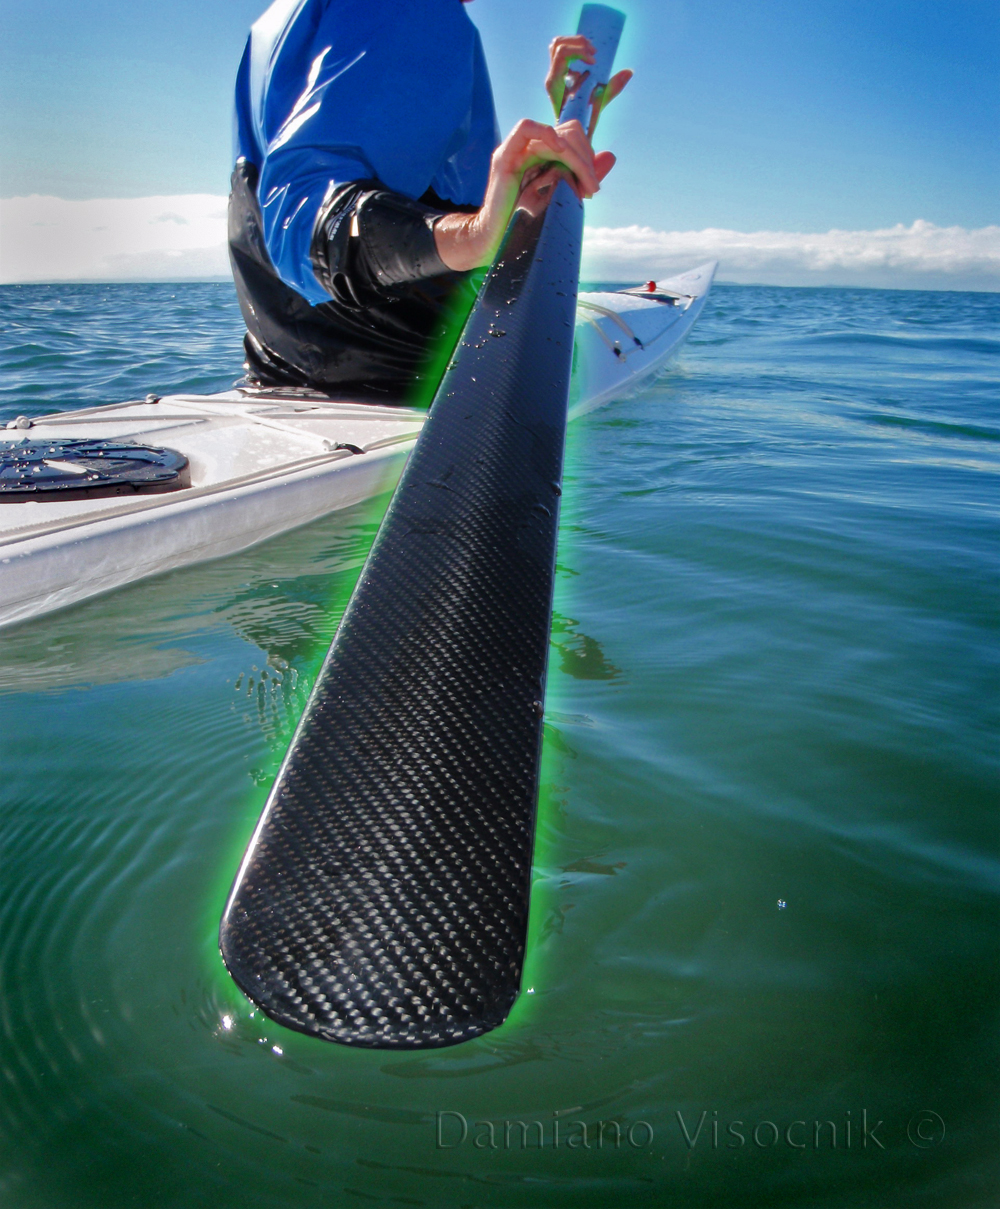
It had to happen: I cracked the carbon fibre paddle.
Since I have been appointed ambassador for Northern Light paddles I have trying hard to see what that paddle can take.
From gingerly taking off in textured waters in a sprint first to becoming more aggressive with my rolling, I eventually took the NLP Greenland in the surf. To me it feels the most comfortable blade when paddling in waves but I had my reservations that it could take the surf and my ungraceful tumbles when tossed in a kayak.
But no matter what I subjected my paddle to it always delivered with no sign of problems.
Paul from Northern Light Paddles said that there was no reason I should hold back with the 3-piece Greenland and he really wanted to see what his paddles could do when treated rough.

NLGP_2

I obliged.
Pushing off from the shore when beach launching I would dig deep into the sand to propel myself before I hit the water. On rocky shores my timing would be out occasionally and I found myself pushing off rocks to prevent ending against them.
My previous wooden paddles were reinforced with epoxy to minimize tip damage but there was no way I could abused them like that.
Not to mention my high-end carbon foam-core Euro paddles where inserting them in the sand and then pry off would simply result in snapping the blade.

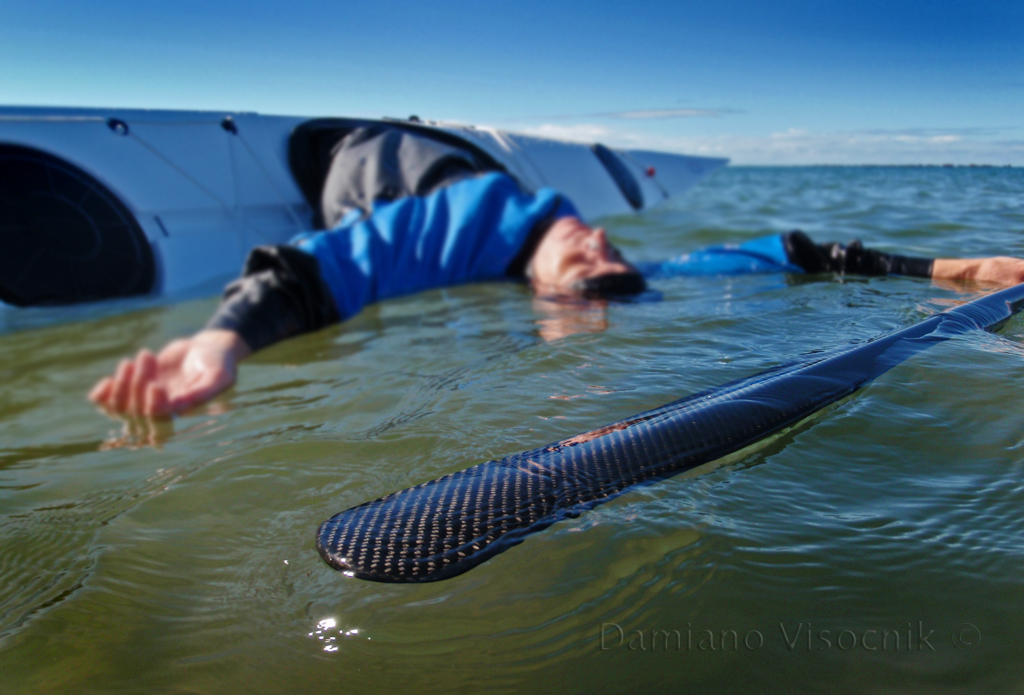
I was enjoying myself in shallow waters getting tossed around by the waves washing over a bank of sand. I was bracing to keep myself upright occasionally touching the bottom when suddenly a larger waves tossed me sideways and I instinctively braced and pushed down hard to keep myself upright.
My full body weight plus the force of the kayak sideways was leveraged on the Northern Light paddle.
I heard a creak and looked down. Nothing seemed to be wrong; paddle looked fine but I didn't want to push my luck and called it a day.
Later on at home I wanted to inspect the paddle and see what that noise was.
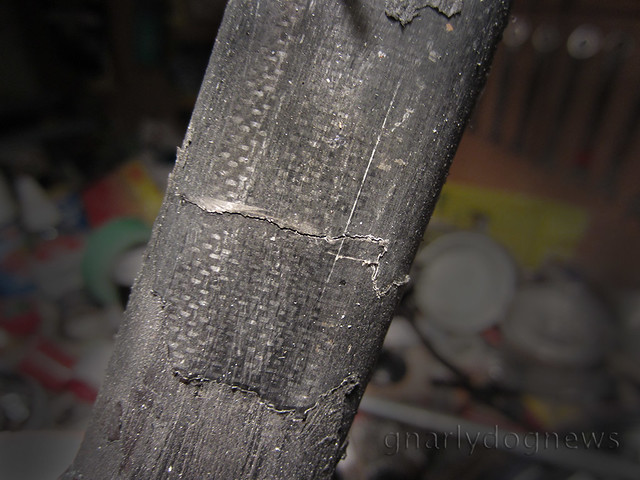
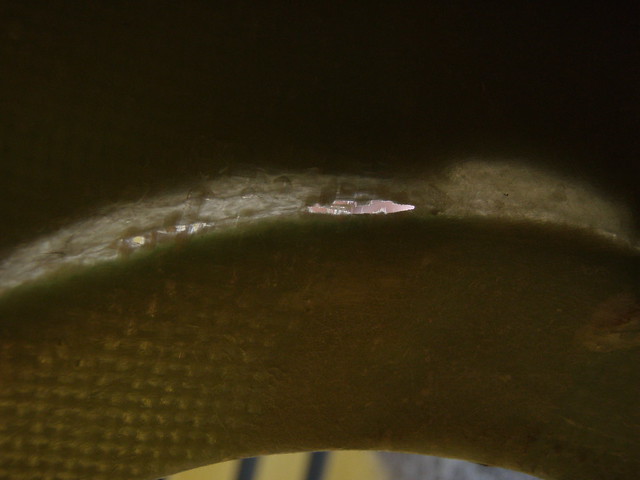
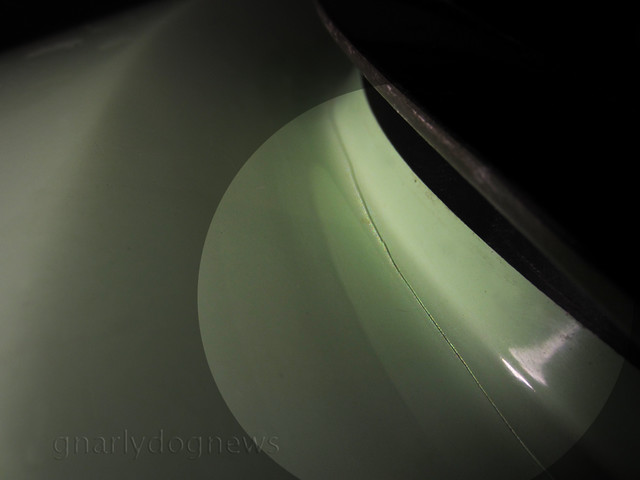
That's where I found the hairline crack.

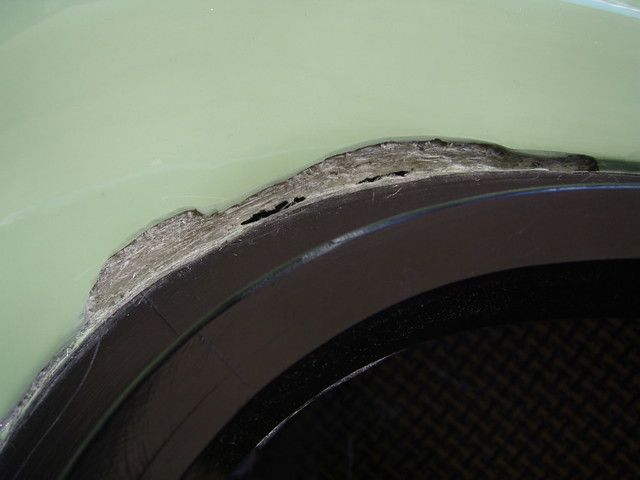
NLP insert crack1_c

The insert on the loom of the 3 piece paddle had almost failed.
I was not too upset since a loom is fairly easy and inexpensive to replace but then I remembered the short insert that comes with every Northern Light paddle that transform it into a "storm" paddle.
It was the exact dimensions of the cracked insert bonded to the loom.
I knew that epoxy's melting point is not that high and a heat gun can soften the resin enough to make it loose its grip.
I would lie if I say that it was an easy job but 15 minutes later with the aid of the heat gun I managed to separate the insert from the loom tube.
I cleaned up the residual resin and used a bit of epoxy glue (epoxy resin and microfibre) to bond the new insert into the loom. I bolted the blades together making sure things were aligned.
The next morning the paddle looked solid and after testing everything looked kosher.
I was paddling with the same paddle the next day not showing any signs of damage or mismatching.
One thing is sure: no Euro paddle of mine can be repaired at home with such incredible ease.
As for the Northern Light Greenland paddle, I now play in deeper waters.

07 August 2012

DIY: replacement carbon-fiber seat in Valley

.
Seats in kayaks seem to be often a deal breaker: some folk won't buy a kayak if the seat is not comfortable for them. Some kayak seats seem to fit more paddlers than others but there are also some seats that cause a lot of grief and paddlers go to great lengths to fix them.
The most common complaint I hear and read about from sea kayakers is the dreaded dead leg syndrome; after a while on the water (sometimes as brief as half an hour) some paddlers start to feel pins and needles or loose the feel of the legs altogether.
I am one of them: I find a lot of sea kayak seats not suitable for me. Maybe is my chunky thighs that force me to extend my legs lower to make them fit or something but I find most seats too short and too "peaked" (high up front) for my anatomy.
One seat that I have removed from more kayaks than any other one is the Valley plastic seat and the current model seems to be just as aggravating as the previous one.
In Adventuretess' Nordkapp LV I removed the seat and replaced it with a DIY fibreglass one removing the back band and replacing it with a foam block.
Steavatron recently borrowed Adventuretess's Nordkapp LV (Sialuk) and was amazed by the difference in feel and stability of the kayak.
Within half an hour of paddling Sialuk, he politely asked me if a similar seat was possible to be had in his own Nordkapp LV.
I agreed that with his help we could fabricate one for this kayak too, and we might as well go "bling".

carbon seat4

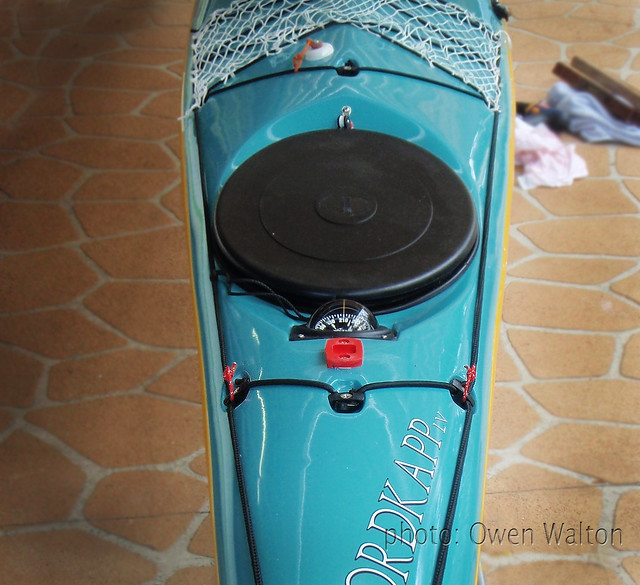
The plastic VCP seat is easy to remove: 4 bolts on the outside of the coaming hold the seat in place.
Once the fsteners were removed the seat came right out but revealed a little problem; the edge of the seat has been "shaving" the hull and a few layers of fibreglass have already been carved away by the motion of the seat slightly swinging when paddling. If not caught in time it would have holed the kayak from the inside out (the same problem occurred in Sialuk).
Patching that divot was dead easy and we restored the hull to full strength.

carbon seat2

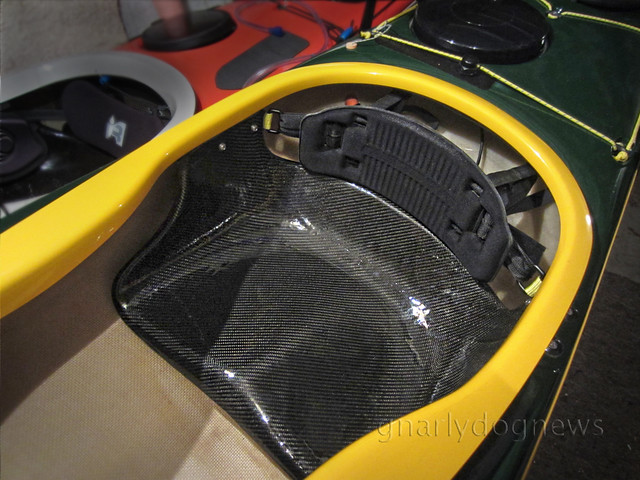
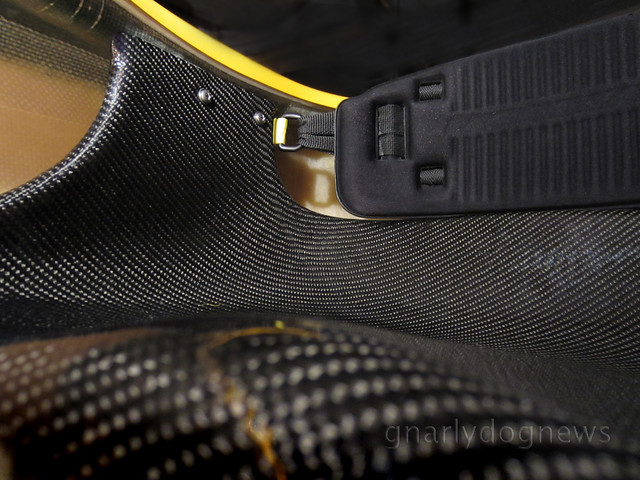
The new seat is made from a laminate of glass fibre, double bias carbon under the sitting area and a veneer of the oh-so-sexy twill carbon fibre on top, for looks of course :-)
The edges of the seat have been reinforced with Kevlar to prevent the typical cracking that I have experienced in other factory chopped-mat kayak seats.

carbon seat1

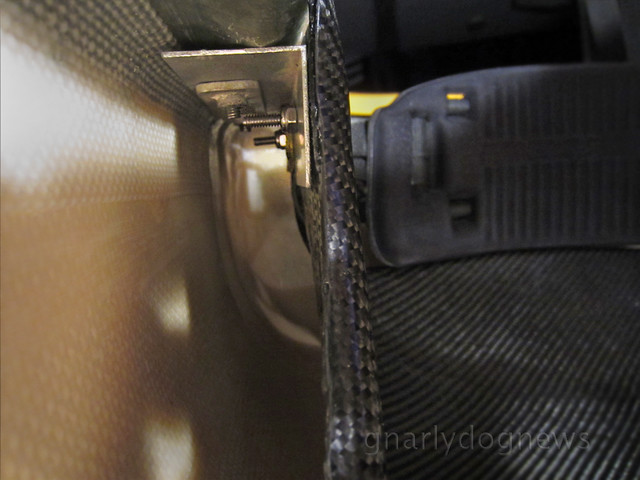
The new seat does not hang on its own but I used "L" brackets to support it. The original VCP hardware was re-utilized and new stainless steel bolts are anchoring the carbon seat to the bracket.

carbon seat3

Stevatron was happy to reuse the original back band and hip pads. The back bands sling is attached to the seat with a short piece of webbing and a "D" ring. Existing straps firmly secure the back band to the rear bulkhead to prevent dislodgment when entering the cockpit.
After the maiden voyage Stevatron was happy with the position and height of the new seat and it was then finally secured to his kayak with a few dobs of polyurethane (Sikaflex) sealant to prevent any swinging and deliver a solid feel. In the event the seat would have to be removed for any reason a spatula will be inserted under the seat to break away those few spots of sealant.
Stevatorn finds the new seat a vast improvement on the stock VCP plastic one. The centre of gravity has been lowered and he finds that the Nordkapp LV has changed personality.
He is more confident on putting his kayak on edge and has gained stabilty when in textured waters.
Since the change and after a few paddles of several hours he no longer experiences the dead legs.

.

31 January 2012

SHOP: repairing a leaky hatch

We all love a sea kayak with dry hatches but rarely that is the case.
After owning numerous kayaks I only had two that had consistently dry hatches.
Kayak hatches leak for a lot of reasons: poor design and materials seems to be the most common but often even a great hatch design can leak on one boat and be dry on the next one.
So what causes hatches to leak?
Hatch cover_ VCP

I found that the type of hatches using a neoprene cover seal under a fiberglass lid work well when new but after a few years deteriorate and start to let water in.
Of course, let's not forget that  most kayak hatches will remain dry if the kayak is used in calm conditions and the water does not reach the lid.
Some hatches seal extremely well and seem totally leak proof, to then let water in when the kayak is inverted (rolled) on a hot day. Drilling a very small hole into the bulkhead usually solves the problem because it helps to equalize the expanding and contracting air when heated and cooled during rolling.
As air heats up in the sun it expands and when the kayak is suddenly inverted into the cold water, the cooling effect contracts the air inside the hatch resulting in suction. The lid might seal enough to prevent water splashes intrude the hatch space, when paddled right side up, but not enough to prevent the force of suction when submerged (inverted)
But what to do when you know that you have a very good seal with the lid (and there is a breather hole to let the expanding/contracting air in-out) and your hatch area is wet after even a non rolling kayak session?
I had a few cases of hatch covers rims leaking.

The (usually) black rim is cemented to the deck of the kayak by a bonding agent. In quality boats that happens to be an epoxy type glue and in some other kayaks is just simple "goop", ranging from silicon to polyurethane.
Either epoxy type glue or goop bonding can perform the task of keeping those rims attached as long as there is a solid continuous bead around the whole perimeter of the rim.
It does not matter how expensive my kayaks are and from what reputable brand; leaking hatch rims are not uncommon.
I have removed a badly sealed rim: I found the caulking under the rim made very poor contact and looked like the factory worker forgot to press-in the rim firmly enough against the deck. I cleaned up the bad silicon and re-seated the rim with polyurethane.
In an other case the epoxy glue did not make it all around the rim leaving a section without a proper seal. I could not remove the rim (the bond is seriously strong) but I mixed-up some epoxy glue of my own and poured/forced it into the section where there was none.

Last but no least: even with the rim seated well and the lid being positively waterproof in one case a hatch was still leaking despite the best efforts in finding the problem.
On a friend's kayak a hairline crack was eventually noticed on the gelcoat close to the rim after doing the test (below). A bit of poking revealed that the gel coat was all there was keeping the water out. There was a large air bubble in the lay-up where the reputable manufacturer did not fill; just fiber and no resin, letting water seep in.


The repair involved him removing away all the gelcoat above the void, remove loose fibers and clean the area with acetone.
P8280214
Several solid layers of new cloth and epoxy were laid (inside the hatch) over the repair. Gelcoat had to be matched to the existing color to make the repair invisible.
P8240211

While performing this repair on the deck the cable for the skeg needed some attention too. It used to be very sticky when trying to deploy it: the housing would flex and bind under pressure. Glassing a long unsecured section of the cable housing to the under deck solved the poor performance.

While some hatch lids will seal really well others will only seal sometimes.
I found that the kayaks with the new Kajak-Sport lids (dual density) work well in winter but poorly in summer. What gives?
I have the mandatory vent holes in the bulkheads but when I go for a rolling session in the summer warm waters it seems that the new lids (softer rubber on the edge, stiff plastic in the center) leak about a cup after an hour or so. I am not the only person that has this problem since others have revealed me to experience the same.


in this video light vaccum was applied to test if water would seep past the lid's lip

A friend of mine solved his case with the dealer promptly shipping him the older style round lids that are made entirely from soft rubber (non floating type): now they seals 100%.
Worth mentioning that after precise measurements of the roundness of the hatch rim, he found it to be 1mm out; would that effect the sealing of the dual density hatches?
However to solve my problem, I am unsure if I will be able to source the old large oval Kajak-Sport lid to address my summer paddling leaks.

PS: The key to these repairs was placing a small waterproof camera inside the hatch and film the source of the leak. I recommend trying it if your hatches are suspect.

PS AUG2012 If you are not happy with the performance of your hatch covers have a look at Sea-Lect Design ones. Review here
.

10 January 2012

SHOP: sail mast base on Valley kayak

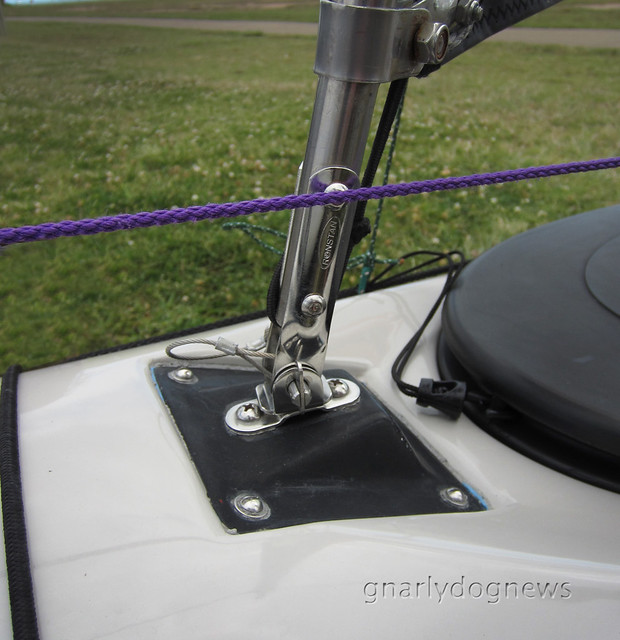
Following Jim's set up for a sail mast base on a Valley sea kayak utilizing the compass recess, I want to detail here a fitting that requires no additional holes drilled to the deck.
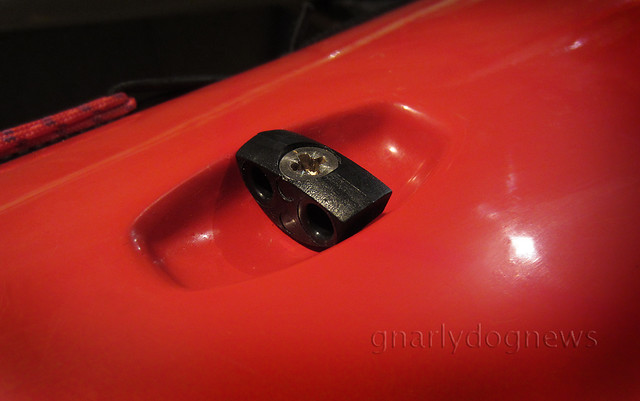
On the Valley decks there is usually a fitting that holds bungee cords in place typically used for stowing split paddles on the foredeck.
I have a hard time placing a paddle under those bungee cords and prefer the paddle parks.
Actually these days I prefer to carry a Greenland style storm paddle on the rear deck.
So, that fitting on the deck is the perfect anchor for a sail mast base.

Valley deck fitting recess

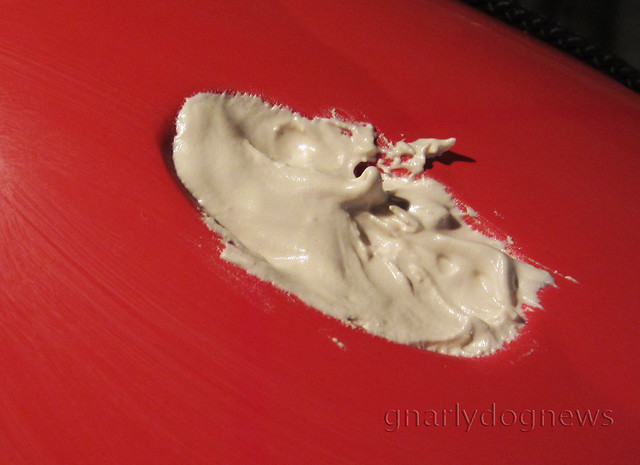
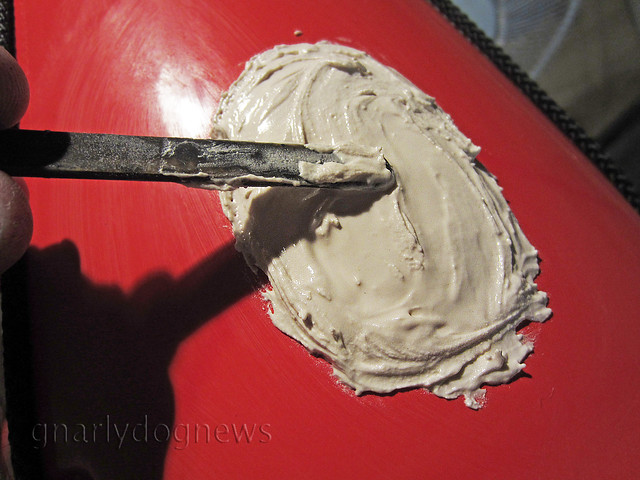
I remove the fitting and grease up the cavity/recess with several layers of mold release. I find that a final layer of PVA mold release works best before I fill the cavity with epoxy paste (I mix epoxy, microfibre and filler to the consistency of peanut butter).

filling cavity

Working-in the paste ensures that there are no air bubbles. I build the base high sitting proud of the deck.

filling cavity_2

glass layer

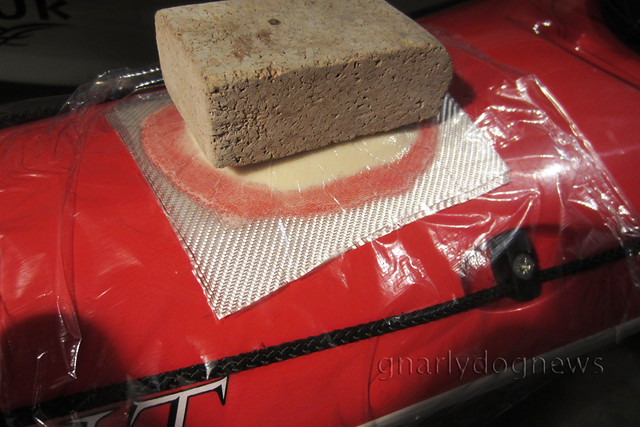
I add a layer or two of fibreglass to keep the epoxy paste from running too much

flattening top

A final layer of kitchen cling wrap to be able to shape the paste into a neat bump and I place a square object to create a flat surface.
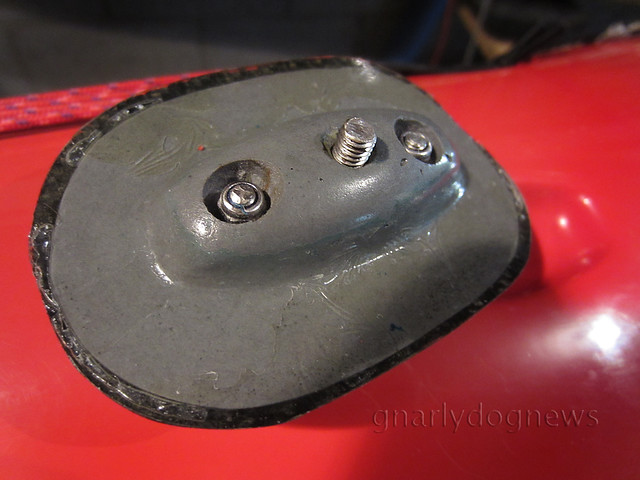
Once the epoxy cures overnight I pry the fitting out of the mold and smooth it with sandpaper. There will be a dimple where the original bolt held the deck fitting: that's where I drill through the sail base and countersink the top to accept a new longer bolt of the same thread pitch (M6, metric). I cover the mast base with a layer of carbon (just for looks) and UV stable epoxy (West System 105/207). I make sure I push the countersunk area down to maintain the recess for the bolt's head. Often I place a small greased-up plastic cap just of the right size with a tiny weight on it to keep the wet carbon cloth in place.
Once cured, I drill through the last thin carbon layer to insert the central bolt.

Central bolt

The base of the mast is carefully positioned onto the carbon base and holes drilled to accept the fasteners.
A recess is needed for the nuts underside making sure they clear the deck.

underside

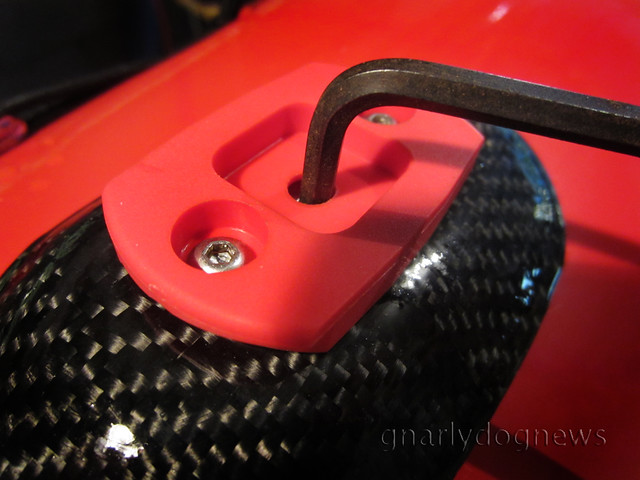
I use M4 stainless steel Allen key button head fasteners and nylock nuts.

fastened to deck

The plastic red base is bolted to the carbon base which in term is secured to the original Valley factory anchor on deck.
The base does not rotate because of the recess. No holes were drilled into the deck for the mast base but I still needed to create some recessed anchors for the mast stays.
I also reinforced the underdeck area with a rib fabricated from foam-core, fibreglass, carbon and epoxy under the mast base since the deck is too flexible.
However I discovered that this location is not ideal on all Valley decks. The deck fitting is not located in the same place on the different model Valleys. One of my Valley kayaks tends to leecock when paddled at slow speeds.
Just like when I used to windsurf, where I tilted the mast back to turn into the wind, I have now tilted the mast of my Flat Earth Sail backwards to give the kayak a neutral direction in beam winds. 
Video of sailing with this kayak and the new Code ZERO Flat Earth Sail coming soon.


.

01 December 2011

SHOP: removable sail rigging

In my previous post I have detailed how I install cat rigged style sails (Flat Earth Sails for example) onto the deck of my kayaks.
The anchors, cleats and mast base are permanently secured to the deck and require several holes to be drilled through the fibreglass deck to have the bolts secure the items.
Some people cringe at the idea of drilling holes in a brand new kayak especially when experimenting with equipment that they are not familiar with.
My early sail rigs had the cleats mounted too close to where my hand would occasionally brush when paddling in a low angle style.
A few hits of the knuckles on the sharp edges of the cleat made me relocate them and plug the holes left behind by the fasteners.
My friend Jim has not done a lot of kayak sailing before and was unsure if he would like it on his Nordkapp LV.
He decided to minimize the damage that an ill fitting sail rig would do to the deck and devised a system that would keep his deck clean when he did not want to use a sail.

For the mast he used the existing recess where normally a 70P compass would be fitted. He fabricated a base out of fibreglass that has the identical hole location as a compass. He does not use that type of compass but he believes the recess and the complex fibreglass profile of the deck in that area is a very solid location for the mast base. He did not need to reinforce the deck since no flex is detected when the sail is deployed, even in heavy winds.
Jim's set up3

Jim had to drill holes for the stay anchors; unfortunately a Nordkapp LV does not have perimeter-line anchors suitably located to double as stay anchors.
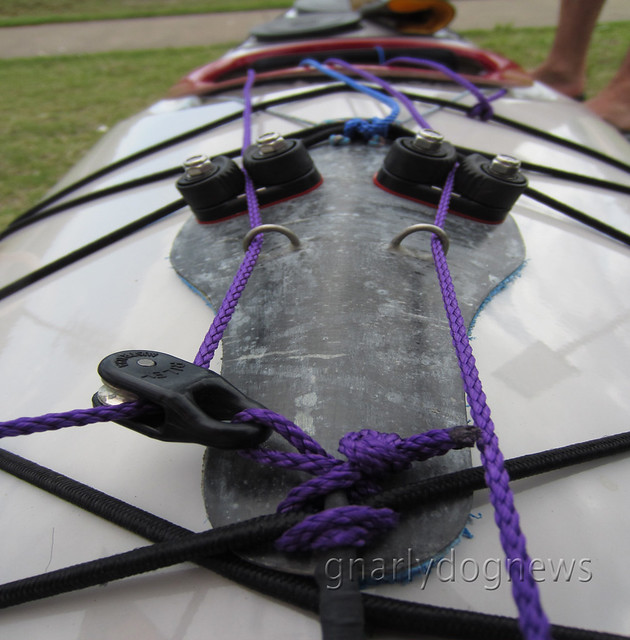
The rest of the cleats and pulleys (blocks) are mounted on a custom made piece of fibreglass that contours the deck of the kayak.
Jim's set up1

He simply waxed the deck of his kayak with mould release compound (even grease would work in a pinch) and laid up several layers of glass cloth and resin. Once the laminate cured he padded the underside with a thin layer of closed cell foam to prevent scuffing of the deck and installed the necessary hardware to secure the uphaul and trim the main sheet. He used sections of stainless steel welding rods embedded into the laminate to create guides for his lines but stainless steel saddles could be used as alternative.
Jim's set up4

His "plate" is held back by a thin line that loops around the coaming of the kayak, and in the front, under the deck bungee cord. The coaming line takes most of the load, the front bungee just keeps the plate close to the deck.

Jim's system can be removed in seconds when he does not use his sail. The base for the mast remains attached up front but there are no cleats and pulleys to clutter his deck.


PS 02DEC
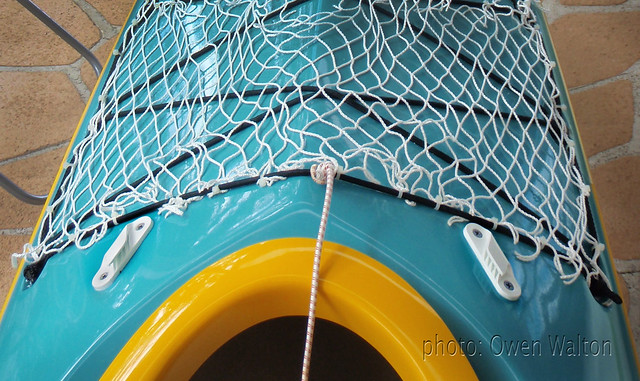
Owen Walton has sent me these images of his sail set up.
It requires one more stay (back stay) but the sail can rotate freely 360 degrees.
The plastic cleats are low profile.
Deck cleats

Deck fittings

24 November 2011

SHOP: repair a cracking coaming

.

In a previous post I mentioned that I reinforced the under-deck thigh brace area surrounding the coaming where I had hairline cracks appear in the coaming-deck junction.
Adventuretess' kayak (and several other ones of the same make) had the crack develop at the front of the coaming.
It appears that the deck is a a bit weak there, where the tight radius of the laminate meets the coaming, flexes too much and the gel coat cracks because is not elastic enough.
A friend of mine repaired the same type of crack on his kayak by reinforcing the underdeck and inspired me to stiffen up  Adveturetess' kayak too.
cracking deck_coaming
crack in the deck along the front of the coaming
I suspended the kayak on slings from the ceiling, turned it upside down and brought it to shoulder height; it is much easier to work inside the cockpit of an elevated kayak than bending over on the floor.
I made sure that the area was first thoroughly washed with fresh water, dried and then cleaned with acetone. I inspected the laminate but it didn't show any cracks in the fabric.
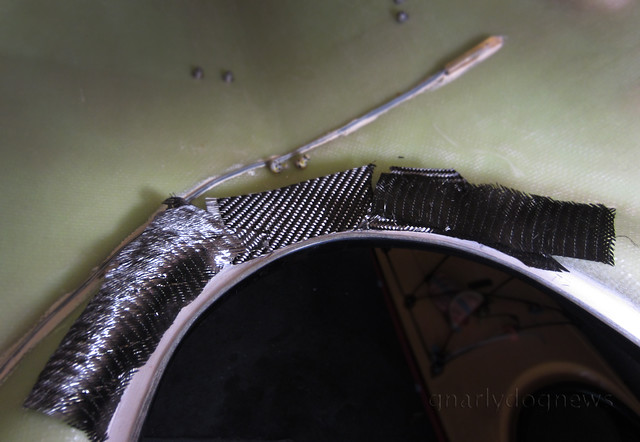
For the reinforcement I used scraps of carbon fibre cloth (unidirectional and woven), but quality fibreglass cloth could have been used instead; carbon fibre is just a bit stiffer.
dry lay up
(wire and reed for magnetic switch showing)

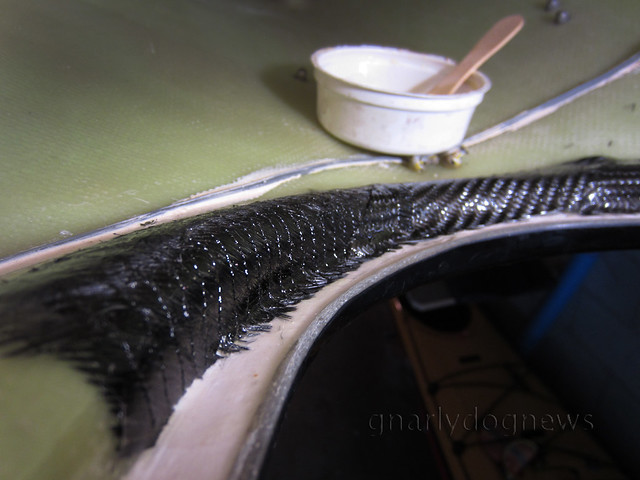
I chopped the cloth into short strips so they were easier to lay around a curved shape. I used several layers of carbon cloth, overlapping. I exclusively use West System epoxy for my work and for this area, exposed to daylight, I mixed 105/207 since it's UV stabilized. Epoxy allows me to work in small batches, does not produce too many toxic fumes and has excellent adhesion to most composite laminates.
I often hear that paddlers are scared to use resins and do their own repairs. Mixing epoxy is dead easy and is feels like watery honey. If you clean the area to be repaired repair well and keep the work tidy a job like this one is not more difficult than smearing honey onto a cloth, really.

wetting out layer1

I saturated the carbon cloth making sure there was enough resin against the kayak deck, pushing the fabric into the tight curve of the under deck. I finished the repair with a top layer of fine fibreglass twill cloth to create a smooth surface while absorbing possible excess epoxy.
glass layer
Top layer of fine fibreglass. Resin only partially saturating the cloth.
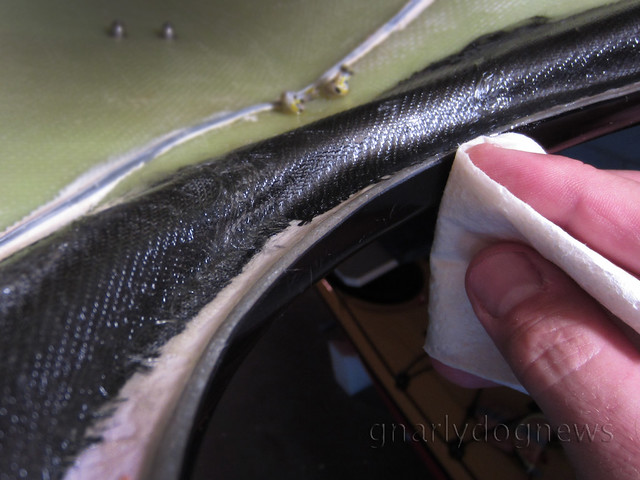
After all the layers were saturated (white fibreglass becomes transparent) I cleaned up any spills on the exterior of the coaming with methylated spirits (alcohol).
clean up

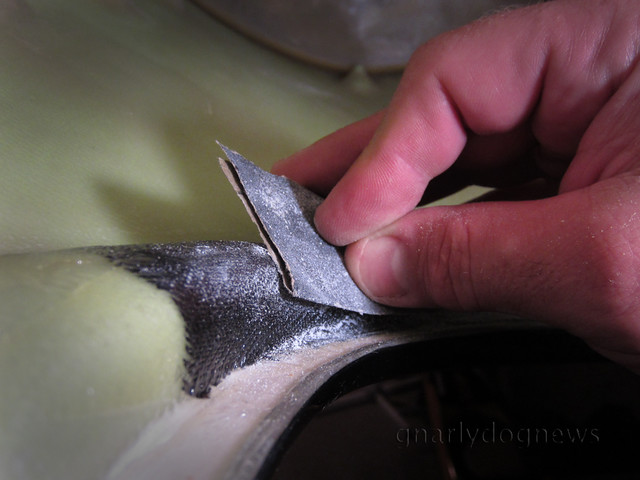
I left the epoxy cure for 24 hours (25C temps) and then smoothed any fibreglass spikes with sandpaper.
sanding

I am not sure if I will repair the cosmetic hairline crack on the outside of the deck since I don't have the factory matching gel coat from Valley. It takes a fair amount of trial and error to mix up the perfect tint to match the color.
The deck now feels very solid and the hairline crack does not expand when pressure is applied.

.

07 July 2011

FAIL: a list of problems

After a few years of sea kayaking and having owned nothing less than 13 sea kayaks and personally worked on 10 belonging to other people I have seen a few weaknesses in design and manufacture.
The list that follows is my personal experience of actual fails that I have observed up close. Fortunately not all on my kayaks J 

1) The most common failure I had on my composite sea kayaks (I have never owned a plastic one) is cracking of the laminate.
Occasionally the hull of my kayak hit a rock and produced damages of various degrees: on one occasion holing a thin laminated hull with surprisingly very little impact force.
Some other cracks in the hull have occurred from stressing the boat in heavy seas. The cockpit area is particularly prone to stress since there is no deck to create a solid monocoque structure.
The hull under the seat is at its widest and flattest area: compression and flexing of the hull is common even on high-end kayaks. I have reinforced all of my current kayaks (apart from the hard chined Zegul) with a layer of carbon/Kevlar or double bias carbon to strengthen and stiffen a weak cockpit. 
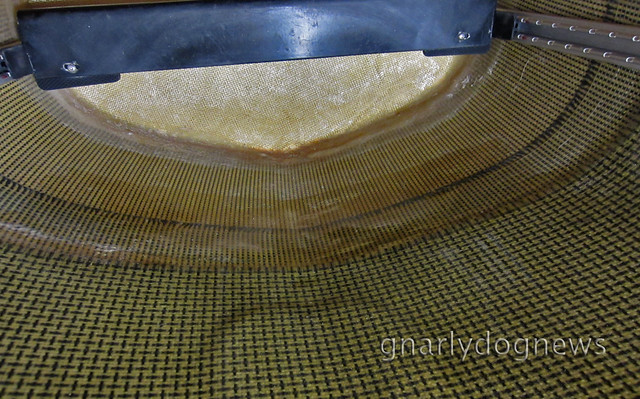
reinforced hull_c
additional layers of carbon/Kevlar in cockpit area
2) The cockpit coaming/deck joint has so far cracked in all my latest kayaks unless reinforced. These days I put a new boat on the “blocks” before it even hits the water. I remove any foam padding in the thigh braces and laminate the area with carbon.
In the boats I have not done so I have eventually stressed the deck enough to create hairline cracks in the deck. When rolling and edging in the surf, the kayak sees a lot of upward pressure from bracing with my thighs. Manufacturers rarely address/reinforce the coaming.  
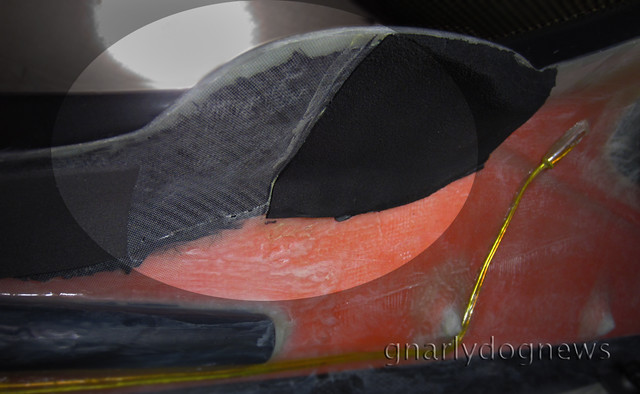
reinforced thigh brace area
layers of carbon reinforcing the coaming/deck junction in thigh brace area
3) Speaking of junctions, the other common failure is the seam of the hull/deck. So far none of my kayaks have suffered a leak there but I have seen numerous kayaks without external seams develop a hairline crack that inevitably results in water entering the hatches. Adding a cosmetically acceptable external seam to a friend’s cracking kayak has been very time consuming. I only use epoxy for my work and I finished the seam with a coat of UV resistant black resin. A flow coat would have been easier tho… 


4) And while I talk about cracks I should mention that most kayak manufacturers skip on the design and strength of the deck. The inexperienced might be fooled by a thick lay-up but rarely does he/she realize that glass-poor chopped strand (chopper gun lay-up) is suitable for very tick laminates like in a motorboat but are very poor executions for a sea kayak. Problems start to occur when a person needs to climb on the deck of a kayak in a recovery. So far I have repaired and reinforced half a dozen decks that failed under the weight of paddlers. On the other hand, my very light Chinese kayak has a core laminated deck making it extremely resilient. Other kayaks I now own have fabric instead of just chopped stand in the deck lay-up, and so far have held up very well.  
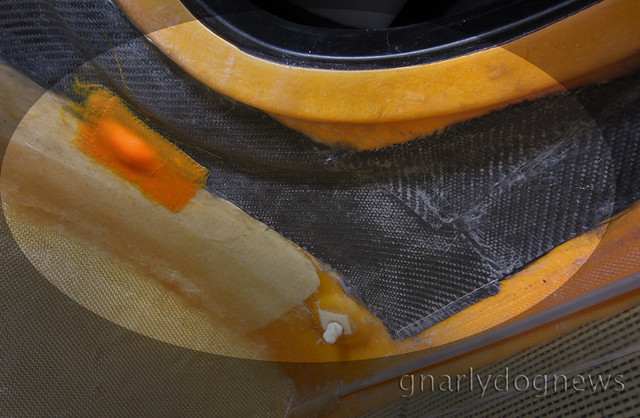
deck reinforcement_c
underdeck hatch cover coaming area reinforced with carbon cloth
5) Leaks to the hatches are often lamented by sea kayakers that paddle in conditions that will see water wash over the deck or proficient rollers that submerge the hatch covers.
I have had a few hatches leak. The most common problem has been water ingress from fittings on the deck.
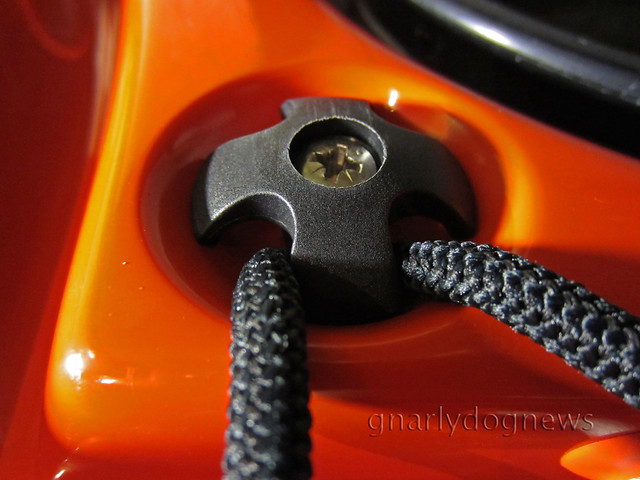
deck fitting_c
deck fitting "well" where water pools
The little well where the hardware is bolted to the fiberglass holds water that slowly seeps through to the inside if there is no proper sealing under the nut against the deck. Kayaks that have recessed deck anchors don’t have that problem.
I had leaks coming from the junction of the hatch’s rim where the bonding sealant was not completely encompassing the rim. All it takes is a small section left out and water will seep in.
I have removed poorly fitted hatch rims and resealed them with polyurethane or epoxy glue. 

6) Hatch covers are also prone to leak. So far only Valley and Kajak-Sport hatches have proven to be leak proof in my fleet. All other have leaked, even if often just minimally. Mind you, the Valley hatch covers have a reputation of deteriorating sometimes prematurely. Replacement of those is not cheap. Luckily there seems to be improvements on the quality of the Valley hatches and there are less reports for the need to replace them too soon. Excellent alternative/replacement hatch covers are available from SEA-LECT Designs.

7) While most leaks occur from the top of the deck I have repaired 3 kayaks with leaking bulkheads. On one occasion the seal around the fiberglass bulkhead was not that great: a small amount of epoxy glue fixed the little hole. In two other instances I had to fabricate new bulkheads since the factory ones were made out of closed cell foam. It is just a matter of time before a foam bulkhead will leak. If a kayak is used in waves the hull/deck will flex enough to separate the weak glue that bonds foam to fiberglass (things get really ugly in plastic kayaks). Lifting the kayak by the rear of the cockpit coaming will separate the foam too. To date I have not met anybody with dry hatches in a kayak with foam bulkheads. I would only choose a plastic kayak that has welded plastic bulkheads.

8) Small leaks to the cockpit area usually go unnoticed since water entering through the tunnel of the spray deck is greater than around the coaming junction. There have been however a few cases (not mine) where the rim was so poorly bonded that a low-deck kayak was flooding every half an hour. A large section was left out and not bonded at the factory. I have also observed a brand new, very high-end British kayaks, that had a visibly separating rim. It pays to inspect the new kayak before purchase.
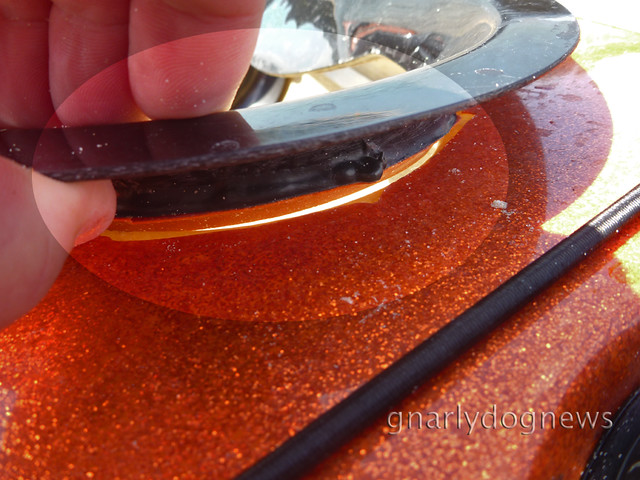
coaming separating_c
coaming separating from deck
9)  Last but not least leaks can occur from skeg cable housings or rudder lines. I had a badly glassed-in skeg box that leaked substantially. Gel coat concealed the cavity and only a small crack was visible inside the recess. Epoxy glue fixed the problem.
Rudder lines leaks can be a bit trickier. If the housing has worn out (result of constant abrasion of the stainless steel cable by operating the rudder) the water that enters the tube will leak into the hatch. Replacing the cable housing is often a pain. 

10) And while I am mentioning cables I also had a few rudder cables snap on me (that’s when I still used to paddle ruddered boats). The stainless steel wire fatigues and after a while (that depends on how often you paddle) it snaps. It was no fun trying to keep that kayak go where I wanted without a rudder. While I find skegs more reliable (never kinked one myself) I have seen several malfunction. Sloppy workmanship at the factory will create sticky cables. A skeg that has resistance can kink the cable when one forgets to retract it on landing. A smoothly operating skeg will usually just retract without the paddler even noticing. I find rudders on a kayak a weak tool to keep directional stability. While without doubt they are more efficient when one’s goal is to just eat miles, I had a few snap on me when in rough waters. Don’t try reversing in surf with one deployed. I also ruined one being retracted on deck since most retention systems for stowing it on deck are not secure enough for surf work. 

11)  An area of weakness and potential failure can be the carry-handle mounted to the deck. Some kayaks have simple bolt-on (in some cheap plastic kayaks it is just pop rivets) carry handles. Carry handles are not designed to pull a kayak loaded with heavy gear but some handles are secured to such thin laminates that struggle to lift the weight of the kayak alone. In one very bad case I have seen the whole handle rip out of the deck. Needless to say that reinforcing the deck so far in the bow or stern is really difficult. My preferred carry handles are positioned at the very ends of the kayak, with a line threaded through a hole at the seam of the hull/deck. More on grab handles safety issues here 

12)  Last but not least: the seat. I have cracked several seats in my kayaks. Incidentally the seats that failed were thick and heavy. So is there no seat strong enough for my paddling? Yes, there is: a decently laminated one!
I have noticed that most sea kayak seats are constructed with real cheap resin-rich chopped strand. As mentioned before this type of material is not suitable for light applications. The seats that have not failed on me are made from several layers of woven fiberglass, often reinforced in stress areas with Kevlar. Unless a weak hung seat is secured to the bottom of the hull to prevent it from swinging side to side the chopped strand will often not last too long before starting to crack in the corners. Repairing it involves removing the seat and reinforcing it with quality woven fabric. See this article for more info.

There are a couple of other  items that I have seen fail but they are accessories. I will write a separate article on those issues some other time.

11 June 2010

SHOP: joiner for a timber paddle

It's been more than a year since I have happily transitioned from Euro paddles to traditional paddles and I have not looked back.
One advantage that my former paddles have over my sticks is the ability to split the paddle in half to be able to store it on the deck of the kayak.
While some split GPs are available locally reports say that they aren't all that strong.
So, I have decided to make my own split traditional paddle.
I wanted a simple joiner that would require minimal fuss and no need to source special parts overseas.
I decided on a simple stainless steel bolt and (long) nut system.
While very primitive compared to some other offerings it is dead simple to install.
The loom of a traditional paddle is not round like in a Euro one but oval or tear shaped.
I measured the half way point of my Vanstix and cut it carefully in half.
Then I reduced the diameter of the loom in two progressive steps
I needed to reinforce the ends of the split paddle or any inserted fitting would compromise the strength of the loom.
Two staggered layers of carbon sleeve were epoxied onto the recessed loom.
The second sock layer protruded beyond the recess and later was sanded down.
Once the resin cured I cut the carbon sleeve flush.
I then removed 1 cm of the timber at the end of the cut loom leaving just the thin carbon sleeve.
An oversized tapered hole was drilled into the centre of the cut loom, deep enough to accommodate the long sleeve/nut.
I filled the hole with a mix of thick epoxy glue (microfibre filler) tinted black.
I threaded the sleeve/nut onto a long bolt and sunk it into the hole making sure that the resin would fully encase the stainless steel hardware.
The temporary bolt was greased up so it would not stick to the epoxy mix and be removable.
excess epoxy mix to be sanded back once cured
I positioned the paddle horizontally clamping it to a work bench.
I supported the bolt with a spacer to make sure it would be positioned parallel to the loom.
Once cured I removed the bolt and sanded the end surface smooth and square to the loom.
I repeated the same procedure on the other half this time inserting the cut-down stainless steel bolt.
bolt end squared to be glued into epoxy mix
I filled the second half with epoxy mix and joined the two halves to create a uniform joined surface.
I waxed up the first half of the paddle to prevent it from gluing together to the second half.
excess epoxy mix spilling as the two halves are brought together
After the resin cured the paddle was separated and a very thin plastic spacer inserted as mating spacer to create a very positive joiner when the paddle is assembled.
This paddle joiner worked out great.
I am now working on a different style split that requires a lathe to fabricate the carbon joiner pieces.

24 May 2010

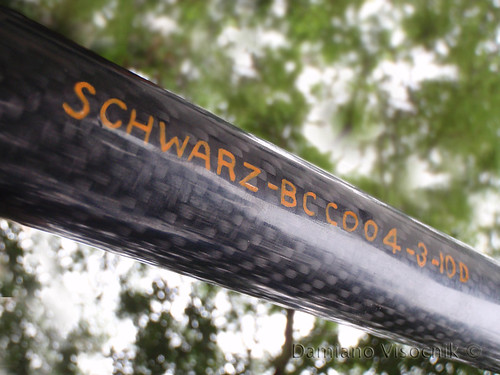
Black Stick by Greg Schwarz

Schwarz_Black Stick_4_lg (c)

The latest creation from Greg Schwarz: a high density laminated balsa core with carbon skin Greenland paddle.
If his previous hollow core paddles were art this one is pure magic.
This is a one-off (not a production paddle) since it takes an insane amount of time to manufacture.
Schwarz_Black Stick_3 (c)

The Black Stick is a paddle like no other I have tried.
The surface is extremely smooth but not totally mirror shiny.
Greg finished the paddle with a coat of boiled linseed oil to give it a bit of grip.
I found the paddle to have no slip with my gloves on while others said that it felt less grippy than a non-shiny timber GP.


The shoulders of the paddle have a rather soft transition from the loom and sliding the hand to the blade is noticeable but not "notchy".
Surprisingly the paddle displays relative good flex considering it is skinned with carbon fiber.
Other carbon GPs I have tried were more rigid and a hollow carbon one was particularly stiff and noisy.
Paddling with the Black Stick had a similar feel of solid timber.
Black Stick_2 (c)
This paddle is slightly different in shape to Greg Schwarz's timber hollow core one: a slightly more pronounced ridge makes just a bit more diamond shaped.
I believe that it offers a more neutral feel and less canting is needed to avoid flutter.
It gave me a very reassuring feedback and compared to Greg's timber ones it was easier to use, considering my rather limited time since I have swapped from Euro style paddles to GP.
I thought it required a bit more precise technique than my Aleut paddles (which have a strong dihedral ridge) but less than a flatter faced GP. A beginner would probably find this paddle easier to use.
Rolling with this paddle is outstanding.
It offers ample buoyancy and the blades, having a rather fine edge, allowed for superb sculling.

It is butter smooth through the water offering very good lift.
Black Stick_1 (c)
The Black Stick made my limited sculling skills look so much better than when I use an Aleut paddle :-)
However it still does not offer the raw power of the Aleut.
Vanstix have more surface area than the GPs I own and consequently will still probably be my choice for confused waters or surf play.
Interestingly enough most paddlers transitioning from Euro paddles seem to prefer the Aleut ones (myself included).
Once the paddlers become accustomed to the new paddling style, Greenland paddles seem to be easier to use than earlier on.
Just like kayaks: each one has its own strength and best suited for a particular situation/style.
The Black Stick complements my fast expanding quiver of traditional paddles and possibly might become my favorite all rounder.

20 April 2010

SHOP: modifying the stern of a sea kayak


SeaBird Designs NorthSea: stern modified
Of the modification I have done to my kayaks, this one certainly was the most daunting one: modify the hull!
In my early days of paddling I quickly understood that the shape of a hull in a kayak is detrimental to its handling.
While kayak designers often spend years perfecting the hull shape I don't always find their designs perfect.
I have very little knowledge in naval engineering (read: about zero) but I can feel when a kayak is not performing the way I desire.
My first attempt to fix a kayak that was in my opinion "too loose" was simple: I added a little fin (fixed skeg) to the stern. The kayak improved dramatically.
Apparently modelled on a Nordkapp hull (probably an early version) the stern on the Arctic Raider seems to be cut away more than the current hulls on the VCP Nordkapps.
The Arctic Raider is designed to be paddled with a rudder.There is less keel on the stern.
The Arctic Raider weathercocks really strongly when the rudder is not deployed (like when surfing).
Storm kyking (c)
Arctic Raider
Adding the fin helped to the stern from laterally drifting when windy stabilizing the stern.
On my Seabird Designs NorthSea carbon/Kevlar core sea kayak I had the opposite problem: the boat leecocks.
Soudkapp (c)
SeaBird Designs NorthSea before the mods
Originally designed to be used with a rudder I removed it and installed a skeg.
The NoprthSea paddled very neutral in low winds but became a bit of a handful in high winds.
Above 20 knots the bow will turn downwind and it was hard to maneuvre.
However the kayak will surf very well: no broaching there.
I moved the seat forward and that changed the trim a bit and made it OK to paddle.
Maneuverability however was still slow: edging the kayak would not release the deep keel line in the stern.
I finally decided to modify the hull.
How much should I modify my stern?.... hard to say/quantify.
I worked out a rough estimate (modelling it on the design of my other kayaks) and marked the stern with tape.

Once I was confident that the cut line would be appropriate I fired up my Dremel tool and took the plunge: hacked into the hull.

It took only a few minutes to cut away the section from the stern.

I made sure that both sides were symmetrical and cut even.

I then cleaned all the dust and any possible salt residues from the surface inside the hull to make sure my epoxy glue would stick to the existing surface.
I mixed up some West System 105 resin/207 UV stabilized hardener mix, tinted it to match the hull color and added microfibre to the consistency of peanut butter.
I generously filled the gap that I created by cutting of the stern with this epoxy mix.
I used tape to reduce the gap: squeezed the hull sides by hand and applied tape to hold the new shape. Surprisingly there was not a lot of tension on the tape.

Once the epoxy glue cured (overnight) I removed the tape and filled the remaining gaps (left by the tape area) with more epoxy mix.
Shaping the final fine keel line was relatively easy with some sand paper.
A smooth finished was achieved with a last coat of clear 105/207 mix.
PIC to come
I tested the new stern shape of my SeaBird kayak over the weekend.
The wind was ideal (up to) 20 knots and the kayak was lightly loaded.
I could definitely feel the stern being more loose now.
In beam winds it finally would weathercock slightly.
I paddled along a Norkapp LV and about the same amount of skeg was needed to correct weathercocking.
While I had no chance yet to test the kayak fully unloaded (I had about 20 Kg of gear with me over the weekend) it appears now to be handling much more like my other British style kayaks.