23 August 2009

Tahe Marine Greenland: first impressions

This is the first Tahe Marine kayaks Greenland landed in Australia.
The proud owner Brian Towell is ecstatic about it.
Chick magnet (c)
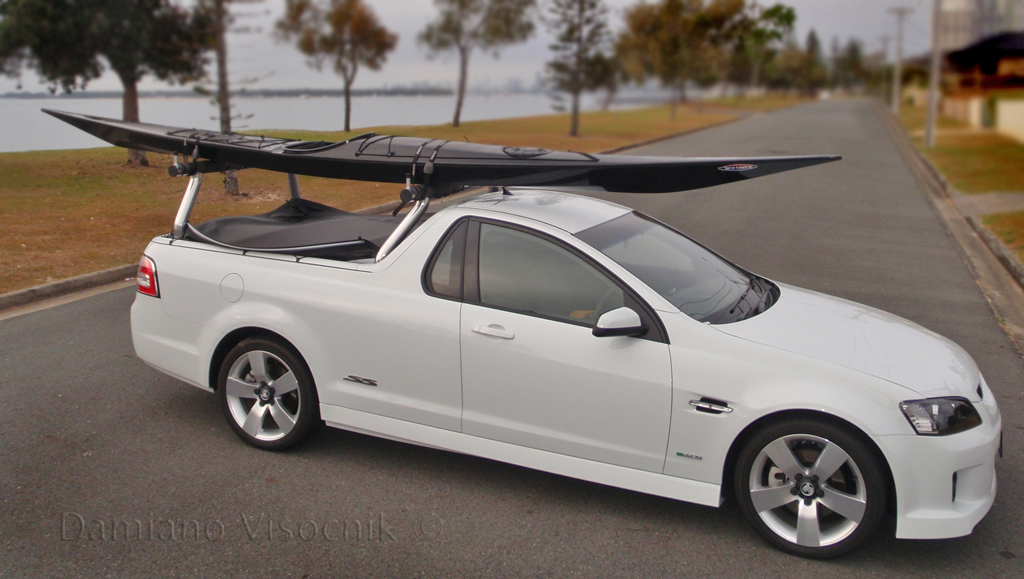
chick magnet, the kayak, I mean :-)
I am not a car man but I got to say that this combo (sports ute and that black "needle" on the rack) is positively a poser look (not saying that Brian is one, quite the opposite)


Greenland top view (c)
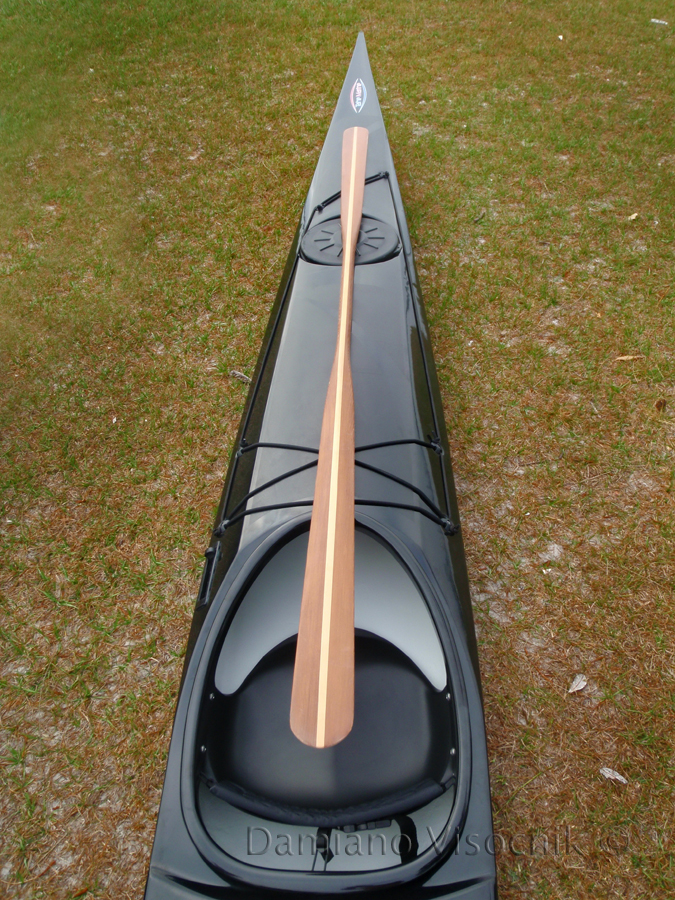
deck (paddle by Elverpaddles.com)
The finish on the gel coat is impeccable (hard to pull off a perfect finish on a black boat).
The external seam between deck and hull is a tiny 1/4" (not sure if there is any fibreglass tape there) but the interior one seems solid. All of the inside of the boat is painted to prevent any possible fibreglass splintering.
The seat is rather minimalist but offers a great shape and support for the medium size butt (arbitrary measurement :-)


how's this for low volume! can't even fit a six pack :-)

maybe size 11 (US) with thin booties?
I would raise the pegs to have the ball of my feet resting, not my heels..
The Greenland is a low volume boat, seriously low.,
Laybacks in that kayak are done without too much curving of the spine and full contact on deck is possible.
Needles to say that a kayak with such low rear coaming won't have a lot of freeboard.
Brian is not a big guy and there was only centimeters left between the deck and the water.
Any edging of the boat would flood a cockpit if there was no skirt, but who would paddle a kayak like this without one.
Speaking of skirts only a "miniskirt" is required (ocean style cockpits).

Greenland size comparison (c)
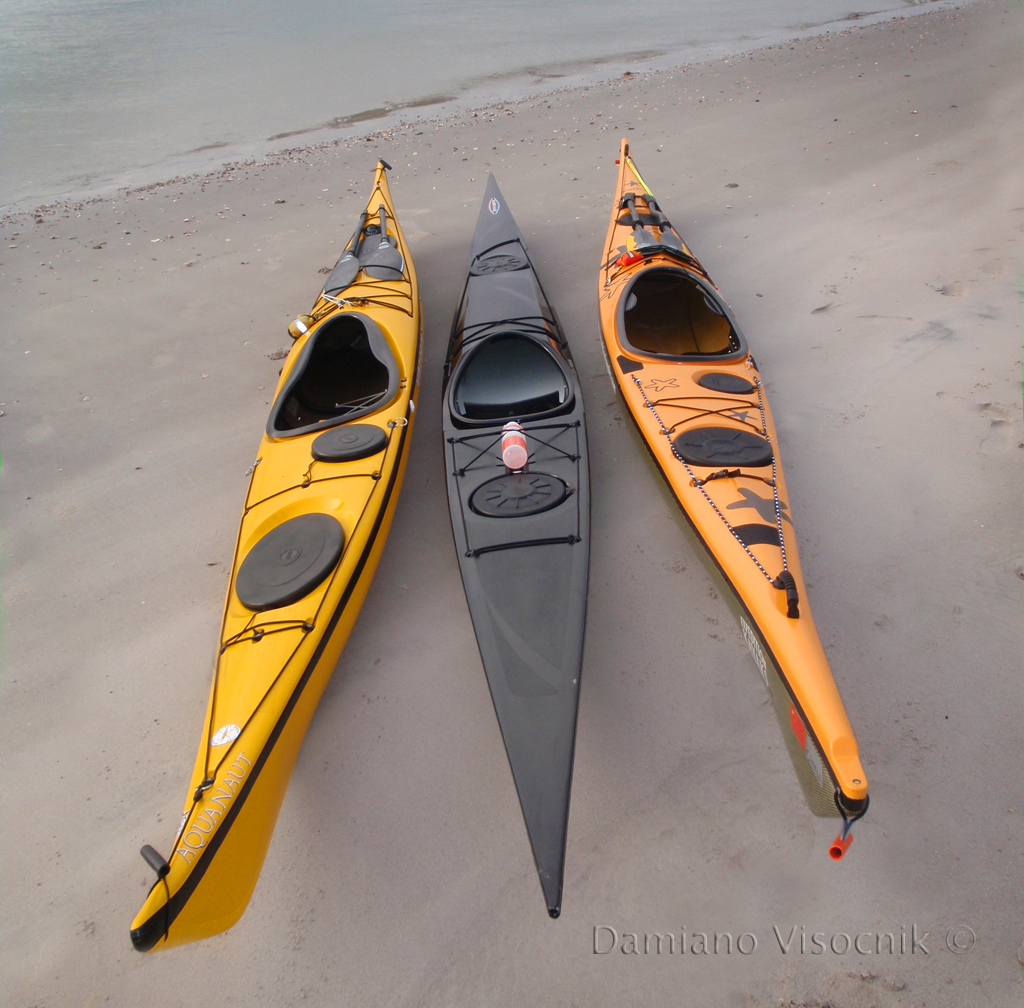
size comparison: VCP Aquanaut, Tahe Greenland, SeaBird Northsea
When compared in size to a British style kayak, the Greenland was dwarfed.
There is not a lot of room in that kayak.
Unless you are willing to go "commando" a camping trip is out of question :-)

Greenland reflection (c)
Freeboard is low. Wearing that skirt is essential.
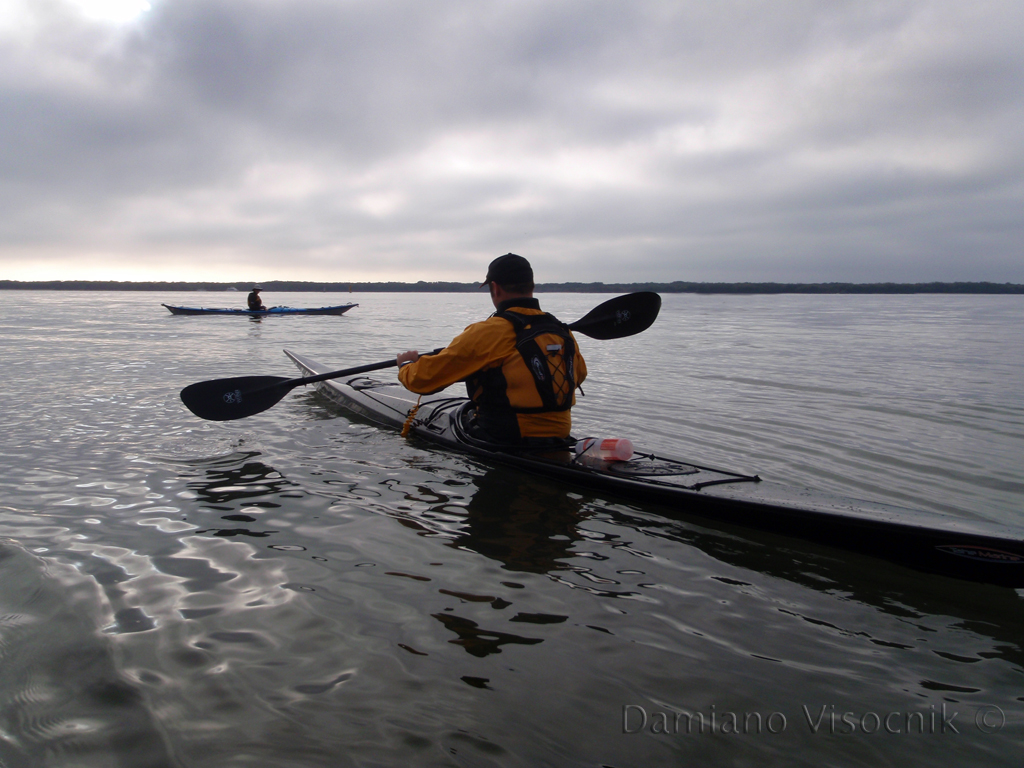
The kayak glides effortlessly on calm water creating very little turbulence.


Interestingly enough the Greenland is not just at home in calm waters.
Brian had great fun playing in the tidal flow next to a rock wall.
He said that attention is needed when edging because the kayak is not very forgiving with it's hard chined hull: a little edge means a sharp response.
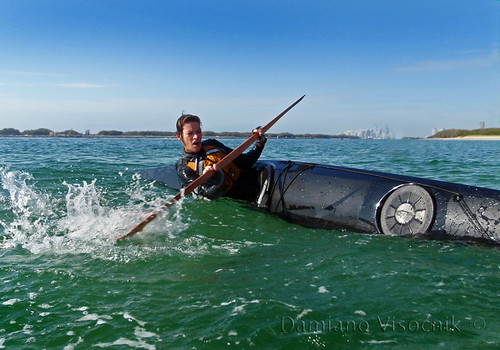
There was a brief surfing session in 3-4' rolling waves that were braking.

While not exactly a surfing kayak the Greenland was still OK in the waves and Brian did not complain that boat broaching any more then his Aquanaut.
Tess Dodd also had a go rolling the Greenland.
It looked effortless.
Anybody that tried the kayak that morning said that it is a dream roller.
The ocean cockpit offers great contact with the thighs/legs and the very low volume kayak is easily rolled.
Laybacks are for once realistic without hurting your back.
Tess skulling Greenland (c)
Tess skulling the Greenland

Tess rolling the Greenland
The Tahe Marine is not a "one kayak does it all" kind of boat but more likely an addition to a quiver unless your only game on the water is rolling.

PS Silvio Testa's impression here

PPS MAY10: improved skills on the second test paddle here

18 August 2009

Review: iStick by Vanilla

A recent trip of 5 days to Fraser Island gave me the perfect opportunity to test a prototype paddle of my design and executed by Vanilla.
Fraser Island's western shores are on Hervey Bay where at the moment humpback whales are visiting on their annual migration from Antarctica.
The whales are present from around mid June to early September and then return back to the south cold waters to feed again.
The sheltered waters of Hervey Bay offer the perfect opportunity to observe this marine mammals from the kayak.
A previous trips to the bay has been very successful but last year's outing was not as good: we saw only one whale.
To increase the chance of whale encounters MEI has engineered a new revolutionary tool that attracts whales.
The iStick (TM).
In joint venture with Vanilla (he has been carving Aleut type paddles for some time now) we have come up with the ultimate whale watching paddle.
What? a paddle just for whale watching?... get out of here.
Well, I figured that whales are attracted to whale songs.
After some research I was able to find some recordings of whale songs on the net.
I downloaded the songs from http://www.oceanmammalinst.org/songs.html into my iPod.
The challenge was on how would I play the songs to the whales.
I was lucky to find some waterproof speakers from a local distributor (
http://cpc.farnell.com/1/1/46402-mini-waterproof-speaker-2w-8ohm-k50wp-2915-visaton.html ) and decided that I could play the songs while submersing the speakers into the water. Sound travels very well under water.
Suddenly I had this great idea: integrate the speakers into a paddle.
back side (non power face) of the iStick TM
Vanilla was able to help me out with my idea.
His paddles are made from easily carved wood (western red cedar) and would lend themselves perfectly to the modification.
A laminated version of the paddle had to be made to house the speaker wires.
I found a really good waterproof connector (http://nexinc.thomasnet.com/viewitems/all-categories/miniatures?&forward=1) that has been placed in the middle of the shaft to plug in my iPod.
waterproof connector
The whole unit is pretty light and the weight increase from the speakers at the end of the paddle is not really noticeable.
The test paddle at Fraser Island went very well.
The paddle proved to be strong (as much as a standard Vanilla Aleut paddle) and there was only very small difference in paddle "noise" when entering the water (the speakers are on the back side of the paddle).
As far as attracting whales it proved successful.
We came across several pods and the whales seem to turn around and approach us rather close.
Since the iStick seem to be a success I have bothered applying for a patent.
If the patent application is successful (Pat. pending #6360693) I might consider commercial production.
testing the iStick TM

05 August 2009

SHOP: DIY sea kayak foot brace

A paddling acquaintance of mine announced that he wanted to sell his beloved carbon/Kevlar sea kayak.
His reasoning was that the factory foot pedals collapsed on him once and the replacement ones did not look any better. He was not confident with the outfit of his otherwise great kayak.
While jokingly I promptly offered him a ridiculous sum to buy his kayak I added that if the foot pedals were his only problem it would be unwise to sell a kayak that he loved.
After making a few suggestions, with a simple solution on how to remove the existing plastic pedals and fabricate an aluminum bar as replacement, he no longer wished to part with his kayak.
On the next paddle he proudly showed me the modification. Admittedly he did a decent job.
His feet were resting on a bar that was spanning across the width of the hull offering more than one foot position.
His replacement foot bar prompted me to finally address my own foot pedal set- up in my prototype SeaBird Designs Northsea.
The kayak I have is a preproduction one where the outfit was not fully finalized and the foot pegs rails were not positioned correctly. A factory retrofit was done to ship the kayak in time but the job was below my standard.
As they say: "You don't buy a house because of its furniture"; I decided that the flexible factory foot pegs had to go.


Factory set up in pre-production Northsea. These foot pegs were for a rudder (that I removed and replaced with a skeg)
I wanted a secure wide bar to push my feet against.
I removed the rails and the foot pegs and fabricated a new rail from anodized aluminum "L" section.
I used the existing threaded studs to mount the rails.

replacement aluminum rails: "L" section anodized profile
The cross brace where my feet will rest against had to be rather wide and curved a bit.
I could have used the aluminum profile that I have used in my other kayaks but the adjustment in the SeaBird was different: the pegs and rail have been removed.
I set out to fabricate a cross bar made from foam and composite fiberglass and carbon.
I cut a wide section of foam core and heating it up with a heat gun I shaped it into a shallow channel.
I cut a slot in the end to create a tab for anchoring it on the aluminum "L" rail.


heat shaped foam core
The foam core was layered by double bias glass cloth and West System epoxy (105/206).

double bias covered by 4oz glass
Once cured I trimmed the excess cloth off from the edges.
Subsequent sessions did cover the front side with carbon cloth.
Carbon added a lot of strength and made the brace stiff.
Unfortunately carbon is not very abrasion resistant and an area that would see constant rubbing of shoes and sand had to be protected with a final layer of 2oz glass cloth.


2oz glass cloth covering carbon cloth
The foot brace once cured had the anchor tabs drilled and a last coat of epoxy was done for durability and looks.
Installing the cross brace meant careful alignment on the aluminum rails and a row of holes for adjustment (different leg lengths).
I used a 1/4" stainless steel bolt and a wing nut (rubber washer) for securing the foot brace.


Replacement foot brace installed (not shown with wing nuts but nylocks)