On a sea trip of 5 weeks in Sweden and Åland (Finland) Petra paddled a Sea Lion LV.
Aquarius of Poland sponsored her with a very light carbon/Kevlar kayak and we installed her Flat Earth sail to make our expedition more fun.
Petra picked the color scheme of her kayak and I thought the graphics were particularly attractive making the kayak very visible against the water and granite islands.
The kayak behaved very predictably in varied conditions and weather-cocked just enough to make it safe when windy, even in a storm.
The only real modification was removing the padding that was factory fitted on the seat; lowering the center of gravity made the kayak a bit more stable. Given that she has never paddled a Sea Lion LV before, Petra liked how she felt in that kayak right from the beginning.
Despite the cockpit maybe being a bit too roomy for her the key hole style thigh braces allowed her to brace efficiently when the waves picked up and tossed her around a bit.
Cargo space was sufficient for our extended trip and the main hatch covers (Kajak Sport) never leaked (the "glove box" needed a bit of sealing around the rim).
The skeg performed flawlessly and was butter smooth to operate. Adjusting the foot rests was possible even while paddling (without needing to exit the cockpit to reach the adjusting tab behind the foot rest!).
The shorter waterline and the rockered hull seems to be well suited to shallow waters with shorter waves (no ocean swell in the Baltic sea). Clapotis was not upsetting Petra and I noticed increased confidence in following seas where she was catching and surfing waves way faster than me, leaving me behind.
I think that the Sea Lion LV combined with a sail is a great fun kayak.
It performed well with just light loads in strong winds (slight leek cocking when sailing) and very steady when filled with camping gear, food and water.
Showing posts with label carbon/Kevlar. Show all posts
Showing posts with label carbon/Kevlar. Show all posts
03 October 2014
10 December 2013
VIDEO: Surfing Vixen
.
My new kayak is tippy, with me on board.
A narrow beam and a deep V hull give me less initial stability but allow slightly higher speeds.
I have used the Johan Wirsen designed XP on the bay a few times; in milder conditions I chased the little short wind waves with ease as I can glide where usually I can’t with my other kayaks.
In steeper waves however the longer and less rockered kayak becomes more difficult to keep straight on the short waves. The bow seems to get caught in the wave in front of me while the stern is still getting pushed by the following wave, broaching the kayak.
Then every so often I get a decent longer wave and linking the one in front I get a free ride.
Conditions were rather windy with recordings of winds in excess of 25 knots all around the bay. The tidal flow was opposing the wind and the waves were starting to get blown over, flattening them. After an hour of surfing I no longer could paddle out against the wind as it increased beyond my skills: I had to call it quits. I pulled the kayak back to my launching spot and battled the wind trying to keep it in my hands once out of the water. I was tired, a bit frightened but happy to have overcome the initial tippines that I felt in the XP.
.
My new kayak is tippy, with me on board.
A narrow beam and a deep V hull give me less initial stability but allow slightly higher speeds.
I have used the Johan Wirsen designed XP on the bay a few times; in milder conditions I chased the little short wind waves with ease as I can glide where usually I can’t with my other kayaks.
In steeper waves however the longer and less rockered kayak becomes more difficult to keep straight on the short waves. The bow seems to get caught in the wave in front of me while the stern is still getting pushed by the following wave, broaching the kayak.
Then every so often I get a decent longer wave and linking the one in front I get a free ride.
Conditions were rather windy with recordings of winds in excess of 25 knots all around the bay. The tidal flow was opposing the wind and the waves were starting to get blown over, flattening them. After an hour of surfing I no longer could paddle out against the wind as it increased beyond my skills: I had to call it quits. I pulled the kayak back to my launching spot and battled the wind trying to keep it in my hands once out of the water. I was tired, a bit frightened but happy to have overcome the initial tippines that I felt in the XP.
.
01 January 2013
PHOTO: Start of the Year
Somehow the conventional NYE celebrations left me wanting for something a bit more real this year.
On the 1st of January, not having to nurse a headache, I headed to the beach instead.
The surf was promising and I was in an unfamiliar kayak.
Not wanting to hold back I decided I was starting 2013 head on.
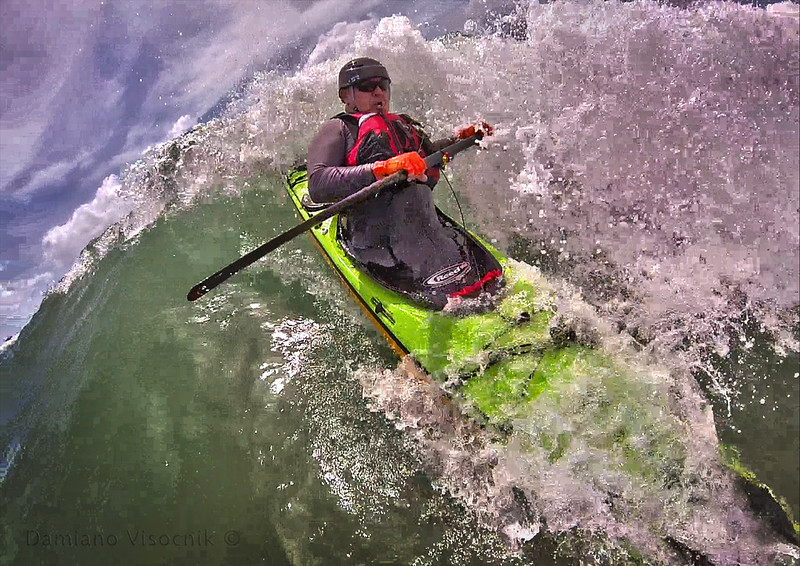
New Year's resolution: more of this :-)
.
On the 1st of January, not having to nurse a headache, I headed to the beach instead.
The surf was promising and I was in an unfamiliar kayak.
Not wanting to hold back I decided I was starting 2013 head on.
New Year's resolution: more of this :-)
.
30 March 2011
VIDEO: Surfing with a Zegul 520
After a couple of weeks of getting accustomed to a new style of kayak I finally had the opportunity to take the Zegul 520 HV into some breaking surf.
This kayak performs a bit differently than a fish-form British style one and I find it harder to surf than my other kayaks.
After a few minor modifications (replaced the seat and moved it forward) I have finally the kayak to suit my needs and skills.
The first outing in the surf was a bit sketchy and I was surprised to get spun around so easily and surfed backwards (at: 2:47).
The low rear deck allows me to perform easy layback rolls without having to lift myself from the seat and bend my back too much.
Otherwise I found the Zegul not as maneuverable as some other high volume kayaks of mine.
The Zegul seems to track well for me (heavy person) but the extended keel line doesn't release for easy turning unless edged very aggressively.
The combination of low rear deck, narrow beam and rather high front deck makes this kayak very easy to roll.
The Zegul 520 is a combination of slightly Swede form hull, with decent rocker, partial hard chines (rounded off at bow and stern) rather full bow and somehow close in form to a Greenland style kayak.
For readers seeking a comparison, my personal dimensions: 184cm (6'1") 110Kg (240Lbs), size 38 butt, 35" inseam (88cm), size 12 (US) 46 (EU) shoes.
This kayak performs a bit differently than a fish-form British style one and I find it harder to surf than my other kayaks.
After a few minor modifications (replaced the seat and moved it forward) I have finally the kayak to suit my needs and skills.
The first outing in the surf was a bit sketchy and I was surprised to get spun around so easily and surfed backwards (at: 2:47).
The low rear deck allows me to perform easy layback rolls without having to lift myself from the seat and bend my back too much.
Otherwise I found the Zegul not as maneuverable as some other high volume kayaks of mine.
The Zegul seems to track well for me (heavy person) but the extended keel line doesn't release for easy turning unless edged very aggressively.
The combination of low rear deck, narrow beam and rather high front deck makes this kayak very easy to roll.
The Zegul 520 is a combination of slightly Swede form hull, with decent rocker, partial hard chines (rounded off at bow and stern) rather full bow and somehow close in form to a Greenland style kayak.
For readers seeking a comparison, my personal dimensions: 184cm (6'1") 110Kg (240Lbs), size 38 butt, 35" inseam (88cm), size 12 (US) 46 (EU) shoes.
08 March 2011
REVIEW: comparison Zegul Baidarka and Tahe Reval

Two expedition worthy kayaks from Tahe Marine.
Tahe Marine has recently brought on the market a new style of kayak: the Zegul Baidarka.
I wanted to compare it to the other big loader: the Reval. (Zegul is to Tahe what Lexus is to Toyota).

two very different stern styles
The view of these sterns is compelling: there couldn't be two kayaks more different.
The Reval has a typically British style up swept stern while the Baidarka..., well, there is no other kayak like it. (correction 01JUL11. Nick Shade has a valid argument; see comments)
A traditional Baidarka of the Aleut islands has a different stern than the interpretation of the Zegul.
The Reval has a decent rocker while the Baidarka has very little. Despite the low stern the Baidarka paddled OK in reverse and didn't seem to dig in below the surface.

Stern low in the water. The Aleut paddle seemed very apt for this test paddle
The bow of the Baidarka is just as unique as its stern. A very fine low volume end that up sweeps to a unique horn-like shape. What is missing from a traditional Baidarka is the bifurcated bow, but I guess that would be too much for most to take in :-)
The hull is in epoxy infused carbon/aramide core reinforced construction making it a rather stiff hull.
The kayak is large, there is no denial. The hatch spaces are huge and would swallow an insane amount of gear.
Despite the size of the kayak (of strong swede form) it appeared to cruise at 8 kph with little effort.
The cockpit coaming sits high and there is plenty of room even for the chunkiest legs to fit under the thigh braces of the keyhole cockpit. Large feet also have no problems fitting on the easily adjusted foot pegs.

interesting bow, to say the least
The Baidarka has a unique way of lashing the generous deck bungee cords: a section of teak timber provides the anchor point. There is plenty of room to stash your gear on deck.

a fantastic finish of the deck's bungees
The Baidarka rolls easily thanks to the positive thigh braces however low laybacks are hindered by the rather high rear coaming.

high brace with Aleut paddle.
The Reval is Tahe's other rudderless big-boat offering.
It has strong British style influence with a more chiseled deck look.
The cockpit has again plenty of room for large paddlers while still suited for lighter bodies. It is however not a low volume kayak. Maneuverability seemed very quick despite the size. I felt that the pronounced V shape of the keel line makes the kayak a bit tender on the primary stability. When sitting on the beach it leans to one side however the kayak felt solid when paddled. It tracked well for a rockered boat and was easily turned if edged. Weight didn't seem to slow down either kayak.

The deck has an indent for (surface) mounting a compass forward of the front hatch.

The bow and stern have a funny shape. Initially I thought it was rather bizarre but as soon as I grabbed the kayak to carry it to the beach I realized the reason for it: it sits very well in the hand and prevents slippage. A nice little touch. The seam tape on the Reval and Baidarka is 1/2" black aramide with no gelcoat cover. It looks very neat with a perfect finish.

The skeg slider on the Tahes is superb: it slid smoothly and didn't seem to have any drag. A welcome discovery after seeing (and repairing) a few dodgy skegs on other branded kayaks.
Deploying the skeg made a strong effect on the kayak behavior and would correct the slight tendency to weathercock.

The cut-away on the deck next to the cockpit offers a paddle reach close to the hull for high angle paddling.
The cockpit has a positive space for my thighs (not just resting on little wings) and bracing in the Reval was great. The kayak rolled extremely easily for me and a fair degree of layback was possible.


Test paddle conditions;
We loaded the kayaks with about 45 Kg alternatively. They were both paddled loaded and unloaded.
Test paddlers were of mid to heavy weight (68 to 110Kg) and mid to tall height (175 to 184cm)
There was an average of 8-10 knots of wind (gusting to 15kn) and there was 1-2 knots of tidal flow in some spots. The small wind waves were little indication on how the two boats would perform in following seas.
Only an extensive test paddle over several days would give us a better understanding on the kayaks' performance therefore any firm opinions on these kayaks ability are abstained.
This review's aim is to depict the two new kayaks since public images are very hard to come by.
Test kayaks were supplied by Adventure Outlet.
25 October 2010
TEST: Zegul 520 LV
I had the opportunity to do a brief test paddle of a brand new kayak: the Zegul 520 LV (by Tahe Marine).
The local importer had several new (to Australia) sea kayaks available for testing but the Zegul 520 definitely caught my eye over the 530 and the 550 models aimed towards the "need for speed" crowd.
Its profile resembles a more traditional kayak (so called Greenland lines) with a healthy overhanging bow.
With possibly a more pronounced upturned ends than the typical skin on frame kayak that I have seen, the hull appeared to have a considerable rocker in its keel.
The bow and stern are not as fine as the Tahe Greenland (also on offer at the demo) as there is more volume in those areas.
Actually the whole kayak is more "chunky" than the super-sleek looking Greenland.
With its generously long keyhole cockpit I could seat "bum first, legs later", even with my rather long legs.
The coaming slopes aggressively from high up front to pretty low on the back (I had no chance to get those measurements...).
Compared to the Greenland T, the front was substantially higher and the rear probably an inch higher.
Looking at the profile of the cockpit it had good credentials to be a "comfortable" low rear-deck kayak.
My quick compression test (the good old fashioned: press with my hand on the deck and hull) revealed that this kayak's lay-up had a bit more substance than the alarmingly soft deck of some other "glitter finish" British offerings :-)
The hull is a very solid carbon/Kevlar weave that is vacuum infused .
The finish is superb, inside and out.
The rear deck has a very clever profile that despite looking flat gives the surface an very positive support for possible over the deck reentry (not that you would on such a narrow high end kayak) and did not flex when I sat on it.

Initially I was sceptical about the third hatch in front of the cockpit: my experience with another British boat with that design was not positive.
But, on the Zegul, it proved to be out of the way of my knees and just big enough to store small items (compact camera, snack, towrope etc.)
The seat was a bit on the narrow side (may I say that my ass ain't size 30....).
I didn't like the configuration of the backband anchor point inboard, on the seat pan.
I would move it to the exterior of the pan and have a smooth surface with no plastic protruding into my hips.
The Zegul 520 trialled was an LV (low volume) version.
My thighs were just getting pinched at the start of the thigh braces.
I think I would fit the HV version better.
Kudos to Zegul (Tahe) for identifying that one size does not fit all body types and having two deck versions of the same hull.

Greg balance bracing Zegul 520 LV
How did it behave on the water?
Better than expected.
Where you expecting it to behave bad?
Well, not really, but hopping in a new boat that is considerably narrower than my current kayaks, I was expecting the initial stability to be a bit more tender.
Interestingly enough Vanilla found the Zegul not as stable as I did.
Admittedly I thought it was a bit more tippy than the Tahe Greenland but I still felt confident to let go of the paddle and relax.
It will be interesting to see how the Zegul behaves in textured waters.

The low deck allowed me to lay on the back of the deck (with PFD) without lifting my bum out of the seat: great.
Finally a kayak that fits my legs and allows lay-backs.
The Zegul appeared to track straight (short test paddle with very little wind) and could be turned relatively sharp with a gentle sweep stroke and edging. The hard chined hull allows for precise maneuvering and correction of direction by dropping and edge, something that my round hulled kayak does not.
I felt a solid secondary stability and could drop the seam of the deck lower into the water than usual, without going over.
The Zegul shined when rolled: really.
With my limited rolling skills I could perform very slow Greenland layback rolls, something that I can't do too well in my high decked kayaks.
Skulling was a breeze, to the point of falling into a static brace with little effort.
The cockpit is roomy enough to allow my body to twist and my legs to move and apply pressure onto the deck to rotate the hull.
When I asked Greg Schwarz to briefly test the Zegul I just watched in awe the beautiful moves he could perform.
Then again Greg looks good in just about any kayak.
select 360p (not 720p) if you have slow internet connection
The Zegul 520 is a strong contender in my search for that elusive "Greenland style" kayak that would fit my non slender figure.
The quality of construction is impeccable and with the considerable lower price than the British competitors Tahe has brought to the masses a fantastic line-up of new kayaks.
PS FEB2011: I have added a Zegul 520 HV to my fleet and after a few paddles I have modified the cockpit set up. Details of the new seating arrangement coming soon...
The local importer had several new (to Australia) sea kayaks available for testing but the Zegul 520 definitely caught my eye over the 530 and the 550 models aimed towards the "need for speed" crowd.
Its profile resembles a more traditional kayak (so called Greenland lines) with a healthy overhanging bow.
With possibly a more pronounced upturned ends than the typical skin on frame kayak that I have seen, the hull appeared to have a considerable rocker in its keel.
The bow and stern are not as fine as the Tahe Greenland (also on offer at the demo) as there is more volume in those areas.
Actually the whole kayak is more "chunky" than the super-sleek looking Greenland.
With its generously long keyhole cockpit I could seat "bum first, legs later", even with my rather long legs.
The coaming slopes aggressively from high up front to pretty low on the back (I had no chance to get those measurements...).
Compared to the Greenland T, the front was substantially higher and the rear probably an inch higher.
Looking at the profile of the cockpit it had good credentials to be a "comfortable" low rear-deck kayak.
My quick compression test (the good old fashioned: press with my hand on the deck and hull) revealed that this kayak's lay-up had a bit more substance than the alarmingly soft deck of some other "glitter finish" British offerings :-)
The hull is a very solid carbon/Kevlar weave that is vacuum infused .
The finish is superb, inside and out.
The rear deck has a very clever profile that despite looking flat gives the surface an very positive support for possible over the deck reentry (not that you would on such a narrow high end kayak) and did not flex when I sat on it.
Initially I was sceptical about the third hatch in front of the cockpit: my experience with another British boat with that design was not positive.
But, on the Zegul, it proved to be out of the way of my knees and just big enough to store small items (compact camera, snack, towrope etc.)
The seat was a bit on the narrow side (may I say that my ass ain't size 30....).
I didn't like the configuration of the backband anchor point inboard, on the seat pan.
I would move it to the exterior of the pan and have a smooth surface with no plastic protruding into my hips.
The Zegul 520 trialled was an LV (low volume) version.
My thighs were just getting pinched at the start of the thigh braces.
I think I would fit the HV version better.
Kudos to Zegul (Tahe) for identifying that one size does not fit all body types and having two deck versions of the same hull.
Greg balance bracing Zegul 520 LV
How did it behave on the water?
Better than expected.
Where you expecting it to behave bad?
Well, not really, but hopping in a new boat that is considerably narrower than my current kayaks, I was expecting the initial stability to be a bit more tender.
Interestingly enough Vanilla found the Zegul not as stable as I did.
Admittedly I thought it was a bit more tippy than the Tahe Greenland but I still felt confident to let go of the paddle and relax.
It will be interesting to see how the Zegul behaves in textured waters.

The low deck allowed me to lay on the back of the deck (with PFD) without lifting my bum out of the seat: great.
Finally a kayak that fits my legs and allows lay-backs.
The Zegul appeared to track straight (short test paddle with very little wind) and could be turned relatively sharp with a gentle sweep stroke and edging. The hard chined hull allows for precise maneuvering and correction of direction by dropping and edge, something that my round hulled kayak does not.
I felt a solid secondary stability and could drop the seam of the deck lower into the water than usual, without going over.
The Zegul shined when rolled: really.
With my limited rolling skills I could perform very slow Greenland layback rolls, something that I can't do too well in my high decked kayaks.
Skulling was a breeze, to the point of falling into a static brace with little effort.
The cockpit is roomy enough to allow my body to twist and my legs to move and apply pressure onto the deck to rotate the hull.
When I asked Greg Schwarz to briefly test the Zegul I just watched in awe the beautiful moves he could perform.
Then again Greg looks good in just about any kayak.
select 360p (not 720p) if you have slow internet connection
The Zegul 520 is a strong contender in my search for that elusive "Greenland style" kayak that would fit my non slender figure.
The quality of construction is impeccable and with the considerable lower price than the British competitors Tahe has brought to the masses a fantastic line-up of new kayaks.
PS FEB2011: I have added a Zegul 520 HV to my fleet and after a few paddles I have modified the cockpit set up. Details of the new seating arrangement coming soon...
20 April 2010
SHOP: modifying the stern of a sea kayak

SeaBird Designs NorthSea: stern modified
Of the modification I have done to my kayaks, this one certainly was the most daunting one: modify the hull!
In my early days of paddling I quickly understood that the shape of a hull in a kayak is detrimental to its handling.
While kayak designers often spend years perfecting the hull shape I don't always find their designs perfect.
I have very little knowledge in naval engineering (read: about zero) but I can feel when a kayak is not performing the way I desire.
My first attempt to fix a kayak that was in my opinion "too loose" was simple: I added a little fin (fixed skeg) to the stern. The kayak improved dramatically.
Apparently modelled on a Nordkapp hull (probably an early version) the stern on the Arctic Raider seems to be cut away more than the current hulls on the VCP Nordkapps.
The Arctic Raider is designed to be paddled with a rudder.There is less keel on the stern.
The Arctic Raider weathercocks really strongly when the rudder is not deployed (like when surfing).
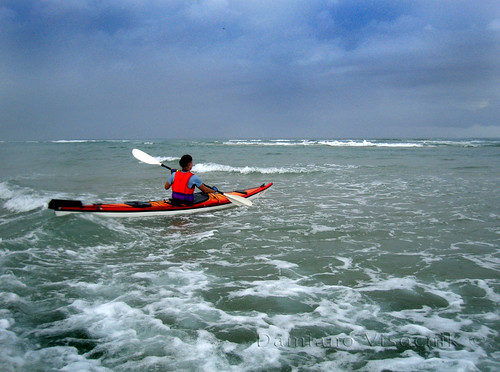
Arctic Raider
Adding the fin helped to the stern from laterally drifting when windy stabilizing the stern.
On my Seabird Designs NorthSea carbon/Kevlar core sea kayak I had the opposite problem: the boat leecocks.

SeaBird Designs NorthSea before the mods
Originally designed to be used with a rudder I removed it and installed a skeg.
The NoprthSea paddled very neutral in low winds but became a bit of a handful in high winds.
Above 20 knots the bow will turn downwind and it was hard to maneuvre.
However the kayak will surf very well: no broaching there.
I moved the seat forward and that changed the trim a bit and made it OK to paddle.
Maneuverability however was still slow: edging the kayak would not release the deep keel line in the stern.
I finally decided to modify the hull.
How much should I modify my stern?.... hard to say/quantify.
I worked out a rough estimate (modelling it on the design of my other kayaks) and marked the stern with tape.

Once I was confident that the cut line would be appropriate I fired up my Dremel tool and took the plunge: hacked into the hull.

It took only a few minutes to cut away the section from the stern.

I made sure that both sides were symmetrical and cut even.

I then cleaned all the dust and any possible salt residues from the surface inside the hull to make sure my epoxy glue would stick to the existing surface.
I mixed up some West System 105 resin/207 UV stabilized hardener mix, tinted it to match the hull color and added microfibre to the consistency of peanut butter.
I generously filled the gap that I created by cutting of the stern with this epoxy mix.
I used tape to reduce the gap: squeezed the hull sides by hand and applied tape to hold the new shape. Surprisingly there was not a lot of tension on the tape.

Once the epoxy glue cured (overnight) I removed the tape and filled the remaining gaps (left by the tape area) with more epoxy mix.
Shaping the final fine keel line was relatively easy with some sand paper.
A smooth finished was achieved with a last coat of clear 105/207 mix.
PIC to come
I tested the new stern shape of my SeaBird kayak over the weekend.
The wind was ideal (up to) 20 knots and the kayak was lightly loaded.
I could definitely feel the stern being more loose now.
In beam winds it finally would weathercock slightly.
I paddled along a Norkapp LV and about the same amount of skeg was needed to correct weathercocking.
While I had no chance yet to test the kayak fully unloaded (I had about 20 Kg of gear with me over the weekend) it appears now to be handling much more like my other British style kayaks.
05 November 2009
Warming up to my "Mockpool"
All that vast "plain" deck needs some "bling"...

Some might think that I ripped off Rockpool's design but certainly they are not the first to use starfish as decor on a kayak; they just made them famous.
I was looking at my new (to me) Seabird Designs NorthSea kayak.
This unique kayak (unique as different than any other and unique as the-only-one in Australia) is a prototype that I purchased used after the importer assessed it.
It had a few scratches and it needed a bit of work but it was a kayak that I could fit.
My legs don't have to be splayed wide or flattened to the floor in this kayak.
I can have my legs slightly bent and my knees closer together, a position favouring a fast paddling technique (surfski style).

It had a few scratches and it needed a bit of work but it was a kayak that I could fit.
My legs don't have to be splayed wide or flattened to the floor in this kayak.
I can have my legs slightly bent and my knees closer together, a position favouring a fast paddling technique (surfski style).

North Sea's cockpit compared to Tahe Greenland
What I did not like (initially) was the narrower beam and the round hull.
It felt tippy like a log when I first took it for a paddle.
Noticeably faster than my Impex Assateague (most narrower kayaks are) it has much less initial stability.
I was actually rather disenchanted at first and almost put it on eBay after a particularly frustrating first session in the surf with it.
I am glad that I listened to Mark Sundin when he told me to persevere and spend some time in it: I would eventually get the hang of it and probably love it.
A few months later I have to say that he was right.
While I will probably never have the same confidence to just bob around without my paddle in hand and trying to chase images in rough waters like I can do in the Assateague, the kayak is warming up to me.
I love how it needs so little effort to surf small wind waves.
The bay where I often paddle produces those conditions.
The waves are not big or steep enough to push my Impex but sufficient for the SeaBird.
All I often need is a couple of powerful strokes at the moment my hull is lifted by the following wave and I can usually surf along having fun.
It seems that the round hull of the SeaBird offers less friction (wetted surface) and a higher hull speed.
Looking at surfskis' bottoms there seems to be some similarity in the shape of the hull of my North Sea.
One thing I disliked about the SeaBird was the rudder.

Flimsy and very badly executed hardware prompted me to remove it and install a skeg.
If my preferred paddling would be racing or trying to leave my paddling buddies behind I probably would have left the rudder on, but for my style of just enjoying sea kayaking for the sake of it, a skeg suits me better.
So back to that big "plain" deck.
I am not a cool (?) "all white" kayak kind of guy.
While the hull on the North Sea is carbon/Kevlar weave with clear coat (admittedly very sexy) the deck begged for some "bling"
I like the look of SKUK (Nigel Dennis) custom deck designs and Rockpool's decoration.
I like the look of SKUK (Nigel Dennis) custom deck designs and Rockpool's decoration.
Rockpool kayaks have not been available in Australia until recently.
Adding glitter to the finished kayak would be rather difficult, so I just settled for the "starfish"

A made-in-China kayak that is trying to impersonate a British boat?
Not wanting to pretend that it is a Rockpool I named my North Sea: MOCKPOOL, complete with the Chinese flag instead of the Union Jack.

Some might think that I ripped off Rockpool's design but certainly they are not the first to use starfish as decor on a kayak; they just made them famous.
If I can only work out on how to add glitter now... :-)
05 August 2009
SHOP: DIY sea kayak foot brace
A paddling acquaintance of mine announced that he wanted to sell his beloved carbon/Kevlar sea kayak.
His reasoning was that the factory foot pedals collapsed on him once and the replacement ones did not look any better. He was not confident with the outfit of his otherwise great kayak.
While jokingly I promptly offered him a ridiculous sum to buy his kayak I added that if the foot pedals were his only problem it would be unwise to sell a kayak that he loved.
After making a few suggestions, with a simple solution on how to remove the existing plastic pedals and fabricate an aluminum bar as replacement, he no longer wished to part with his kayak.
On the next paddle he proudly showed me the modification. Admittedly he did a decent job.
His feet were resting on a bar that was spanning across the width of the hull offering more than one foot position.
His replacement foot bar prompted me to finally address my own foot pedal set- up in my prototype SeaBird Designs Northsea.
The kayak I have is a preproduction one where the outfit was not fully finalized and the foot pegs rails were not positioned correctly. A factory retrofit was done to ship the kayak in time but the job was below my standard.
As they say: "You don't buy a house because of its furniture"; I decided that the flexible factory foot pegs had to go.

Factory set up in pre-production Northsea. These foot pegs were for a rudder (that I removed and replaced with a skeg)
I wanted a secure wide bar to push my feet against.
I removed the rails and the foot pegs and fabricated a new rail from anodized aluminum "L" section.
I used the existing threaded studs to mount the rails.

replacement aluminum rails: "L" section anodized profile
The cross brace where my feet will rest against had to be rather wide and curved a bit.
I could have used the aluminum profile that I have used in my other kayaks but the adjustment in the SeaBird was different: the pegs and rail have been removed.
I set out to fabricate a cross bar made from foam and composite fiberglass and carbon.
I cut a wide section of foam core and heating it up with a heat gun I shaped it into a shallow channel.
I cut a slot in the end to create a tab for anchoring it on the aluminum "L" rail.

heat shaped foam core
The foam core was layered by double bias glass cloth and West System epoxy (105/206).

double bias covered by 4oz glass
Once cured I trimmed the excess cloth off from the edges.
Subsequent sessions did cover the front side with carbon cloth.
Carbon added a lot of strength and made the brace stiff.
Unfortunately carbon is not very abrasion resistant and an area that would see constant rubbing of shoes and sand had to be protected with a final layer of 2oz glass cloth.

2oz glass cloth covering carbon cloth
The foot brace once cured had the anchor tabs drilled and a last coat of epoxy was done for durability and looks.
Installing the cross brace meant careful alignment on the aluminum rails and a row of holes for adjustment (different leg lengths).
I used a 1/4" stainless steel bolt and a wing nut (rubber washer) for securing the foot brace.

Replacement foot brace installed (not shown with wing nuts but nylocks)
His reasoning was that the factory foot pedals collapsed on him once and the replacement ones did not look any better. He was not confident with the outfit of his otherwise great kayak.
While jokingly I promptly offered him a ridiculous sum to buy his kayak I added that if the foot pedals were his only problem it would be unwise to sell a kayak that he loved.
After making a few suggestions, with a simple solution on how to remove the existing plastic pedals and fabricate an aluminum bar as replacement, he no longer wished to part with his kayak.
On the next paddle he proudly showed me the modification. Admittedly he did a decent job.
His feet were resting on a bar that was spanning across the width of the hull offering more than one foot position.
His replacement foot bar prompted me to finally address my own foot pedal set- up in my prototype SeaBird Designs Northsea.
The kayak I have is a preproduction one where the outfit was not fully finalized and the foot pegs rails were not positioned correctly. A factory retrofit was done to ship the kayak in time but the job was below my standard.
As they say: "You don't buy a house because of its furniture"; I decided that the flexible factory foot pegs had to go.

Factory set up in pre-production Northsea. These foot pegs were for a rudder (that I removed and replaced with a skeg)
I wanted a secure wide bar to push my feet against.
I removed the rails and the foot pegs and fabricated a new rail from anodized aluminum "L" section.
I used the existing threaded studs to mount the rails.

replacement aluminum rails: "L" section anodized profile
The cross brace where my feet will rest against had to be rather wide and curved a bit.
I could have used the aluminum profile that I have used in my other kayaks but the adjustment in the SeaBird was different: the pegs and rail have been removed.
I set out to fabricate a cross bar made from foam and composite fiberglass and carbon.
I cut a wide section of foam core and heating it up with a heat gun I shaped it into a shallow channel.
I cut a slot in the end to create a tab for anchoring it on the aluminum "L" rail.

heat shaped foam core
The foam core was layered by double bias glass cloth and West System epoxy (105/206).

double bias covered by 4oz glass
Once cured I trimmed the excess cloth off from the edges.
Subsequent sessions did cover the front side with carbon cloth.
Carbon added a lot of strength and made the brace stiff.
Unfortunately carbon is not very abrasion resistant and an area that would see constant rubbing of shoes and sand had to be protected with a final layer of 2oz glass cloth.

2oz glass cloth covering carbon cloth
The foot brace once cured had the anchor tabs drilled and a last coat of epoxy was done for durability and looks.
Installing the cross brace meant careful alignment on the aluminum rails and a row of holes for adjustment (different leg lengths).
I used a 1/4" stainless steel bolt and a wing nut (rubber washer) for securing the foot brace.

Replacement foot brace installed (not shown with wing nuts but nylocks)
16 February 2009
SHOP: kayak mods_ retrofitting a ruddered kayak with a skeg
My SeaBird Designs kayak came with a rudder.
While probably a faster proposition for the racer a rudder in my opinion hinders good sea kayaks. I have paddled the kayak for a while now and always with its rudder stored on deck. The kayak does weathercock slightly.
In winds of 15 knots or stronger some effort is needed to edge the boat and use corrective strokes to keep it from turning into the wind.
The rudder has been removed and I have embarked into the daunting task of fabricating my own adjustable skeg.
Pricing a ready made kit from a local kayak manufacturer made me think that I can probably make a better one possibly cheaper.
Greg Schwarz has been my inspiration and his work is truly outstanding and after some consultation with him I decided that it must be done.
The trickiest part was sourcing high quality housing for the stainless steel wire/cable needed to adjust the skeg.
I found what I needed at an industrial hose supplier. The exact product is a high density polyethylene hose used for compressed air. The fitting for the hose is brass and has a neat "olive" to securely attach the hose to the skeg box.
The next step was to decide what shape and what size I wanted my skeg.
The skeg does not need to be very large and a sloped triangular one was going to be the least obtrusive one inside the rear hatch. I cut a piece of "smoke" colored 5 mm tick polycarbonate (Lexan®) to the slightly oversized shape of my desired skeg. Note the slightly oversized; we will come back to that later.
I waxed up the skeg with mould release wax and placed it on a smooth flat surface. Mixed up some epoxy and tinted it with black die: I don't like the look of semi transparent fiberglass. I used 2 layers of double bias cloth (available at most marine chandleries) and draped it neatly over the skeg.

top half ready, bottom is freshly laid
Once the resin hardened enough (10 hrs approx) I trimmed the excess cloth away with scissors and left a flange of about 2 cm. I repeated the same operation by flipping the skeg and making the second half of the skeg box. The two sides were flat and matched well.
I roughed up the flange surface with coarse sandpaper to create a good mechanical bond. This time I mixed up some epoxy (tinted again with black) and some microfibre filler (extender) to create a thicker glue that would not run. I joined the two skeg box halves allowing for a slightly wider gap at the bottom/entrance of the box to create a slight taper.

the two halves are joined

the bottom of the box was separated slightly to create a taper
The joint was filleted with the tick epoxy paste to create a strong joint line.
Once the joint cured the excess fibreglass flange was cut away and the ridge line made smooth with sandpaper.
A slot was cut to accomodate the brass housing fitting.
The fitting was fibreglassed into the slot with epoxy paste.


skeg box before glassing
skeg blade retracted

pivot point


housing attached to skeg box.
I hope I have not bored you with my account of retrofitting a kayak with a skeg.
While probably a faster proposition for the racer a rudder in my opinion hinders good sea kayaks. I have paddled the kayak for a while now and always with its rudder stored on deck. The kayak does weathercock slightly.
In winds of 15 knots or stronger some effort is needed to edge the boat and use corrective strokes to keep it from turning into the wind.
The rudder has been removed and I have embarked into the daunting task of fabricating my own adjustable skeg.
Pricing a ready made kit from a local kayak manufacturer made me think that I can probably make a better one possibly cheaper.
Greg Schwarz has been my inspiration and his work is truly outstanding and after some consultation with him I decided that it must be done.
The trickiest part was sourcing high quality housing for the stainless steel wire/cable needed to adjust the skeg.
I found what I needed at an industrial hose supplier. The exact product is a high density polyethylene hose used for compressed air. The fitting for the hose is brass and has a neat "olive" to securely attach the hose to the skeg box.
The next step was to decide what shape and what size I wanted my skeg.
The skeg does not need to be very large and a sloped triangular one was going to be the least obtrusive one inside the rear hatch. I cut a piece of "smoke" colored 5 mm tick polycarbonate (Lexan®) to the slightly oversized shape of my desired skeg. Note the slightly oversized; we will come back to that later.
I waxed up the skeg with mould release wax and placed it on a smooth flat surface. Mixed up some epoxy and tinted it with black die: I don't like the look of semi transparent fiberglass. I used 2 layers of double bias cloth (available at most marine chandleries) and draped it neatly over the skeg.

top half ready, bottom is freshly laid
Once the resin hardened enough (10 hrs approx) I trimmed the excess cloth away with scissors and left a flange of about 2 cm. I repeated the same operation by flipping the skeg and making the second half of the skeg box. The two sides were flat and matched well.
I roughed up the flange surface with coarse sandpaper to create a good mechanical bond. This time I mixed up some epoxy (tinted again with black) and some microfibre filler (extender) to create a thicker glue that would not run. I joined the two skeg box halves allowing for a slightly wider gap at the bottom/entrance of the box to create a slight taper.

the two halves are joined

the bottom of the box was separated slightly to create a taper
The joint was filleted with the tick epoxy paste to create a strong joint line.
Once the joint cured the excess fibreglass flange was cut away and the ridge line made smooth with sandpaper.
A slot was cut to accomodate the brass housing fitting.
The fitting was fibreglassed into the slot with epoxy paste.

slot cut into skeg box

fitting before fibreglassing

fitting with fibreglas and resin
The skeg pivots on a stainless steel 5mm bolt secured with epoxy in the skeg box. A washers was cut out of nylon (or polyethylene) for each side of the skeg to prevent friction between blade and box.

cutting the washer

washers in place, excess bolt still to be cut
A slot was cut into the skeg blade to allow the skeg to be attached/removed without undoing the bolt.

The skeg wire was attached directly to the polycarbonate blade. A hole was drilled into the blade, a slot cut for the cable, the cable end was frayed a bit to ensure a better grip for the resin.The cable was resined in with epoxy paste and a laid on baking paper to create a smooth surface. The excess resin was trimmed once cured.

cable before resin

resin before baking paper

skeg dimensions (in mm, sorry metric only) click on image for larger view
The skeg is controlled by a stainless steel wire.
A control box with a knob attached to the wire was fabricated.
I used a piece of PVC conduit to shape a plug for my control box.
I cut the PVC pipe in half and after heating it gently on a flame I pushed it into a “U” shaped section.
A control box with a knob attached to the wire was fabricated.
I used a piece of PVC conduit to shape a plug for my control box.
I cut the PVC pipe in half and after heating it gently on a flame I pushed it into a “U” shaped section.


I used West System 105 resin, 207 hardener (UV stabilized) to impregnate some carbon weave cloth.
Draped the resin rich cloth over my plug and overlaid it with cling wrap (Glad Wrap®) to prevent it sticking to the two blocks of wood keeping close shape to the sides of the cloth/plug.The box once cured needed end “walls”. I cut a small section of plastic and used it to “dam” the ends.
Draped the resin rich cloth over my plug and overlaid it with cling wrap (Glad Wrap®) to prevent it sticking to the two blocks of wood keeping close shape to the sides of the cloth/plug.The box once cured needed end “walls”. I cut a small section of plastic and used it to “dam” the ends.

control box with ends in place
A section of the deck had to be cut out to have the control box recessed flush with only the knob slightly protruding.
Would you believe that after all that careful measurement and attention I cut and installed the skeg control box in the wrong position?
I took great care to make sure it will be out of my legs and knees' way but forgot to allow for the cable that would protrude past the box.
And of all places I did align it perfectly with one of the deck fittings.
The cable would run into the fitting!
After much cursing (you can imagine) I had to cut out the carbon box, clean up the resin and repair the massive hole left by the box. A new box was fabricated and repositioned.
The deck was repaired (I kept the section of deck that was cut out) and the gap left by the cutting blade filled with color matched gel coat.

skeg control knob (slider)
The control knob was fabricated from a piece of clear polycarbonate.
The knob was shaped to fit neatly inside the box and a hole drilled at the base to allow the sleeve to fit through.
The sleeve is drilled to allow a bolt (or grub screw) pinch the cable and keep it in the desired position.
The whole assembly has to run smooth and care must be taken to ensure that there are no bends where the sleeve runs inside the housing or a jam will occur.

control knob secured onto the brass sleeve.
The skeg cable runs inside the housing until it reaches the control box.
Here it enters a stiffer tube (stainless steel is desirable, brass will do) that would act as a sleeve.
The sleeve has to fit tightly around the cable and still be able to fit inside the polyethylene housing. The stainless steel cable is never exposed and therefore the chance of kinking the cable is reduced.

gel coat repair still to be sanded and buffed

skeg box view inside under the deck
It was time to assemble the skeg blade into the box.
You should end up with the blade well inside the box allowing trimming for the hull thickness and curve of stern keel line.
Once I had my parts ready it was time to prepare the hull for cutting.
This is the most critical part.
Measure twice, cut once! (yeah right...:-)
A perfect centre line is needed along the keel.
I selected and area as close as possible to the stern of the kayak but not too far for being able to reach from the hole of the rear hatch. I would need to work through that hole and be able to glass the skeg into place!
I masked the area with masking tape and draw lines on it to have a very visible cutting line.

You should end up with the blade well inside the box allowing trimming for the hull thickness and curve of stern keel line.
Once I had my parts ready it was time to prepare the hull for cutting.
This is the most critical part.
Measure twice, cut once! (yeah right...:-)
A perfect centre line is needed along the keel.
I selected and area as close as possible to the stern of the kayak but not too far for being able to reach from the hole of the rear hatch. I would need to work through that hole and be able to glass the skeg into place!
I masked the area with masking tape and draw lines on it to have a very visible cutting line.
masking and marking


checking for gap width
Once I was positively sure that all was good I fired up the Dremel®.
You will need a high speed cut off wheel. Wear a mask and goggles.
I cut less than needed and enlarged the hole slightly as required to fit the skeg box.
I managed to cut away a very tight fit and my skeg box had a gap of only 1 mm in places.

the scary part
You will need a high speed cut off wheel. Wear a mask and goggles.
I cut less than needed and enlarged the hole slightly as required to fit the skeg box.
I managed to cut away a very tight fit and my skeg box had a gap of only 1 mm in places.

the scary part
The box fitted well and with the blade in place I made sure it would not protrude once trimmed.

skeg box before glassing
The skeg box was then perfectly aligned vertically in the kayak
A spirit level helps.
I removed the skeg blade and inserted a piece of wood the width of the box protruding about ½ meter.
I used that to align the skeg box.
The skeg box was then glassed into place with epoxy paste first (to create a watertight seal) and fiberglass tape later for strength.
Once cured I trimmed off the excess of the skeg box. A flush finish is desirable.
A spirit level helps.
I removed the skeg blade and inserted a piece of wood the width of the box protruding about ½ meter.
I used that to align the skeg box.
The skeg box was then glassed into place with epoxy paste first (to create a watertight seal) and fiberglass tape later for strength.
Once cured I trimmed off the excess of the skeg box. A flush finish is desirable.
I masked a small frame around the box, sanded it and applied some West System 105/207 epoxy since my hull is clear and I wanted to have a non visible joint line. I did two applications for wear abrasion.

skeg blade retracted

pivot point

the skeg fully extended

skeg box view inside hull

housing attached to skeg box.
Loop/guard of fibreglass to prevent damage to housing when loading kayak with camping equipment
I also hope that I have not omitted something and made the instructions not clear enough.
Feel free to comment and I might try to amend/update the document.
Subscribe to:
Posts (Atom)