Showing posts with label invention. Show all posts

25 June 2015

Digital camera hand grip modification

.
I reached the limit of tolerance with my pocket compact digital camera as I realized my images were lacking sharpness when light conditions were not ideal.
Most of my images are displayed on monitors (web use) and only occasionally I print the very best pictures of mine.
While all images look great when displayed small things don't look so good once they are enlarged.
Add, low light and the tiny lenses of most compact cameras suddenly look a bit fuzzy.
If you believe that the images you take on your smart phone are good enough, then don't need to read any further: you are wasting you time.

I want better results for my photographic efforts but I refuse to schlep a large camera with me.
Weight and bulk are always my concern (some say, personal too :-) but gone are the days of toting around a large heavy camera.
If the subjects that I want to photograph would be within reach of a short walk away from the car I would worry less, but when I take my cameras in a backpack and lug it around for days in the back country, or it has to fit inside my kayak on extended trips, then size does matter.
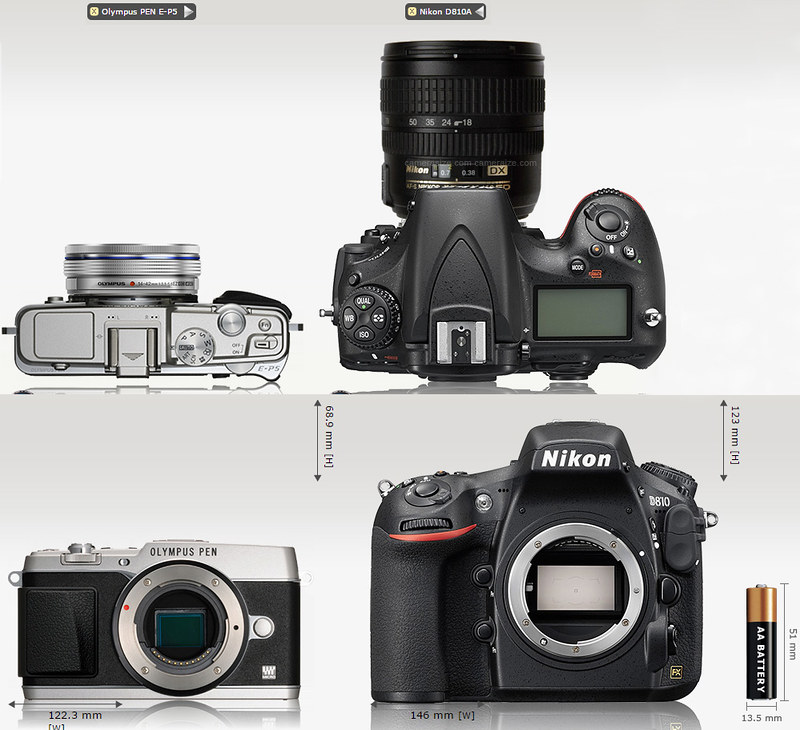
Oly vs Nikon_lens
Olympus camera and lens compared to Nikon, similar focal length, same f/stop
For my second trip to Scandinavia I wanted to have a higher quality camera, one that allows me to apply my skills and one that would reward my creativity. My intention was no longer to simply record my trip, I wanted images I would be happy to hang on my wall.

The Micro Four Thirds system of cameras is the perfect compromise for me: images are sharp and the cameras have features than no other system has, size being one of the major ones.
I can afford to have a camera body and a couple of lenses with me and not really feel it in my backpack, something I could not do with a lot of DSLRs.

But where the Micro 4/3 system excels it also poses some problems with users with slightly bigger hands: the hand grips are often a bit small.
As I started to attach larger/heavier lenses on my Olympus cameras I felt that the grip was a bit diminutive and I had to clutch the camera too tightly.
I could use their Pro models but that would defeat the idea of compact and light: I just wanted a better grip, not a bigger camera.
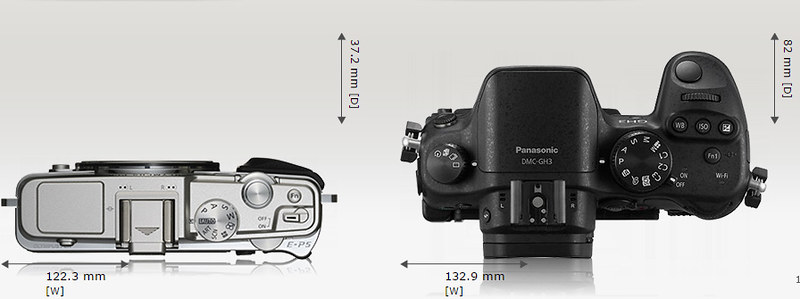
camera size comparison_3
same image sensor, different body, same image result
Commercially available add-on grips look too bulky (no need to have a base plate bolted to the bottom if one is not needed) and the glue-on aftermarket grips were not available for the camera I was using.
However those aftermarket grips looked really good and that prompted me to come up with my own DIY modified hand grips.
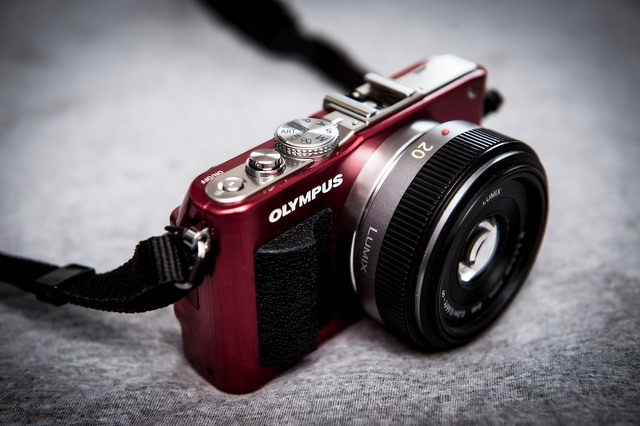
8653856259_d099d50b12_z
commercially available stick-on grip, here

I used Sugru, a silicon putty that feels like Plasticine but cures hard like rubber, sticks well and does not feel too slippery.
A small packet of Sugru contain enough material to shape a single grip if a large one is desired, or just enough for two smaller ones. Bright colors are available but I went with conservative black.
I have so far modified an Olympus E-PM2 (smallest of the M4/3 series) a couple of E-P5 and several E-M5.
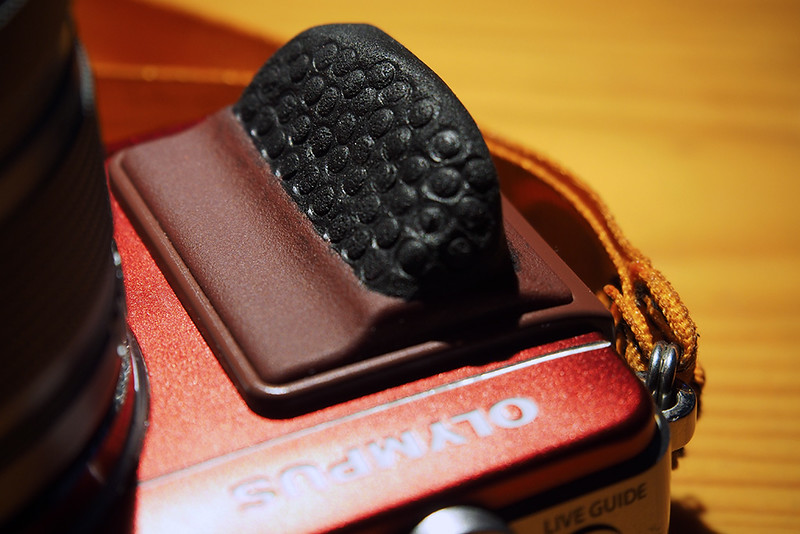
grip mod on PM2
Olympus E-PM2
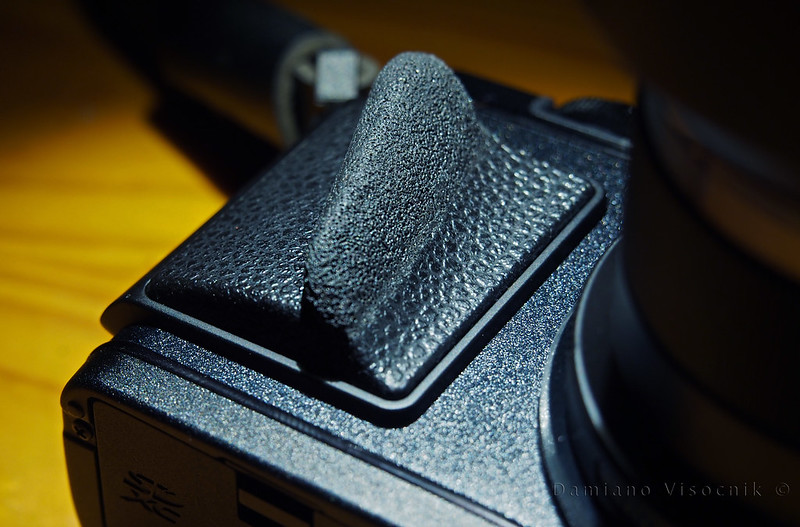
Once the putty is kneaded and then firmly pressed onto the existing small protrusion where the fingers grip the camera, I shape the soft material with a small bladed knife to create a clean edge.
A moistened index finger keeps on shaping the putty until I am happy with the overall shape, then I run the back of the knife blade to create a perfectly uniform surface (not bumpy).
If the form of the grip is in its final shape I like to add some texture to enhance the surface and create more friction for my fingers.
Sugru grip on P5_3
Olympus E-P5
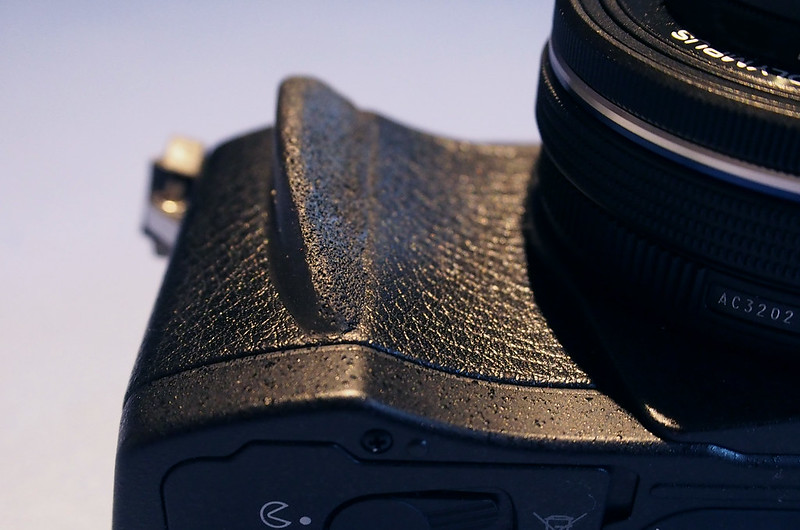
Here I use a combination of pins, pen ends (to create little circles) and an old toothbrush for finer texture.
I try to achieve a look that matches the existing camera finish but I simply will never be able to replicate the faux leather surface.
Before I let the camera rest to cure I check that there are no bits of stray silicon putty on the grip, where I don't want it.
While the cured silicon does become hard like rubber it is not impossible to remove it mechanically but one needs to scrape vigorously to get it off.
Sugru grip on M5_2
Olympus E-M5
I have seen some photographers push their fingers into the soft putty before it's cured to have an "imprint" look; I go for a more universal one where the grip is an extension of the original one and less fully-custom.
Sugru grip on M5_3
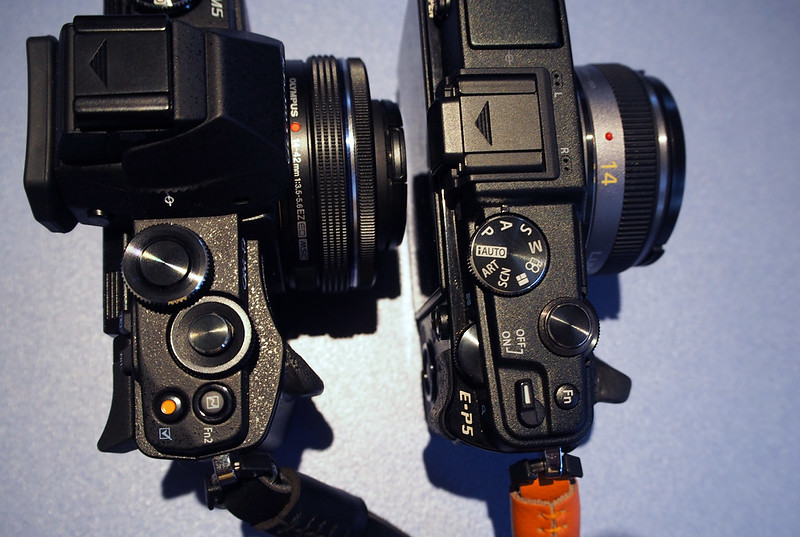
Olympus E-M5 and E-P5, modified grips

The grip on my Olympus cameras is now much more positive: my fingers don't have to clutch the body so tightly and the softer grip fatigues my hand much less when on longer photo shoots.

Photographing the sunset_c .

29 January 2013

GEAR: a rudder like no other

.
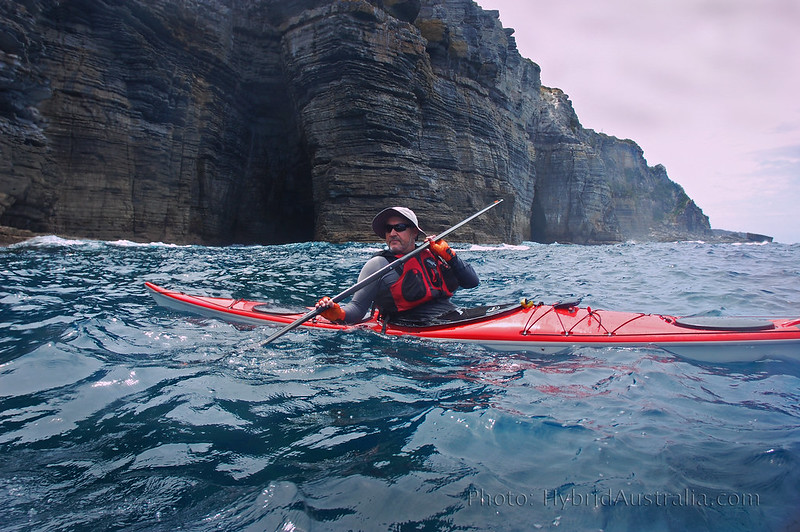
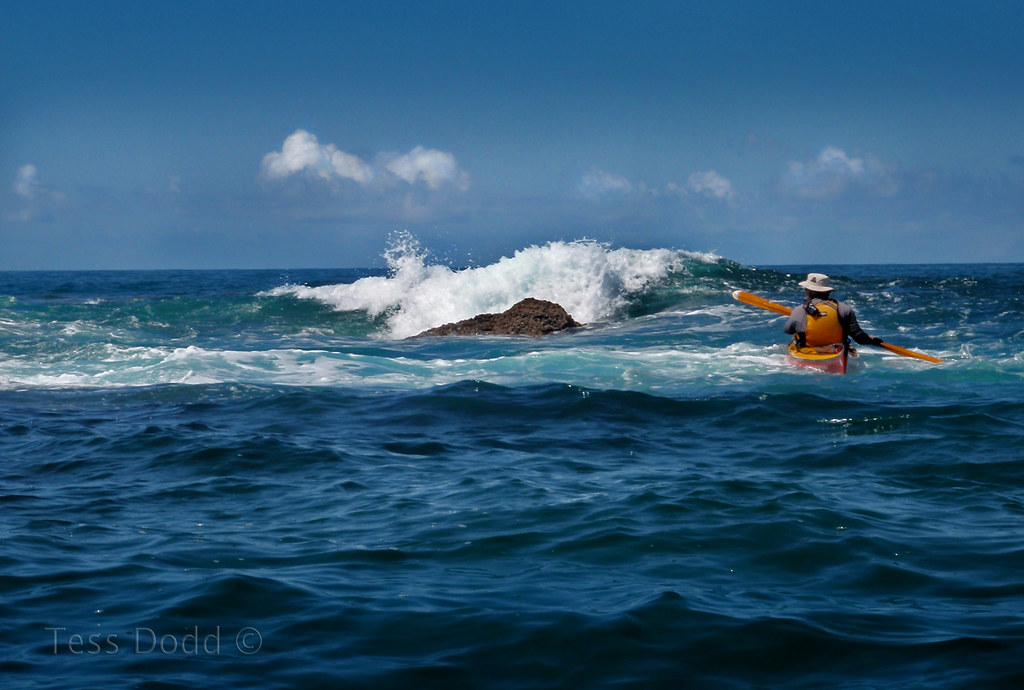
I found myself constantly sweeping on my right hand side with my Greenland paddle to keep away from the crushing waves against the tall cliffs.
The mild swell of 1.5 mt and the stern wind of 15 knots were affecting my British kayak like I have not experienced before.

Beecroft Pen_cliffs_JAN13
in a bay away from the heavy seas
I often paddle in environments where wind is the only reason for a bumpy sea.
Even on my extended trips I have dealt with following seas and breezes with ease where a bit of skeg control would balance the weather cocking of my rudderless kayaks.
I used to paddle kayaks with over-stern rudders and while I found the cruising much easier than in a skegged boat I eventually abandoned the pesky blade sticking from the end of my boat.

The deciding point of getting rid of those kayaks with “crutches” came when for the 3rd time my rudder was damaged when paddling in waves.
I was not happy with the unreliability of rudders.
As I transitioned to skegged kayaks I learned how to maneuver a boat with my body (by edging) and sweeping paddle strokes while directional stability was taken care by the adjustable skeg.
I now have 6 sea kayaks, all without rudders.
There is no denying that a skegged kayak is slower for me and that I don’t keep a perfectly true course in following seas. That does not bother me: I am in no rush and I usually don’t like to paddle too close to my buddies to be then bumping into them if my kayak sways a bit.

But all that I wanted right now was keeping myself off the big spraying smashing waves against the rocky coast. I looked over to my paddling buddy and I noticed that he was paddling with greater ease and I didn’t see any corrective strokes.
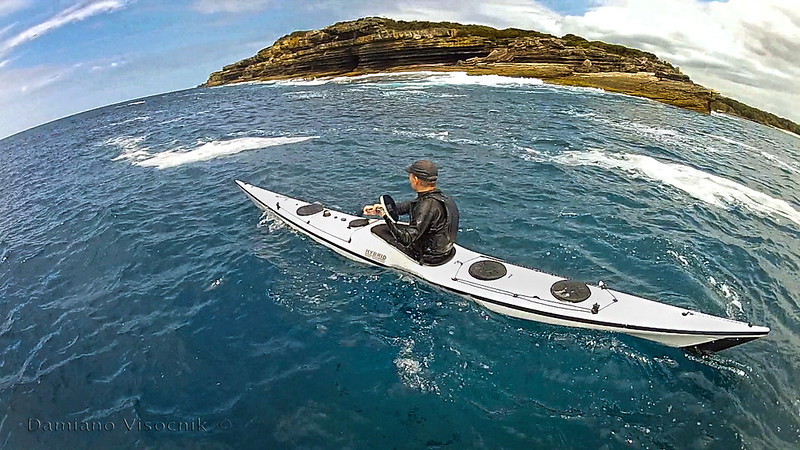
He was paddling a Hybrid550.

Hybrid550_1_c

The Hybrid550, designed by Andre Janecki, is a kayak like no other. It has features that I have not seen on any other boat. The thought process that went into designing and redefining that kayak is astonishing.
Unlike so many kayaks that capture my attention and look so similar to each other, the Hybrid550 is unique. Its cockpit concept is inspired by white water boats with outstanding ergonomics for this chunky body of mine while still perfectly accommodating a more nimble paddler. One thing that concerns me is the width of the cockpit rim since my, how can I put it, “love handles” might rub after a while.  I hope one day Andre will produce the Hybrid 550 L (larger cockpit) but I understand his priorities are with the “UNLIMITED”  www.hybridfoundation.org.au
 
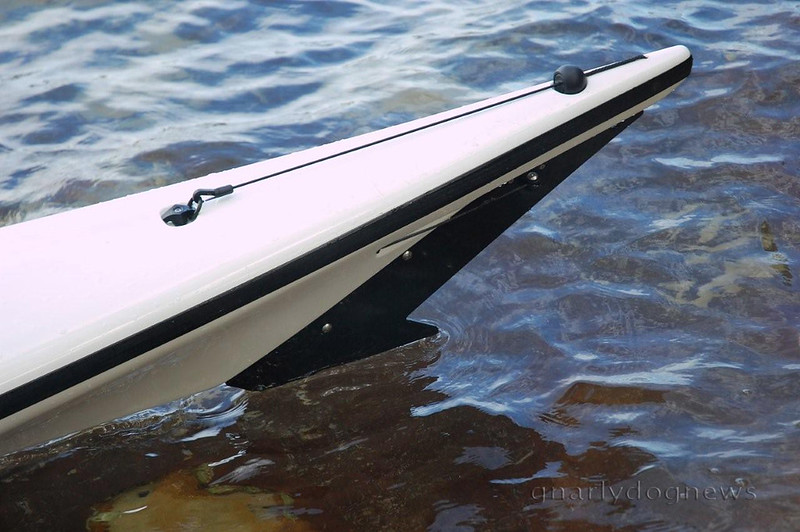
What intrigues me however is the unique design of the rudder.

Hybrid rudder_1

As I was dissatisfied with my own rudder boats many years ago I looked at the alternative integrated rudder of Mirage kayaks. I liked the look and I like the idea of not having anything above deck, nothing to swing and insert in to the water with so many less parts moving resulting in a simpler design. What concerned me though is the fact that the Mirage rudder is always there, even when I want to seal launch or beach land and drag the kayak.
After repairing a few split rudder blades from friends' Mirages I decided that if I wanted a rudder boat it had to be stronger than that.

I did the initial mistake of confusing the rudder design of the Hybrid550 as a copy of the Mirage but I never had a real close look at the details.
I now know that the pivot points are totally different, the action of the swinging blade is different and the construction is nothing like the Mirage...
 
Hybrid rudder_2

I had a GOOD look at the rudder on the Hybrid550 and I have one thing to say: brilliant.
It can take a reverse surf landing, right on the blade. What other ruddered kayak can do that?
None that I have seen so far.

Hybrid rudder_3
rudder folding away and bending when being hit
I am a skeg man, I don’t paddle with ruddered kayaks. I came to the realization that rudders are not suitable for my style of paddling.
With the Hybrid550 however I now have to rethink my philosophy. 

Psychologists have found that familiarity breeds fondness: Repeated exposure to a new idea leads to progressively lower fear and avoidance and even, eventually, sometimes, to acceptance. (Megan Kimble)


26 October 2012

SAFETY: going solo made safer

On the left shoulder of my PFD I have my personal locator beacon (aka PLB) tightly strapped hoping I never have to use is. It gives me a sense of security that in case the proverbial sh*t really hits the fan somebody might come to my cry for help and pluck me out of the water.
I also know that those electronic gadgets aren't totally foolproof or operate 100% of the time (details here ).
Lately I have found myself venturing on more trips alone; my usual paddling companions seem to have other commitments or maybe have just grown tired of me :-)
While solo trips have a certain appeal they also pose more risks, especially when on the water.
As I prefer more textured waters and longer paddles to more remote places (of a week or so) I have been contemplating undertaking those trips alone.
Ex Cap_34

One concern that has crossed my mind would be the rare scenario where I would come to trouble and be left stranded somewhere with no way of letting people know of my predicament.
I should let my loved ones know where and when I am going but giving them all the details and logistic constraints might prevent that from happening. Printing out maps with detailed plots and ...
I also don't want to "burden" a relative or a friend with the duty of checking on me if I don't contact them on my return, giving them the mental constraint to be my lifeline in case of no-show.
Put it this way: I would rather not be that person that a buddy relies on for safety.
So I was rather pleased when a new registration service was set up for the purpose of "keeping an eye" on theirs subscribers.
iNeverSolo.com a free service that allows you to register you intentions.
"The brainchild of an outdoorsman,
pilot and engineer, iNeversolo is an innovative online resource that lets you create
a plan for your outdoor activity so that, if you don’t make it back when you said you
would, an email and text alert goes out to the people you designate and they can track
you down. iNeverSolo ensures that while you may be on your own outdoors, you are
not really alone." says Peter Downing of iNeverSolo.

The service is free to the users supported by international advertisers and sponsors.
Initially only available in USA, it has just recently added international coverage.
Anybody that signs up to iNeverSolo.com can submit as much (or little) information about the proposed outing, and it doesn't have to be epic. Anything from a simple outing of a few hours in the bay (or woods) to week long expeditions.
You let them know when you will be back and when you will log off and they keep track of you.
I don't mean that they physically check on you (nobody will come around my place if I don't log-off) but they will send out an alert to the contacts I nominated if iNeverSolo fails to get hold of me first and I don't send them a response. So, if I fail to come back from my trip and iNeverSolo can't get in hold of me they will alert my contacts that might notify the authorities to come look for me.
For more details watch this animation or read this info

Ex Cap_33

Of course such service has one downfall: what if I get "stranded" on a remote island (with no mobile service) with a couple of Swedish backpackers and prolong my trip for a few days? I would hate to see that Marine Rescue chopper hovering above looking for me :-)

.

23 October 2012

REVIEW: Carb neutral beer powered vehicle

While the engineers of the world are scampering to invent a carbon neutral vehicle to happily transport people around, a different kind of development has been happening behind Oregon's mountains: a carb neutral vehicle that is very environmentally friendly.
While this vehicle has had tremendous success in Oregon, Utah's DMV seems to be reluctant to allow registration...


Powered by a "V12"engine that sometimes fires in slight imperfect synchronicity, it requires open minded and willing passengers to cruise with one "designated" driver and one licensed barman to make it reach the top speed of 7 miles per hour. Unsuitable for off road (the engine is underpowered for steep hills) it is primarily designed to transport patrons between "refuelling" stations closely spaced apart (microbreweries).
Manufacturers' fuel recommendation is premium (beer) only with a rather high average in-town consumptions of 3 gallons per mile; it is however carb neutral as the carbs ingested are soon burned off by the engines frantically spinning the pedals.
The vehicle is a soft top with excellent street appeal: trust me, you will get second looks, from either gender :-)
The downside of this unique vehicle are the seats: testers found them somehow spartan and suitable only for short journeys as a long drives in the country produced saddle sores.

.

01 June 2012

GEAR: the kayak sled by Hybrid

I busted my back lifting a kayak to my shoulders and carrying it to the beach.
X-rays revealed some spinal degeneration that apparently is caused by an accumulation of accidents.

The quack asked me:   "Have you had any falls on your back in your past, even as a child?"
Me:   "About one a year, if not more..."

The back injury is probably a manifestation of a life full of crashes on skis, motorcycles, mountain bikes and who knows what other back blows that I used to just shrug off when occurring. They are now catching up with me :-(
I am also sure that my current sedentary lifestyle (desk jockey) and lack of regular exercise during the week contribute to my now bad back. What bugs me is that I can't carry my kayak solo on my shoulders and look macho, even though I feel some of my kayaks are not exactly ultra light.
So, my back got bad again schlepping my boat across a bank of sand onto shore and into a back yard. Not a  long distance but long enough to compress my spine out of whack; I need a trolley even for that short of a stretch.
The kayak carts I have are bulkier than I would like; they also have wheels.
Wheels and the shallow small lagoon I have to cross don't mix: the axle would clog up and the bearing would suffer.
I then remembered attending a presentation at a kayak fest (NSWSKC Rock&Roll in 2009) where a kayak designer showcased a "sled" that required no wheels.


Hybrid kayak sled presented at Rock&Roll 2009
I needed something like that.
I contacted Andre Janecki, the brilliant designer behind the Hybrid 550 sea kayak and founder of the Hybrid Foundation. Andre has been tinkering and inventing all his life; his expertise spans from architecture to industrial design, including his passion for sea kayaking.
Andre is also a philanthropist seeking funds for producing a sea kayak that will enable wheel-chair bound paddlers to access the water unassisted, in a kayak. (More info here)

I asked Andre for details on the "sled" and he immediately offered to help sending me a new sample that he showcased a few years back.
Here is the "Kayak Sled"

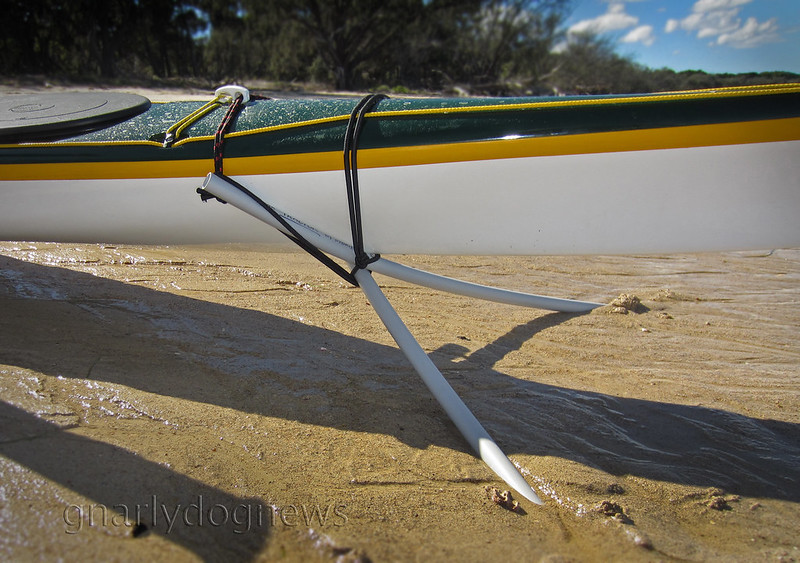
sled mounted_c
Mounted on the stern, the bungee cords are not essential to the operation of the sled
Simple in design the sled is a good alternative to wheels, providing it doesn't get dragged over pavement too much. I would like to quote A. Einstein: "Anything should be made as simple as possible, but not simpler"
It weights slightly more than a water bottle and takes almost no space inside the hatch, when folded.
It doesn't rust and costs so little to fabricate that even the kayaker on the tightest budget can afford.


Adventuretess testing the Hybrid Kayak Sled
While they are easy to replicate, Andre Janecki holds the copyright to the design. He is happy to share his invention with all paddlers who donate $25 into the Hybrid Foundation account.
Chasing up individuals that want to forego his request is not his intention but I am sure he would have a legal team onto a commercial operation trying to swipe his idea.
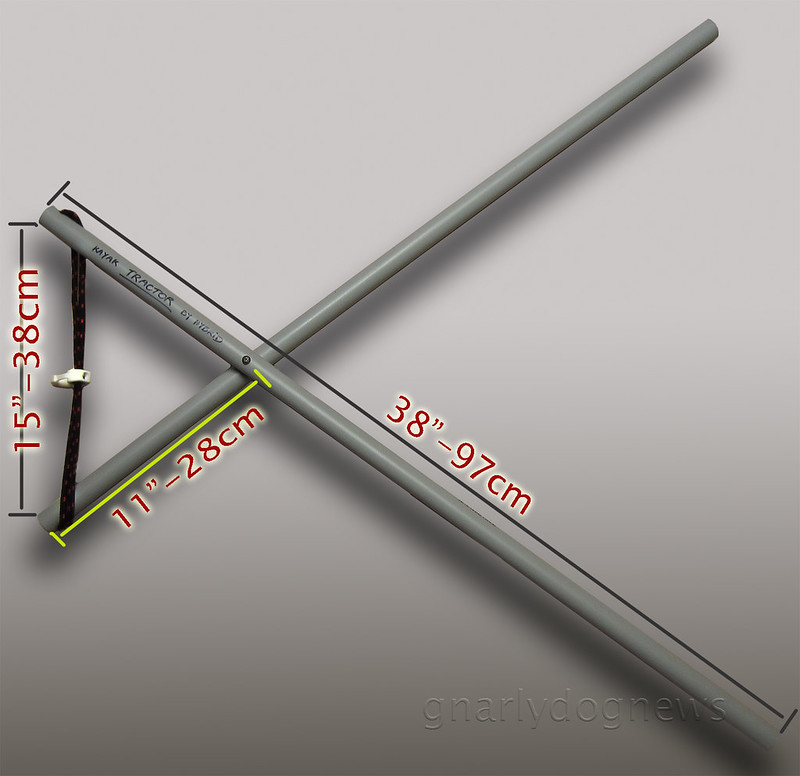
For exact dimensions and details, please email Andre Janecki and support his project.

Included are a few shots of the   "Kayak Sled" showing general proportion as well as some details of the design.
Hybrid kayak sled_2
The double (or single) rope (shown with the white plastic hook) should be securely clipped to the deck fitting/s
The 316 Stainless Steel screw is 60mm long x 5mm thick and the nut is the nylon-lock type.
The PVC tubes are standard stock size 25mm  O/D diameter, sourced from an electrical/plumbing supplier.
Kayak sled_1
The Hybrid kayak sled folded
The 25mm tubes are further stiffened with the 20mm inner tubes. Please note: the inner tubes run top and across to approx. 2/3rd length only. This configuration assists with bending and distributing the load as much as possible.
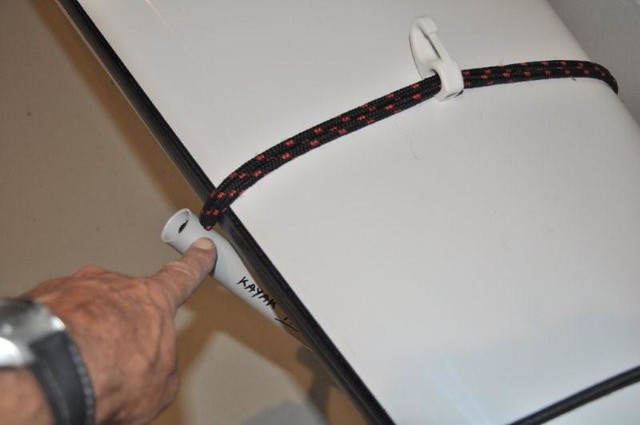
CSC_6166
IMPORTANT: the cord exit point from the PVC tube should be against the hull

P.S. Of course, the cheap PVC tubes have only a very limited carry load capacity.
Andre informs me that the commercial version will use very different materials, including a custom made cross section, etc.

.

12 December 2011

SHOP: reefing the Flat Earth Code Zero sail

In a previous post I have reviewed the new Code Zero Flat Earth kayak sail.
It features reefing point to make the sail smaller when the wind is really blowing and a smaller sail is called for.
My solution to reef the sail is simple: two little loops that pull the sail to the mast and reduce the surface area. One drawback: I need somebody to help me with the reefing since I can’t be seated in my cockpit and reach the loops; they are just too far away from me.
Gnarlydog News reader Kris Carlson, a designer from Swansea MA, USA has designed a relatively simple way to reef the Code Zero sail when paddling solo.
Most of his sea kayaking is usually alone and he wants to have the ability to safely reduce the surface area when seated in his kayak.
He sent me some drawings and explanation of his idea.
Here is his concept


click on image to enlarge


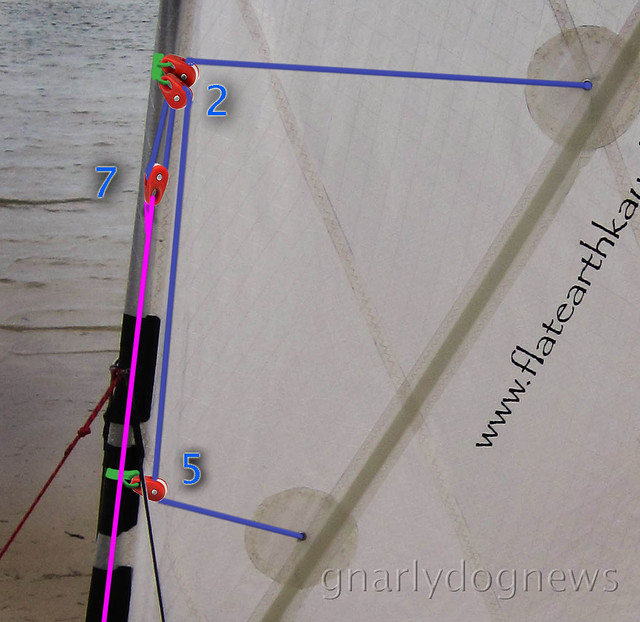
Above is a composite image of his concept using Ronstan superlight plastic blocks.
Below are the itemized components from Kris:

1. Upper Reinforced Grommet in Sail

2. Upper Double Reef Block

3. Upper Webbing Strap

4. Lower Reinforced Grommet in Sail

5. Lower Reefing Block

6. Lower Webbing Strap

7. Reef System Downhaul Block

8. Mast Base Turning Block

9. Bullseye

10. Clamcleat

FEKS CodeZero_reefing_det

Installation:
Webbing straps (3,6) need to be sewn onto the mast sleeve of the sail. A double block (2) needs to be lashed to the upper webbing strap. A block (5) needs to be lashed to the lower webbing strap. A block (8) needs to be lashed to the base of the mast. A bullseye (9) needs to be installed near the edge of the deck to guide the line down the side of the boat. A Clamcleat (10) needs to be installed with-in arms-length of the cockpit. Tie or splice block (7) to the lower reef line. Tie a stopper knot at the end of the upper reef line and pull it through the upper sail grommet (1). Run line through the first sheave on block (2). Run line through block (7). Run line through the second sheave on block (2). Run line down through block (5). Feed line through lower grommet (4) and tie a stopper knot. Feed the lower reef line (now attached to the upper line via block 7) through the mast base block (8). Feed the line through the bullseye (9). Run the line back to the Clamcleat (10) and tie a stopper knot.

Use:

When the reef line passing through the Clamcleat (10) is pulled towards the cockpit, the downhaul block (7) will evenly pull the upper reef line loop towards the deck and collapse the sail up against the mast.


Kris’ concept could be modified to have the Clamcleat removed from the deck and replaced with a suitable cleat on the end of the boom. This variation however might require to have the sail mast lowered (like when stowed) since reefing the sail lifts the boom higher away from the operator. Also, the Ronstan blocks could be replaced by simple stainless steeel rings although some increased friction might occur on the reefing line.
I am sure that some will find this reefing concept too complicated but I am very thankful to Kris for his contribution to this blog; he has find a solution for solo sailors that want to use the reefing on the FEKS Code Zero sails.


.

01 December 2011

SHOP: removable sail rigging

In my previous post I have detailed how I install cat rigged style sails (Flat Earth Sails for example) onto the deck of my kayaks.
The anchors, cleats and mast base are permanently secured to the deck and require several holes to be drilled through the fibreglass deck to have the bolts secure the items.
Some people cringe at the idea of drilling holes in a brand new kayak especially when experimenting with equipment that they are not familiar with.
My early sail rigs had the cleats mounted too close to where my hand would occasionally brush when paddling in a low angle style.
A few hits of the knuckles on the sharp edges of the cleat made me relocate them and plug the holes left behind by the fasteners.
My friend Jim has not done a lot of kayak sailing before and was unsure if he would like it on his Nordkapp LV.
He decided to minimize the damage that an ill fitting sail rig would do to the deck and devised a system that would keep his deck clean when he did not want to use a sail.

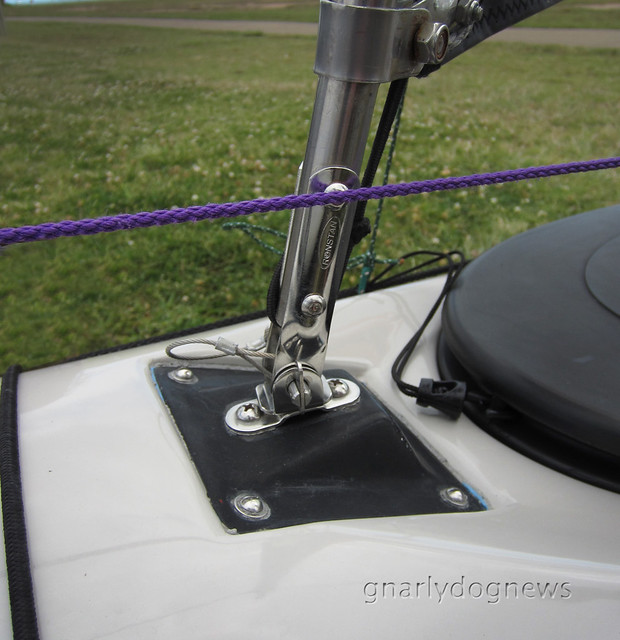
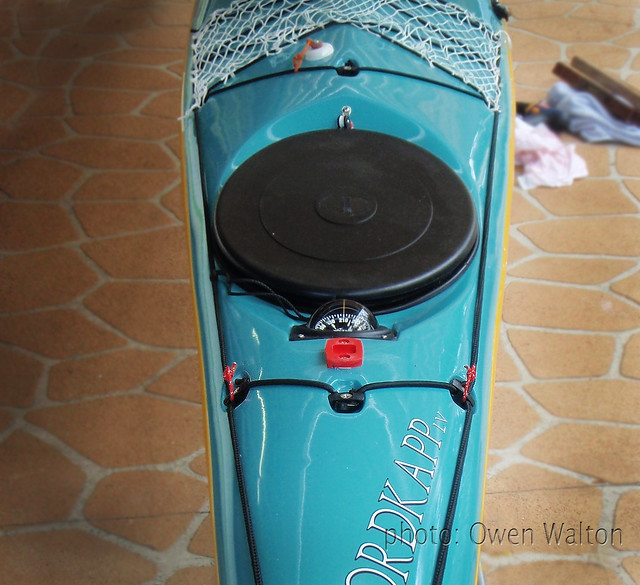
For the mast he used the existing recess where normally a 70P compass would be fitted. He fabricated a base out of fibreglass that has the identical hole location as a compass. He does not use that type of compass but he believes the recess and the complex fibreglass profile of the deck in that area is a very solid location for the mast base. He did not need to reinforce the deck since no flex is detected when the sail is deployed, even in heavy winds.
Jim's set up3

Jim had to drill holes for the stay anchors; unfortunately a Nordkapp LV does not have perimeter-line anchors suitably located to double as stay anchors.
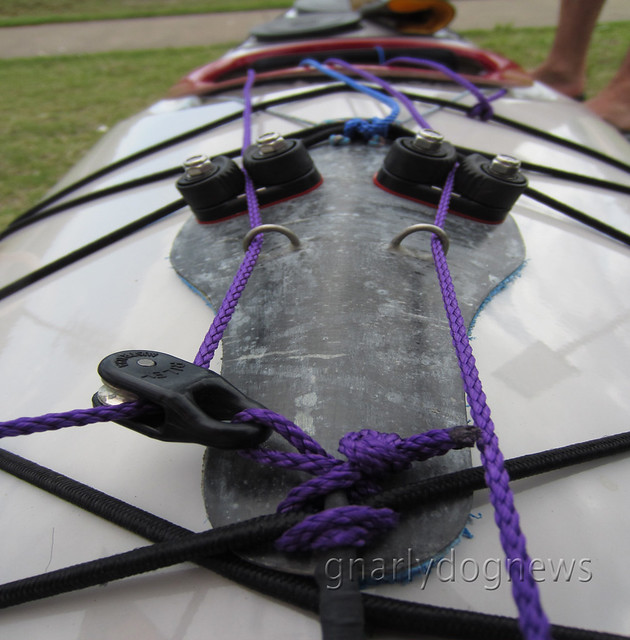
The rest of the cleats and pulleys (blocks) are mounted on a custom made piece of fibreglass that contours the deck of the kayak.
Jim's set up1

He simply waxed the deck of his kayak with mould release compound (even grease would work in a pinch) and laid up several layers of glass cloth and resin. Once the laminate cured he padded the underside with a thin layer of closed cell foam to prevent scuffing of the deck and installed the necessary hardware to secure the uphaul and trim the main sheet. He used sections of stainless steel welding rods embedded into the laminate to create guides for his lines but stainless steel saddles could be used as alternative.
Jim's set up4

His "plate" is held back by a thin line that loops around the coaming of the kayak, and in the front, under the deck bungee cord. The coaming line takes most of the load, the front bungee just keeps the plate close to the deck.

Jim's system can be removed in seconds when he does not use his sail. The base for the mast remains attached up front but there are no cleats and pulleys to clutter his deck.


PS 02DEC
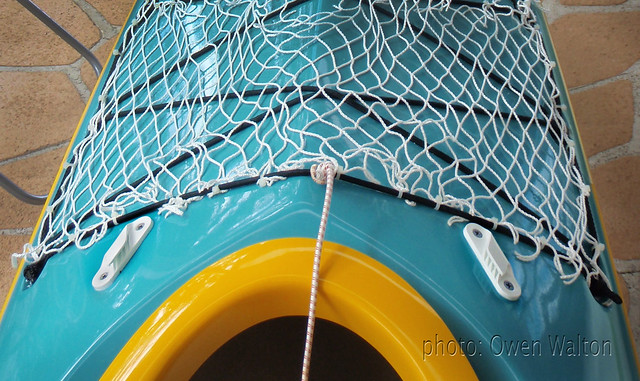
Owen Walton has sent me these images of his sail set up.
It requires one more stay (back stay) but the sail can rotate freely 360 degrees.
The plastic cleats are low profile.
Deck cleats

Deck fittings

24 August 2011

GEAR: the Birthday Rolls counter

I was getting dizzy and closer to my goal but I didn’t know for sure if I hit my target; I had lost count of my rolls.
It has become customary that when one of the senior paddlers in our group celebrates his/her birthday rolls must be performed.
A tradition started by Adventuretess that has gained popularity and is now religiously observed: one must perform a kayak roll for every year he/she celebrates (plus one for good luck).
Concentrating on keeping my rolls going in the rather nippy water I lost count of how many I still had to do.
I could cheat (nobody was really counting, they were all busy busting out their own rolls) but hey, we are an honest bunch and the Birthday Rolls are a serious matter to us.
So our ever ingenius collective mind, fuelled by friendly banter, suddenly came up with the idea to create a “rollometer”
We need something that will count how many revolutions a kayak makes.
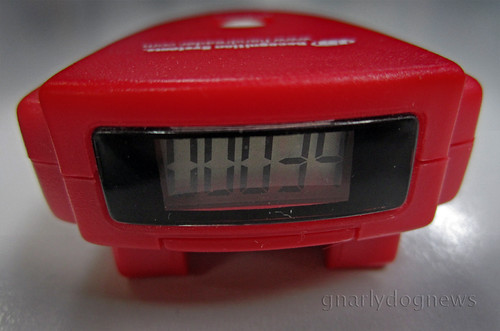
Unaware of the existence of such a gizmo I thought that modifying a “step counter” (device used for walking, favoured by seniors) could work for sea kayaking.
stepcounter_1_c

I had a step counter laying around (schwag collected at a trade show) that my engineer promptly disassembled and modified.
stepcounter_2_c
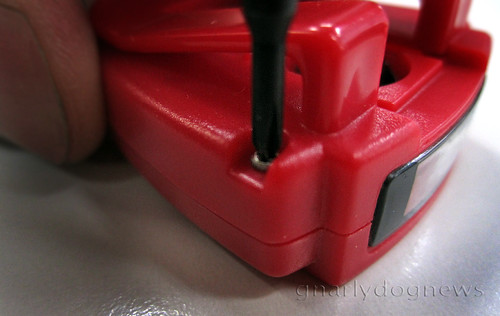
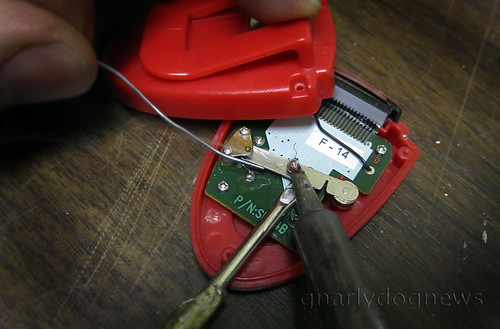
The step counter has a spring that holds the contact separated. A relatively firm jolt is needed to create the contact and trigger the counter.
When rolling there is no such jolt (as when walking) and the spring had to be de-tuned and made really “soft”.
stepcounter_3_c
We disassembled the step counter, re-soldered the spring/contact and luckily everything fit back together again.
Now the counter adds correctly even when simply inverted, not just when jolted.
A waterproof container with a viewing window was needed so it would be easy to see the progress of the rolls. A small clear dry bag (the ones used for waterproofing a cell phone) is used to keep the roll-counter in sight on the kayak's deck so progress can be monitored.
Rolling_12_c

Now there are no ifs or buts anymore; the counter doesn’t lie. I must do all of my rolls or there is no cake for me later :-)

.

01 April 2011

GEAR: prototype neutral shaft Greenland paddle

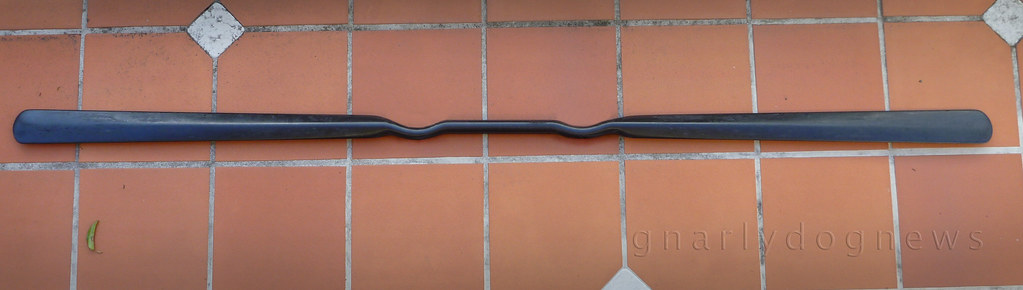
After months of design, test, redesign and a few headaches finally we have produced the first working prototype of a "neutral shaft" (aka as bent shaft) Greenland paddle.
bent stick_1_c

I used to paddle with neutral shaft Werner paddles and I wanted to try the same concept with my new found love: the GP.
The idea and execution is a collaboration between myself and a few close friends of mine.
The paddle is a foam core carbon reinforced shell. Unfortunately the first prototype is not as light as we hoped tipping the scales at just over 990 grams.
Once we are happy with the performance and design we will consider creating a mould to craft a lighter model.
On water testing went without a problem. After the initial few minutes of adjustment needed to locate the hands in the "well" the paddle sat nicely and a dramatic improvement in speed was recorded (this time I had to use a GPS even if I don't like the gadget).
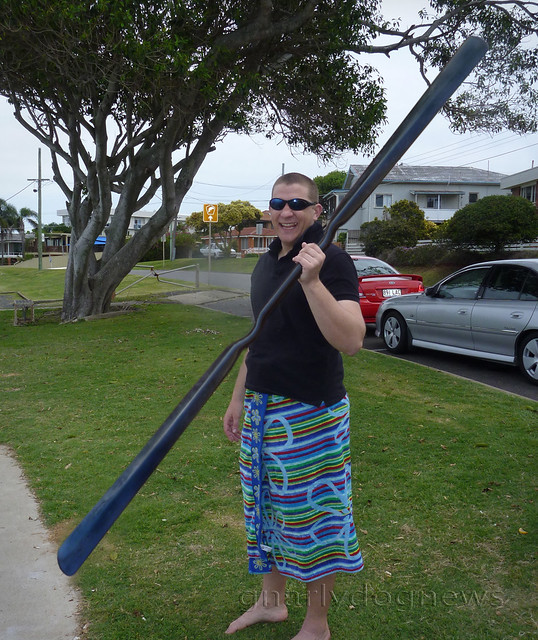
Dreamer with bent stick_c
Dreamer after testing the new neutral shaft GP
I didn't want to post any close up picture of the paddle since we have applied for a patent and we don't want the industry try to rip our design off (see the case of the electric bilge pump).

Anybody seriously interested in commercially manufacturing the paddle should contact me at gnarlydognews(at)gmail.com

24 February 2011

SHOP: retractable grab handle

The latest addition to my fleet of kayaks needed a toggle handle to be repositioned since I deemed it to be attached in a dangerous location.
The kayak’s deck is designed to accommodate an optional rudder and the designer could not attach the grab handle at the stern of the kayak since it would interfere with the rudder.
I have previously detailed the reasons why I regard some grab handles and its position on some kayaks dangerous. After a few pinched fingers and a bruised knuckles I now like to have all of my handles attached at the ends of my boats.
I believe that the best handle on a kayak is the single cord (not a loop) one from SKUK (Nigel Dennis).
SKUK grabhandle (c)
handle on SKUK Exporer
While some argue that it is not as easy to use in an emergency towing situation (no loop for a carabiner to be attached to) I prefer that type of set up to prevent injuring my fingers.
One thing that I don't like is the banging that the handles produces when the kayak is paddled in textured waters. Some other set ups (like Valley kayaks) have a bungee cord tensioning the handle back onto the deck which stops the annoying banging.
Then it dawned on me: why not combine the two? Why not tension the single line?
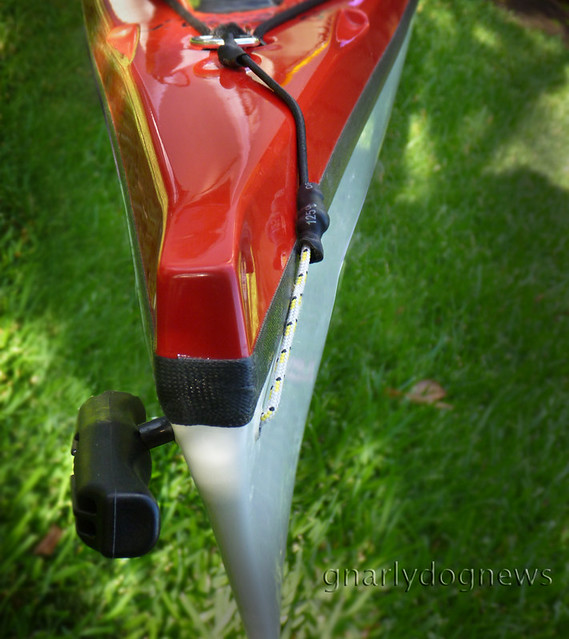
retractable handle_3
the handle was originally attached on top of the deck
While simple in concept the details of the execution and the quality of materials for this handle set up must be first rate.
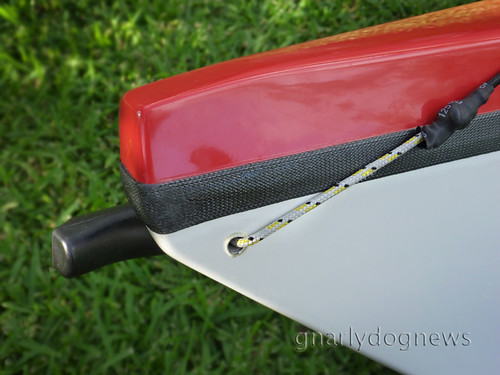
I used a sheeted Dyneema core 4 mm line for the cord and quality bungee cord for the retracting/tension section.
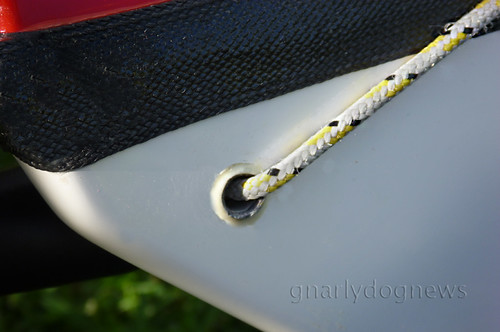
retractable handle_4
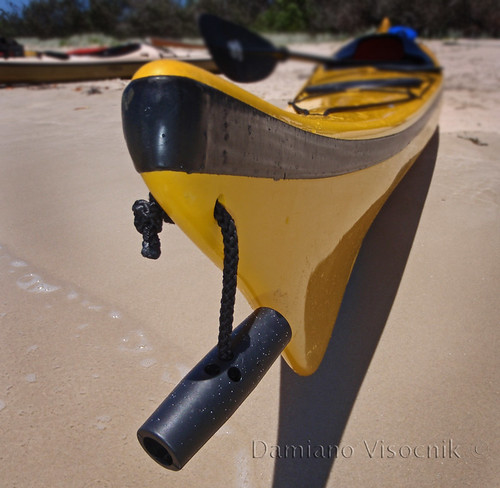
Dyneema line through a sleeve in the hull
A knot joins the two and a bit of heat shrink covers the ends to make it look neater. The knot stops the cord from being pulled through the sleeve in the hull. The bungee is attached to the toggle's original anchor point on deck.
retractable handle_2
Dyneema/bungee junction
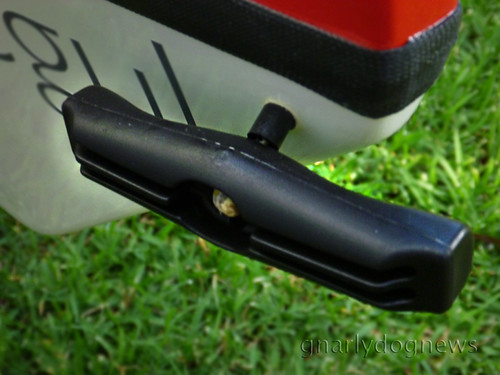
The handle has a short stand-off from the hull so it can be grabbed easily when in a hurry (like in the surf).
retractable handle_1
handle with stand-off
The idea of having a retractable handle came to me after I had drilled and sleeved the end of the hull of my kayak.
If I had to do it again I would position the sleeve on a slant to alleviate the (right) angle of the hole and have it more in line with the toggle cord. That would achieve less friction when the handle is pulled out and possibly reduce the wear on the line.

PS You have seen this set up here first

14 September 2010

Bilge pump system for sea kayaks_patent pending?

In late 2007 I published my installation for a sea kayak electric bilge pump (on QSKC website_ it has been recently removed by the current webmaster).
I published a variation of that installation on this blog in 2009.
The article has attracted a tremendous amount of interest and I have seen links to my article appear on many websites around the world.
USA, British and German readers are particularly interested in the set up.

Recently I have found a manufacturer that appears to offer the same set up commercially.


There are no details (images or drawings) of the system but it lists the components that are the same as my documented items.
The video on their website seems to replicate the identical set up as mine.
However what intrigued me is the mention of a magnetic switch for the activation of the pump (Bluewater website: "Sealed switch, waterproof, dustproof, operated by a sliding magnet that runs on your deck bunge cord")
To my knowledge, I was the first to publish the idea of the switch, even though it is not my invention.
I am not aware of any other publication showing the magnetic switch assembly.

I do know that manufacturers occasionally scan my blog for ideas and some actually use my findings on their products.
There is nothing wrong with that, or I would keep my tinkering ideas to myself.
What makes me a bit dubious is the fact that Bluewater claims a pending patent to the system.
Bluewater makes no mention of the alleged patent number (most manufacturer don’t divulge that) but I have not been able to find any documentation of such patent in my searches.

There are a couple of scenarios: Bluewater could have applied for a patent that is not directly related to the bilge pump system that I have documented or they are just bluffing to scare competition away.
Bluewater has not replied to my queries of patent application date, and probably won’t :-)

If Bluewater has applied for a patent of the existing system, it will not be valid.
The electric bilge pump system has been used for some time now (documented on several websites) and the magnetic switch documentation is not recent (Feb 2008)

Gnarlydog News ideas are published for the benefit of the private public and not for the monopolization from the industry.
I want to keep sharing my findings with fellow adventurers that might benefit from my projects.

18 August 2009

Review: iStick by Vanilla

A recent trip of 5 days to Fraser Island gave me the perfect opportunity to test a prototype paddle of my design and executed by Vanilla.
Fraser Island's western shores are on Hervey Bay where at the moment humpback whales are visiting on their annual migration from Antarctica.
The whales are present from around mid June to early September and then return back to the south cold waters to feed again.
The sheltered waters of Hervey Bay offer the perfect opportunity to observe this marine mammals from the kayak.
A previous trips to the bay has been very successful but last year's outing was not as good: we saw only one whale.
To increase the chance of whale encounters MEI has engineered a new revolutionary tool that attracts whales.
The iStick (TM).
In joint venture with Vanilla (he has been carving Aleut type paddles for some time now) we have come up with the ultimate whale watching paddle.
What? a paddle just for whale watching?... get out of here.
Well, I figured that whales are attracted to whale songs.
After some research I was able to find some recordings of whale songs on the net.
I downloaded the songs from http://www.oceanmammalinst.org/songs.html into my iPod.
The challenge was on how would I play the songs to the whales.
I was lucky to find some waterproof speakers from a local distributor (
http://cpc.farnell.com/1/1/46402-mini-waterproof-speaker-2w-8ohm-k50wp-2915-visaton.html ) and decided that I could play the songs while submersing the speakers into the water. Sound travels very well under water.
Suddenly I had this great idea: integrate the speakers into a paddle.
back side (non power face) of the iStick TM
Vanilla was able to help me out with my idea.
His paddles are made from easily carved wood (western red cedar) and would lend themselves perfectly to the modification.
A laminated version of the paddle had to be made to house the speaker wires.
I found a really good waterproof connector (http://nexinc.thomasnet.com/viewitems/all-categories/miniatures?&forward=1) that has been placed in the middle of the shaft to plug in my iPod.
waterproof connector
The whole unit is pretty light and the weight increase from the speakers at the end of the paddle is not really noticeable.
The test paddle at Fraser Island went very well.
The paddle proved to be strong (as much as a standard Vanilla Aleut paddle) and there was only very small difference in paddle "noise" when entering the water (the speakers are on the back side of the paddle).
As far as attracting whales it proved successful.
We came across several pods and the whales seem to turn around and approach us rather close.
Since the iStick seem to be a success I have bothered applying for a patent.
If the patent application is successful (Pat. pending #6360693) I might consider commercial production.
testing the iStick TM