Showing posts with label anchor point. Show all posts

25 September 2013

Technique: pitching a tent on rocky slabs


My favorite natural environment is rock; granite to be precise.
I am not a rock climber these days but I have always gravitated to locations where exposed granite forms the landscape.
Last season I traveled to the  High Sierras, to a familiar area.
This season I chose to undertake a sea kayak trip instead where thousands of little island gently emerge from the sea and create incredibly smooth landscapes.
There is a strong similarity between the High Sierra and the Stockholm archipelago; both have glacially polished granite, the latter at sea level.
For the Sierras I chose a very light shelter since I knew I didn't need an inner tent to protect myself from insects.

PeeweeLake camp_c

For Sweden I chose a tunnel tent: a known design able to shed wind well.
I chose a non-freestanding tent over a more pitch-friendly free standing one because of weight and bulk. I dislike travelling with heavy gear and flying across the word to reach my destination usually limits my choice of equipment; there is an incredible difference between car camping and international travel.

Tunnel tents however pose some problems when pitching on hard ground.
Staking out the ends of the tent is essential  to keep the tent erect (unlike in a freestanding tent).
Since polished granite offers too much resistance for conventional pegging (like rock-hard ground!) a little tinkering on my part is usually necessary to have a secure shelter for the night.

Sunset at Windy camp_c

Instead of relying on pegs at the stake point I collect a stick and a couple of decent size rocks.
I insert the stick into the stake loop of the tent and place it horizontally on the ground where a large rock will secure it in place. I find that a rock on top of a stick is generally a way better anchor than a typical tent peg pushed into soft ground.

Furthermore, where the ground is a polished slab there are usually a few cracks.
Here is where I like to place a little wired metal wedge designed for rock-climbing  (aka stoppers, nuts, rocks etc).
A carefully placed wedge is bombproof and no amount of wind will rip that anchor out.

rock anchor_c
Black Diamond stopper
In locations where there is little to no trees, or large boulders to create a wind break, I am confident that my tunnel tent will stand  up to strong winds, even without any pegs secured into the ground.

Windy on Magic_c

rock anchor_gdn
Omega Pacific wedgie


12 July 2012

GEAR: sea kayak sail_update

.
Several years of using sails on my sea kayaks has lead to refining my initial set up.
I no longer sew my sails but I still create my rigging, using custom made carbon masts.
On some narrower kayaks my sail set up was not as bombproof as I would like it to be where in a strong breeze (above 20 knots) the mast would not keep vertical and the little polymer base would deform under the lateral pressure of the wind. In a beam wind I would like to have my mast in a vertical position, making the sail more efficient and increase a bit of speed.
Mick at Flat Earth Kayak Sails has developed a brilliant way to reduce the down pressure on the flexible joint and is now shipping his sail with a new system where the mast contacts directly the removable fitting.
I want to use carbon fibre masts but I have been unable to find an off-the-shelf mast that would replicate Mick's system.
Not wanting to bond aluminum to carbon to create the oversize sleeve for the mast, the only way I could achieve what I wanted was to modify my existing masts to create the sliding foot sleeve.
mast base_sleeved_c
mast uphauled
Instead of having a larger diameter mast running the whole length, I just made a short sleeve out of glass fibre tape wound around a tube of slightly larger diameter than my carbon mast. Once cured I bonded a the sleeve section to the base of the existing mast and covered it with carbon cloth for strength, and looks :-)
The sleeve section slides over a stubby base with the flexible polymer allowing the mast touch the actual hard surface of the red plastic base.
No load is now exerted on the polymer so it will no longer deform when the mast is uphauled and cinched down hard.
mast base sleeve_c
mast lifted for demo purposes
Of course the mast can still be lowered as before and when the sail is folded onto the deck the mast slides back up just enough to allow the flexible polymer do its job.

mast folded_c

To prevent the sliding mast and the stubby base come apart I have used a short piece of shock cord threaded internally holding the two together.

boom junction_c

I have also improved my anchor point for the stays on the mast.
I no longer use a stainless steel ring riveted with a saddle to the carbon tube but I prefer the use of soft Dyneema core line bonded directly to the mast with a section of carbon fibre cloth.
The load is distributed better and there is no risk of cracking the thin carbon tube with the pressure of installing (pulling) a stainless steel rivet.
mast stays junction_c
mast rotated to show the carbon cloth anchor for the Dyneema cord
I have been using the new recessed anchors with great success, locating them right on the seam of the hull/deck to achieve a wider stance and a better load angle.
The stainless steel shackles are now heat shrunk (see warning below) to the Dyneema stays so they don't rotate when the sail is lowered on deck.

anchor and stays_c

The whole assembly, viewed from the bow.
on beach_c

WARNING:
update 04JAN13
Richard Sharp from SEQSK has this to say:
"I had the sail up in 20knots and got hit by a gust which tipped me in. It
was at that point that I noticed the sidestay had snapped. Finding it hard
to believe that this was possible given the breaking point of spectra, I
examined the break closely. It was then that I discovered that where it had
snapped the internal spectra cord was melted together. See the enclosed
photos."

P1010037

P1010038

It appears that the core has melted while the outer sheet remained OK.
Using a heat gun at close quarters causes the Dyneema/Spectra fibres to fuse and become very weak.
The melting point of Dyneema is much lower than the outer polyester (pictured here black) and no noticeable damage was visible from the outside.
He now prefers to use the heat shrink only over the loose end of the rope, not over the entire knot and apply very gentle heat for longer to allow the tube to shrink.

image001

20 March 2012

Outfitting a sea kayak

Here is a summary of the outfitting and modifications that I do to my kayaks.
Not all kayaks have the same amount of work done and some outfitting is not shown here.
Some kayaks have more work than this one but those modifications (camera mounts) are not relevant to general paddling.
Most of the work depicted here is only possible on a composite lay-up and I use exclusively West System for my fiberglassing.
I currently don't have any ruddered kayaks in my fleet so there are not details of previous modification done to rudders.
Here is on overview of outfitting of a recently acquired British style kayak.

Kadtzait on Lego_1

The numbers are referring to modification or additions that I have permanently attached to the kayak. Other items that are added for a particular outing are not depicted.
Each item that is light-blue has a hot-link pointing to the relevant article in GnarlyDog News.

Kadtzait bow
Bow
1) retractable grab handle, replacing factory looped ones
2) pulley (block) for Flat Earth sail. Attached to deck anchor via Dyneema line
3) short tether line for quick anchor to piers (no article)
4) mast base for Flat Earth sail;  under-deck is reinforced
5) recessed anchor for side stays (sail). Dyneema loops
6) protective tape for mast/boom joiner (possibly scraping deck when sail lowered_no article).
7) 3M Dual-Lock fastener for removable compass (often removed when surfing).
8) pulley (block) for boom of Flat Earth sail. Secured with recess anchor and Dyneema loop

Kadtzait midship
Midship
9) bungee loop for stowing lowered sail
10) cam-cleat for trimming boom
11) slim profile tow-line
12) cleat for up-haul on sail
13) paddle leash (anchor point)
14) magnetic switch for bilge pump
15) replacement DIY fiberglass seat
16) replacement back-band: Immersion Research (no article)
17) electric bilge pump
18) bilge pump outlet, away from the cockpit to prevent water being pumped back in
19) drinking system (below deck)

Kadtzait stern
Stern
20)  protective "deck thread" tape for spare paddle (prevent scuffing)
21)  retractable grab handle
22) clip-on flag for car topping transport (removed before launch_no article)

10 January 2012

SHOP: sail mast base on Valley kayak

Following Jim's set up for a sail mast base on a Valley sea kayak utilizing the compass recess, I want to detail here a fitting that requires no additional holes drilled to the deck.
On the Valley decks there is usually a fitting that holds bungee cords in place typically used for stowing split paddles on the foredeck.
I have a hard time placing a paddle under those bungee cords and prefer the paddle parks.
Actually these days I prefer to carry a Greenland style storm paddle on the rear deck.
So, that fitting on the deck is the perfect anchor for a sail mast base.

Valley deck fitting recess

I remove the fitting and grease up the cavity/recess with several layers of mold release. I find that a final layer of PVA mold release works best before I fill the cavity with epoxy paste (I mix epoxy, microfibre and filler to the consistency of peanut butter).

filling cavity

Working-in the paste ensures that there are no air bubbles. I build the base high sitting proud of the deck.

filling cavity_2

glass layer

I add a layer or two of fibreglass to keep the epoxy paste from running too much

flattening top

A final layer of kitchen cling wrap to be able to shape the paste into a neat bump and I place a square object to create a flat surface.
Once the epoxy cures overnight I pry the fitting out of the mold and smooth it with sandpaper. There will be a dimple where the original bolt held the deck fitting: that's where I drill through the sail base and countersink the top to accept a new longer bolt of the same thread pitch (M6, metric). I cover the mast base with a layer of carbon (just for looks) and UV stable epoxy (West System 105/207). I make sure I push the countersunk area down to maintain the recess for the bolt's head. Often I place a small greased-up plastic cap just of the right size with a tiny weight on it to keep the wet carbon cloth in place.
Once cured, I drill through the last thin carbon layer to insert the central bolt.

Central bolt

The base of the mast is carefully positioned onto the carbon base and holes drilled to accept the fasteners.
A recess is needed for the nuts underside making sure they clear the deck.

underside

I use M4 stainless steel Allen key button head fasteners and nylock nuts.

fastened to deck

The plastic red base is bolted to the carbon base which in term is secured to the original Valley factory anchor on deck.
The base does not rotate because of the recess. No holes were drilled into the deck for the mast base but I still needed to create some recessed anchors for the mast stays.
I also reinforced the underdeck area with a rib fabricated from foam-core, fibreglass, carbon and epoxy under the mast base since the deck is too flexible.
However I discovered that this location is not ideal on all Valley decks. The deck fitting is not located in the same place on the different model Valleys. One of my Valley kayaks tends to leecock when paddled at slow speeds.
Just like when I used to windsurf, where I tilted the mast back to turn into the wind, I have now tilted the mast of my Flat Earth Sail backwards to give the kayak a neutral direction in beam winds. 
Video of sailing with this kayak and the new Code ZERO Flat Earth Sail coming soon.


.

01 December 2011

SHOP: removable sail rigging

In my previous post I have detailed how I install cat rigged style sails (Flat Earth Sails for example) onto the deck of my kayaks.
The anchors, cleats and mast base are permanently secured to the deck and require several holes to be drilled through the fibreglass deck to have the bolts secure the items.
Some people cringe at the idea of drilling holes in a brand new kayak especially when experimenting with equipment that they are not familiar with.
My early sail rigs had the cleats mounted too close to where my hand would occasionally brush when paddling in a low angle style.
A few hits of the knuckles on the sharp edges of the cleat made me relocate them and plug the holes left behind by the fasteners.
My friend Jim has not done a lot of kayak sailing before and was unsure if he would like it on his Nordkapp LV.
He decided to minimize the damage that an ill fitting sail rig would do to the deck and devised a system that would keep his deck clean when he did not want to use a sail.

For the mast he used the existing recess where normally a 70P compass would be fitted. He fabricated a base out of fibreglass that has the identical hole location as a compass. He does not use that type of compass but he believes the recess and the complex fibreglass profile of the deck in that area is a very solid location for the mast base. He did not need to reinforce the deck since no flex is detected when the sail is deployed, even in heavy winds.
Jim's set up3

Jim had to drill holes for the stay anchors; unfortunately a Nordkapp LV does not have perimeter-line anchors suitably located to double as stay anchors.
The rest of the cleats and pulleys (blocks) are mounted on a custom made piece of fibreglass that contours the deck of the kayak.
Jim's set up1

He simply waxed the deck of his kayak with mould release compound (even grease would work in a pinch) and laid up several layers of glass cloth and resin. Once the laminate cured he padded the underside with a thin layer of closed cell foam to prevent scuffing of the deck and installed the necessary hardware to secure the uphaul and trim the main sheet. He used sections of stainless steel welding rods embedded into the laminate to create guides for his lines but stainless steel saddles could be used as alternative.
Jim's set up4

His "plate" is held back by a thin line that loops around the coaming of the kayak, and in the front, under the deck bungee cord. The coaming line takes most of the load, the front bungee just keeps the plate close to the deck.

Jim's system can be removed in seconds when he does not use his sail. The base for the mast remains attached up front but there are no cleats and pulleys to clutter his deck.


PS 02DEC
Owen Walton has sent me these images of his sail set up.
It requires one more stay (back stay) but the sail can rotate freely 360 degrees.
The plastic cleats are low profile.
Deck cleats

Deck fittings

03 August 2011

FAIL: sail set up

I have noticed an increase in popularity of the single-mast sails for sea kayaking. I find the forward (of the hatch) mounted sail to be the easiest and most efficient sail to use while paddling.
I never liked the twin mast one and even less the step mast ones where the sail would interfere with my paddling stroke.
I believe that a collapsible mast is a safe sail too, taking only a split second to depower when the wind suddenly becomes just too strong to sail.
I currently use Flat Earth Sails and while they are more efficient than similar style sails (lateen) they require thoughtful mounting.
I have seen and read about sails that have failed when the breeze picked up above 15 knots; surprisingly those failures could have been avoided if the sailor would have set them up correctly.

A single mast sail should be kept as vertical as possible when sailing since tilting the kayak away from the breeze usually spills the wind and slows the boat down.
While often unavoidable, a paddler should counteract the heeling of the kayak to maintain proper balance and forward momentum.
When I set up a sail on my kayaks I take a fair amount of time to create the perfect-length stays. I  secure high quality line (always Dyneema) to a very solid anchor on deck.
My anchors are spaced widely apart on the edge of the kayak's deck. Using existing deck fitting for anchors only works if they are in the right spot.Early experimentation demonstrated that stays too close to the base will not keep the mast upright.
Proper length stays are a critical component to successful sailing.
As unsolicited advice can be met with contempt, I often refrain from commenting (on the spot) when I see a set up destined to fail.
I have witnessed stays attached to the kayak's perimeter lines because the owner didn't want/care to create proper anchors for the stays.
When perimeter lines do stretch under the strain of the wind the mast would then often collapse.

sail2
not so good set up
Needless to say the paddler would then blame the sail manufacturer and tout that his sails are rubbish.

So how do you set up the sail to keep up in strong winds?
I mentioned Dyneema line, in my opinion the crucial part. Nylon stretches when wet and elongates under load.
Secondly I make sure that the stays are just a bit on the short side. When the wind loads the sail the polymer mast joiner (base) deforms a bit and compresses. A stay that is a bit too long would then angle the mast precariously.
sail set up
sail about to collapse
Lastly I make sure that the deck of my kayaks don't flex under the base of the mast.
Most kayaks' decks are not designed to take a concentrated load in one spot. Peaked decks are better but often still not strong enough.
Since I don't like creating metal plates externally under the mast's base, I prefer to reinforce the deck of the kayak internally. A few layers of quality fibreglass cloth (even carbon, if I have any scraps laying around) make a much neater set up than agricultural looking metal plates, in my opinion, and lighter.
Tess with FEKS (c)
sail set up with mast in upright position
I use quality cleats that keep the uphaul line in position. I hate nylon cleats that let the rope slip.
A tensioned uphaul will keep the mast upright.
And finally the fasteners that keep the stays attached to the deck anchors.
I don't use snap links and even less clasps.
Nothing is more solid, secure and unobtrusive than a proper small "D" shackle.
It might take a second longer to secure it but I am positively sure it won't let go.

So, if your sail set up has failed you consider checking the above pointers.
If any other cause is not keeping your sail upright I might be able to advise you on a solution.

JUL 2012: updates on sail set up here
.

07 July 2011

FAIL: a list of problems

After a few years of sea kayaking and having owned nothing less than 13 sea kayaks and personally worked on 10 belonging to other people I have seen a few weaknesses in design and manufacture.
The list that follows is my personal experience of actual fails that I have observed up close. Fortunately not all on my kayaks J 

1) The most common failure I had on my composite sea kayaks (I have never owned a plastic one) is cracking of the laminate.
Occasionally the hull of my kayak hit a rock and produced damages of various degrees: on one occasion holing a thin laminated hull with surprisingly very little impact force.
Some other cracks in the hull have occurred from stressing the boat in heavy seas. The cockpit area is particularly prone to stress since there is no deck to create a solid monocoque structure.
The hull under the seat is at its widest and flattest area: compression and flexing of the hull is common even on high-end kayaks. I have reinforced all of my current kayaks (apart from the hard chined Zegul) with a layer of carbon/Kevlar or double bias carbon to strengthen and stiffen a weak cockpit. 
reinforced hull_c
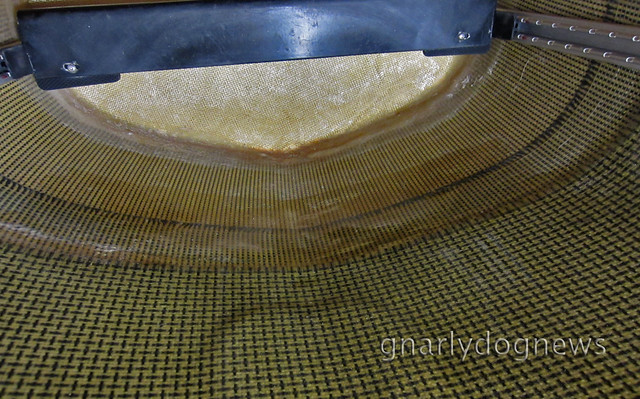
additional layers of carbon/Kevlar in cockpit area
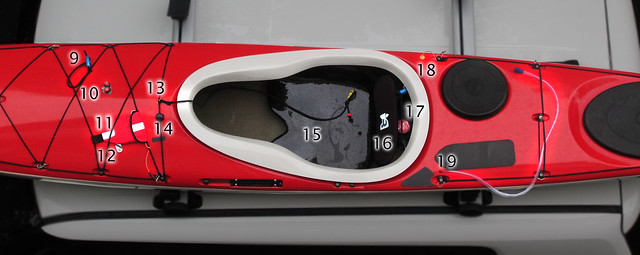
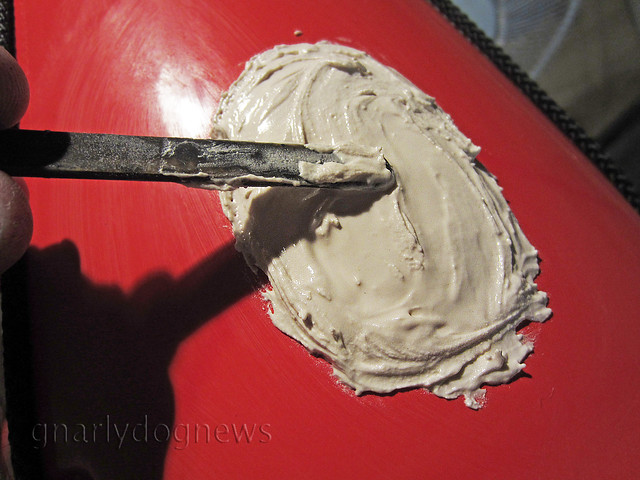
2) The cockpit coaming/deck joint has so far cracked in all my latest kayaks unless reinforced. These days I put a new boat on the “blocks” before it even hits the water. I remove any foam padding in the thigh braces and laminate the area with carbon.
In the boats I have not done so I have eventually stressed the deck enough to create hairline cracks in the deck. When rolling and edging in the surf, the kayak sees a lot of upward pressure from bracing with my thighs. Manufacturers rarely address/reinforce the coaming.  
reinforced thigh brace area
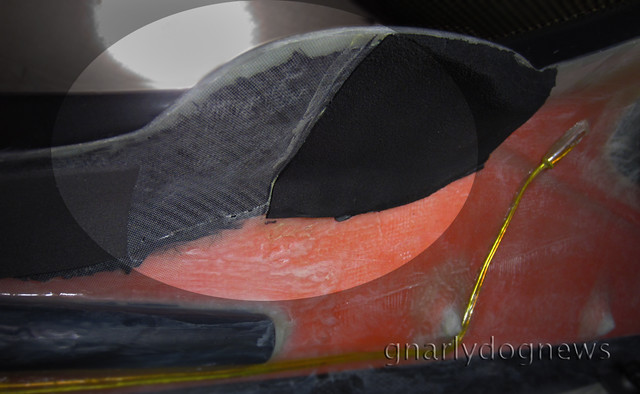
layers of carbon reinforcing the coaming/deck junction in thigh brace area
3) Speaking of junctions, the other common failure is the seam of the hull/deck. So far none of my kayaks have suffered a leak there but I have seen numerous kayaks without external seams develop a hairline crack that inevitably results in water entering the hatches. Adding a cosmetically acceptable external seam to a friend’s cracking kayak has been very time consuming. I only use epoxy for my work and I finished the seam with a coat of UV resistant black resin. A flow coat would have been easier tho… 


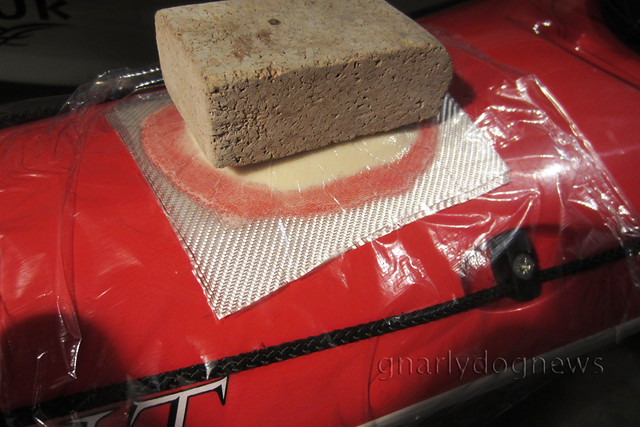
4) And while I talk about cracks I should mention that most kayak manufacturers skip on the design and strength of the deck. The inexperienced might be fooled by a thick lay-up but rarely does he/she realize that glass-poor chopped strand (chopper gun lay-up) is suitable for very tick laminates like in a motorboat but are very poor executions for a sea kayak. Problems start to occur when a person needs to climb on the deck of a kayak in a recovery. So far I have repaired and reinforced half a dozen decks that failed under the weight of paddlers. On the other hand, my very light Chinese kayak has a core laminated deck making it extremely resilient. Other kayaks I now own have fabric instead of just chopped stand in the deck lay-up, and so far have held up very well.  
deck reinforcement_c
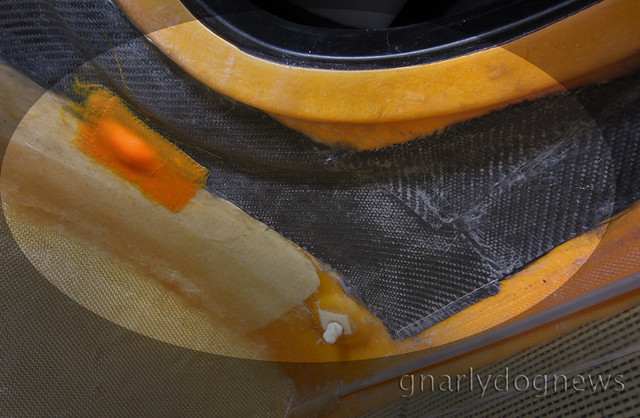
underdeck hatch cover coaming area reinforced with carbon cloth
5) Leaks to the hatches are often lamented by sea kayakers that paddle in conditions that will see water wash over the deck or proficient rollers that submerge the hatch covers.
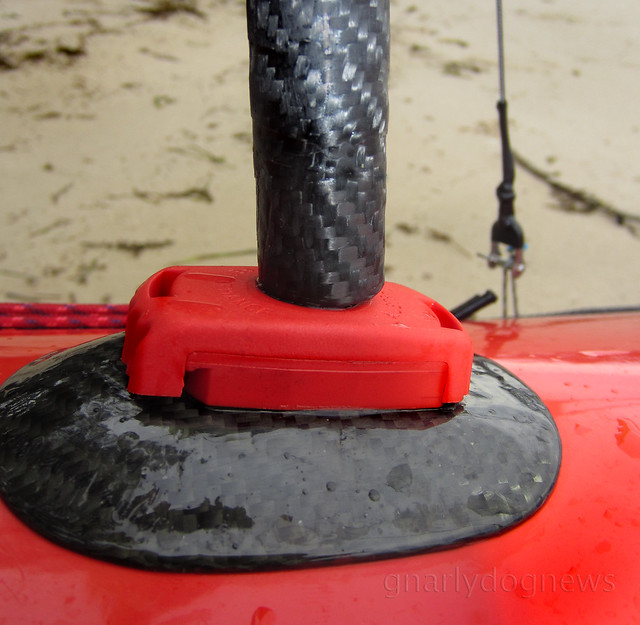
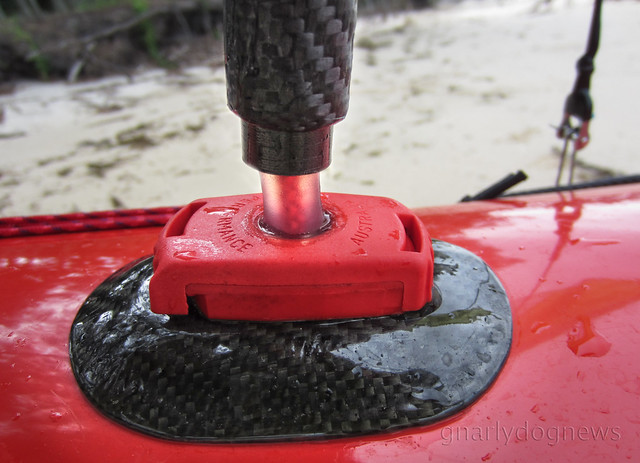
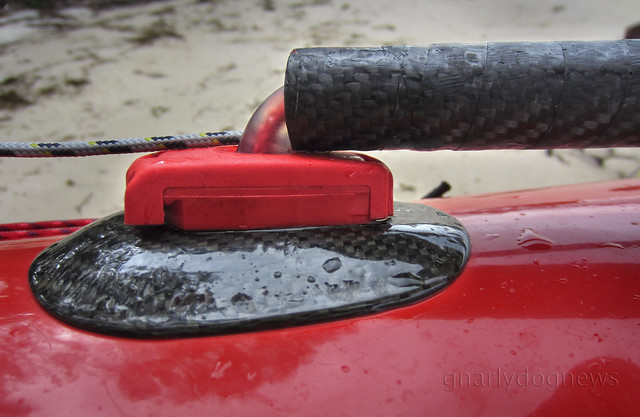
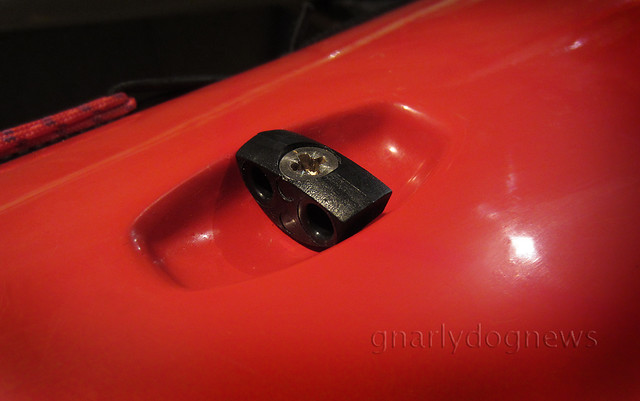
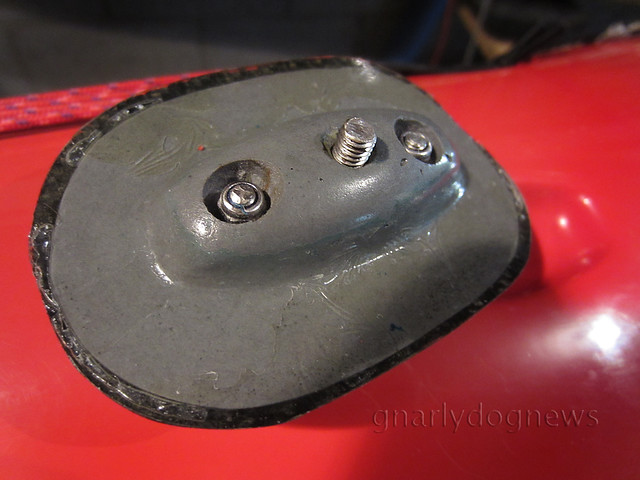
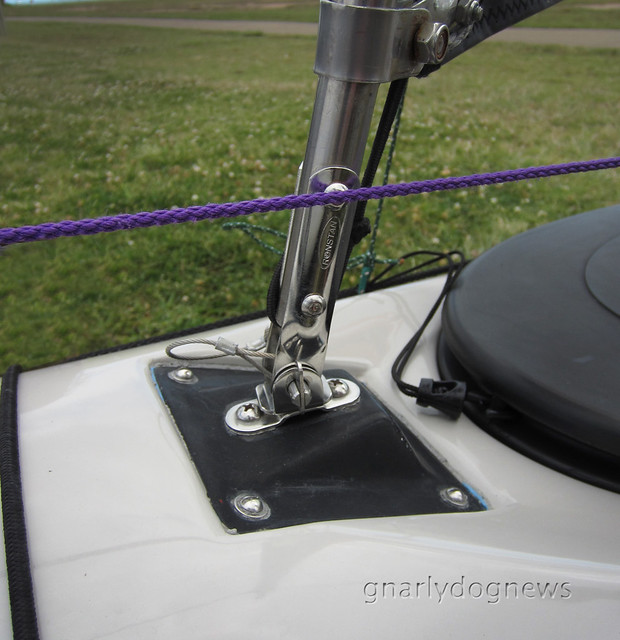
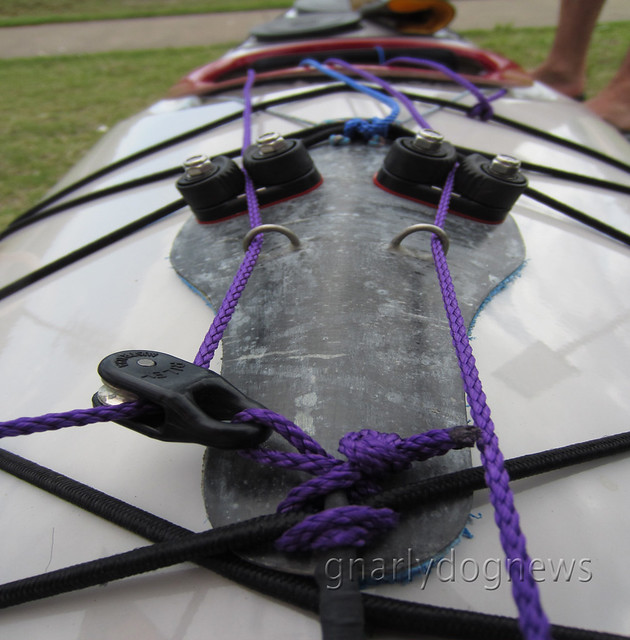
I have had a few hatches leak. The most common problem has been water ingress from fittings on the deck.
deck fitting_c
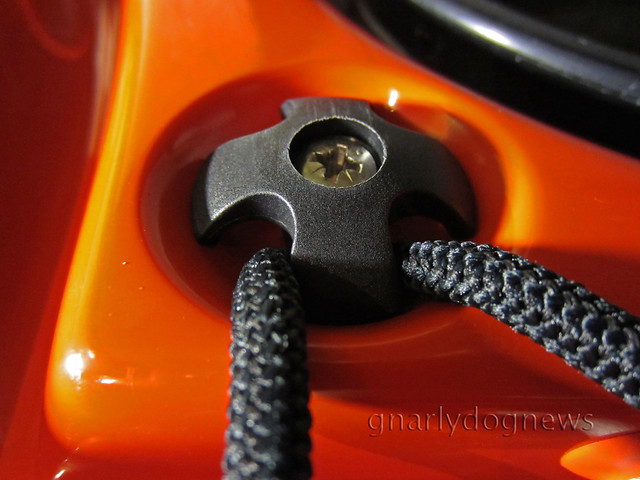
deck fitting "well" where water pools
The little well where the hardware is bolted to the fiberglass holds water that slowly seeps through to the inside if there is no proper sealing under the nut against the deck. Kayaks that have recessed deck anchors don’t have that problem.
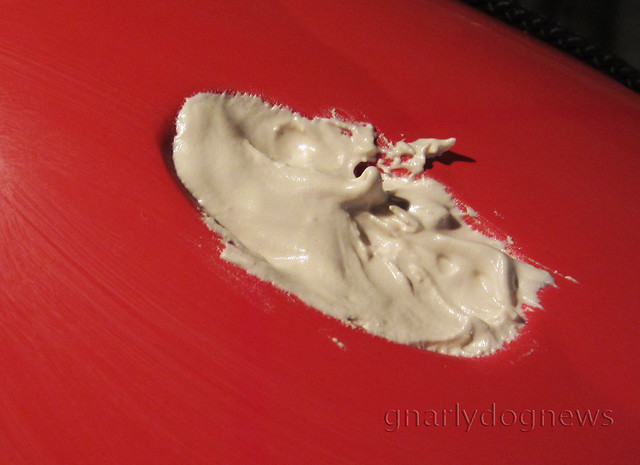
I had leaks coming from the junction of the hatch’s rim where the bonding sealant was not completely encompassing the rim. All it takes is a small section left out and water will seep in.
I have removed poorly fitted hatch rims and resealed them with polyurethane or epoxy glue. 

6) Hatch covers are also prone to leak. So far only Valley and Kajak-Sport hatches have proven to be leak proof in my fleet. All other have leaked, even if often just minimally. Mind you, the Valley hatch covers have a reputation of deteriorating sometimes prematurely. Replacement of those is not cheap. Luckily there seems to be improvements on the quality of the Valley hatches and there are less reports for the need to replace them too soon. Excellent alternative/replacement hatch covers are available from SEA-LECT Designs.

7) While most leaks occur from the top of the deck I have repaired 3 kayaks with leaking bulkheads. On one occasion the seal around the fiberglass bulkhead was not that great: a small amount of epoxy glue fixed the little hole. In two other instances I had to fabricate new bulkheads since the factory ones were made out of closed cell foam. It is just a matter of time before a foam bulkhead will leak. If a kayak is used in waves the hull/deck will flex enough to separate the weak glue that bonds foam to fiberglass (things get really ugly in plastic kayaks). Lifting the kayak by the rear of the cockpit coaming will separate the foam too. To date I have not met anybody with dry hatches in a kayak with foam bulkheads. I would only choose a plastic kayak that has welded plastic bulkheads.

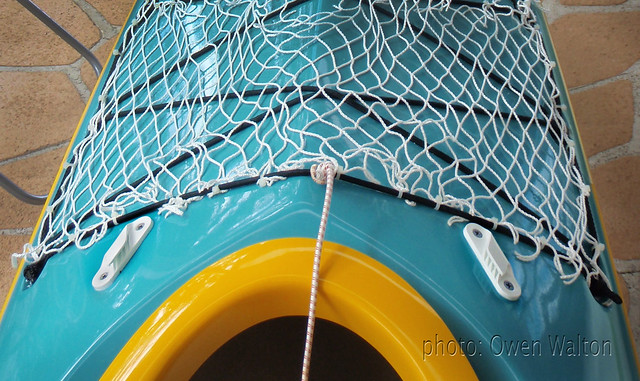
8) Small leaks to the cockpit area usually go unnoticed since water entering through the tunnel of the spray deck is greater than around the coaming junction. There have been however a few cases (not mine) where the rim was so poorly bonded that a low-deck kayak was flooding every half an hour. A large section was left out and not bonded at the factory. I have also observed a brand new, very high-end British kayaks, that had a visibly separating rim. It pays to inspect the new kayak before purchase.
coaming separating_c
coaming separating from deck
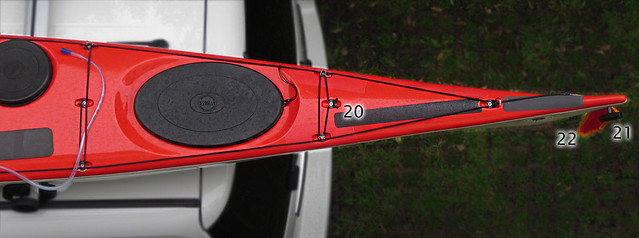
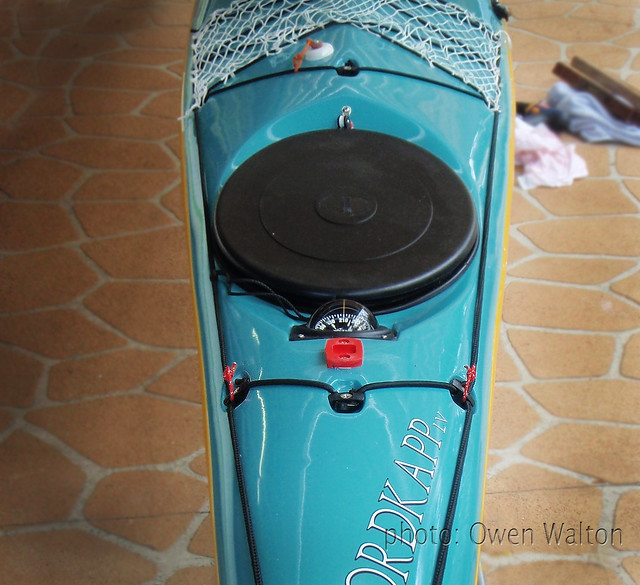
9)  Last but not least leaks can occur from skeg cable housings or rudder lines. I had a badly glassed-in skeg box that leaked substantially. Gel coat concealed the cavity and only a small crack was visible inside the recess. Epoxy glue fixed the problem.
Rudder lines leaks can be a bit trickier. If the housing has worn out (result of constant abrasion of the stainless steel cable by operating the rudder) the water that enters the tube will leak into the hatch. Replacing the cable housing is often a pain. 

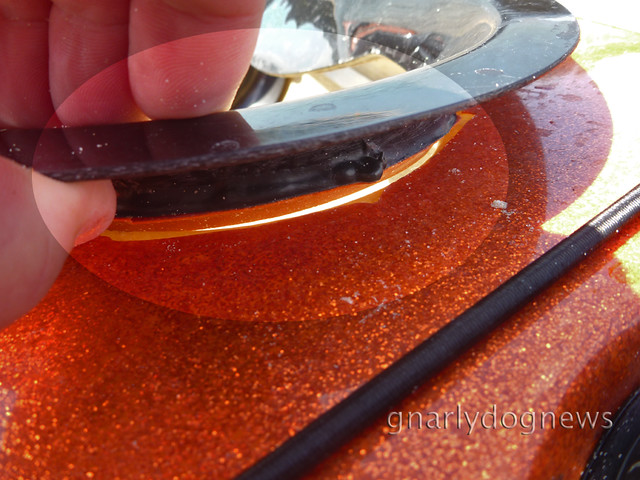
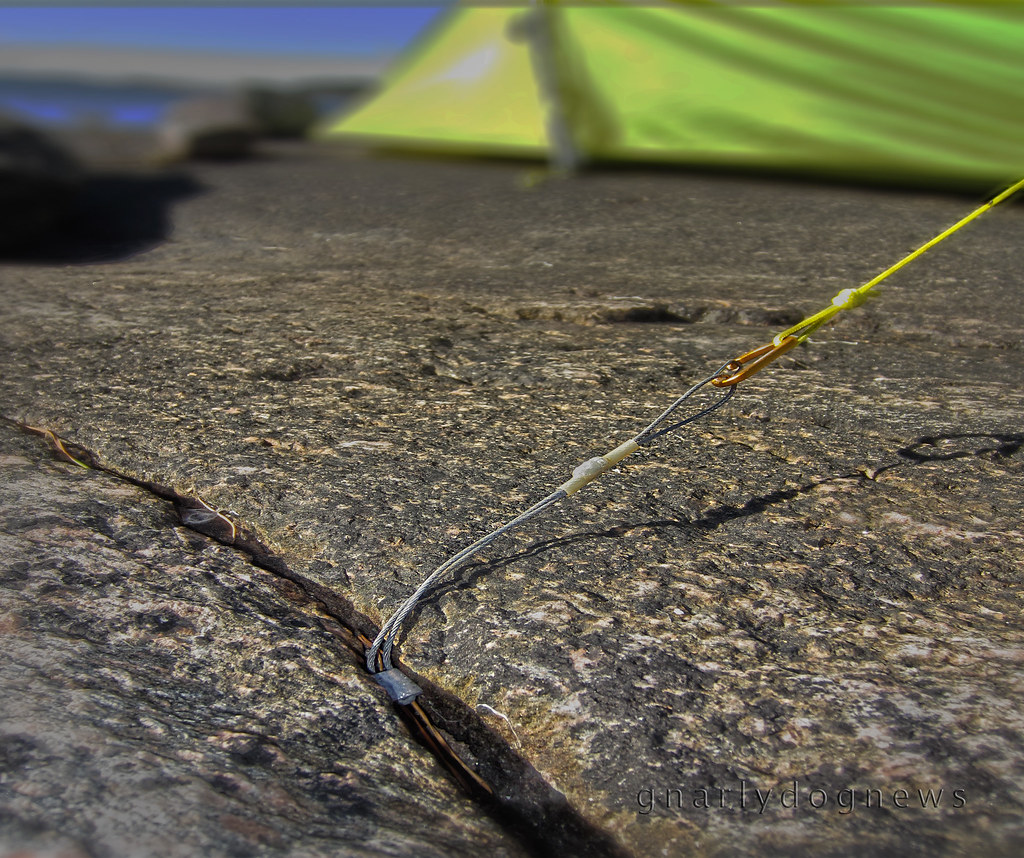
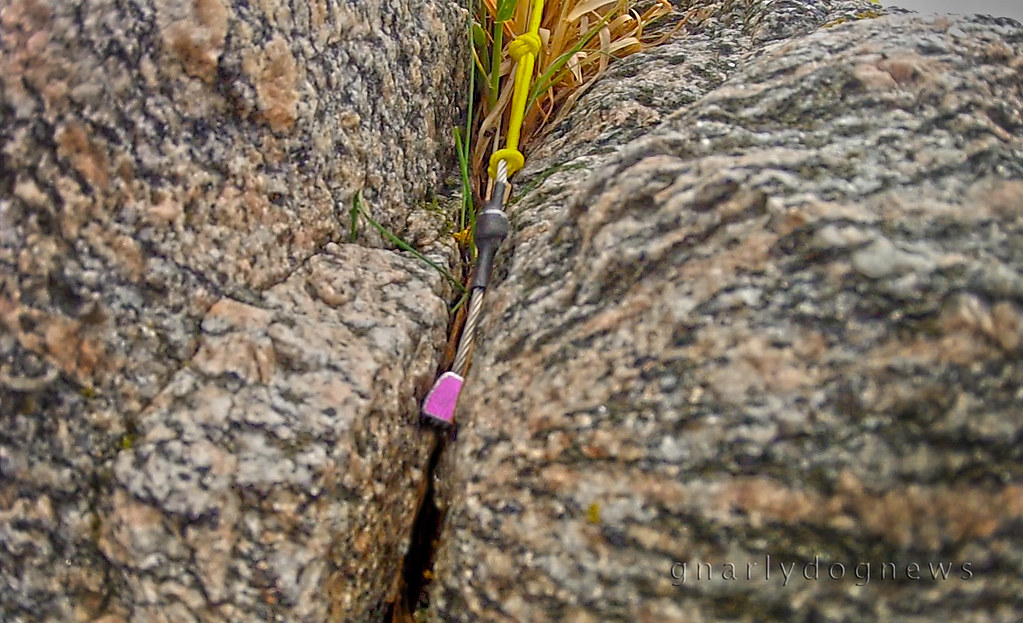
10) And while I am mentioning cables I also had a few rudder cables snap on me (that’s when I still used to paddle ruddered boats). The stainless steel wire fatigues and after a while (that depends on how often you paddle) it snaps. It was no fun trying to keep that kayak go where I wanted without a rudder. While I find skegs more reliable (never kinked one myself) I have seen several malfunction. Sloppy workmanship at the factory will create sticky cables. A skeg that has resistance can kink the cable when one forgets to retract it on landing. A smoothly operating skeg will usually just retract without the paddler even noticing. I find rudders on a kayak a weak tool to keep directional stability. While without doubt they are more efficient when one’s goal is to just eat miles, I had a few snap on me when in rough waters. Don’t try reversing in surf with one deployed. I also ruined one being retracted on deck since most retention systems for stowing it on deck are not secure enough for surf work. 

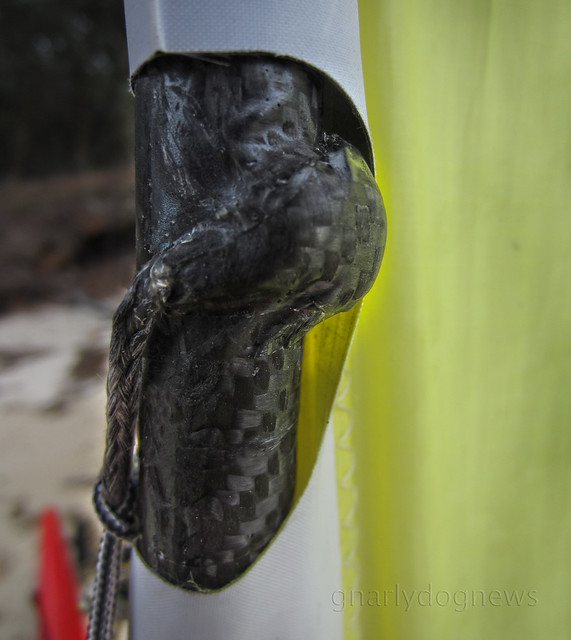
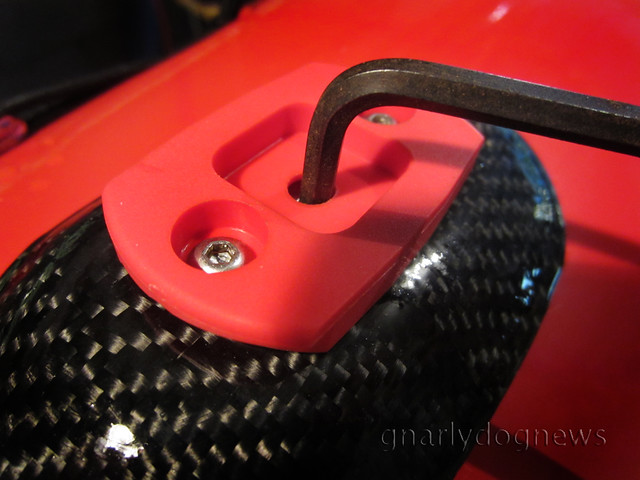
11)  An area of weakness and potential failure can be the carry-handle mounted to the deck. Some kayaks have simple bolt-on (in some cheap plastic kayaks it is just pop rivets) carry handles. Carry handles are not designed to pull a kayak loaded with heavy gear but some handles are secured to such thin laminates that struggle to lift the weight of the kayak alone. In one very bad case I have seen the whole handle rip out of the deck. Needless to say that reinforcing the deck so far in the bow or stern is really difficult. My preferred carry handles are positioned at the very ends of the kayak, with a line threaded through a hole at the seam of the hull/deck. More on grab handles safety issues here 

12)  Last but not least: the seat. I have cracked several seats in my kayaks. Incidentally the seats that failed were thick and heavy. So is there no seat strong enough for my paddling? Yes, there is: a decently laminated one!
I have noticed that most sea kayak seats are constructed with real cheap resin-rich chopped strand. As mentioned before this type of material is not suitable for light applications. The seats that have not failed on me are made from several layers of woven fiberglass, often reinforced in stress areas with Kevlar. Unless a weak hung seat is secured to the bottom of the hull to prevent it from swinging side to side the chopped strand will often not last too long before starting to crack in the corners. Repairing it involves removing the seat and reinforcing it with quality woven fabric. See this article for more info.

There are a couple of other  items that I have seen fail but they are accessories. I will write a separate article on those issues some other time.

24 February 2010

SHOP: recessed deck anchor

On my Mockpool I needed an anchor for the main sheet pulley of my sail.
I did not want to use the same style as the stay anchor that I have documented here but I was after a recessed fitting.
In the past I owned a Raider sea kayak and the clean deck free of hardware anchors for the perimeter lines really appealed to me.
The Raiders use through holes as deck fittings.
While very clean and very strong those fittings are a bit harder to make than your standard bolt-on stainless steel saddle.
I selected a section of the deck that was free of bulkheads and other under deck fittings.
Using a high speed drill (Dremel) I made two parallel holes large enough to fit snugly a polyethylene tube (Ă˜ approx 8 mm ).
The tube is about the diameter of the cord that I wanted to thread through the hole.
Since the poly tube would deform and flatten on a tight radius I inserted a cord inside the tube that will prevent kinking of the tube.
The tube fitted snugly and it was threaded through the two holes.
The below pictures shows the view inside the kayak.
The tube was pushed hard against the under deck leaving just a small gap.
I mixed and tinted a small batch epoxy and microfibre to the consistency of firm peanut butter.
Working through the small front hatch I pushed the paste into place by forcing it with my fingers into the gap between tube and deck. This is essential since I wanted to created a tight seal around the tube with no voids.
It was all done by feel since I could not see inside the kayak.
The tube would be later removed and any gaps would leave a hole.
Untinted epoxy would have made a white recess; I preferred to color match the deck.
epoxy paste before curing and sanding
After full cure, the epoxy patch was heated up with a light bulb (warm temp) to soften the poly tube.
The tube was then easily removed (epoxy does not stick to poly) and a nice clean recess was left behind where the desired fitting was inserted.
here is the "fixed" version for my boom pulley
and this is the "dynamic" version for the same pulley.
I used bungee cord to create a loop for the boom pulley.
In windy conditions the bungee allows for some give when caught in a gust and possibly preventing a capsize.
The large epoxy patch distributes the load better then just a simple stainless steel saddle or a single plastic deck fitting.
To date I have not seen any of these fittings fail while I have encountered numerous factory fittings brake (plastic ones) or rip out (single bolt on a light deck).

21 December 2009

DIY: tie down anchors for modern cars

Like most kayakes I travel to destinations where I paddle.
Probably very few paddlers are lucky enough to live close to the water so launching the boat does not involve transporting it.
Even fewer, if not launching from home, are willing to catch public transport to get to their paddling destination with their own kayak (actually I know only of Dubside that does it).
So, like majority of sea kayakers, I transport my boats with my own vehicle.

When I was shopping for a new car one of my priorities was that it would have decent roof racks.
I primarily intended to car top mountain bikes.
Only later on I found that to safely transport sea kayaks I would need to tied down the bow.
My car, being a relatively efficient vehicle that does not guzzle insulting amounts of gasoline, it's shaped to offer less wind resistance.
With that comes a front end that is rather round and with no anchor points, unlike some chunky urban warrior vehicles :-)
I have a few spots under the car where I could attach a rope but that would rub right across the plastic bumper and probably wear off the paint.
Fortunately one day I saw somebody else with the perfect solution: an anchor point that was off the car's under hood ("bonnet" in Australia).

Holden (Opel) Zafira's front end with webbing for tie down.
All I needed was a simple section of flat webbing and a washer.
The strap is 5" long, folded in half to create a loop.
I used a nail, heated up on a flame, to poke a hole through the webbing of the strap and the same time seal the hole and preventing fraying of the fibres.
Most times the bolts that mount the mudguards to the body of the car might be just in the perfect location for an tie-down anchor point.
In my car the hood is very "slopy" and I need a very forward anchor point: I drilled a hole closer to the end of the hood .
I used stainless steel hardware so I would not have corrosion problems later on.

The webbing loop can be tucked away under the hood when not in use.
My friend Greg Schwarz however has made a more sophisticated anchor point.
He fabricated a bracket of stainless steel that has been shaped and polished to match the car's look.

Once I had a closer look at the bracket I realized that a lot of work went into it.
It's shaped so it will fit under the hood and has a welded rib for strength.

Like anything else that Greg does his anchor point is obviously deluxe!


Anchoring a bow of a sea kayak is often overlooked and not many people do it.
I usually don't bother anchoring mine unless I envision driving the car on the freeway.
My roof rack is drilled to the body of the car (factory) and the chance of that failing is extremely remote.
However, aftermarket roof racks that are held against a car by simple brackets and don't have a solid bolt anchoring them to the roof are way more prone to be dislodged at high speed and in strong cross winds.


PS 31JAN10
The above article has been reproduced with permission at Adventure Kayak Magazine