30 December 2011

PHOTO: surfing with Flat Earth Code ZERO sail

I finally had the opportunity to give the new prototype Flat Earth Code Zero sail a decent test.
I had the perfect conditions: 15 knots of tail wind on a opposing tidal flow that created short waves.
The steep waves kept me on an edge while trying to manoeuvre the kayak and prevent myself from being dunked. A few very fast braces were necessary every so often when the kayak tried to broach. Eventually I got tired but the smile on my face lasted for hours.

Brace sailing FEKS_1
Tail wind makes for easy sea kayak surfing with the new Code Zero Flat Earth sail

.

21 December 2011

GEAR: Greenland paddle_The Hammerhead™

Guest article by Greg Schwarz.

Hammerhead storm_ret

Because I carry a "Storm paddle" as my spare, I like to practice with it quite often so it's not a problem should I really need it one day.
I now enjoy the sliding stroke so much that sometimes I forget that I'm using the storm paddle. This, however, can be a problem (in my case anyway) if I suddenly need to brace, and I extend the paddle only to find my inboard hand empty! ( a butterfly roll is a handy skill to have here!)
I decided that if I made the end armour wider than the blade, I would have a built in "stop" to let me know that I had reached the end. Hydrodynamics is a pet interest of mine, so it appealed to me to shape the armour to optimise it's "end plate" effect, ie:- To help prevent the loss of water that could be used for lift, instead of escaping over the tip. This is by no means a new concept! Greenlanders, for centuries have been putting enlarged tips of bone and ivory on their paddles to protect the timber when smashing ice etc. But was that it's only purpose? As these people relied on their equipment for their survival, I'm inclined to think there is more to it. We now know that the Greenland paddle can be as efficient as a modern wing paddle when used correctly. As the son of a professional fisherman, I know that nothing is kept onboard that is not functional. So why the enlarged tips on some paddles ?….I decided to experiment.

Oiling the stick_ret

I built a new storm paddle with widened tips. Although it was only 6.5mm (1/4") wider overall than the blade, it felt very smooth through the water. Everyone who tried the paddle made this comment unsolicited. It also appeared to give more lift, but this paddle had 1.5mm (1/16") finer edges on the blades than my normal blade, was that just the difference?

Hammerhead on deck_1

My paddling mate Steve needed a new paddle so I decided to expand on the theory and make the "flanges" larger, now 16mm (5/8") wider than the blade….We could always trim them down if they didn't work.
Steve likes fine edges on his paddles so I have yet to try this style of end armour on a thick edged blade, however, the paddle feels like it's another step up again in lift. Comparing it with a same sized, conventional paddle of mine, there is definitely an increase in lift and it is very smooth through the water.
My biggest concern was the entry into the water, but it is whisper quiet and again felt smooth. I had keep the tips of the "flange" quite fine for this reason, so I will have to get Steve to refrain from breaking ice with it… a real problem here in S.E. Queensland ;-)
I am keen to try even larger tips now! The sad part is that I now feel, all of my own paddles are obsolete!

Hammerhead on deck_2

last edited 21DEC

.

13 December 2011

GEAR: the invisible paddle.

The latest development in superlight paddles has lead to thin incredible pinnacle of engineering: the Invisible paddle.
Strictly designed for Greenland style rolling it is aimed to the advanced kayaker.
Beginners will find this paddle way too light, unsupportive and downright too difficult to use.


Expert paddlers however will cherish the flexibility that this laminated paddle (according to Helen Wilson) offers. It is also one of the lightest and most compact paddles for air travel.
I am sorry Paul, but your Northern Light paddles have met their match :-)

.

12 December 2011

SHOP: reefing the Flat Earth Code Zero sail

In a previous post I have reviewed the new Code Zero Flat Earth kayak sail.
It features reefing point to make the sail smaller when the wind is really blowing and a smaller sail is called for.
My solution to reef the sail is simple: two little loops that pull the sail to the mast and reduce the surface area. One drawback: I need somebody to help me with the reefing since I can’t be seated in my cockpit and reach the loops; they are just too far away from me.
Gnarlydog News reader Kris Carlson, a designer from Swansea MA, USA has designed a relatively simple way to reef the Code Zero sail when paddling solo.
Most of his sea kayaking is usually alone and he wants to have the ability to safely reduce the surface area when seated in his kayak.
He sent me some drawings and explanation of his idea.
Here is his concept


click on image to enlarge


Above is a composite image of his concept using Ronstan superlight plastic blocks.
Below are the itemized components from Kris:

1. Upper Reinforced Grommet in Sail

2. Upper Double Reef Block

3. Upper Webbing Strap

4. Lower Reinforced Grommet in Sail

5. Lower Reefing Block

6. Lower Webbing Strap

7. Reef System Downhaul Block

8. Mast Base Turning Block

9. Bullseye

10. Clamcleat

FEKS CodeZero_reefing_det

Installation:
Webbing straps (3,6) need to be sewn onto the mast sleeve of the sail. A double block (2) needs to be lashed to the upper webbing strap. A block (5) needs to be lashed to the lower webbing strap. A block (8) needs to be lashed to the base of the mast. A bullseye (9) needs to be installed near the edge of the deck to guide the line down the side of the boat. A Clamcleat (10) needs to be installed with-in arms-length of the cockpit. Tie or splice block (7) to the lower reef line. Tie a stopper knot at the end of the upper reef line and pull it through the upper sail grommet (1). Run line through the first sheave on block (2). Run line through block (7). Run line through the second sheave on block (2). Run line down through block (5). Feed line through lower grommet (4) and tie a stopper knot. Feed the lower reef line (now attached to the upper line via block 7) through the mast base block (8). Feed the line through the bullseye (9). Run the line back to the Clamcleat (10) and tie a stopper knot.

Use:

When the reef line passing through the Clamcleat (10) is pulled towards the cockpit, the downhaul block (7) will evenly pull the upper reef line loop towards the deck and collapse the sail up against the mast.


Kris’ concept could be modified to have the Clamcleat removed from the deck and replaced with a suitable cleat on the end of the boom. This variation however might require to have the sail mast lowered (like when stowed) since reefing the sail lifts the boom higher away from the operator. Also, the Ronstan blocks could be replaced by simple stainless steeel rings although some increased friction might occur on the reefing line.
I am sure that some will find this reefing concept too complicated but I am very thankful to Kris for his contribution to this blog; he has find a solution for solo sailors that want to use the reefing on the FEKS Code Zero sails.


.

01 December 2011

SHOP: removable sail rigging

In my previous post I have detailed how I install cat rigged style sails (Flat Earth Sails for example) onto the deck of my kayaks.
The anchors, cleats and mast base are permanently secured to the deck and require several holes to be drilled through the fibreglass deck to have the bolts secure the items.
Some people cringe at the idea of drilling holes in a brand new kayak especially when experimenting with equipment that they are not familiar with.
My early sail rigs had the cleats mounted too close to where my hand would occasionally brush when paddling in a low angle style.
A few hits of the knuckles on the sharp edges of the cleat made me relocate them and plug the holes left behind by the fasteners.
My friend Jim has not done a lot of kayak sailing before and was unsure if he would like it on his Nordkapp LV.
He decided to minimize the damage that an ill fitting sail rig would do to the deck and devised a system that would keep his deck clean when he did not want to use a sail.

For the mast he used the existing recess where normally a 70P compass would be fitted. He fabricated a base out of fibreglass that has the identical hole location as a compass. He does not use that type of compass but he believes the recess and the complex fibreglass profile of the deck in that area is a very solid location for the mast base. He did not need to reinforce the deck since no flex is detected when the sail is deployed, even in heavy winds.
Jim's set up3

Jim had to drill holes for the stay anchors; unfortunately a Nordkapp LV does not have perimeter-line anchors suitably located to double as stay anchors.
The rest of the cleats and pulleys (blocks) are mounted on a custom made piece of fibreglass that contours the deck of the kayak.
Jim's set up1

He simply waxed the deck of his kayak with mould release compound (even grease would work in a pinch) and laid up several layers of glass cloth and resin. Once the laminate cured he padded the underside with a thin layer of closed cell foam to prevent scuffing of the deck and installed the necessary hardware to secure the uphaul and trim the main sheet. He used sections of stainless steel welding rods embedded into the laminate to create guides for his lines but stainless steel saddles could be used as alternative.
Jim's set up4

His "plate" is held back by a thin line that loops around the coaming of the kayak, and in the front, under the deck bungee cord. The coaming line takes most of the load, the front bungee just keeps the plate close to the deck.

Jim's system can be removed in seconds when he does not use his sail. The base for the mast remains attached up front but there are no cleats and pulleys to clutter his deck.


PS 02DEC
Owen Walton has sent me these images of his sail set up.
It requires one more stay (back stay) but the sail can rotate freely 360 degrees.
The plastic cleats are low profile.
Deck cleats

Deck fittings

24 November 2011

SHOP: repair a cracking coaming

.

In a previous post I mentioned that I reinforced the under-deck thigh brace area surrounding the coaming where I had hairline cracks appear in the coaming-deck junction.
Adventuretess' kayak (and several other ones of the same make) had the crack develop at the front of the coaming.
It appears that the deck is a a bit weak there, where the tight radius of the laminate meets the coaming, flexes too much and the gel coat cracks because is not elastic enough.
A friend of mine repaired the same type of crack on his kayak by reinforcing the underdeck and inspired me to stiffen up  Adveturetess' kayak too.
cracking deck_coaming
crack in the deck along the front of the coaming
I suspended the kayak on slings from the ceiling, turned it upside down and brought it to shoulder height; it is much easier to work inside the cockpit of an elevated kayak than bending over on the floor.
I made sure that the area was first thoroughly washed with fresh water, dried and then cleaned with acetone. I inspected the laminate but it didn't show any cracks in the fabric.
For the reinforcement I used scraps of carbon fibre cloth (unidirectional and woven), but quality fibreglass cloth could have been used instead; carbon fibre is just a bit stiffer.
dry lay up
(wire and reed for magnetic switch showing)

I chopped the cloth into short strips so they were easier to lay around a curved shape. I used several layers of carbon cloth, overlapping. I exclusively use West System epoxy for my work and for this area, exposed to daylight, I mixed 105/207 since it's UV stabilized. Epoxy allows me to work in small batches, does not produce too many toxic fumes and has excellent adhesion to most composite laminates.
I often hear that paddlers are scared to use resins and do their own repairs. Mixing epoxy is dead easy and is feels like watery honey. If you clean the area to be repaired repair well and keep the work tidy a job like this one is not more difficult than smearing honey onto a cloth, really.

wetting out layer1

I saturated the carbon cloth making sure there was enough resin against the kayak deck, pushing the fabric into the tight curve of the under deck. I finished the repair with a top layer of fine fibreglass twill cloth to create a smooth surface while absorbing possible excess epoxy.
glass layer
Top layer of fine fibreglass. Resin only partially saturating the cloth.
After all the layers were saturated (white fibreglass becomes transparent) I cleaned up any spills on the exterior of the coaming with methylated spirits (alcohol).
clean up

I left the epoxy cure for 24 hours (25C temps) and then smoothed any fibreglass spikes with sandpaper.
sanding

I am not sure if I will repair the cosmetic hairline crack on the outside of the deck since I don't have the factory matching gel coat from Valley. It takes a fair amount of trial and error to mix up the perfect tint to match the color.
The deck now feels very solid and the hairline crack does not expand when pressure is applied.

.

08 November 2011

GEAR: Flat Earth Sail Code ZERO

Flat Earth Kayak Sails has provided me with a new sail for testing.
I have been very satisfied with the design and quality of Mick's sails in the past and I now use them exclusively on all of my kayaks.
I believe the design is superior to the ones I designed and they are easier to use.
While Mick can supply a complete sail set (sail, mast, deck fittings and sheet) I use my own rig that is slightly different to his standard approach.
I was keen to try his high mounted sails with the stays below the boom for this new sail but I realized I would have to modify some deck anchors so I decide to simply slip the new sail on my existing mast and stays; there has been no modifications to the rigging.
The new sail uses Code Zero sail cloth: a very thin but very dimensionally stable material that has reinforcement filaments laminated into the surface.
The material does not stretch and does not wet out as much as conventional sail cloth keeping the sail light and maintaining its shape when dunked in the water.
I still remember the difference a wet or dry sail made when I used to windsurf: after a water start the sail seemed sluggish and slow to gradually become more taught as the sail would dry out. Once fully dry the fabric would shrink and the sail was “fast” again. I am not sure if the surface area of a kayak sail is affected as much as a windsurfing one but having a dry fabric seems an advantage to me.
FEKS3_1_gdn
FEKS Code ZERO 1 meter, fully deployed
The sail is shaped differently than my other two FEKS: the shape is fuller and closer to the mast that flattens out towards the rear. There are more panels sewn into this sail to create the efficient shape. Mick’s sails seem to be less susceptible to wind change directions and they don't need constant trimming to get the maximum power from them, if compared to my own designed sails. In other words they are more forgiving. What makes them even more user friendly is the shock absorption built into the main sheet. When the sail is hit by a gust of wind the bungee cord stretches and spills some of the wind to possibly prevent a capsize of the kayak.
My new sail is rather large: 1.0 m². For a sea kayak sail that large surface can become a handful in higher winds (let’s say above 20knots).
When on a kayak sailing outing on a few occasions I had to lower my sail and stow it away when the wind picked up beyond what I could comfortably handle in my kayak; the sail was just too big for the stiff breeze.
Mick has engineered a simple solution to reduce the sail area (reef) and make it still usable in higher winds.
FEKS3_2_gdn
reefing points with simple Dyneema loops
I have used a very thin Dyneema line to create simple loops that can tie around the mast and hold back a section of the sail . The reduced area (0.5 m²) is much more manageable when the wind really blows. Unfortunately I have not come up with a solution on how to reef the sail by myself when seated in the cockpit; I need somebody’s help to do so.
FEKS3_3_gdn
sail reefed to reduce the surface area
My first outing with the Code Zero consisted of a short trip to a small island and back across a tidal flow channel. Initially the breeze was very gentle (just a few knots) to suddenly change to a solid 10-15 knots with several higher gusts.
The sail performed very well in those breezes but I had no opportunity to try it in something more challenging to the point to have to reef it and observe its performance when the surface of the sail is reduced.
FEKS3_4_gdn
in this configuration the sail can be used in higher winds without overpowering


The Code ZERO sails will be available in a limited edition in early 2012.

.

02 November 2011

Don't renounce the customer service

As a dedicated sea kayakers I usually seek specialized equipment to purse this highly-technical gear-intensive sport. Such equipment is generally not available from big box stores but is rather sourced from the knowledgeable and educated staff of dedicated paddling shops.
Well established businesses that have been around for a long time owe their success to a number of factors but, in this small tightly-knit community of skilled kayakers, one very important aspect of retail is customer service.
It seems that aggressive advertising can lead to a healthy customer base too since often paddlers are willing to give the "new guy in town" a go.
The initial success however must be backed by a solid customer service or the buyer has the same security of purchasing gear as on eBay.
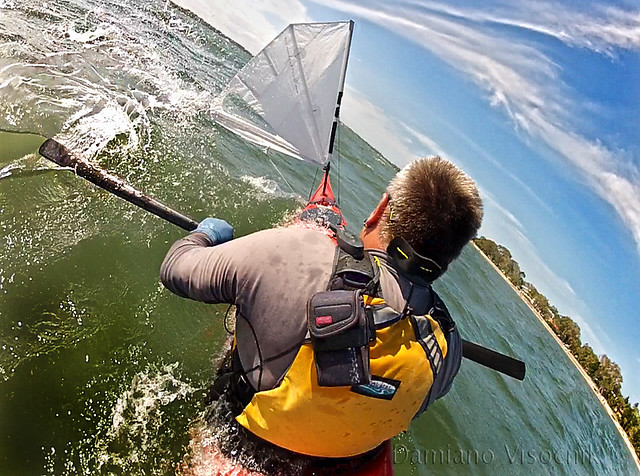
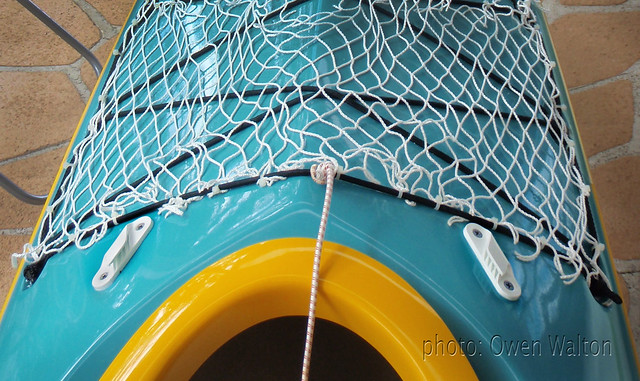
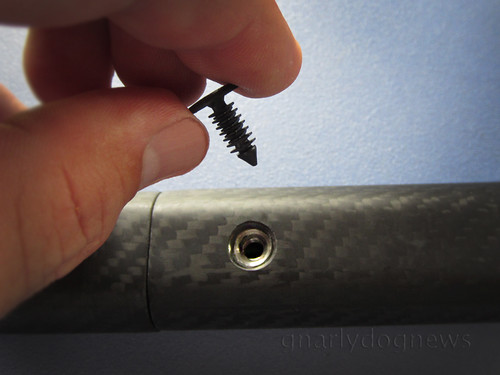
day 134 - 10.01.2009 - high key frustration
Photo: Arden
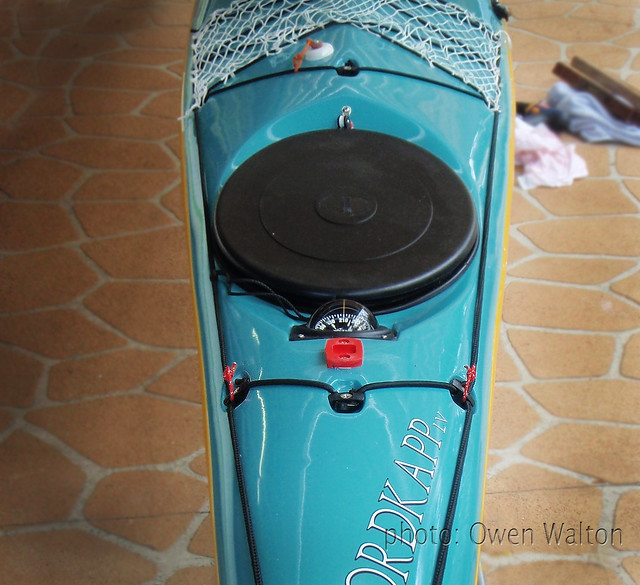
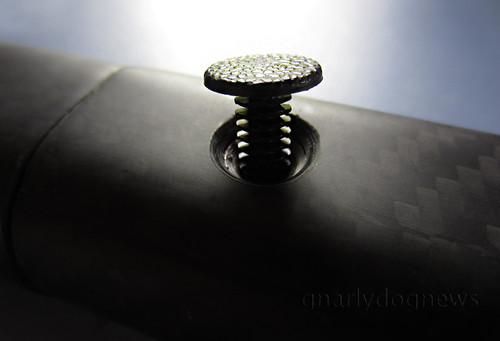
As an avid consumer of outdoor gear I have purchased (way) more than the average share of equipment throughout the years.
I do my shopping locally, if I can (if the desired items are available for a reasonable comparable price), or I shop online to source the exotic equipment that most local retailer have not heard of.
When purchasing online I buy almost exclusively from trusted vendors that offer a serious warranty policy: if it does fail they will replace it, unconditionally.

Wow! Is that true: unconditional guarantee? How can that be possible? How can they stay in business? one might ask...

The concept of an unconditional guarantee was pioneered in USA by LL Bean in 1912.
Unthinkable at the time, he started to offered unconditional warranty replacement on items that he sold in his store. The concept was so progressive that naysayers were convinced he would be bankrupt in very short time.
Well, his retail concept worked and against all odds he became very successful.
Many vendors followed his idea and equally succeeded including now the biggest retailer of outdoor gear in the world: REI.

This policy incites me to have no reservations purchasing from a retailer that genuinely backs its products by a warranty that can be claimed when things fail.
Unfortunately not all items that I purchase are from these vendors since some highly specialized gear is not main stream and is available from only selected retailers that don't have this policy.
I have purchased several items that I wished were sourced from vendors that would back up faulty equipment.

I have noticed a recent increase in dissatisfaction from local and interstate paddlers with the purchase of some British boats. Several high end kayaks have displayed problems in manufacturing ranging from poorly assembled decks, hulls and coamings to problems in the laminate.
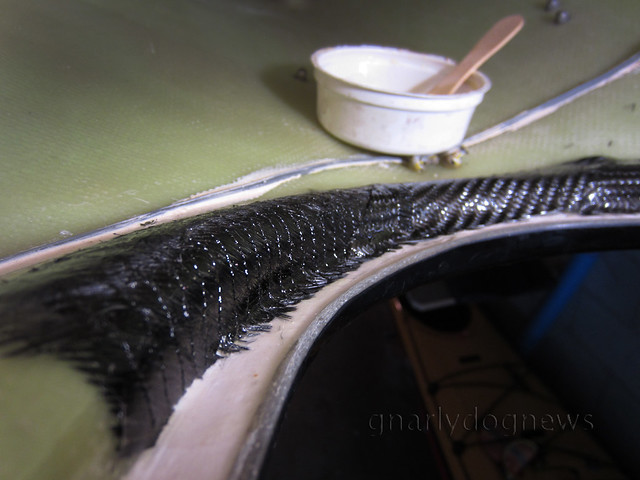
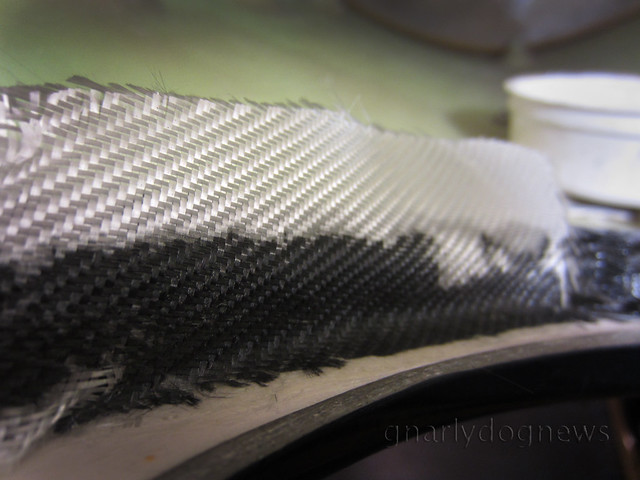
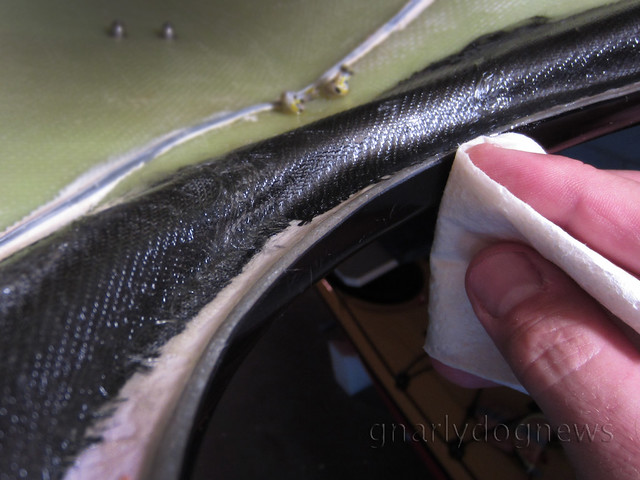
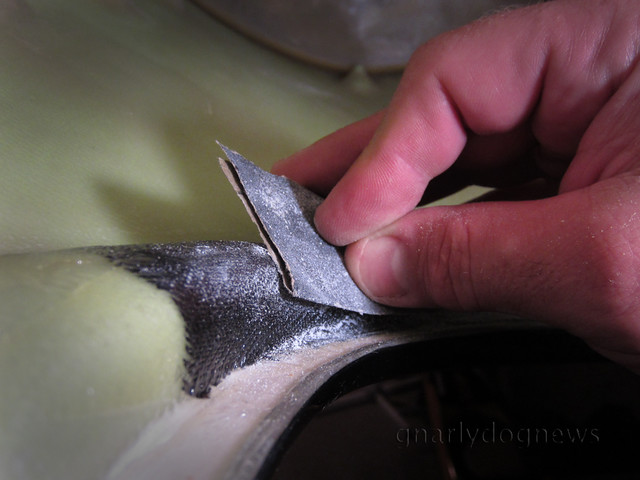
I had my share of bubbles in the gel coat where the fibreglass was not laid out carefully in the factory but I repaired those voids myself without inconveniencing the retailer of the kayak or the manufacturer. I did not have to and I could have had it done professionally and billed the retailer.

void on keelline_gdn
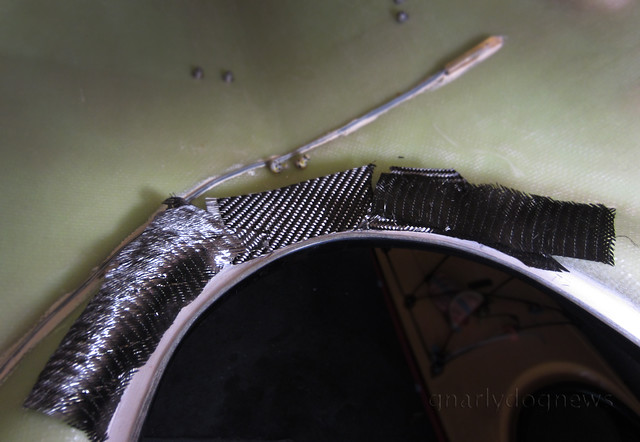
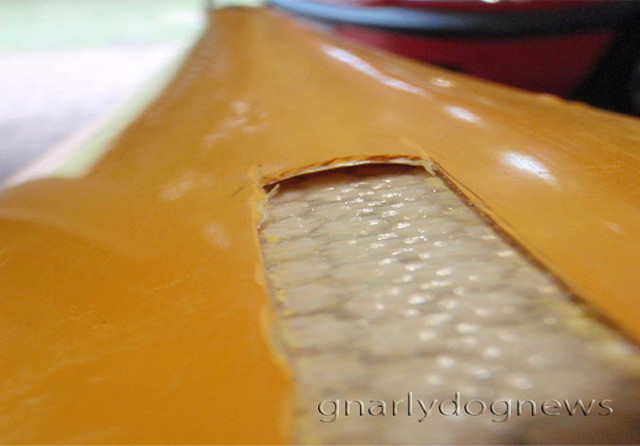
laminate problem on the keel line
I had also a couple of imported kayaks that had problems with the construction of the laminate and could not be repaired to a satisfactory level. I had to negotiate a deal with the manufacturer and eventually had those kayaks replaced.
I am also aware of the same laminate problem on a kayak in Tasmania and the customer has never had the kayak replaced. He is stuck with a kayak that is faulty.
Several other customers have come forward with faults on their kayaks.
Some problems were rectified by the owners of those kayaks but in too many cases the retailer has simply washed his hands of the problem.
High end sea kayaking retailing is based on repeated custom or word-of-mouth advertising; poor customer service is giving these retailers a bad reputation and is very damaging.
While their business seems to be still thriving now, eventually it will suffer.
They are not dealing with teenagers that assume faulty equipment is just the nature of the product: cheap and with a short lifespan.
Sea kayakers are demographically more mature and value good after sale service; failing them is shortsighted.

photo: Chris Walker

.

20 October 2011

Photo: balanced brace

Balance brace with NLP_1
Adveturetess just floating and stretching her back.
The balanced brace is the foundation to many Greenland rolls.
Once a paddler masters the balance brace he/she can roll with so much more grace using the body to turn the boat, not the resistance or momentum offered by the paddle or hand.
Unfortunately I am not flexible enough to balance brace and  my Butterfly rolls are performed with force and momentum with plenty of support from the paddle.

.

18 October 2011

GEAR: Greenland spare paddle on rear deck

With the recent shipment from Northern Light  I now have a high quality spare paddle on the rear deck of my kayaks.
I paddle exclusively with traditional style paddles and so far I have been forced to carry a Euro paddle as a spare.
I rarely had to use my spare but it would be unwise to venture out at sea without one; after all if I lost/broke my main paddle I would be left using just my hands or having to be towed.
My DIY split Aleut paddle was never tested in rough waters but I am not sure if it would have held up.
Some paddlers (Greg Schwarz for example) carry a full size GP on the front deck of their kayak.
I tried to configure a way to carry a full size on my kayak but the deck is shaped differently and just would not work. A full size paddle would not sit flat and would protrude too far outside the deck risking to catch a wave in heavy seas and possibly dislodge.
My Zegul 520 doesn't lend itself to have a split paddle up front either; really the best place it the rear deck.
Northern Light sectional carbon paddles seem to almost have been designed in conjunction with that kayak; the split NLP sits incredibly well in the recess of the deck.
NLP on read deck_6

NLP on read deck_3

No other paddle that I have tried sits as secure and has such a low profile.
Retrieving the NLP is much easier than my Euro paddles, that must be secured by a tight bungee wrapped around the shaft to prevent dislodging in heavy seas.
While the carbon Greenland is a real strong paddle I was wondering what would happen if I had to retrieve and assemble one in bumpy conditions.
Would the inserted shaft really fit tightly enough to paddle for a while and, without being screwed together, not come apart?
Well, I never really tried it but I didn't want to find out by accident.
I kind of like things to be really secure and after discussing the idea with Paul from Northern Light I sourced a little plastic plug that can be just pushed into the metalthread instead of having to use the Allen key stainless steel screw.
Xmas tree plug_2_c
Of course I will remember to have a few of those nifty plugs handy in my PFD.

Xmas tree plug_3_c

After some testing, the plastic plug seems to really secure the paddle together and no amount of pulling managed to separate it.
The NLP approach to positively assemble the sections with fasteners instead of a snap-together style joiner is in my experience a better solution.
On my carbon Euro paddles the so beautiful tight joiner, that would fit perfectly together when new, soon developed a bit of slop; eventually the paddle would wobble so bad that it needed to be replaced, luckily under warranty.

An alternative to a full size paddle it to carry a Northern Light paddle in the "storm" format.
Every NLP comes with a joiner that transforms a full size paddle into a short one that has a very short loom. A storm paddle sits perfectly fully assembled on the back of my deck without much protrusion past the stern.
NLP on read deck_5
NLP on rear deck in "storm" configuration
 A storm paddle is a fully functional alternative to a full size GP but it takes a bit of practice to develop a solid sliding stroke.
A skilled paddler can use a storm GP as efficiently as a full sized one but for now I am not confident to use a storm paddle in the surf; my rolling however seems to be unaffected.

.