Mounting a sail on a sea kayak requires a few considerations: position and deck strength.
On the newly acquired Whisky16 the front hatch is positioned surprisingly way far forward.
In front of that there is a deck-mounted compass recess.
The previous owner of that kayak had a small sail mounted there and I used the existing holes to mount mine.
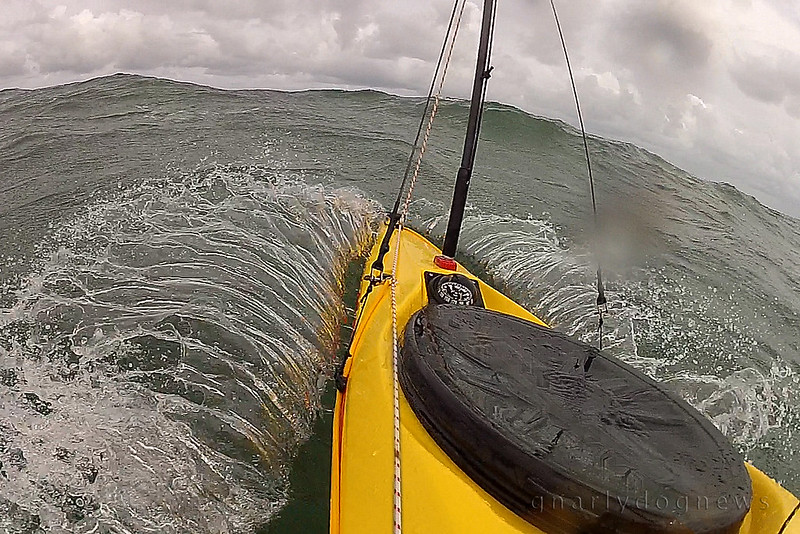
first run with the Whisky16
A test run revealed that the sail worked well on the Whisky16 but the reach was a bit too far for grabbing the sail and stow it on deck, securing it.
Most other sailing buddies use a 3 stay set up ending with a rather long mast.
I see their stowed sails going past the front of the cockpit ending with a sail mast half way across the spray deck. I prefer to have mine clear off my deck so I do not rub it with my hands when paddling.
The Whisky16 however has the sail mounting spot just a bit too far out or reach for the sail to fit nicely on deck. As I use my sails on several kayak I need to have them fit all decks well, with the same stay lengths.
I could increase the size of the mast and bring the sail higher (and make an ill-fit on other kayaks), but I prefer to keep the sail as low as possible and minimize the heeling force of a beam wind exerted on the sail.
The compass was not really needed on that kayak so I removed it and decided to utilize that space to mount the sail closer.
I wanted to fill the void left (recess on the deck) and create a solid base for the mast fitting.
I could have used a simple block of wood somehow attached to the deck but I knew I could do better.
I shaped a block of foam (polystyrene) to fit a bit loose within the cavity of the recess. Shaping the foam was easy: a bit of coarse sandpaper on a cork block.
Once the foam was shaped I placed kitchen cling wrap (Glad® wrap) over the deck and wetted out some fiberglass with epoxy. I draped the block of foam (under side) and pressed it into the cavity.
Once cured (overnight) I removed the excess and trimmed the glass.
The finish was really rough; maybe I could have used wax and mold release to have a perfect fit but nobody was going to see that part.
The top was done similarly.
I carved out foam from the area where the screws for the fitting would go for my mast base and filled it with epoxy glue (mix of epoxy and microfiber). While wet I then used a few layers of glass for the top and a scrap of carbon fibre for where the main load would be.
Polystyrene foam compresses easily when spot loaded so I needed a sturdy surface.
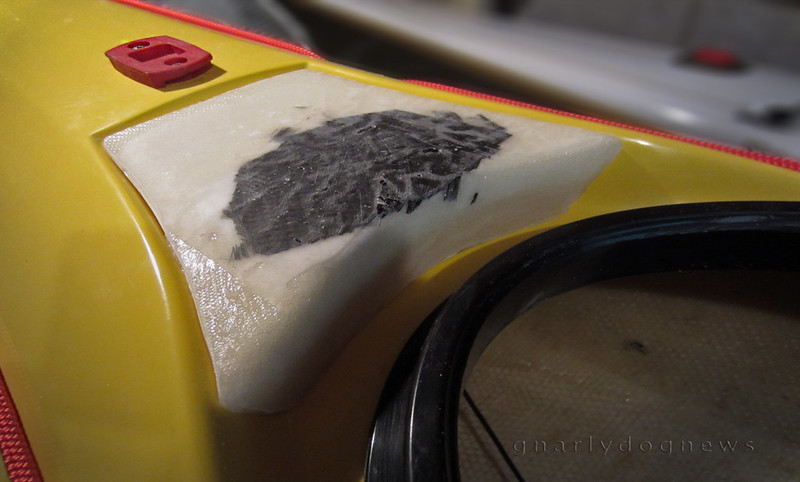
the "black patch" is carbon fibre cloth over the carved-out foam filled with epoxy glue.
The next step was to clean and cut back the edges a bit leaving a bit of a gap between foam block and kayak deck. I filled that with epoxy glue again to create a hard edge and seal the two surface together creating a monocoque style item. Of course I waxed and prepped the kayak deck so epoxy would not stick to it...
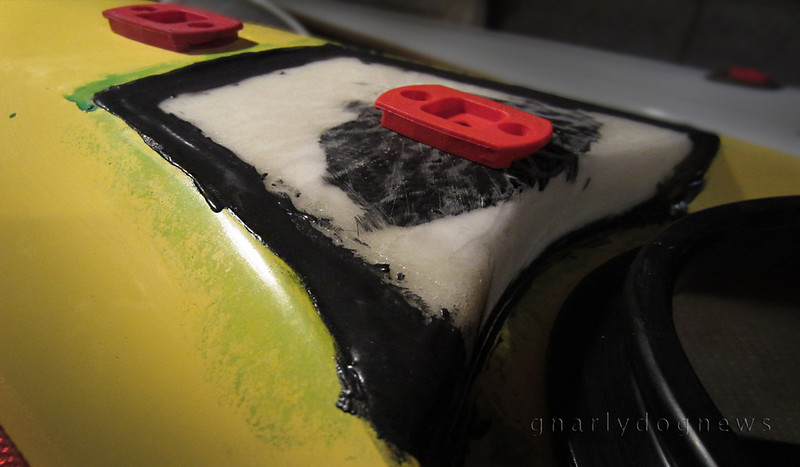
the new mast-base fitting placed only for testing
The last step was to add a nice layer of carbon fibre weave: partly structural, partly looks.
A few coats of UV stabilized epoxy later and my block was ready for installation of the mast base.
I used wood screws that secured the mount very solidly: the epoxy glue is very dense.
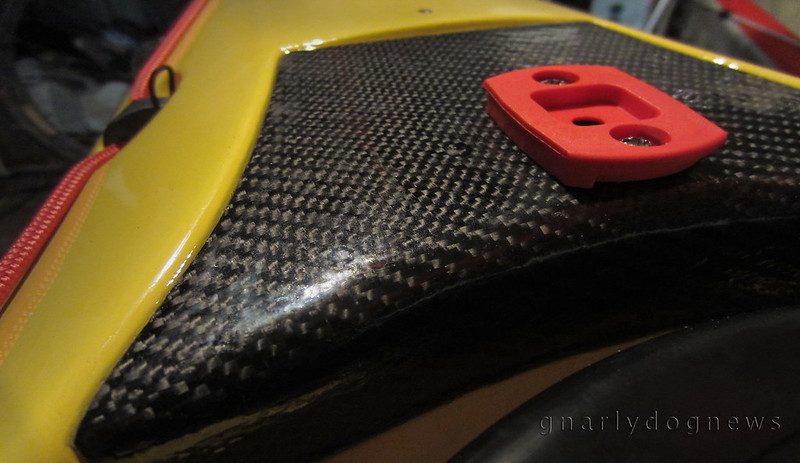
the foam block now covered with carbon fibre cloth
Final step: securing the foam block to the deck.
This one was simple: a small bead of polyurethane all around the edge (only!) to then seal perfectly against the deck.
The original deck void was now sealed and the sail mounted closer to the cockpit.
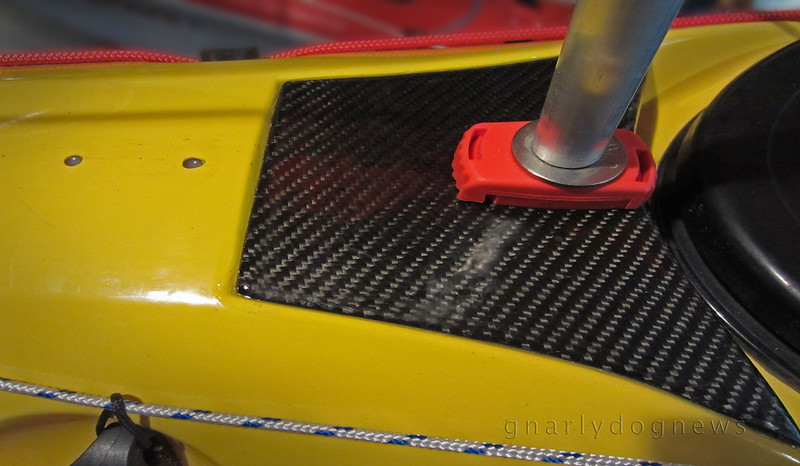
notice the difference between old position and new closer location for the mast base. The old holes will get filled with matching gel coat
So, do 4" make a difference? *
Not in handling of the kayak but when reaching for the sail to be bundled on deck when stowed (reaching for the boom particularly) is now much better.
*Hell yes, she said :-)


No comments:
Post a Comment
Thank you for taking the time to comment.
Because of spam received from unwanted manufacturers/retailers all comments are now moderated. Allow a few days for your comment to appear when the operators of GnarlyDog News are on safari.