Showing posts with label designs. Show all posts

25 June 2015

Digital camera hand grip modification

.
I reached the limit of tolerance with my pocket compact digital camera as I realized my images were lacking sharpness when light conditions were not ideal.
Most of my images are displayed on monitors (web use) and only occasionally I print the very best pictures of mine.
While all images look great when displayed small things don't look so good once they are enlarged.
Add, low light and the tiny lenses of most compact cameras suddenly look a bit fuzzy.
If you believe that the images you take on your smart phone are good enough, then don't need to read any further: you are wasting you time.

I want better results for my photographic efforts but I refuse to schlep a large camera with me.
Weight and bulk are always my concern (some say, personal too :-) but gone are the days of toting around a large heavy camera.
If the subjects that I want to photograph would be within reach of a short walk away from the car I would worry less, but when I take my cameras in a backpack and lug it around for days in the back country, or it has to fit inside my kayak on extended trips, then size does matter.
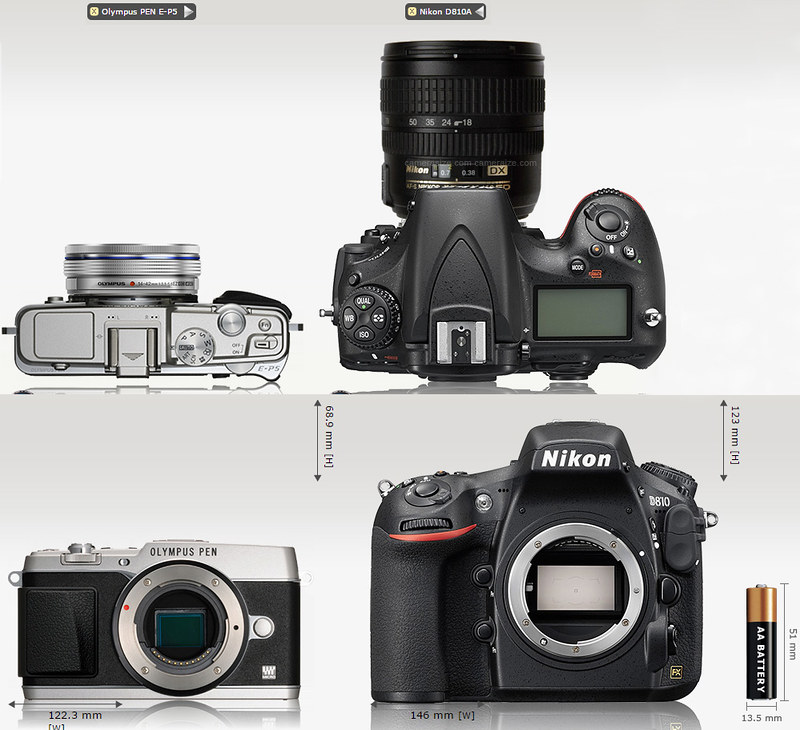
Oly vs Nikon_lens
Olympus camera and lens compared to Nikon, similar focal length, same f/stop
For my second trip to Scandinavia I wanted to have a higher quality camera, one that allows me to apply my skills and one that would reward my creativity. My intention was no longer to simply record my trip, I wanted images I would be happy to hang on my wall.

The Micro Four Thirds system of cameras is the perfect compromise for me: images are sharp and the cameras have features than no other system has, size being one of the major ones.
I can afford to have a camera body and a couple of lenses with me and not really feel it in my backpack, something I could not do with a lot of DSLRs.

But where the Micro 4/3 system excels it also poses some problems with users with slightly bigger hands: the hand grips are often a bit small.
As I started to attach larger/heavier lenses on my Olympus cameras I felt that the grip was a bit diminutive and I had to clutch the camera too tightly.
I could use their Pro models but that would defeat the idea of compact and light: I just wanted a better grip, not a bigger camera.
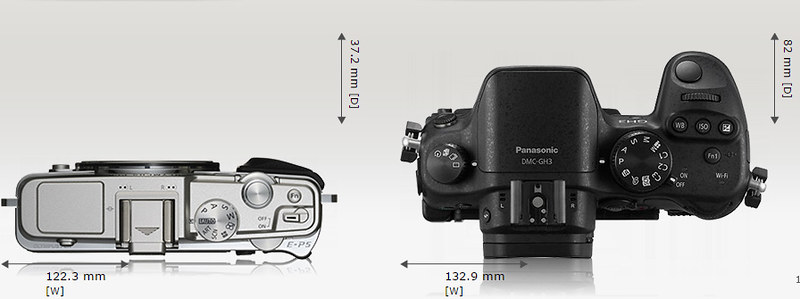
camera size comparison_3
same image sensor, different body, same image result
Commercially available add-on grips look too bulky (no need to have a base plate bolted to the bottom if one is not needed) and the glue-on aftermarket grips were not available for the camera I was using.
However those aftermarket grips looked really good and that prompted me to come up with my own DIY modified hand grips.
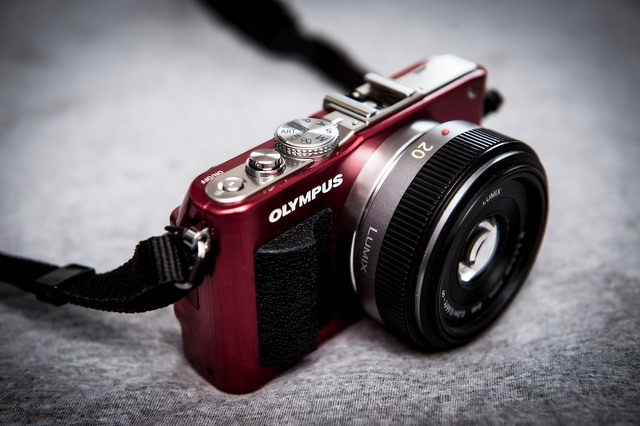
8653856259_d099d50b12_z
commercially available stick-on grip, here

I used Sugru, a silicon putty that feels like Plasticine but cures hard like rubber, sticks well and does not feel too slippery.
A small packet of Sugru contain enough material to shape a single grip if a large one is desired, or just enough for two smaller ones. Bright colors are available but I went with conservative black.
I have so far modified an Olympus E-PM2 (smallest of the M4/3 series) a couple of E-P5 and several E-M5.
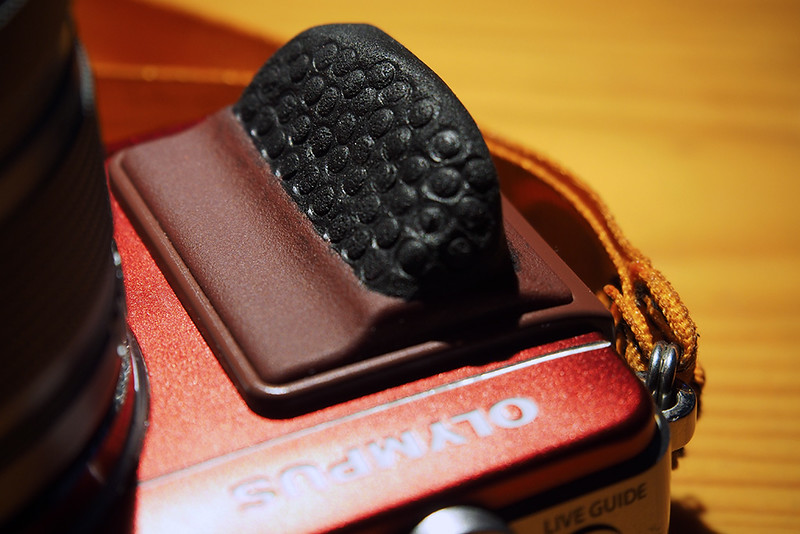
grip mod on PM2
Olympus E-PM2
Once the putty is kneaded and then firmly pressed onto the existing small protrusion where the fingers grip the camera, I shape the soft material with a small bladed knife to create a clean edge.
A moistened index finger keeps on shaping the putty until I am happy with the overall shape, then I run the back of the knife blade to create a perfectly uniform surface (not bumpy).
If the form of the grip is in its final shape I like to add some texture to enhance the surface and create more friction for my fingers.
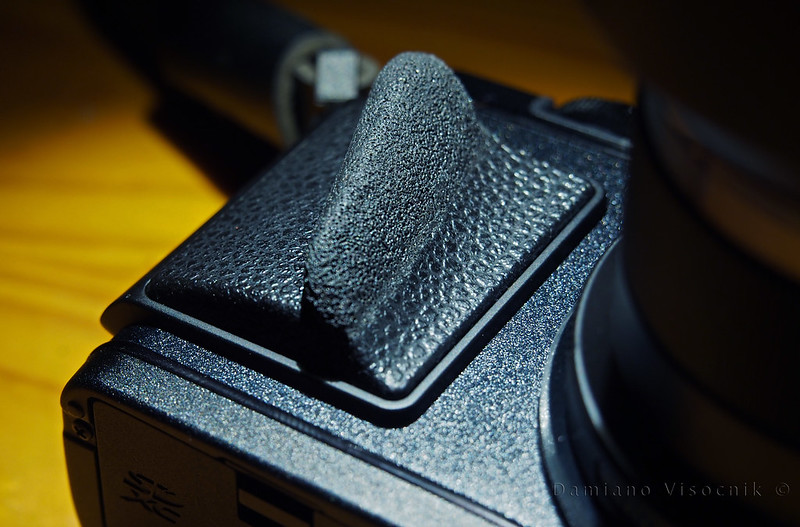
Sugru grip on P5_3
Olympus E-P5
Here I use a combination of pins, pen ends (to create little circles) and an old toothbrush for finer texture.
I try to achieve a look that matches the existing camera finish but I simply will never be able to replicate the faux leather surface.
Before I let the camera rest to cure I check that there are no bits of stray silicon putty on the grip, where I don't want it.
While the cured silicon does become hard like rubber it is not impossible to remove it mechanically but one needs to scrape vigorously to get it off.
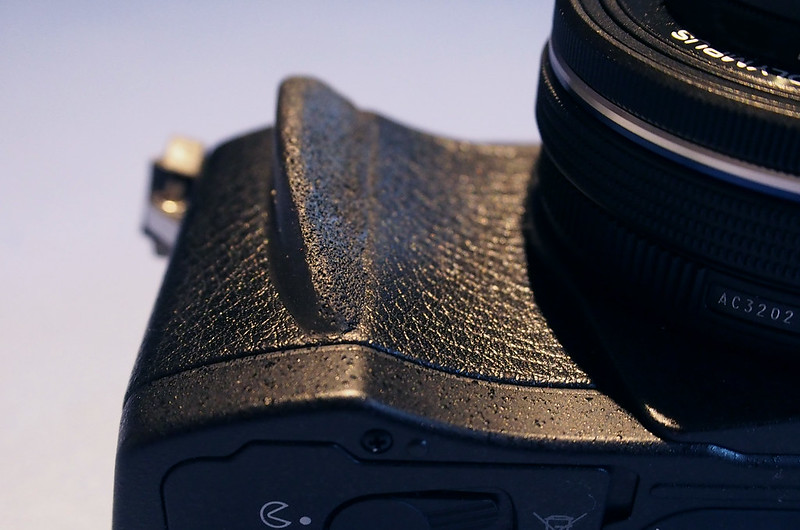
Sugru grip on M5_2
Olympus E-M5
I have seen some photographers push their fingers into the soft putty before it's cured to have an "imprint" look; I go for a more universal one where the grip is an extension of the original one and less fully-custom.
Sugru grip on M5_3
Olympus E-M5 and E-P5, modified grips

The grip on my Olympus cameras is now much more positive: my fingers don't have to clutch the body so tightly and the softer grip fatigues my hand much less when on longer photo shoots.
Photographing the sunset_c .

25 May 2015

GEAR: SeaDog Commander.

I fell in, again.
I have been surfing for an hour and now I was heading home.
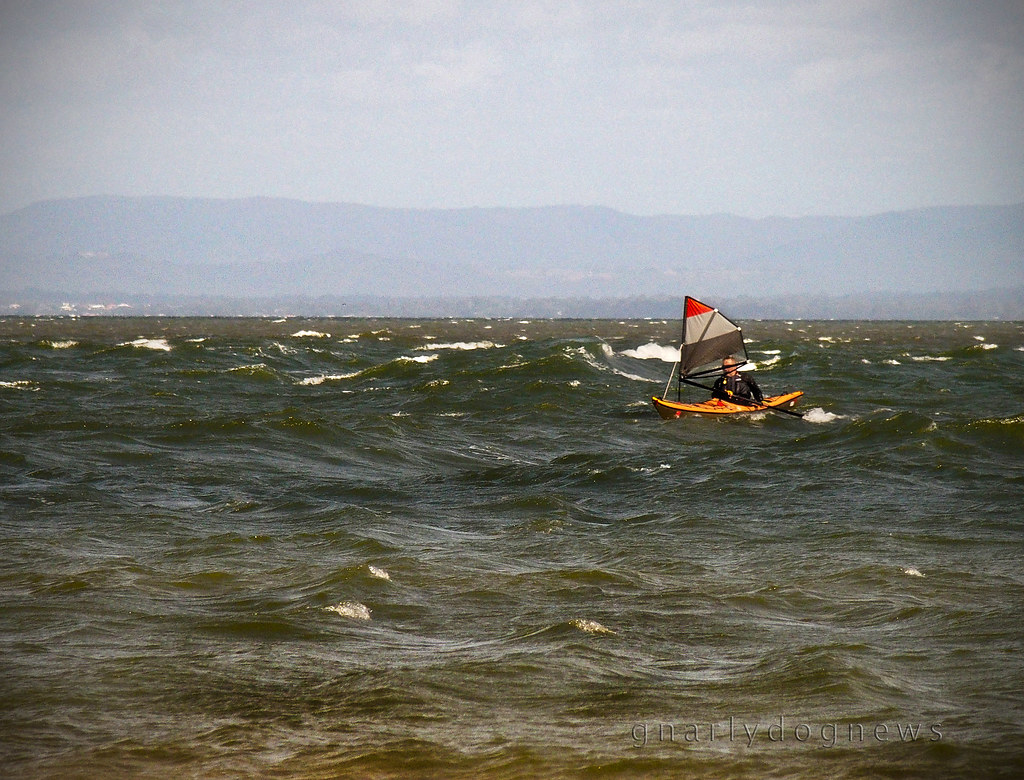
I sailed for a while but then I turned directly into the wind and I wanted to stow my sail away.
Stretching myself forward trying to reach the shock cord to secure the folded bundle of my sail made my loose my balance and I kept on falling in.
I realized that I needed a sail that would fold easily on my kayak deck.

Commander testing_1

My high aspect SeaDog sail (0.7 Code Zero) catches the wind beautifully and allows me to cut into the wind at a higher angle than before, but I had a problem with it.
Since I like to have my spray deck area clear my sail is mounted differently than a typical set up.

Commander1 at Peel_r
image courtesy of SeaDog
A typical mount for the sprit style sail (SeaDog, Flat Earth etc.) calls for a tall mast with stays mounted below the boom.
I prefer to have my sail mounted lower to allow the mast not to protrude in my "paddling area" when stowed on deck.
I don't like a folded sail that encroaches the deck where my hands swing when paddling.
It's simple: I want that area clear so my hands don't catch the sail.

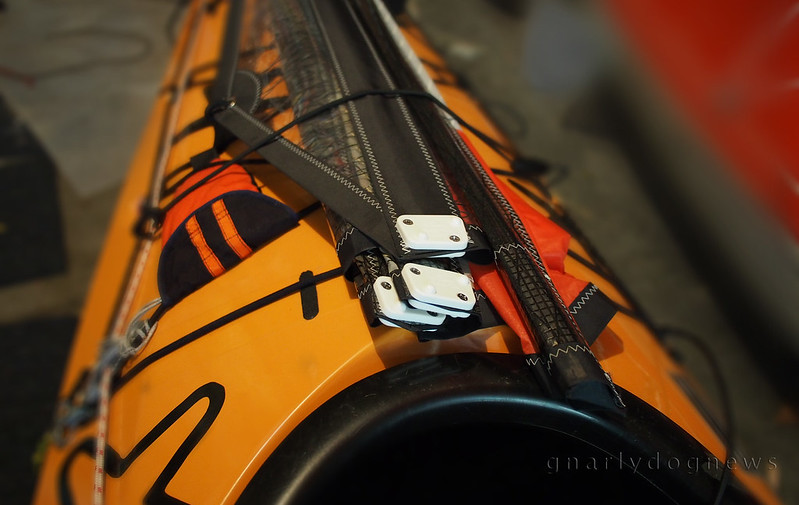
On my high aspect sail the boom is substantially shorter than the luff (mast section) resulting in an uneven bundle when the sail is lowered down: the boom is much further away from me when I lower my sail onto the deck.
In need to secure the sail firmly onto the deck I use a section of sock-cord to wrap around the mast, battens and boom to create one solid bundle that I know will not fill up with water when waves wash over the deck or I roll the kayak.
In the bumpy waters, I was now having trouble reaching that boom and I was loosing my balance.

SD_CodeZero 07_c_gd
SeaDog CodeZero 0.7, folded. In order to reach the boom this sail intrudes the cockpit area.

It has been in the back of my mind for some time now: I wanted a sail with a slightly lower aspect and a longer boom.
I consulted with SeaDog sails and after I proposed my design to Richard a technical compromise was hatched: the design I had in mind might end up less efficient and might cause some loss of upwind reach.
One other trait that I really desired in my new sail was that it would be quiet.
Douglas Wilcox aptly calls it "motoring"; the sound that the leech makes when sailing cross-wind.
I don't like that at all and a highly value a quiet sail.
I proposed a double batten to Richard and after some measuring we decided on an optimal length, given my initial request of "neat bundle" when folded.

SD_commander_5_c_gd
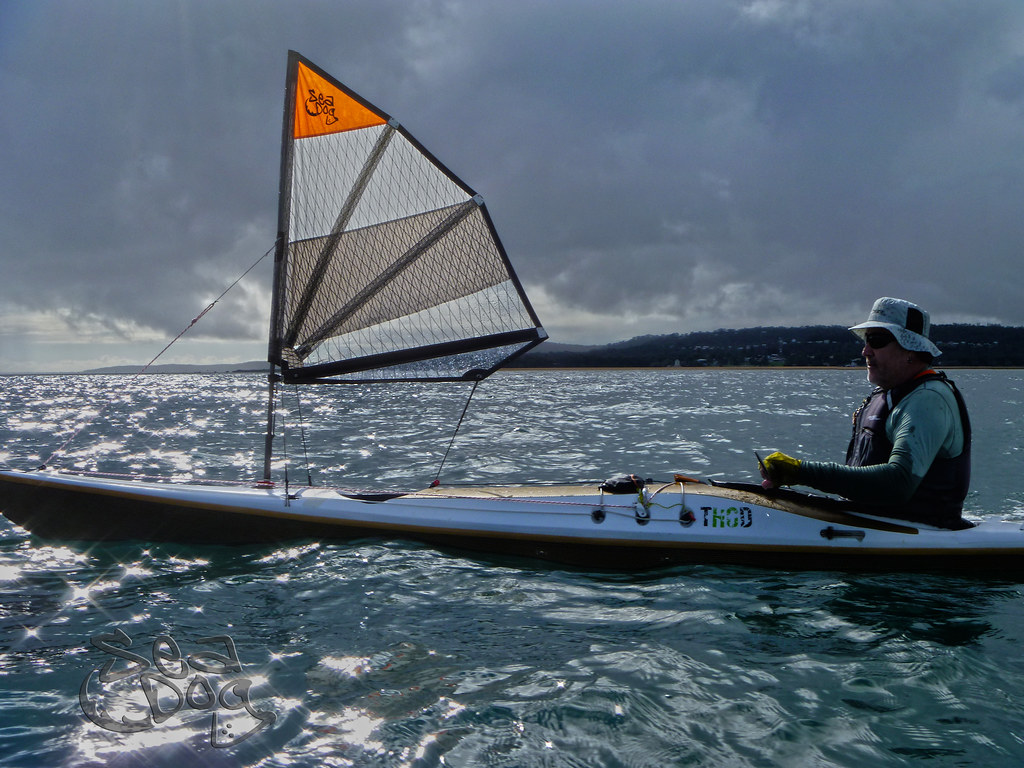
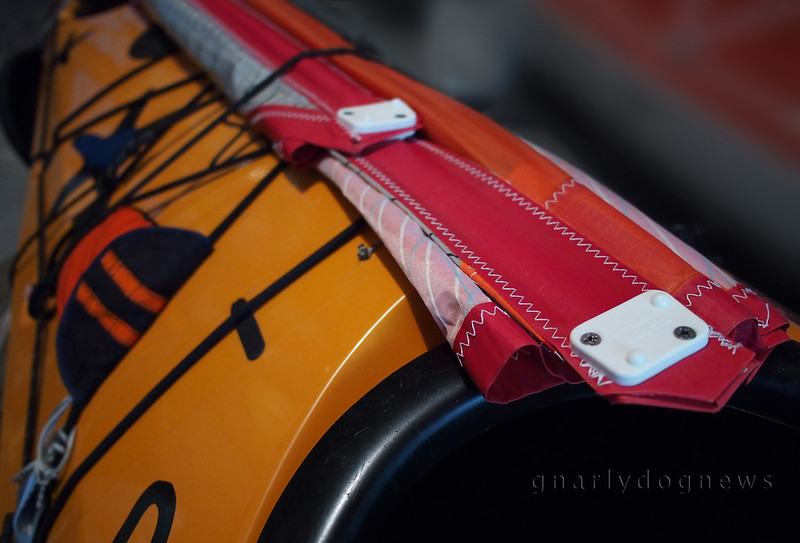
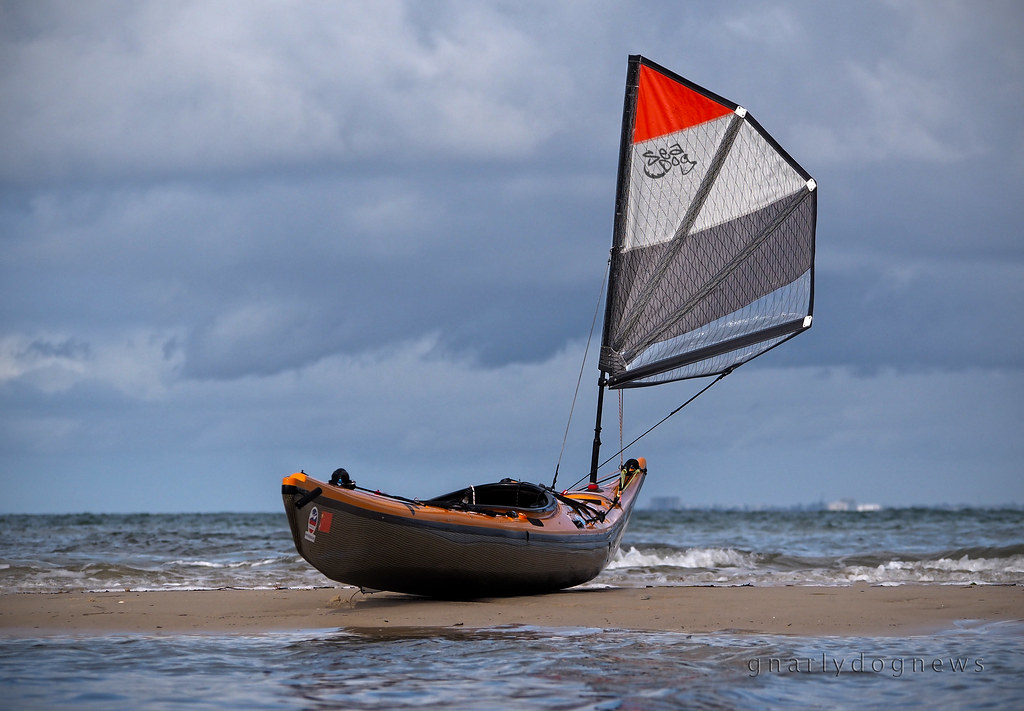
SeaDog Commander Mk1, folded on deck

SeaDog sails distinguish themselves for utilizing the very best high tech materials and superb cut and manufacture.
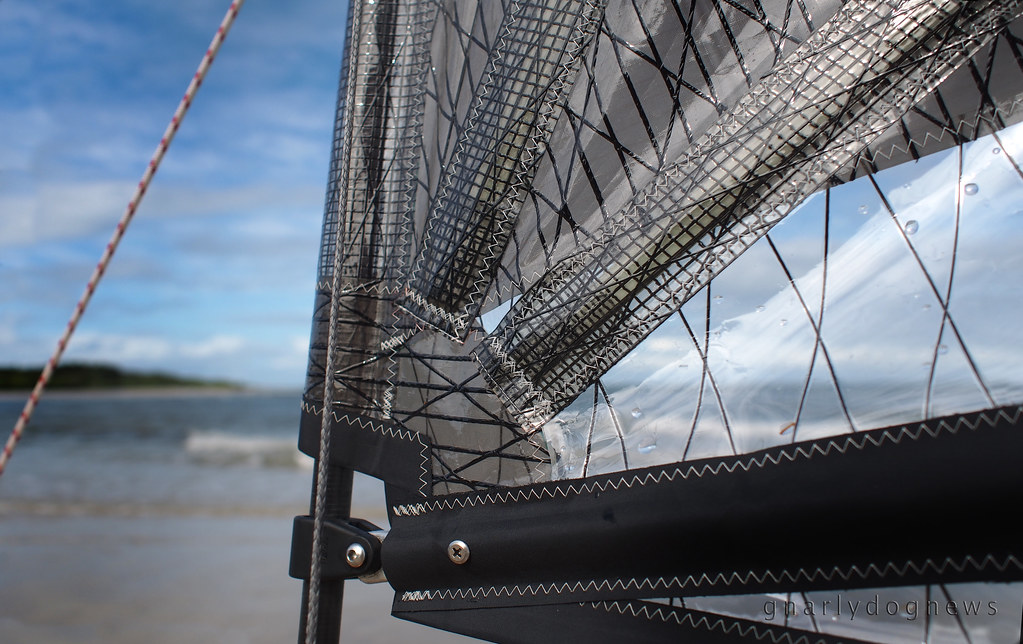
I love the pattern that the carbon fibre makes in the sail cloth used for the batten pockets; it looks really high-tech matching the finish of my Greenland paddles :-)
The twin battens shape the sail perfectly and there are no areas where the sail puckers; the sail stays aerodynamically shaped to catch light breezes allowing a high angle of head wind sailing.
My concerns for decreased upwind performance did not materialize: the SeaDog Commander stays inflated at really high angles too.

SD_commander_3_c_gd
SeaDog utilizes a special thin thread that is incredibly tenacious and UV resistant: the results is beautiful stitching.

I asked for a combination of sail cloth that would be stretch resistant, dry fast and remain stable. I also wanted to add the Clear-View feature into the bottom panel so I could easily see where I was going. Somehow vinyl windows cut into my previous sails never really helped with forward vision; they were just too milky and were ruining a smooth surface with a puckered section of sail (different stretch).

The new Clear-View panel really offers a better vision of on-water obstacles and boat traffic while the sail surface remains perfectly tensioned and smooth.
The orange tip adds incredible high visibility on the water while the pattern in the other panels makes for a stunning sail. The SeaDog Black Diamond series (with the Clear-View TM lower panel) are the highest technology sails that I have see so far: a true masterpiece.

SD_commander_2_c_gd

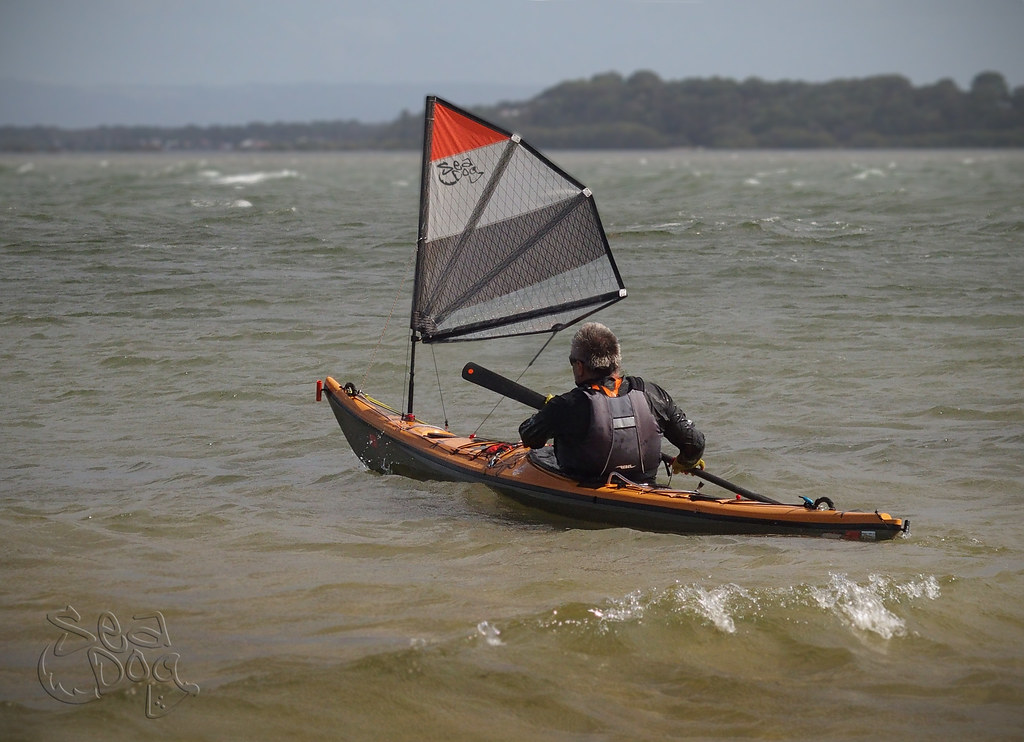
The new SeaDog Commander has a surface area of about 0.8m² to match the sail I most use in winds up to 20 knots.
Above 20 knots, in a beam wind, there is more heeling (pushing over) that I am comfortable with while my kayak does not really go any faster (max. hull speed).
If I know that there will be high winds forecasted I rather use my SeaDog CodeZero 0.7m²
I mounted this SeaDog Commander sail high enough on my carbon mast so I can reach it when folded onto the deck but not too high to intrude into my paddling area.

SD_commander_1_c

Disclaimer: my association with SeaDog has grown where we now collaborate on new projects. After purchasing my first sail from SeaDog I started to offer feedback and stimulated Richard with new ideas. Richard recognized that there was room for improvement with the original sprit sail design. Being able to quickly accommodate to special needs or requests with custom sails, SeaDog is able to blend high-tech sailing cloth to create sails that I wanted to realize for a while. I paid for the materials and he offers his workmanship: we both benefit from it.
 

16 April 2014

Travel with camera gear

.
With two expeditions planned in the near future I have been busy organizing myself.
My main focus for the new season will be improving my photography skills and trying to capture higher quality footage.
I believe that the best talent will shine with any half decent camera equipment and since I don't fall into that category I am justifying my average efforts with the lack of equipment.
The saying "A good tradesmen doesn't blame his tools" comes to mind tho...

On my previous trips my footage has been limited to point-and-shoot style cameras.
Occasionally I wished for higher quality (even if my use is almost exclusive to computer screen display) and specifically more control over focus and exposure.
Also my on-board of kayak footage on last year's trip to Sweden was limited to hand-held angles; I want to have the flexibility of varied angles for on-deck camera mounts.
I need light and compact.
At home I have a garage full of custom made deck mounts that often take too long to set up and are way too bulky for international travel.
I drool over footage taken with Steady-cams and dollies while I realize that it would require more than a one-man-band to schlep and use that gear.
After 5 different prototypes I have finally come up with something I can transport with me without having to pay excess luggage when flying.
I can now set up my system to any kayak deck within minutes (no custom molded carbon base for each specific location) and have footage steady enough, even in surf environment.
The mount is made of carbon and Kevlar plates to be light, but stiff enough to prevent wobbles when extended higher up.
Here is a sample short video of the angle I can get


While I am confident on my tinkering I am not sure how well it will really work for weeks of continuous use. Stuff breaks and it does, fittings come loose and carbon snaps when hit hard.
Next week's one-week trip will be a good test before I fly to Scandinavia with my rig.

 My biggest challenge: recharging batteries where there are no wall power outlets.
8 different types of batteries are really going to be a handful. Again I need the lightest set up possible.
Here in Australia I just shove my gear in the car and then set up at launch. Flying with my proposed equipment is however a very different story..
There will be a compact solar panel on deck during the day and this time I am trying a Lithium battery pack to power my chargers at night.
Ah, the good old days of film cameras :-)

PS no images are available yet, until I am satisfied with my work.

13 March 2014

INTERVIEW: Johan Wirsen, the kayak designer

.
Johan Wirsen is today one of the most prolific kayak designers.
His home is in Scandinavia and his heritage of sea fearing Vikings is well represented with his skillful art of designing modern sea kayaks.
I was lucky to meet Johan in 2011 when I invited him on a trip to the Queensland tropical coast.
A very understated person with great insight, Johan is an incredibly likable character.
Humble and considerate in his thoughts and trusting by nature has not always been an advantage in the cut-throat business of sea kayak manufacturing.
He has been designing and constructing boats and kayaks since early teens and it is his livelihood.
Last July I visited him in his hometown of Borgholm on Oland Island, Sweden and he revealed to me that something big was brewing in his shed.
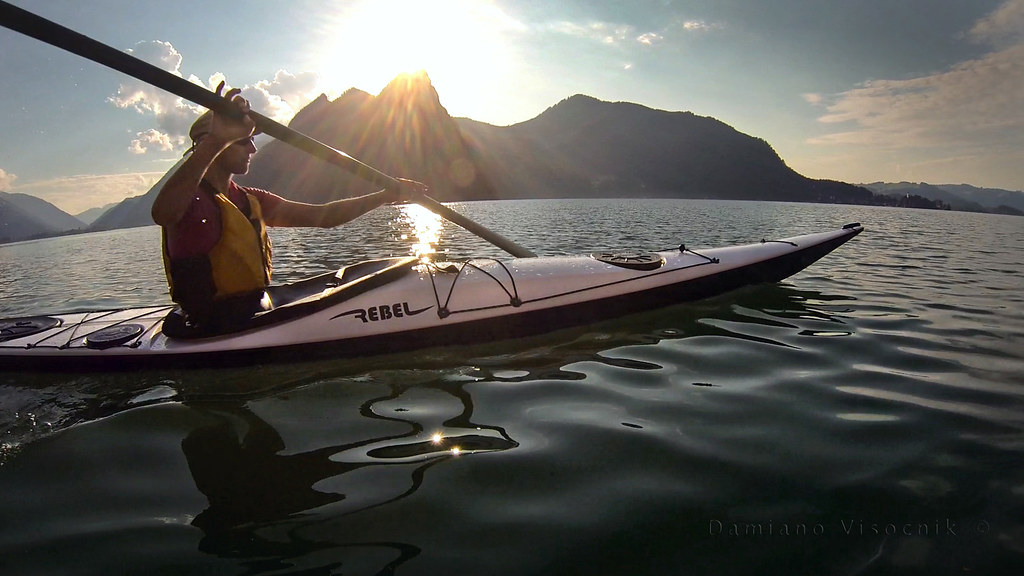
After years of designing and working for other manufacturers, fed up with some of their attitude and malpractices (he got ripped off several times)  he decided that it was time to launch his own brand: Rebel Kayaks.

Rebel ILAGA rolling1
Ann-Kristin Skinlo at Göteborg Boatshow_ image with permission from Lars Jönson


I took the opportunity to interview Johan Wirsen:


gdn) You have started a new brand of sea kayaks called Rebel: why another brand ?

JW) -You know, since 2001 I have been working independently with kayak designs for a number of companies. Of course I was building and designing my own kayaks before that so I more or less took the experience I had and transformed that from “one off” designs to a serial production. But as you know, the kayak business is also quite dirty and some of the companies I have been working with were also very greedy, so I have decided to terminate some contract with the “big ones” and start all over with this new little company Rebel Kayaks and try to keep the passion for the sport and paddling alive for myself.

Where and when will these kayak be available?
- For the moment we are that lucky that we have been contacted by so many high end retailers, dealers and customers that we can’t satisfied them all!! 
The truth is that we are too small and can’t produce that many kayaks, yet. When we shift our production to Poland we naturally will start to sell our kayaks here in Northern Europe.

Rebel kyk_Janusz
image courtesy of Janusz Kowalski from Rebel kayaks


What style of kayaks are you focusing on under your brand Rebel?

-    The first two models that we put into production are my two Greenland styled kayaks: the “ILAGA” and the ”T”. Those are the type of kayaks that I personally feel a lot for, and since they are well known they are like a signature for me. It feels important to me that I design and in the future build kayaks that I would like to paddle myself. 
Since our production capacity is not too big, we also prefer to put the effort into building light and stiff. – Why build something you would not want for yourself ?

Petra on Traunsee_c


Are you still designing for other manufacturers?

-Yes I still do some work for other companies, and for the moment I am working on a Coastal Rowing boat.

I notice a certain consistency of style in your creations even if the kayaks that you have designed have different goals in mind. How did you get involved in boat design and what is the driving force for your passion?

-Born on an island, and growing up with a father that had all kinds of boats (anything from fishing to sailing and even a water-ski boat) it is not that unusual that I got this interest and eventually I went to school to become a boat builder. I have always tried to build or rebuild my own stuff, even motorbikes! 
But boats and especially traditionally boats with smooth lines have always appealed to my eyes. And there is something special about boats and the tree dimensional shapes that should be put together in a smooth way (to achieve less drag).
For ex. The single coastal rowing boat that I recently designed where I had to learn new traits while listening to skilled rowers to get the ergonomics right. I am not a rower myself so there was a lot to learn.
Another kind of boats I love is our traditional wooden boats and of course to sail them. 

Johan sailing

 The picture shows my 17´ “Sandbacken” which is our traditional type of boats from our Island

What? Rowing boats???  

- Yes, this is actually really funny.
It started as a small project that then won tree medals in last World Championship!! (Gold and Bronze – men, and Silver – woman)
Mats Leo (rower and the owner of the project) asked me if I could help him to design a boat and together with one of the most skilled rower here in Sweden, Peter Berg, we got this far!!
-For more info check    www.leocoastalrowing.com

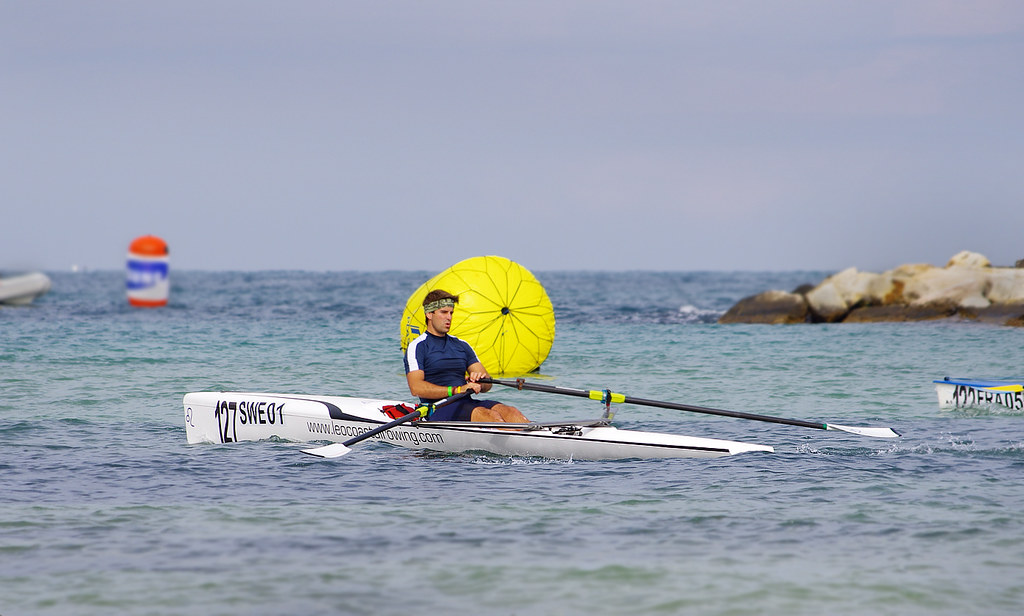
Peter Berg rowing
Pictured Peter Berg. Recently Peter Berg also won a race in Monaco

Sea kayak sailing: what do you think of that?

- I must admit that I have not experienced sailing with a kayaks before I visited Australia. But I really got hooked!  It is fun, it is energy saving and the “Flat Earth Sails” are working well. The position of the mast is not ideal on a sea kayak, however at the same time you don’t want it to interfere with paddling. But it works, and I recommend paddlers to try out.

Swede form or Fish form: what is the best hull shape?

- A quick explanation, or to say when and where is best would be hard to describe here in a short form. 
A Swede form (the widest part aft of centre of the hull ) creates less drag and wave resistant on the surface resulting in more laminar flow and less turbulent flow than on a fish form, that has the opposite shape. However there are also so many other things to be taken in consideration when designing a kayak or a hull.
In my current designs I concentrate on the thought of how strong we are as a paddler, and I try to make a kayak as fast as possible in the low speed area, let say in 3 – 4 pound drag area; because this is where most of us ordinary paddlers fit with our “touring sea kayaks”. 
If you would like more info please visit www.marinerkayaks.com and click the link at the bottom about designs. It does not tell every thing but can give you something to think about.
When I am working on a new design, in most cases I also build and test paddle my kayaks. It gives me the possibility to make adjustments before the kayaks goes in production, unlike many other producers today that make something up on a computer and then email it to a CNC-machine shop. Furthermore, in their catalog,  they will then tell you all about the kayak's advantages before they even ever built the first one.

Johan, you know that this is a passion of mine: What do you think of Greenland paddles?

- In the beginning I did not find the Greenland paddles interesting. I had been using a Euro paddle produced from our Swedish brand VKV for many years and modified the size of the blade more for a touring paddling, since the original blade was too big for long distance paddling; I also made the paddle shorter and I was happy with that. 
When I started to become more focused on rolling and was paddling more Greenland style kayaks I had to re-think. I can’t say that I have a pure Greenland paddling technique and while I do more what is intuitive and adept to the situation I almost never use anything else than a “stick” today.  If speed is a concern the Greenland paddle is not limiting, and if we talk about feeling I have the biggest respect for that paddle. 
I love to hold onto a wooden paddle, even if I have had in mind to make some carbon ones. However hollowed ones made out of cedar are around 650 gr.

Johan in ILAGA
image courtesy of Janusz Kowalski from Rebel kayaks

- If anybody here in Scandinavia is interested in learning good rolling, or paddling techniques, consider Helen Wilson and Mark Tozer from Greenland or Bust in partnership with Rebel Kayaks, on their “Nordic Tour 2014”:  a three months long tour around Sweden, Denmark and Norway.  For more info visit www.greenlandorbust.org

I have seen you tool around with the shape of the Greenland paddle and I have seen an interesting twist to the traditional shape. Thoughts on that?

- I started to make my paddles like that a few years ago. I like the shoulder on the loom as a position for my thumbs; at the same time I just make the other (top) side smoother for my hand to hold onto. What is most important is that the edges of the blade should be sharp so the paddle works quietly. I also have my tip of the blade more rectangular and at a slight angle. Some of my paddles have been copied and are for sale at Rebel Kayaks now. The paddles are made of cedar with ash edges as a harder more durable wood. The length of my paddles is often around 2.18m total, while the width of the blade can vary. 

Johan JUL2013-cr
   
Last words?

 Well I guess that would be: With paddling try to make it your own journey.
 The experience I have is not “one size fits all”. We all have to listen to our self and it is not always that important what gear we are using or if we go to the most exotic places; your own bay is often good enough. Paddling or sailing is mindfulness in itself for me, and hopefully for you too. 
/ Johan Wirsén


Summer storm_c

.

02 December 2013

Why a tippy kayak can be a good thing

.
A few months ago I paddled a new kayak that really impressed me: the XP designed by Johan Wirsen.
He lent me his personal kayak for a 500 km trip along the Swedish East coast. I had never paddled that kayak and I knew it was going to be very different to my British kayaks.
Along the way I really had a chance to test the kayak properly and I fell in love with it. The kayak was loaded with supplies and camping gear and it sat relatively stable in the water; I never had the chance to paddle it unloaded. I really wanted that kayak because it fitted me so well and allowed me to sit with my legs together, not splayed wide to fit under the thigh braces. It paddled with ease and responded very well to edging.
Once back in Australia I was lucky to get hold of a rare ultralight version; the XP is no longer in production because of copyright breach on the part of the manufacturer.
When I finally got to paddle the XP in my local waters I suddenly realized that this was a very different kayak. While the mould and shape were identical to what I had in Sweden I felt that my kayak was now so incredibly twitchy.

  Sculling Vixen_1_c

With its rather deep V hull shape and a narrow beam the unloaded kayak sat very differently on the water.
My first paddle in choppy conditions found me not in the usual relaxed style but I was bracing every so often to avoid falling in. I was concerned that this kayak might get relegated to “calm” days only but I really wanted to use it in all conditions. I took her out on challenging weather and despite feeling uncomfortable and needing to brace often I persisted.
Slowly my body got used to the tippiness and while I am not totally relaxed in her yet I can come back from a paddle no longer white knuckled.
I remember buying a few years ago another kayak (no test paddle) that I was disappointed with: I kept falling in. I was ready to on sell it but somehow persisted and developed the skill to paddle that demanding kayak. It later became my favorite surfing kayak, unfortunately the cockpit does not fit me that well.
As some say there is no such thing as a tippy kayak, just tippy paddlers I find that it takes a bit of time to overcome the initial low initial stability of a narrow hull. What I gain from my new kayak is increased skills and performance on small waves: I can easily surf wind waves that I can not in my British kayaks. While not perfectly suited to all the conditions that Moreton Bay offers (it’s a handful in short steep tidal flow driven waves) I find the performance superior to other kayaks I have.

Jeff Allen in Ocean Paddler magazine writes:
The other point about stable sea kayaks is that, if we take a beginner and put them straight into
a stable design, we gain instant success; they don’t need to learn a high degree of balance or effective bracing, they get away without the need to develop those most fundamental of skills. They develop the strokes in a stable craft /environment, but, when they move onto a more dynamic environment and try a simple sweep stroke in bubbly water, we see them capsize. 
A lack of balance and supporting blade angle are usually the culprit, which would have been their
first lesson had they started the process in a less-than-stable sea kayak. That is quite a radical
thought however, and (I hasten to add) is only my opinion. Much of our industry is based around
maintaining a good client base; happy customers will keep coming back for more.

  Surfing Vixen_3_c

In my previous life I used to ride passionately mountain bikes. My regular riding partner has a similar trail bike to mine. She was usually lagging behind a bit and I had to wait for her on some rides. She then decided to try riding a single speed on hilly trails. I thought she was mad to forego gears and make her riding harder; she sure will be a real drag…
And she was, for a few weeks. Then her technique improved, her riding style changed and her strength increased as she no longer wanted to get off on the hills she could not ride with the single speed. In a month’s time she was on my wheel and soon after she started to leave me behind.
I realized that by making her conditions harder she became a better rider since she wanted to ride that bike and not walk it, while myself I never pushed hard enough riding my geared bike: I could simply downshift on harder terrain. I never had the courage to go singlespeed but I wished I did; I would have ridden those Californian trails with more finesse and strength.
.

28 May 2013

Review: carbon-fibre skeg by Norbert Gancarz

A carbon-fibre skeg is the ultimate bling aftermarket accessory for any kayak.
If however one considers a kayak just a tool and has little affinity with his/her craft then I don't think this skeg blade would excite them.
Just as some consider a car just a car and see no point in retrofitting it with performance accessories I am sure that to some a carbon-fibre skeg might seem an unnecessary replacement.
I don't care that much about my car but I will not say the same for my kayaks.

As all of my kayaks are rudder-less and incorporate an adjustable skeg for directional stability, I often wondered if the deployment of my skeg had as much effect on drag as when I would lower a rudder (it has been a few year since I have paddled an over-stern ruddered kayak).
In my Impex Kayak the skeg is a rather chunky HDPE blade (same material as the common kitchen chopping board); if I fully lower that skeg my kayak seem to slow down a bit and become a tad sluggish.
When Norbert Gancarz ( norbertga@o2.pl from Poland) offered me to test his latest creation, a carbon-fibre blade to retrofit the Valley skeg, I was keen to try it.

Norbert skeg_1

The skeg blade is of the exact outer shape as the VCP factory standard grey plastic one but this carbon skeg has features that the Valley skeg does not.
The blade is foil shaped like the wing of an aircraft with the leading edge thicker than the back of the blade. This shape minimizes turbulence and promotes an easy flow of water over the blade when the skeg is deployed. Less turbulence equals to less drag that leads to less effort and possibly more speed.
While speed has never been my goal, less effort is certainly welcome.

Norbert skeg_2

The skeg blade is a real work of art and the finish is incredible.
Somehow I felt that such a beautiful accessory looked out of place on the basic finish of the Nordkapp LV's skeg box but I was keen to find out if the blade would actually fit and how much effort the retrofit required. After all the existing skeg blade was still working fine...

Norbert skeg_5

I inserted a 2.5mm Allen key (like the one you get with IKEA furniture, but smaller) into the skeg's control knob found next to the cockpit and tried to undo the grub screw. Initially it would not budge but a squirt of water dispersant (WD40) and a few minutes later the key turned and the pinch on the skeg cable was released.

Norbert skeg_6
salt built up under the skeg control knob,washes away easily...
The knob was free and now I could pull out the skeg blade past its normal maximum deployed setting; the wire came out easily.

Norbert skeg_7
factory VCP skeg blade removal

Norbert skeg_3

Norbert supplied me with the stainless steel wire that I had to cut as each kayak model has a slightly different wire length .
The carbon skeg has a very neat grub screw that pinches the cable that is inserted into blade (not show here).  I measured the length of my existing Valley skeg wire and cut the new one to length with a pair of diagonal cutters (a decent pair of plier would have done the same job).
I fastened the grub screw on the carbon blade onto the wire, inserted the blade into the skeg box and easily wiggled the wire back into the housing all the way to the control knob. The skeg blade was sitting flush with the hull, all the way in the skeg box, before I aligned the knob over the hole in "slider tube" and secured it tightly with the Allen key. I made sure that the knob was in the "retracted" position or I would not be able to deploy that skeg all the way like before.

Norbert skeg_4

Norbert's skeg blade sits in the skeg box without any wiggle and the two little rubber washers on the pivot point offer just enough resistance to keep the blade in position preventing the skeg blade from creeping back up when the kayak is at speed (one of my kayaks does that and I am yet to fix it...).

But how does the skeg perform in the field, err water?
It seems to have a crisper feel with the lowering amount precisely translating to directional changes. There are no wobbles and no "skeg hum" as I have in some of my other kayaks when I speed down the face of a wave.

Norbert skeg_10

As for increased speed?
I can't attest to that as I don't have a GPS to measure precisely the speed of the kayak.
All I really want is to have the kayak on the beach, belly up, with the skeg standing up proud showing off that sexy carbon weave :-)

Norbert Gancarz can be contacted at norbertga@o2.pl
.

29 January 2013

GEAR: a rudder like no other

.
I found myself constantly sweeping on my right hand side with my Greenland paddle to keep away from the crushing waves against the tall cliffs.
The mild swell of 1.5 mt and the stern wind of 15 knots were affecting my British kayak like I have not experienced before.

Beecroft Pen_cliffs_JAN13
in a bay away from the heavy seas
I often paddle in environments where wind is the only reason for a bumpy sea.
Even on my extended trips I have dealt with following seas and breezes with ease where a bit of skeg control would balance the weather cocking of my rudderless kayaks.
I used to paddle kayaks with over-stern rudders and while I found the cruising much easier than in a skegged boat I eventually abandoned the pesky blade sticking from the end of my boat.

The deciding point of getting rid of those kayaks with “crutches” came when for the 3rd time my rudder was damaged when paddling in waves.
I was not happy with the unreliability of rudders.
As I transitioned to skegged kayaks I learned how to maneuver a boat with my body (by edging) and sweeping paddle strokes while directional stability was taken care by the adjustable skeg.
I now have 6 sea kayaks, all without rudders.
There is no denying that a skegged kayak is slower for me and that I don’t keep a perfectly true course in following seas. That does not bother me: I am in no rush and I usually don’t like to paddle too close to my buddies to be then bumping into them if my kayak sways a bit.

But all that I wanted right now was keeping myself off the big spraying smashing waves against the rocky coast. I looked over to my paddling buddy and I noticed that he was paddling with greater ease and I didn’t see any corrective strokes.
He was paddling a Hybrid550.

Hybrid550_1_c

The Hybrid550, designed by Andre Janecki, is a kayak like no other. It has features that I have not seen on any other boat. The thought process that went into designing and redefining that kayak is astonishing.
Unlike so many kayaks that capture my attention and look so similar to each other, the Hybrid550 is unique. Its cockpit concept is inspired by white water boats with outstanding ergonomics for this chunky body of mine while still perfectly accommodating a more nimble paddler. One thing that concerns me is the width of the cockpit rim since my, how can I put it, “love handles” might rub after a while.  I hope one day Andre will produce the Hybrid 550 L (larger cockpit) but I understand his priorities are with the “UNLIMITED”  www.hybridfoundation.org.au
 
What intrigues me however is the unique design of the rudder.

Hybrid rudder_1

As I was dissatisfied with my own rudder boats many years ago I looked at the alternative integrated rudder of Mirage kayaks. I liked the look and I like the idea of not having anything above deck, nothing to swing and insert in to the water with so many less parts moving resulting in a simpler design. What concerned me though is the fact that the Mirage rudder is always there, even when I want to seal launch or beach land and drag the kayak.
After repairing a few split rudder blades from friends' Mirages I decided that if I wanted a rudder boat it had to be stronger than that.

I did the initial mistake of confusing the rudder design of the Hybrid550 as a copy of the Mirage but I never had a real close look at the details.
I now know that the pivot points are totally different, the action of the swinging blade is different and the construction is nothing like the Mirage...
 
Hybrid rudder_2

I had a GOOD look at the rudder on the Hybrid550 and I have one thing to say: brilliant.
It can take a reverse surf landing, right on the blade. What other ruddered kayak can do that?
None that I have seen so far.

Hybrid rudder_3
rudder folding away and bending when being hit
I am a skeg man, I don’t paddle with ruddered kayaks. I came to the realization that rudders are not suitable for my style of paddling.
With the Hybrid550 however I now have to rethink my philosophy. 

Psychologists have found that familiarity breeds fondness: Repeated exposure to a new idea leads to progressively lower fear and avoidance and even, eventually, sometimes, to acceptance. (Megan Kimble)


23 October 2012

REVIEW: Carb neutral beer powered vehicle

While the engineers of the world are scampering to invent a carbon neutral vehicle to happily transport people around, a different kind of development has been happening behind Oregon's mountains: a carb neutral vehicle that is very environmentally friendly.
While this vehicle has had tremendous success in Oregon, Utah's DMV seems to be reluctant to allow registration...


Powered by a "V12"engine that sometimes fires in slight imperfect synchronicity, it requires open minded and willing passengers to cruise with one "designated" driver and one licensed barman to make it reach the top speed of 7 miles per hour. Unsuitable for off road (the engine is underpowered for steep hills) it is primarily designed to transport patrons between "refuelling" stations closely spaced apart (microbreweries).
Manufacturers' fuel recommendation is premium (beer) only with a rather high average in-town consumptions of 3 gallons per mile; it is however carb neutral as the carbs ingested are soon burned off by the engines frantically spinning the pedals.
The vehicle is a soft top with excellent street appeal: trust me, you will get second looks, from either gender :-)
The downside of this unique vehicle are the seats: testers found them somehow spartan and suitable only for short journeys as a long drives in the country produced saddle sores.

.

16 August 2012

REVIEW: SEA-LECT Designs footbraces

.
I paddle kayaks without rudders that use skegs for directional stability.
Most of the kayaks I own came with footbraces that are mounted on rails attached to the hull.
The footbrace pegs have sliding adjustment fore and aft to allow different paddlers' leg lengths fit correctly.
I find most footbraces' surface rather small offering me limited support for my feet, often creating a pressure spot. In trying to maintain a good paddle stroke I tend to have a positive pressure against the pegs, that after an hour or so results in discomfort.
Wiggling my feet around and repositioning them frequently indicates that the footbraces are under engineered for my requirements. In some of my kayaks I have modified the pegs where I have added a bar spanning from side to side creating a much larger platform with infinite foot positions.
The bar works very well for me but when it comes to adjust it for a different paddler it is pretty tricky.
The bar needs to have some adjustment in the mounting holes since the hull of the kayak is tapered.
Pulling back the bar for a closer fit usually requires a bit wiggling, hard pulling and occasionally cursing to get the corroded mechanism (aluminium against stainless steel fastens)  to slide.
In my latest kayak I have not installed my modification since several people borrow that boat and adjustment of the brace would be a pain.

When SEA-LECT Designs offered me to test their footbraces I was very excited.
The design on their website looked good and I awaited the arrival of a set of replacement footbraces.

SeaLect vs Yakima_1

As described on their website the SEA-LECT Designs footbraces are a direct swap for most brands.
I removed my Yakima rails bolts and installed the new fasteners in the same existing holes, no modifications needed.
I was even very impressed with the detail of the fasteners; the bolt comes with a cupped washer that is backed by rubber to ensure a positive seal so no leaks will occur.

SeaLect fastener

SEA-LECT Designs offers also footbraces that will mount on hull-bonded studs, not just through bolts.
There are a couple of fundamental differences with SEA-LECT Designs footbraces.
The adjusting mechanism is all corrosion free and is accessible from the cockpit, while seated in the kayak.

SeaLect footbrace_1

If I need adjustment (bring the pegs closer) I just grab the tab on the rotating rod, flick it 90 degrees upwards and relocate the peg, all on-the-fly, while on the water. I can do that with Yakima footpegs too, wiggling my foot behind the peg and hopefully finding the release tab, but only works when new. After a few months corrosion sets in and the adjusting mechanism becomes very sticky.
The surface area of the SEA-LECT Designs pegs is larger and gently curved to spread the load of the feet-pushing action.
Despite wearing paddling shoes I still find Yakima's sharp pegs edges dig into my feet a bit; SEA-LECT pegs are much nicer on my feet.

SeaLect vs Yakima_2
SEA-LECT Design on the left, Yakima on the right.
There is one thing I don't like about the SEA-LECT Designs pegs: the angle relative to my feet.
Maybe it's a personal taste but I found the pegs oriented too much forward: I kind of like them more square.
In the process to test them thoroughly and offer the manufacturer comparison feedback I added a little plate that I bolted onto the pegs surface, angling it backwards.
After an initial paddle of 10 miles I found the modified angle more to my liking.

.

31 July 2012

Naming that boat

There are very few other things that have evoked "personification" more than a sea going vessel.
Throughout history owners of all kind of boats have been naming her (yep, apparently boats are female... alluding at the changing moods? :-) with captivating, suggestive and exotic names.
Not sure if all paddlers share my attachment to a kayak but I feel being part of "her".
Is it the tight confined space that almost wears my body or is it the medium to deliver so much pure enjoyment that personifies an inanimate object made from fibreglass and resin?
Nevertheless I have named all my kayaks even if our "love" was brief at times.
From "Wet Dream" (a name almost R rated) to Kadzait there have been 14 "girls" in my shed...

I think it's more personal to have a name to refer to, instead of the model that the manufacturer gave her (at one stage I had two of the same model).
I like to display the name of my kayak on the bow, just under the seam line.

Nukilik bow_c

In the past I have come up with the logo for the name myself; using the imagination and electronic tools I would fashion graphics that would work on a sea kayak.
My designs have been so far monochrome; I would cut the logo out of cast vinyl and apply it to the gel coat.
Self adhesive cast vinyl is used for sign making and I would source mine from a local supplier but "flea Bay" seems to be a good source too.
I would trace the logo over the vinyl and with a very sharp hobby knife I would neatly cut out the desired shape. I limit my designs to be rather simple with few pointy edges and no fine lines. A cut-out vinyl sticker needs to have some body if used on the bow of a sea kayak or peeling of the material will occur.

tail surfing_1_c
I used clear vinyl to cover the complex shape of this logo
Recently I have had the urge to spice-up a bit my logos and with the recent purchase of (yet) another kayak I held back for a while. I could design my own logo in full color, maybe even with a drop shadow or something but the quotes I got to print a one-off were rather expensive.
Then I stumbled across Kayak ID, a guy that specializes in making just the very thing I wanted: logos for kayaks in "airbrush" look.
On his website he offers a very simple way to design your own logo in a few different styles.
I asked Bob for a sample and he was happy to supply me one, with exact instructions on how to apply it without messing up.
The decal took a while to make and ship (California based company) but it was delivered in a very protective stiff cardboard envelop to prevent shipping damage.
Cleaned up my kayak as recommended and carefully applied the decal.

kykID decal_1

I think that these graphics look a lot more professional than my amateur efforts.

kayakID decal_Kadzait
.

05 June 2012

GEAR: SEA-LECT Designs hatch covers

.
I regard sea kayaking a wet sport and getting wet is just part of the game.
Water inside the cockpit is often inevitable since I have not found yet a spray deck that really seals 100% (quality tuilik excepted). While I have leaned to live with a bit of water in the cockpit after rolling or heavy seas , I can not understand why so many kayaks have leaking hatches.
A hatch that leaks badly and takes on a gallon of water on a rough paddle it downright dangerous and should be immediately attended to and repaired. What bothers me also are the little leaks that occur in the hatches that apparently have a good hatch cover. I might be anal or OCD but I think there is no need to have sloppy workmanship or design to deliver a kayak with hatch covers that don’t seal well.
Recently one of my not so old kayaks (admittedly I buy new kayaks quite often) the day hatch started to leak. I swapped the cover with another kayak (same size lid) and reduced the leak but never really eliminated it. It annoys me to have wet gear in my hatches: why could not my spare clothing be dry when I need it? why do I have to keep everything in good dry bags to keep it safe? why do I have to wash with freshwater the hatches because they accumulate brine? There has to be a better way.
I managed to rectify the problem on my Zegul 520 with replacement rubber lids from Kajak-Sport (the dual density leaked badly in the heat) but it is also my Valley day hatch that leaks. Some of my paddling friends have noticed their VCP day hatch covers have started to deteriorate and crack; prompted by their concern I checked mine and I noticed the same: cracking of the foam-rubber. After hearing reports from so many kayakers that VCP covers had to be replaced too often and too soon I searched for alternatives. SEA-LECT Designs seems to be the only viable alternative to the factory replacement Valley hatch covers.

Sealect day hatch cover
Sea-Lect day hatch cover: no edges to promote unintentional opening
Paddle Sport is the Australian importer for SEA-LECT Designs and Bruce offered me to test some samples. He sent me a day hatch and an oval hatch for my Valley kayak. The SEA-LECT covers are very different than the VCP ones, in material and design. Since I have previously had a bad experience with dual density hatch covers, where the inner hard plastic material would expand too much in the heat and become so loose to let water in, I was a bit concerned with the SEA-LECT one too. SEA-LECT Designs covers are also dual density material (injection molded polycarbonate and TPU material.) but the centre part is much stiffer and the lid shape is domed.
Sealect day hatch inside
3 solid anchor for a lanyard
The underside of the dome has 3 hard plastic tabs where a lanyard can be attached to. Theses tabs are solid and won't get ripped out anytime soon, unlike the VCP ones.
The hatch cover is installed by depressing the dome firmly to make it expand on pop onto the rim. The action is extremely swift and positive.
Watch video below:

click to view video
The day hatch cover is too easy to install: center it and press down. Done!
It sits very tight on the rim and can not be dislodged unless pulled by the tab. No longer can the lid be popped open when doing a rescue since there are no edges to grab or catch. There is no longer the risk to flood the day hatch by inadvertently removing the hatch cover when you need it the least. The oval hatch cover needs a bit more pressure to pop onto the rim so dumping surf will not implode it. The biggest advantage on the SEA-LECT oval hatch is the thinner perimeter lip.

Sealect oval hatch cover
notice the clearance between hatch cover lip and deck recess
VCP hatch covers need to have the flange of the oval hatch pushed carefully into place or a tight seal is compromised. On some Valley (and other) kayaks I have noticed the black rim not aligned well to the deck recess making this sealing process really difficult. With a  SEA-LECT oval hatch there is plenty of clearance and there is no need to follow the flange with your thumb and press into place.
This feature alone makes me want to replace all my hatch covers with SEA-LECT.
Beside the "slimming black", the covers also come in red, yellow or blue: perfect for the kayaker fashionista.

PS as promised to Steve G (see comments) here are a couple of images of detoriorated VCP day hatch covers VCP hatch fail

UPDATE 10DEC12
GDN reader Frank Baron from Florida, USA had a much more serious case of VCP hatch covers deterioration; his lids literally crumbled away...
Frank Baron's covers

.