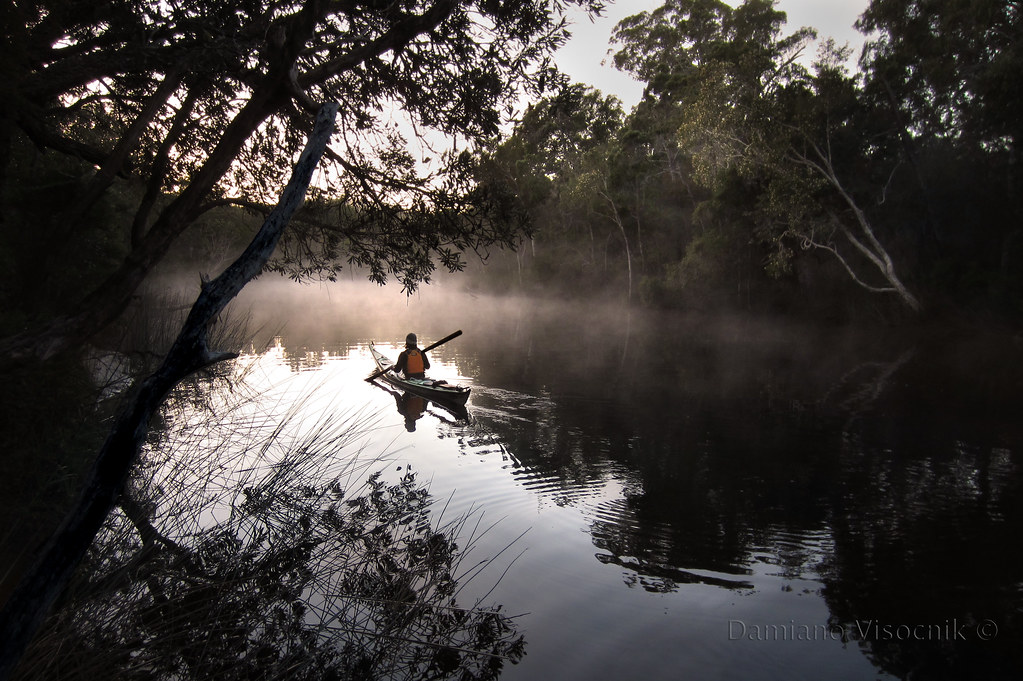
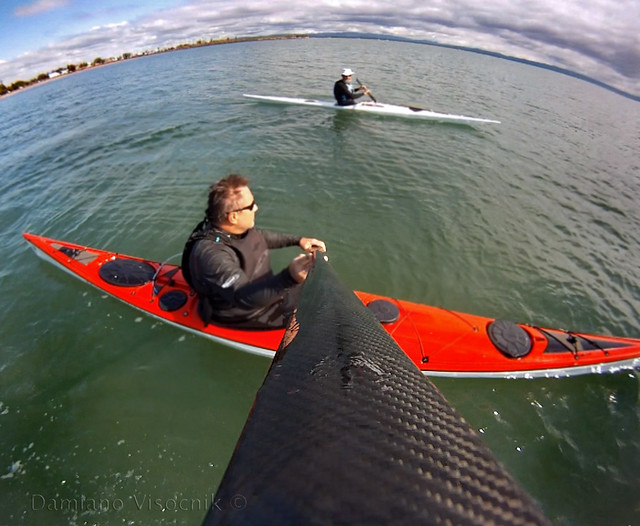
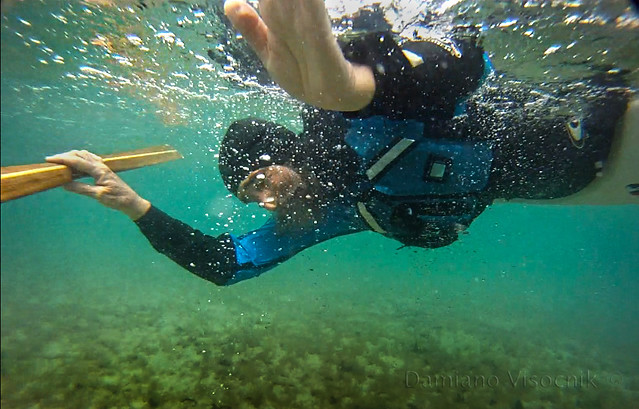
Winter paddling can be uncomfortable when temperatures plummet and ice forms on the water.
Luckily I paddle in Queensland where winter means seas of minimum of 18C degrees :-)
Typically I can expect a short season where simple long sleeve Lycra rashguard is just not enough.
Winter usually has clear skies but windy conditions.
Our paddling group enjoys outings year round and we like to get wet, no matter what the weather is doing.
Reed tuilik (left) and Lavacore top and hood (right)
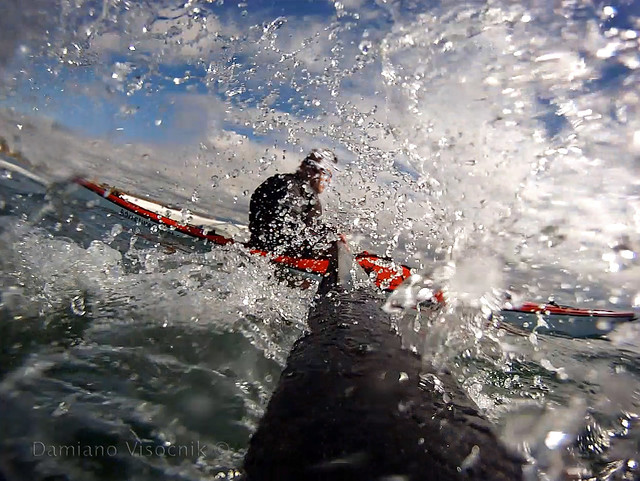
Rolling is slightly more refreshing than other times of the year but the effects of the wind on the wet body can be very cooling. Keeping the body warm just enough to prevent overheating (when underway paddling at a brisk pace) is usually not enough for the after effects of immersion.
Wet hair cools our bodies down very quickly.
Regulating the level of warmth needed for immersion and avoid overheating (when just touring) has always been a difficult balance. I would be freezing after rolling when the wind was blowing.
Stopping on the water to remove the PFD and add a layer is not that easy and sometimes dangerous.
Then Greg introduced me to wearing a hood.
Suddenly I was able to fine tune my body temperature. I would slip the hood on before starting to roll and remove it after my body warmed back up again. There is nothing more efficient and easier than resorting to a hood when the temperatures are variable.
The human head acts as a radiator for our body. There is a lot of blood supply to our brain and very little fat to insulate it. The hair on our skull protects some of the heat loss (if you have hair) but becomes rather useless when wet. The cooling effect of water evaporating is phenomenal as we all know how it feel to wear a wet T-shirt in a breeze...
To protect our heads from heat loss is probably the single most efficient way to keep warm.
Keeping warm with a hood
Most hoods are designed for underwater use where a thin layer of water is trapped between the skin and the neoprene. The water does not flush away and is warmed by our body heat thus creating an insulating layer. Neoprene is a fantastic insulator underwater but I find it not the best material for prolonged use above water. Neoprene does not breath and leaves the skin all clammy. Hearing is impaired and often an annoying drumming is heard from the neoprene over the ears.
For non immersion weather protection a hood from Reed Aquatherm seems to be adequate for Queensland winters. What I really wanted was the warming properties of neoprene but the comfortable breathability of Aquatherm.
Recently I found a product made from polyester that gives the insulation of 3 mm neoprene but still feels fantastic on the skin.
The inner surface has the face of short fleece (polyester) laminated to a windproof barrier that lets body perspiration through, mated to an outer surface that is highly water repellent.
The Lavacore hood keeps my head warm when rolling but dries fast when I start cruising again protecting me from the wind. After a short while my exercising body produces enough heat and I remove my hood without even having to slow down.
I believe that a hood is probably the most effective piece of clothing that a kayaker can have on board for an emergency. It can make the difference between shivering and feeling snug.
.
28 July 2011
25 July 2011
19 July 2011
REVIEW: Northern Light Greenland paddle
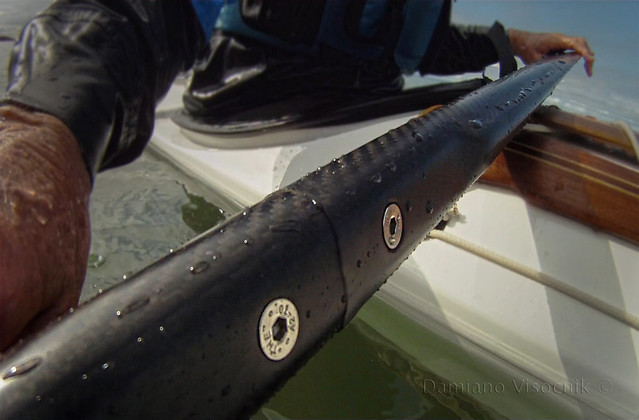
I have been looking for a sectional traditional paddle for a while now. My attempt to create one was OK for a “spare” paddle that I would use in emergency but somehow that short coupling was not going to cut it for demanding situations: I would not use that paddle in the surf. Recently Paul from Northern Light offered me one of his three piece carbon fibre paddles and asked me if I wanted to review it.
I was interested in the concept of a paddle that breaks down into a shorter length that could easily be stowed onto the deck of my kayak since full length paddles just don’t fit that well.
I used to carry around a split Euro paddle but I would hate to use it: these days I find paddling with a EP just weird :-)
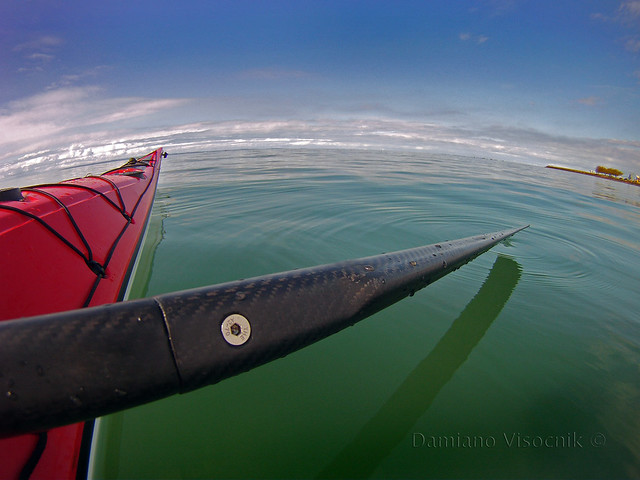
I had the opportunity to use the Northern Light Greenland paddle recently and I put in a few miles with it.
My initial concern was: is this 3 sections paddle going to be strong and wobble free?
The paddle assembled easily but with a firm feel. Just a bit of force is needed to insert the central loom section into the reinforced blades.
Northern Lights idea here is to have a paddle that would be functional even without fitting the fastener, when in a hurry.
There are however very nice stainless steel countersunk metalthreads that firmly hold the paddle together. A metric hex key tool (Allen key) is supplied with the paddle. A few short turns of the key secure the sections into a very solid one-piece paddle with no play.
I don’t have an accurate scale to weight the paddle but Pauls told me that the test paddle supplied was 898 grams. To me it felt just a bit heavier than the one piece balsa cored carbon skin Black Stick but lighter than my super strong beefy laminated Vanstix “battle stick” I use for surfing.
When Paul and I started writing I showed him a picture of Greg Schwarz's Black Stick and Paul wrote back that it was absolutely gorgeous but was concerned with the comparison. He wanted to stress that his paddles were designed for travel and abuse and while Greg's shiny paddles were stunning, he wanted something different. He knew comparisons were inevitable, but he said we were really talking apples to oranges as one was a one piece paddle and the other a three piece.
Northern Light sectional paddles emphasis is on strength (the blades are reinforced internally with carbon fiber and Kevlar making for a nice stiff but not too stiff paddle). Paul told me that he definitively wanted overkill on the blades to ensure they were strong and tough.
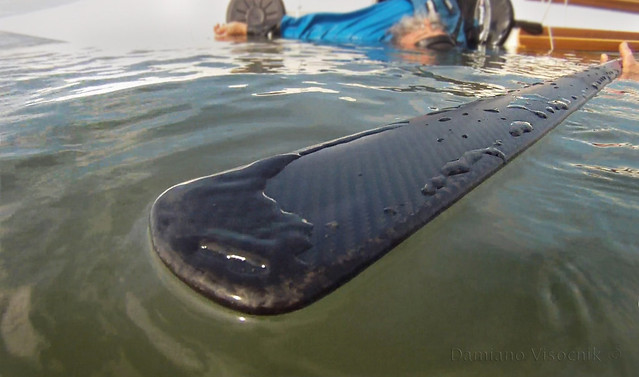
My sample paddle might not have the absolute perfect mirror shiny surface of the Black Stick but I find the finish on the Northern Light impressive. It has a slightly pearl look to it.
There are no rough/sharp edges to cut my hands on when sliding the paddle around in an extended position.
The edge of the blade is thin but not excessively; it sits nicely in the hand and doesn’t hurt when sculling.
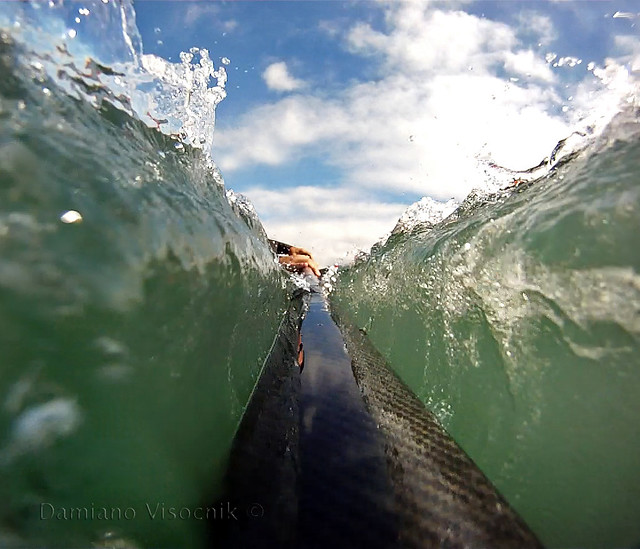
I found the paddle very quiet. I purposely tried to induce vortices of air in a forward stroke without canting. When looked in profile, the surface of the blade does have a small concave running most of the length of the surface.
Maybe that little detail makes the paddle so easy to use?
The loom however is not typical. It is ovalized but has two distinct flat surfaces. I thought that the unusual shape would be a concern. I found the position of my hand on the shaft very agreeable, not unlike my Vanstix Aleut shaped shaft. I found that the thumb rested nicely on the flat surface.
The fasteners were out of the way of the hand position and only when I extended the paddle I could feel the small seam on the joint. I could barely notice it and did not annoy me.
Speaking of looms: I asked for one that would match my overall existing GPs length. The looms can be custom ordered to suit paddlers' dimensions. I believe a 90" paddle can be ordered, down to a minimum of 83". Now that's custom sizing :-)
Paul also supplied a very small “loom”. Actually it’s just an insert that holds the two blades together.
It took only a minute to remove the standard loom and replace it with the joiner. I now had a storm paddle.
Greg had a good rolling session with that short paddle and he liked it.
I am not sure if it was a slip of tongue but I might have heard him saying that the Northern Light felt very similar to his paddles, minus the loom :-)
Overall the carbon Greenland paddle felt very good.
There was no obligation on my part to keep the paddle if I didn’t like it but this one is not going back.
I am now interested in trying the Aleut paddle that Northern Light offers.
Next time I head out for a surf session I will take the Northern Light and see how it performs in the rough.
.
16 July 2011
12 July 2011
VIDEO: winter rolling with Stika
The lower temperatures and settled weather produce clearer water here in Queensland.
The January floods that tainted the waters of Moreton Bay are just a memory and once again rolling in a kayak is a pleasure.
While our cousins down South are dressing up in serious immersion gear for cold water, we are lucky to enjoy seas of 19C where a lightly insulated top is usually enough to keep us warm.
Starring Greg Schwarz, the resident rolling mentor, in his Tahe Greenland dressed in a Reed tuilik.
The paddles are his creations: hollow core, laminated Western red cedar.
.
07 July 2011
FAIL: a list of problems
After a few years of sea kayaking and having owned nothing less than 13 sea kayaks and personally worked on 10 belonging to other people I have seen a few weaknesses in design and manufacture.
The list that follows is my personal experience of actual fails that I have observed up close. Fortunately not all on my kayaks J
1) The most common failure I had on my composite sea kayaks (I have never owned a plastic one) is cracking of the laminate.
Occasionally the hull of my kayak hit a rock and produced damages of various degrees: on one occasion holing a thin laminated hull with surprisingly very little impact force.
Some other cracks in the hull have occurred from stressing the boat in heavy seas. The cockpit area is particularly prone to stress since there is no deck to create a solid monocoque structure.
The hull under the seat is at its widest and flattest area: compression and flexing of the hull is common even on high-end kayaks. I have reinforced all of my current kayaks (apart from the hard chined Zegul) with a layer of carbon/Kevlar or double bias carbon to strengthen and stiffen a weak cockpit.
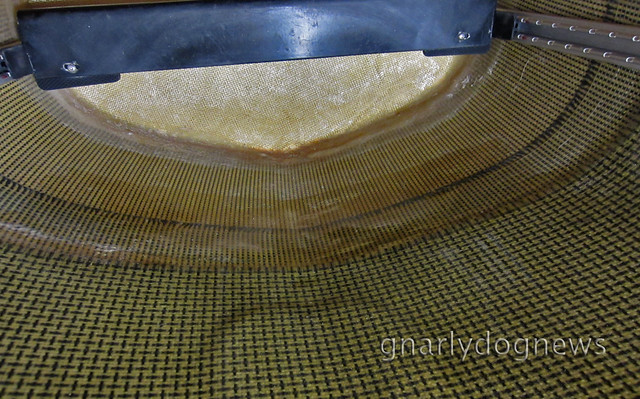
additional layers of carbon/Kevlar in cockpit area
2) The cockpit coaming/deck joint has so far cracked in all my latest kayaks unless reinforced. These days I put a new boat on the “blocks” before it even hits the water. I remove any foam padding in the thigh braces and laminate the area with carbon.
In the boats I have not done so I have eventually stressed the deck enough to create hairline cracks in the deck. When rolling and edging in the surf, the kayak sees a lot of upward pressure from bracing with my thighs. Manufacturers rarely address/reinforce the coaming.
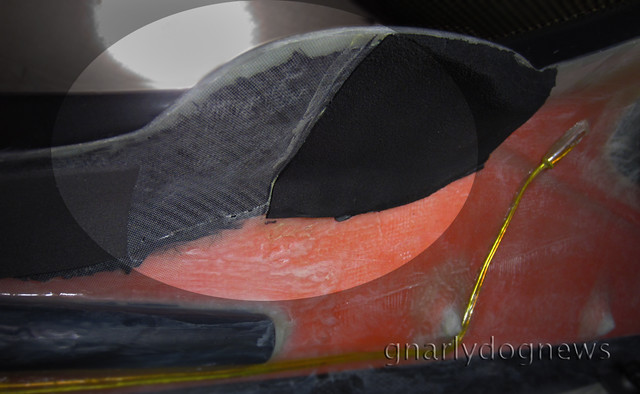
layers of carbon reinforcing the coaming/deck junction in thigh brace area
3) Speaking of junctions, the other common failure is the seam of the hull/deck. So far none of my kayaks have suffered a leak there but I have seen numerous kayaks without external seams develop a hairline crack that inevitably results in water entering the hatches. Adding a cosmetically acceptable external seam to a friend’s cracking kayak has been very time consuming. I only use epoxy for my work and I finished the seam with a coat of UV resistant black resin. A flow coat would have been easier tho…
4) And while I talk about cracks I should mention that most kayak manufacturers skip on the design and strength of the deck. The inexperienced might be fooled by a thick lay-up but rarely does he/she realize that glass-poor chopped strand (chopper gun lay-up) is suitable for very tick laminates like in a motorboat but are very poor executions for a sea kayak. Problems start to occur when a person needs to climb on the deck of a kayak in a recovery. So far I have repaired and reinforced half a dozen decks that failed under the weight of paddlers. On the other hand, my very light Chinese kayak has a core laminated deck making it extremely resilient. Other kayaks I now own have fabric instead of just chopped stand in the deck lay-up, and so far have held up very well.
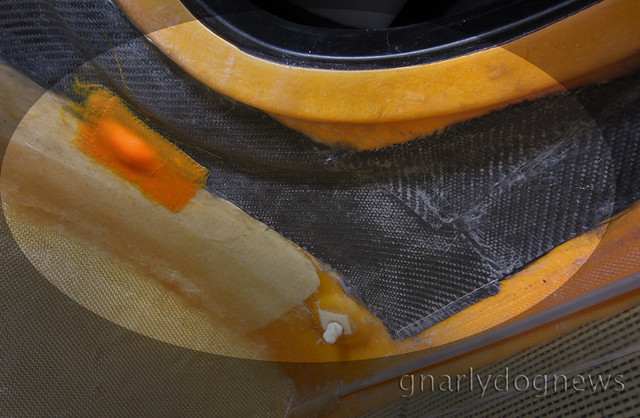
underdeck hatch cover coaming area reinforced with carbon cloth
5) Leaks to the hatches are often lamented by sea kayakers that paddle in conditions that will see water wash over the deck or proficient rollers that submerge the hatch covers.
I have had a few hatches leak. The most common problem has been water ingress from fittings on the deck.
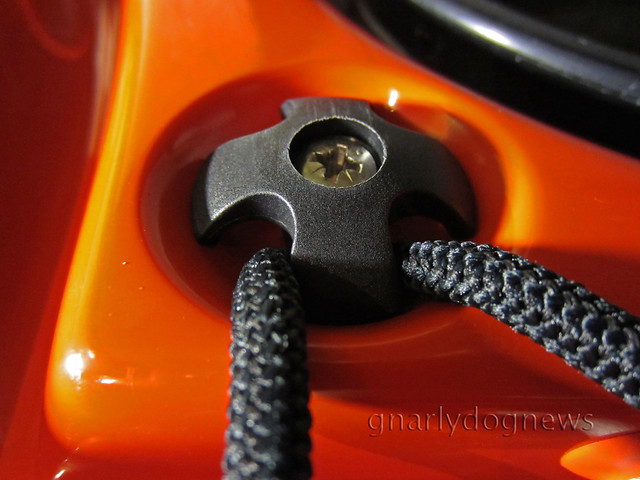
deck fitting "well" where water pools
The little well where the hardware is bolted to the fiberglass holds water that slowly seeps through to the inside if there is no proper sealing under the nut against the deck. Kayaks that have recessed deck anchors don’t have that problem.
I had leaks coming from the junction of the hatch’s rim where the bonding sealant was not completely encompassing the rim. All it takes is a small section left out and water will seep in.
I have removed poorly fitted hatch rims and resealed them with polyurethane or epoxy glue.
6) Hatch covers are also prone to leak. So far only Valley and Kajak-Sport hatches have proven to be leak proof in my fleet. All other have leaked, even if often just minimally. Mind you, the Valley hatch covers have a reputation of deteriorating sometimes prematurely. Replacement of those is not cheap. Luckily there seems to be improvements on the quality of the Valley hatches and there are less reports for the need to replace them too soon. Excellent alternative/replacement hatch covers are available from SEA-LECT Designs.
7) While most leaks occur from the top of the deck I have repaired 3 kayaks with leaking bulkheads. On one occasion the seal around the fiberglass bulkhead was not that great: a small amount of epoxy glue fixed the little hole. In two other instances I had to fabricate new bulkheads since the factory ones were made out of closed cell foam. It is just a matter of time before a foam bulkhead will leak. If a kayak is used in waves the hull/deck will flex enough to separate the weak glue that bonds foam to fiberglass (things get really ugly in plastic kayaks). Lifting the kayak by the rear of the cockpit coaming will separate the foam too. To date I have not met anybody with dry hatches in a kayak with foam bulkheads. I would only choose a plastic kayak that has welded plastic bulkheads.
8) Small leaks to the cockpit area usually go unnoticed since water entering through the tunnel of the spray deck is greater than around the coaming junction. There have been however a few cases (not mine) where the rim was so poorly bonded that a low-deck kayak was flooding every half an hour. A large section was left out and not bonded at the factory. I have also observed a brand new, very high-end British kayaks, that had a visibly separating rim. It pays to inspect the new kayak before purchase.
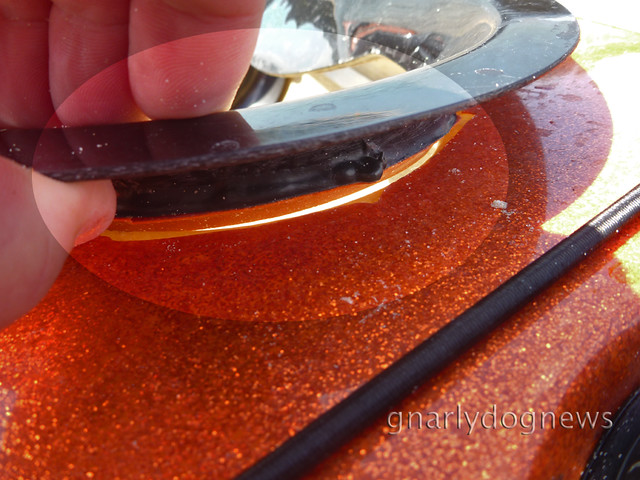
coaming separating from deck
9) Last but not least leaks can occur from skeg cable housings or rudder lines. I had a badly glassed-in skeg box that leaked substantially. Gel coat concealed the cavity and only a small crack was visible inside the recess. Epoxy glue fixed the problem.
Rudder lines leaks can be a bit trickier. If the housing has worn out (result of constant abrasion of the stainless steel cable by operating the rudder) the water that enters the tube will leak into the hatch. Replacing the cable housing is often a pain.
10) And while I am mentioning cables I also had a few rudder cables snap on me (that’s when I still used to paddle ruddered boats). The stainless steel wire fatigues and after a while (that depends on how often you paddle) it snaps. It was no fun trying to keep that kayak go where I wanted without a rudder. While I find skegs more reliable (never kinked one myself) I have seen several malfunction. Sloppy workmanship at the factory will create sticky cables. A skeg that has resistance can kink the cable when one forgets to retract it on landing. A smoothly operating skeg will usually just retract without the paddler even noticing. I find rudders on a kayak a weak tool to keep directional stability. While without doubt they are more efficient when one’s goal is to just eat miles, I had a few snap on me when in rough waters. Don’t try reversing in surf with one deployed. I also ruined one being retracted on deck since most retention systems for stowing it on deck are not secure enough for surf work.
11) An area of weakness and potential failure can be the carry-handle mounted to the deck. Some kayaks have simple bolt-on (in some cheap plastic kayaks it is just pop rivets) carry handles. Carry handles are not designed to pull a kayak loaded with heavy gear but some handles are secured to such thin laminates that struggle to lift the weight of the kayak alone. In one very bad case I have seen the whole handle rip out of the deck. Needless to say that reinforcing the deck so far in the bow or stern is really difficult. My preferred carry handles are positioned at the very ends of the kayak, with a line threaded through a hole at the seam of the hull/deck. More on grab handles safety issues here
12) Last but not least: the seat. I have cracked several seats in my kayaks. Incidentally the seats that failed were thick and heavy. So is there no seat strong enough for my paddling? Yes, there is: a decently laminated one!
I have noticed that most sea kayak seats are constructed with real cheap resin-rich chopped strand. As mentioned before this type of material is not suitable for light applications. The seats that have not failed on me are made from several layers of woven fiberglass, often reinforced in stress areas with Kevlar. Unless a weak hung seat is secured to the bottom of the hull to prevent it from swinging side to side the chopped strand will often not last too long before starting to crack in the corners. Repairing it involves removing the seat and reinforcing it with quality woven fabric. See this article for more info.
There are a couple of other items that I have seen fail but they are accessories. I will write a separate article on those issues some other time.
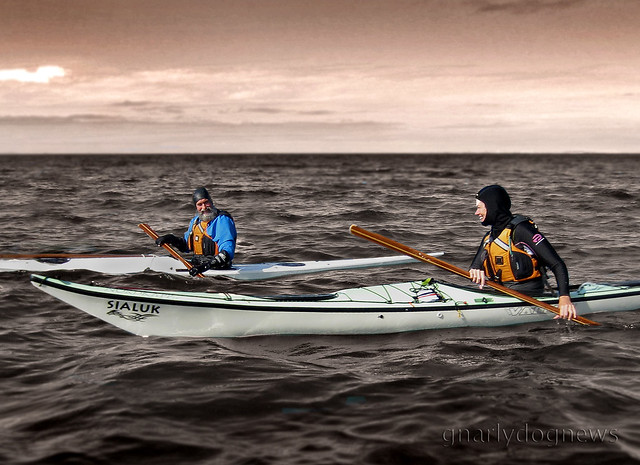
The list that follows is my personal experience of actual fails that I have observed up close. Fortunately not all on my kayaks J
1) The most common failure I had on my composite sea kayaks (I have never owned a plastic one) is cracking of the laminate.
Occasionally the hull of my kayak hit a rock and produced damages of various degrees: on one occasion holing a thin laminated hull with surprisingly very little impact force.
Some other cracks in the hull have occurred from stressing the boat in heavy seas. The cockpit area is particularly prone to stress since there is no deck to create a solid monocoque structure.
The hull under the seat is at its widest and flattest area: compression and flexing of the hull is common even on high-end kayaks. I have reinforced all of my current kayaks (apart from the hard chined Zegul) with a layer of carbon/Kevlar or double bias carbon to strengthen and stiffen a weak cockpit.
additional layers of carbon/Kevlar in cockpit area
2) The cockpit coaming/deck joint has so far cracked in all my latest kayaks unless reinforced. These days I put a new boat on the “blocks” before it even hits the water. I remove any foam padding in the thigh braces and laminate the area with carbon.
In the boats I have not done so I have eventually stressed the deck enough to create hairline cracks in the deck. When rolling and edging in the surf, the kayak sees a lot of upward pressure from bracing with my thighs. Manufacturers rarely address/reinforce the coaming.
layers of carbon reinforcing the coaming/deck junction in thigh brace area
3) Speaking of junctions, the other common failure is the seam of the hull/deck. So far none of my kayaks have suffered a leak there but I have seen numerous kayaks without external seams develop a hairline crack that inevitably results in water entering the hatches. Adding a cosmetically acceptable external seam to a friend’s cracking kayak has been very time consuming. I only use epoxy for my work and I finished the seam with a coat of UV resistant black resin. A flow coat would have been easier tho…
4) And while I talk about cracks I should mention that most kayak manufacturers skip on the design and strength of the deck. The inexperienced might be fooled by a thick lay-up but rarely does he/she realize that glass-poor chopped strand (chopper gun lay-up) is suitable for very tick laminates like in a motorboat but are very poor executions for a sea kayak. Problems start to occur when a person needs to climb on the deck of a kayak in a recovery. So far I have repaired and reinforced half a dozen decks that failed under the weight of paddlers. On the other hand, my very light Chinese kayak has a core laminated deck making it extremely resilient. Other kayaks I now own have fabric instead of just chopped stand in the deck lay-up, and so far have held up very well.
underdeck hatch cover coaming area reinforced with carbon cloth
5) Leaks to the hatches are often lamented by sea kayakers that paddle in conditions that will see water wash over the deck or proficient rollers that submerge the hatch covers.
I have had a few hatches leak. The most common problem has been water ingress from fittings on the deck.
deck fitting "well" where water pools
The little well where the hardware is bolted to the fiberglass holds water that slowly seeps through to the inside if there is no proper sealing under the nut against the deck. Kayaks that have recessed deck anchors don’t have that problem.
I had leaks coming from the junction of the hatch’s rim where the bonding sealant was not completely encompassing the rim. All it takes is a small section left out and water will seep in.
I have removed poorly fitted hatch rims and resealed them with polyurethane or epoxy glue.
6) Hatch covers are also prone to leak. So far only Valley and Kajak-Sport hatches have proven to be leak proof in my fleet. All other have leaked, even if often just minimally. Mind you, the Valley hatch covers have a reputation of deteriorating sometimes prematurely. Replacement of those is not cheap. Luckily there seems to be improvements on the quality of the Valley hatches and there are less reports for the need to replace them too soon.
7) While most leaks occur from the top of the deck I have repaired 3 kayaks with leaking bulkheads. On one occasion the seal around the fiberglass bulkhead was not that great: a small amount of epoxy glue fixed the little hole. In two other instances I had to fabricate new bulkheads since the factory ones were made out of closed cell foam. It is just a matter of time before a foam bulkhead will leak. If a kayak is used in waves the hull/deck will flex enough to separate the weak glue that bonds foam to fiberglass (things get really ugly in plastic kayaks). Lifting the kayak by the rear of the cockpit coaming will separate the foam too. To date I have not met anybody with dry hatches in a kayak with foam bulkheads. I would only choose a plastic kayak that has welded plastic bulkheads.
8) Small leaks to the cockpit area usually go unnoticed since water entering through the tunnel of the spray deck is greater than around the coaming junction. There have been however a few cases (not mine) where the rim was so poorly bonded that a low-deck kayak was flooding every half an hour. A large section was left out and not bonded at the factory. I have also observed a brand new, very high-end British kayaks, that had a visibly separating rim. It pays to inspect the new kayak before purchase.
coaming separating from deck
9) Last but not least leaks can occur from skeg cable housings or rudder lines. I had a badly glassed-in skeg box that leaked substantially. Gel coat concealed the cavity and only a small crack was visible inside the recess. Epoxy glue fixed the problem.
Rudder lines leaks can be a bit trickier. If the housing has worn out (result of constant abrasion of the stainless steel cable by operating the rudder) the water that enters the tube will leak into the hatch. Replacing the cable housing is often a pain.
10) And while I am mentioning cables I also had a few rudder cables snap on me (that’s when I still used to paddle ruddered boats). The stainless steel wire fatigues and after a while (that depends on how often you paddle) it snaps. It was no fun trying to keep that kayak go where I wanted without a rudder. While I find skegs more reliable (never kinked one myself) I have seen several malfunction. Sloppy workmanship at the factory will create sticky cables. A skeg that has resistance can kink the cable when one forgets to retract it on landing. A smoothly operating skeg will usually just retract without the paddler even noticing. I find rudders on a kayak a weak tool to keep directional stability. While without doubt they are more efficient when one’s goal is to just eat miles, I had a few snap on me when in rough waters. Don’t try reversing in surf with one deployed. I also ruined one being retracted on deck since most retention systems for stowing it on deck are not secure enough for surf work.
11) An area of weakness and potential failure can be the carry-handle mounted to the deck. Some kayaks have simple bolt-on (in some cheap plastic kayaks it is just pop rivets) carry handles. Carry handles are not designed to pull a kayak loaded with heavy gear but some handles are secured to such thin laminates that struggle to lift the weight of the kayak alone. In one very bad case I have seen the whole handle rip out of the deck. Needless to say that reinforcing the deck so far in the bow or stern is really difficult. My preferred carry handles are positioned at the very ends of the kayak, with a line threaded through a hole at the seam of the hull/deck. More on grab handles safety issues here
12) Last but not least: the seat. I have cracked several seats in my kayaks. Incidentally the seats that failed were thick and heavy. So is there no seat strong enough for my paddling? Yes, there is: a decently laminated one!
I have noticed that most sea kayak seats are constructed with real cheap resin-rich chopped strand. As mentioned before this type of material is not suitable for light applications. The seats that have not failed on me are made from several layers of woven fiberglass, often reinforced in stress areas with Kevlar. Unless a weak hung seat is secured to the bottom of the hull to prevent it from swinging side to side the chopped strand will often not last too long before starting to crack in the corners. Repairing it involves removing the seat and reinforcing it with quality woven fabric. See this article for more info.
There are a couple of other items that I have seen fail but they are accessories. I will write a separate article on those issues some other time.
tags
anchor point,
cockpit,
customizing,
deck,
designs,
DIY,
epoxy,
fibreglass,
grab handles,
lamination,
modifications,
repair,
sea kayak,
Valley kayaks
04 July 2011
Rolling with Stika
The relative warm and crystal clear winter waters of Queensland offer the perfect environment for some fun in a kayak, underwater.
Video: Winter rolling with Stika_coming soon
Subscribe to:
Posts (Atom)