I was shopping for a new car and since my
current one had factory roof rails I was hoping that the existing roof rack could be transferred to my new wheels.
My search for a replacement vehicle was pointing towards a car that had no rails and I almost discarded that vehicle because of it.
I wanted the security of a seriously well anchored roof rack since I have seen one too many flimsy and ill fitting clip-on style roof racks fail. Transporting a kayak or two on a rack that is just secured by some kind of friction mount against the recess of the car's door is NOT my idea of safety.
Having kayaks come off the roof at high speed on the highway, where up lifting forces are greatest, is a terrible scenario, with possible consequences of causing somebody behind me to crash and possibly die.
Nah, I wanted a bolt-on serious racks.
The vehicle I eventually settled on offered no factory rails but my search for a decent roof racks revealed that some brands offer anchors that pierce the sheet metal of the roof and are permanently bolted to the car; I like that idea.
Some brands required drilling several holes into the roof of the car and installing a
long flush "rail" to then accept a tower and roof rack.
Not exactly unobtrusive and maybe a bit esthetically questionable on some vehicles but the rail solutions allows for quick removal of the roof rack assembly.
On my previous car I had
Rola roof bars that were clamped onto the elevated factory car rails.
The solution was good allowing me to transport two kayaks side-by-side in a lay-down position.
 Rola clamp-on bars on car with factory rails
I prefer that option since in the heat of summer a light high-end kayak (epoxy lay-up) can deform if transported on its side on a "J" cradles.
The contact area of the standard swiveling cradles is so much greater that the J cradle base, not to mention the security and sturdiness (no wobble).
One thing that really annoyed me with Rola rails was the noise that the rails created at highway speed.
When not transporting kayaks, to make my rails quiet, each time I would have to remove the kayak cradles and replace the rubber strip to cover the T slot in the rail: not exactly a swift and easy operation. I did that only twice when I planned a long drive (1000 miles) but, since I used the cradles weekly, I just left them on other times and put up with the noise.
Now, having to purchase a new rack system, I wanted something quiet.
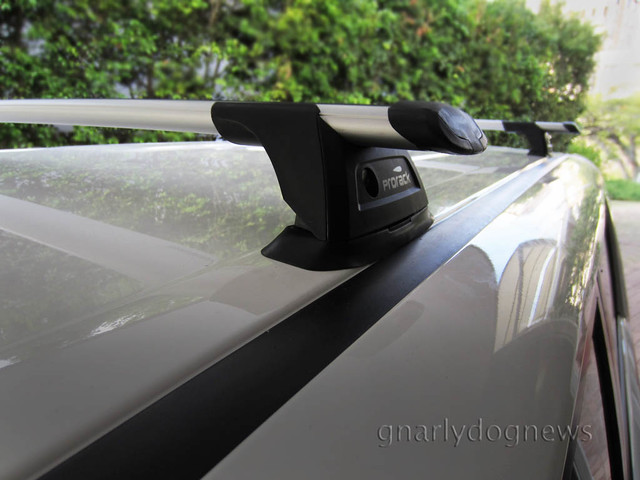
Whispbar from Pro Rack seemed the best solution guaranteeing a noiseless ride.
The rails are wing shaped to eliminate turbulence causing noise and they don't effect gas mileage, the feet are low profile and tapered to eliminate whistling.
I still remember those agricultural offerings that I used to sell when I managed a bicycle shop in USA: they remind me of a
Meccano set where parts were just bolted together with no consideration to noise or aesthetics. They might have looked OK on a Jeep but I thought that they were so out of place on a streamlined
modern car.
Whispbar was offering a permanent drill and bolt-on base for their modular rack system but my car was too new (and uncommon); there was no mention of compatibility.
I searched on the net for rail installs on the same car in USA and found some samples of similar set ups. While I was risking setting off the side curtain air bags I drilled the roof of my car.
All went well and the small anchor pads were riveted solidly to the edge of the car's roof.
 anchor pad and stud for roof rack mount
The rivets are high strength stainless steel and require a commercial style pop-riveter (tore apart my light duty one trying to pull the heavy duty rivets).
The base is now super solid and the rack can not accidentally come off no matter how fast I drive or how much crosswind there is.
There is no noise while I drive and I don't have to remove the cradles: the T slot rail has a built-in rubber strip that seals the void around the cradles. Simple but ingenious.
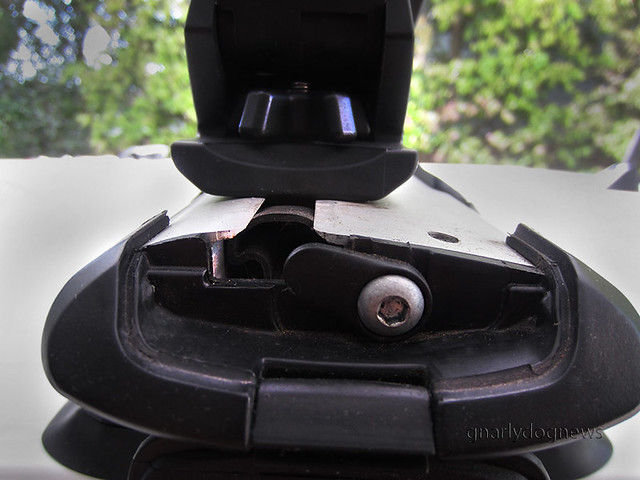 end of rail flap open to reveal T slot detail
The overhanging rails are wide enough to fit most vehicles and when the time will come to get a new car I will not need to shop for a new rack system. All I will need is 4 small metal pads to rivet onto the roof (also modular with door clips).
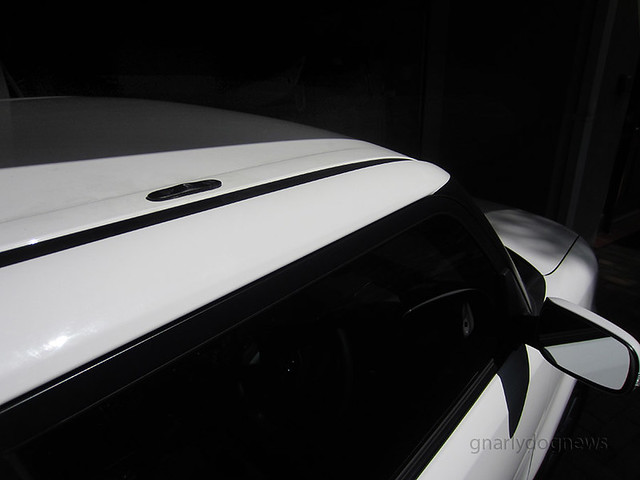 small anchor pad riveted to roof (rack removed)
The bonus part of riveting the pads is that the spread can be way greater than the typical between-the-doors clip-on racks. The kayaks sit much more securely (less pitching). I purposely spaced the bars to the length of a bicycle's wheel base. When I transport a bike I don't need a bulky (and expensive) bike carrier. I secure the fork to a
simple block with a T bolt fitting that slides nicely inside the roof rack rail, The rear wheel is secured by an old school toe strap. Simple, light, quiet, aerodynamic and cheap. However I can't boast to the world: look, I am a bike rider :-)
While I was
not satisfied with the Rola roof rails I was pleased with their kayak cradles.
I have tried several brands (Thule, Thule J cradles, Rhino, "no brand", custom foam blocks, Yakima) No other cradle offers me the ability of the swinging Rola cradles and the hinged pad that contours the hull better than a fixed one.
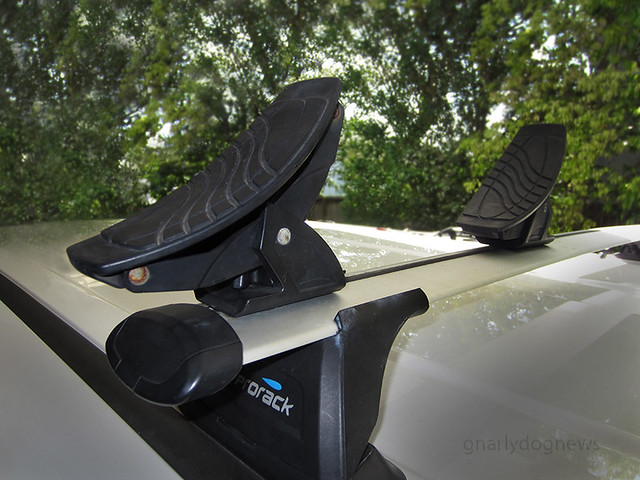 swiveling Rola kayak cradles
Rola cradles self adjust and never create a hard spot that can lead to hull deformation (in the summer heat).
Where Rola come short with their kayak cradles is the simple nut that is housed inside the thumb wheel. While their
T bolt is made from stainless steel the actual nut on the adjusting thumb wheel is mild steel. Not the best choice of material for hardware designed to transport salty kayak. Needless to say the mild steel nuts rusted and froze onto the studs. I had to split one plastic wheel and remove the frozen nut with a spanner.
When contacting Rola for a replacement part (thumb wheel) their reply was:
"... You will need to purchase a new cradle. Part number 25-0069 - RRP $41.00..."
I felt insulted and I want point out here Rola's poor customer service policy.
Not only the rusty nut is a design fault but I find the way the problem was handled is sub standard. It seems that it was too difficult to send me a single thumb wheel and, if Rola manufacturing is done in Australia, how hard would it be to reach for one in the bin and ship it?
I am used to a different style of customer service where a design fault is addressed and remedy is offered.
I ended up sourcing the simple thumb wheel somewhere else ($2).
I generally prefer to deal with companies that offer to repair the faulty/damaged item instead of forcing me to buy a whole new unit while the old would be still perfectly functional with just a small part replaced.
I think that companies like Patagonia for example, where repair is high on the priority list, no matter who is at fault, base their success on an ethical approach to manufacturing and customer service.
Needless to say that they are also the leading brand when it comes to REAL green manufacturing policies and practices. But that will be a future post.
.
