Showing posts with label modifications. Show all posts

25 June 2015

Digital camera hand grip modification

.
I reached the limit of tolerance with my pocket compact digital camera as I realized my images were lacking sharpness when light conditions were not ideal.
Most of my images are displayed on monitors (web use) and only occasionally I print the very best pictures of mine.
While all images look great when displayed small things don't look so good once they are enlarged.
Add, low light and the tiny lenses of most compact cameras suddenly look a bit fuzzy.
If you believe that the images you take on your smart phone are good enough, then don't need to read any further: you are wasting you time.

I want better results for my photographic efforts but I refuse to schlep a large camera with me.
Weight and bulk are always my concern (some say, personal too :-) but gone are the days of toting around a large heavy camera.
If the subjects that I want to photograph would be within reach of a short walk away from the car I would worry less, but when I take my cameras in a backpack and lug it around for days in the back country, or it has to fit inside my kayak on extended trips, then size does matter.
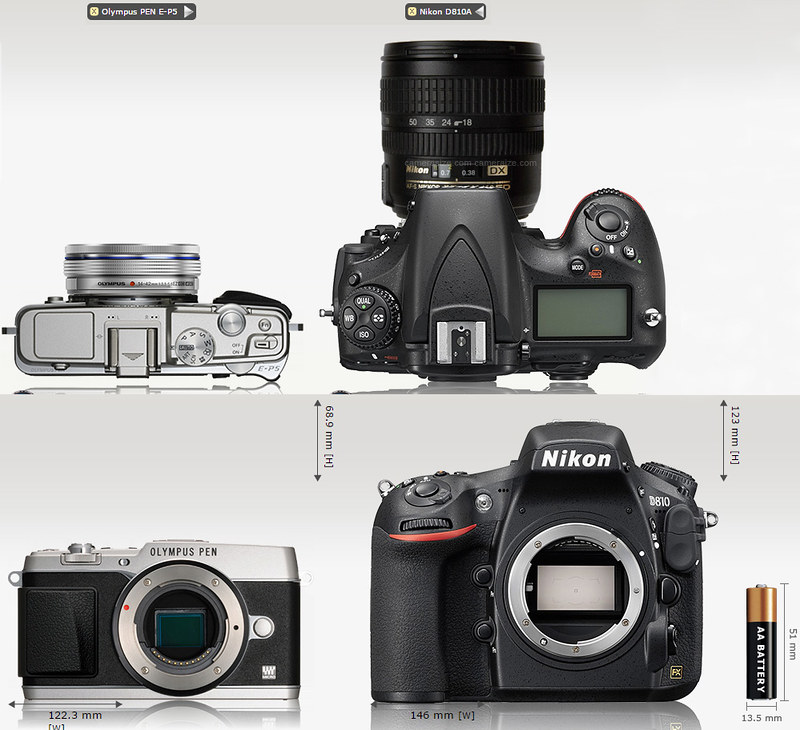
Oly vs Nikon_lens
Olympus camera and lens compared to Nikon, similar focal length, same f/stop
For my second trip to Scandinavia I wanted to have a higher quality camera, one that allows me to apply my skills and one that would reward my creativity. My intention was no longer to simply record my trip, I wanted images I would be happy to hang on my wall.

The Micro Four Thirds system of cameras is the perfect compromise for me: images are sharp and the cameras have features than no other system has, size being one of the major ones.
I can afford to have a camera body and a couple of lenses with me and not really feel it in my backpack, something I could not do with a lot of DSLRs.

But where the Micro 4/3 system excels it also poses some problems with users with slightly bigger hands: the hand grips are often a bit small.
As I started to attach larger/heavier lenses on my Olympus cameras I felt that the grip was a bit diminutive and I had to clutch the camera too tightly.
I could use their Pro models but that would defeat the idea of compact and light: I just wanted a better grip, not a bigger camera.
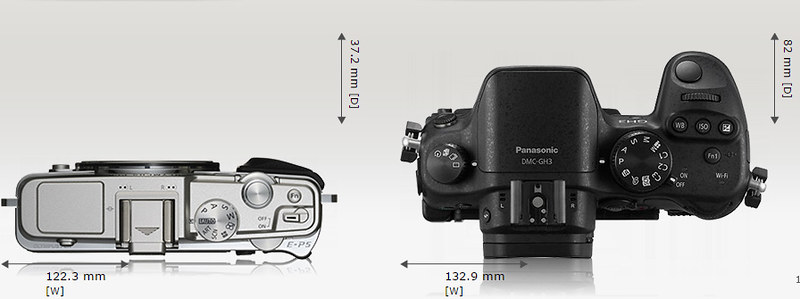
camera size comparison_3
same image sensor, different body, same image result
Commercially available add-on grips look too bulky (no need to have a base plate bolted to the bottom if one is not needed) and the glue-on aftermarket grips were not available for the camera I was using.
However those aftermarket grips looked really good and that prompted me to come up with my own DIY modified hand grips.
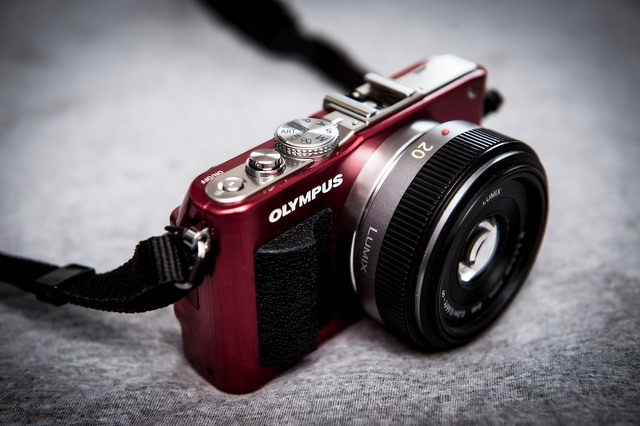
8653856259_d099d50b12_z
commercially available stick-on grip, here

I used Sugru, a silicon putty that feels like Plasticine but cures hard like rubber, sticks well and does not feel too slippery.
A small packet of Sugru contain enough material to shape a single grip if a large one is desired, or just enough for two smaller ones. Bright colors are available but I went with conservative black.
I have so far modified an Olympus E-PM2 (smallest of the M4/3 series) a couple of E-P5 and several E-M5.
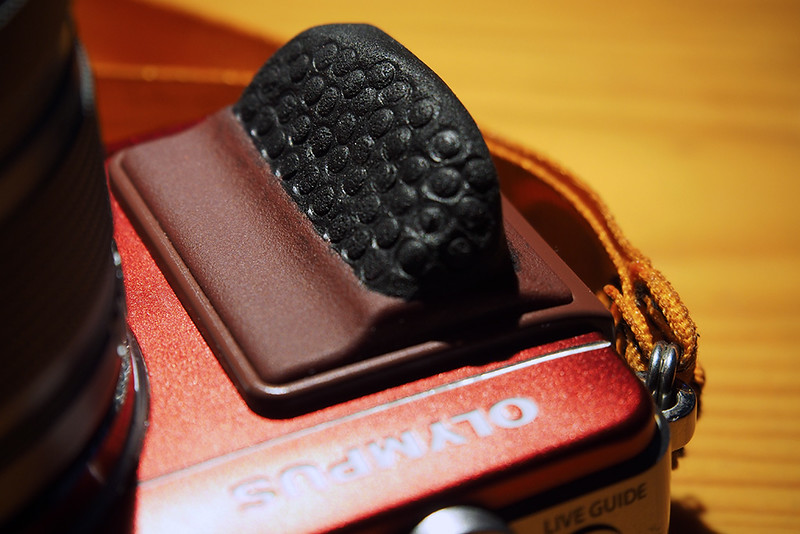
grip mod on PM2
Olympus E-PM2
Once the putty is kneaded and then firmly pressed onto the existing small protrusion where the fingers grip the camera, I shape the soft material with a small bladed knife to create a clean edge.
A moistened index finger keeps on shaping the putty until I am happy with the overall shape, then I run the back of the knife blade to create a perfectly uniform surface (not bumpy).
If the form of the grip is in its final shape I like to add some texture to enhance the surface and create more friction for my fingers.
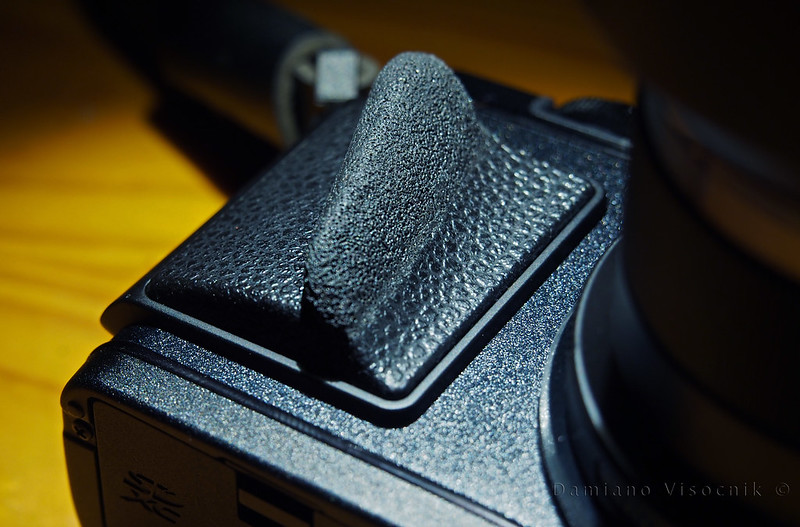
Sugru grip on P5_3
Olympus E-P5
Here I use a combination of pins, pen ends (to create little circles) and an old toothbrush for finer texture.
I try to achieve a look that matches the existing camera finish but I simply will never be able to replicate the faux leather surface.
Before I let the camera rest to cure I check that there are no bits of stray silicon putty on the grip, where I don't want it.
While the cured silicon does become hard like rubber it is not impossible to remove it mechanically but one needs to scrape vigorously to get it off.
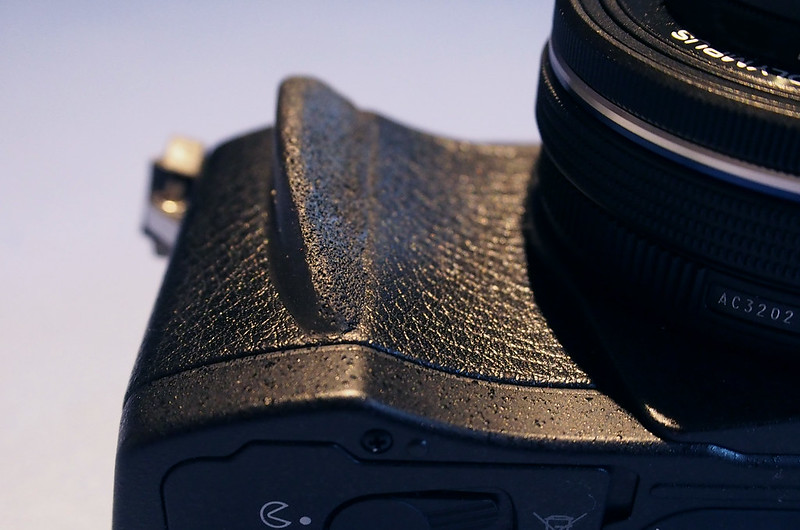
Sugru grip on M5_2
Olympus E-M5
I have seen some photographers push their fingers into the soft putty before it's cured to have an "imprint" look; I go for a more universal one where the grip is an extension of the original one and less fully-custom.
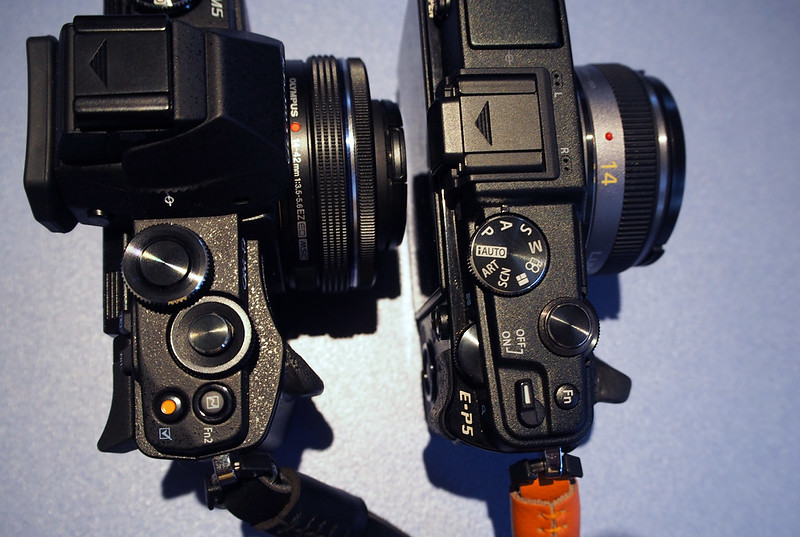
Sugru grip on M5_3
Olympus E-M5 and E-P5, modified grips

The grip on my Olympus cameras is now much more positive: my fingers don't have to clutch the body so tightly and the softer grip fatigues my hand much less when on longer photo shoots.

Photographing the sunset_c .

03 February 2015

SHOP: filling-in the compass recess

.
Mounting a sail on a sea kayak requires a few considerations: position and deck strength.
On the newly acquired Whisky16 the front hatch is positioned surprisingly way far forward.
In front of that there is a deck-mounted compass recess.
The previous owner of that kayak had a small sail mounted there and I used the existing holes to mount mine.

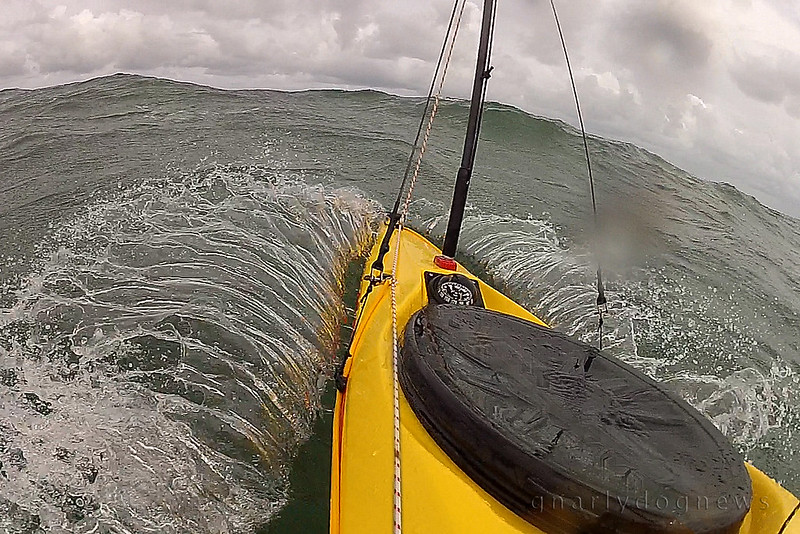
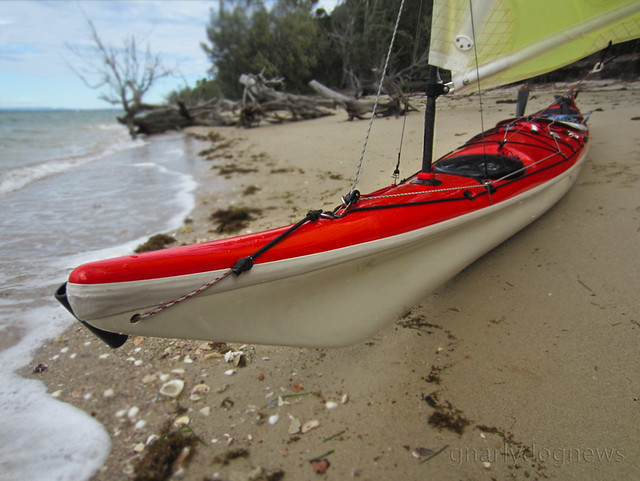
PT65N_Whisky16_bow
first run with the Whisky16
A test run revealed that the sail worked well on the Whisky16 but the reach was a bit too far for grabbing the sail and stow it on deck, securing it.
Most other sailing buddies use a 3 stay set up ending with a rather long mast.
I see their stowed sails going past the front of the cockpit ending with a sail mast half way across the spray deck. I prefer to have mine clear off my deck so I do not rub it with my hands when paddling.

The Whisky16 however has the sail mounting spot just a bit too far out or reach for the sail to fit nicely on deck. As I use my sails on several kayak I need to have them fit all decks well, with the same stay lengths.
I could increase the size of the mast and bring the sail higher (and make an ill-fit on other kayaks),  but I prefer to keep the sail as low as possible and minimize the heeling force of a beam wind exerted on the sail.
The compass was not really needed on that kayak so I removed it and decided to utilize that space to mount the sail closer.
I wanted to fill the void left (recess on the deck) and create a solid base for the mast fitting.
I could have used a simple block of wood somehow attached to the deck but I knew I could do better.
I shaped a block of foam (polystyrene) to fit a bit loose within the cavity of the recess. Shaping the foam was easy: a bit of coarse sandpaper on a cork block.

Once the foam was shaped I placed kitchen cling wrap (Glad® wrap) over the deck and wetted out some fiberglass with epoxy. I draped the block of foam (under side) and pressed it into the cavity.
Once cured (overnight) I removed the excess and trimmed the glass.
The finish was really rough; maybe I could have used wax and mold release to have a perfect fit but nobody was going to see that part.
The top was done similarly.
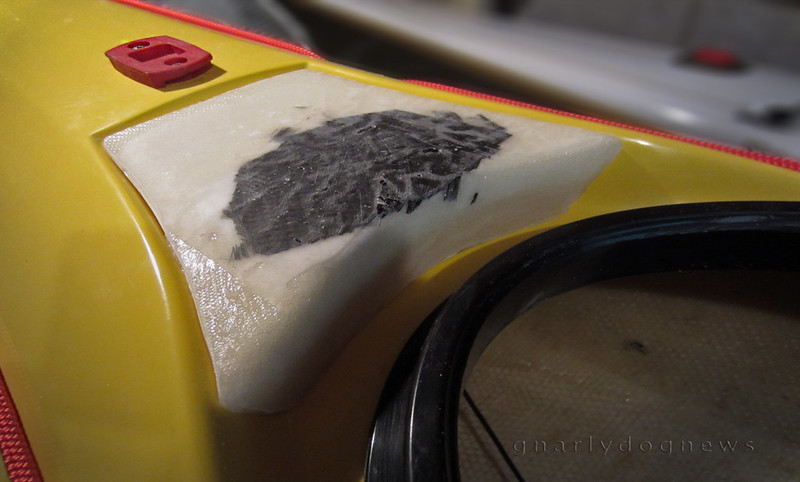
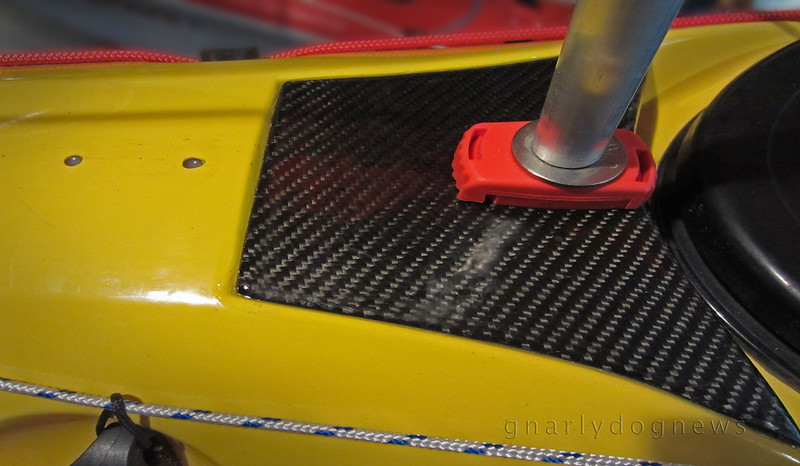
I carved out foam from the area where the screws for the fitting would go for my mast base and filled it with epoxy glue (mix of epoxy and microfiber). While wet I then used a few layers of glass for the top and a scrap of carbon fibre for where the main load would be.
Polystyrene foam compresses easily when spot loaded so I needed a sturdy surface.

compass fill-in1
the "black patch" is carbon fibre cloth over the carved-out foam filled with epoxy glue.

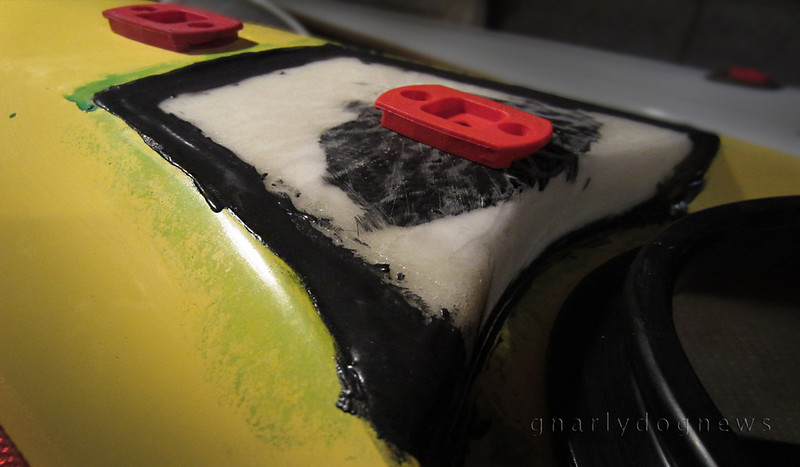
The next step was to clean and cut back the edges a bit leaving a bit of a gap between foam block and kayak deck. I filled that with epoxy glue again to create a hard edge and seal the two surface together creating a monocoque style item. Of course I waxed and prepped the kayak deck so epoxy would not stick to it...

compass fill-in2
the new mast-base fitting placed only for testing

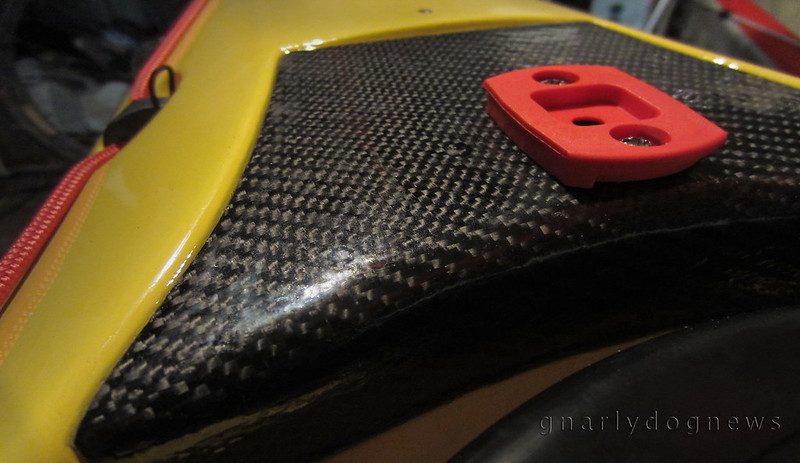
The last step was to add a nice layer of carbon fibre weave: partly structural, partly looks.
A few coats of UV stabilized epoxy later and my block was ready for installation of the mast base.
I used wood screws that secured the mount very solidly: the epoxy glue is very dense.

compass fill-in3
the foam block now covered with carbon fibre cloth

Final step: securing the foam block to the deck.
This one was simple: a small bead of polyurethane all around the edge (only!) to then seal perfectly against the deck.
The original deck void was now sealed and the sail mounted closer to the cockpit.

compass fill-in4
notice the difference between old position and new closer location for the mast base. The old holes will get filled with matching gel coat

So, do 4" make a difference? *
Not in handling of the kayak but when reaching for the sail to be bundled on deck when stowed (reaching for the boom particularly) is now much better.

*Hell yes, she said :-)

27 February 2014

SHOP: DIY back band

.
Paddling comfort can make the kayaking experience great but an ill fitting cockpit keeps my mind away from truly enjoying my pursuit.
I have changed many seats in kayaks that did not fit me and often the back band is part of the equation.
In some kayaks the back band is directly attached to the back of the seat (Valley) while in others it is independently suspended by straps or webbing on the side cheek plates or coaming.

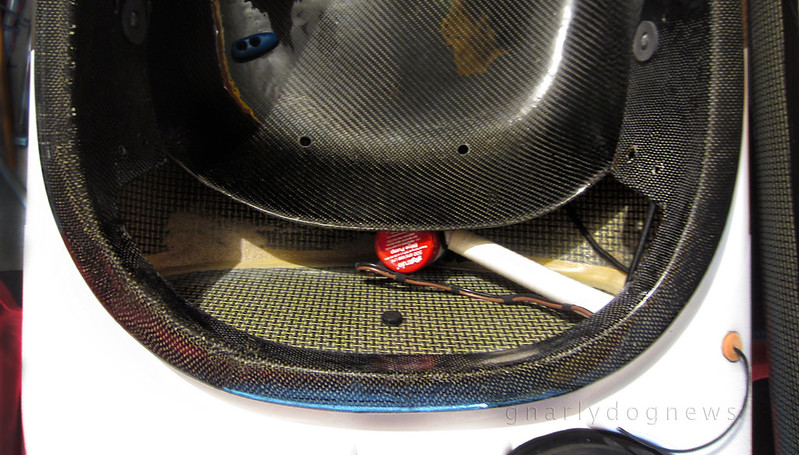
The seat of the Point65North XP was too narrow for my ass and too high up front; I replaced it by fabricating a new wider one out of carbon fiber.
The bulkhead on the XP is really close to the rear of the coaming offering just enough room for an electric bilge pump.

foam backrest_2

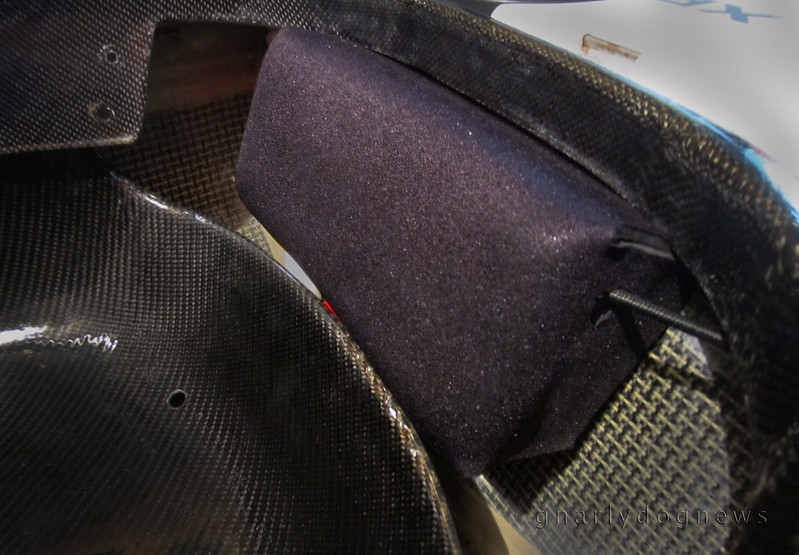
I did not like the original back band that came from factory; it was cutting into the carbon fiber laminate on the pivot points. I also did not like the large plastic tabs digging into my hips.
In some of my kayaks I have installed a Immersion Research backband with a ratchet buckle/strap system (similar to snowboard bindings): I love the support and the low profile it offers still allowing me to do laybacks.
In this kayak the bulkhead was so close to the seat that I could create a backband out of foam and have it resting directly against the bulkhead.

foam backrest_1

In some kayaks I have made a pillar from closed cell foam that is nested and jammed between seat and bulkhead; in the XP is wanted to try a floating foam block to be able to access the bilge pump.
As a prototype I wanted to use cheap foam and some discarded packaging from electronic goods was good enough for my first try. I laminated two pieces by gluing them together with contact cement.

foam backrest_5

This type of foam is very easy to carve with a sharp kitchen knife and in minutes I had a nicely contoured backrest shaped to allow layback rolls. My intention were to test the foam back first on a longer paddle and see if it fitted OK.
After some minor reshaping following my initial trial I was happy with the shape of it.

Initially I planned to use high quality closed cell foam for the final product but this cheap foam was working well enough to not bother with higher quality foam, like the one in a block used for yoga.
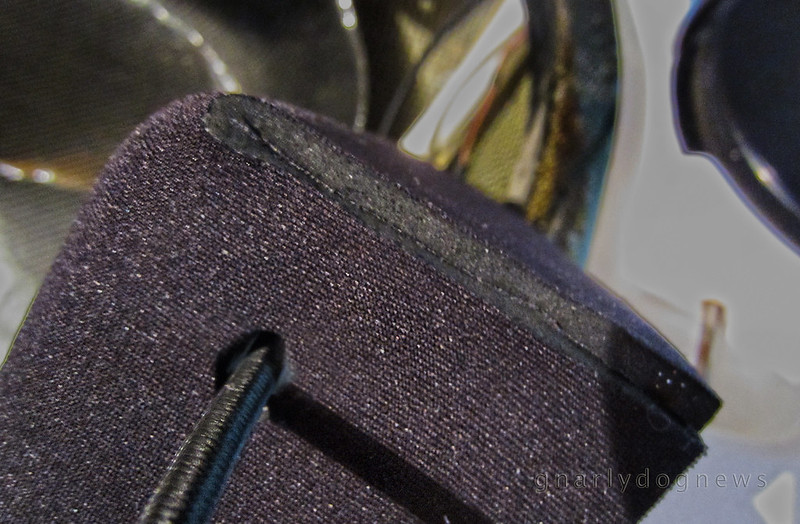
I just wanted to cover the rough surface with a bit of neoprene.
Again, I used contact cement to laminate the black neoprene.
I made a hole in the foam, the length of the block, to allow a bungee cord to secure it to the coaming of the kayak.

foam backrest_6

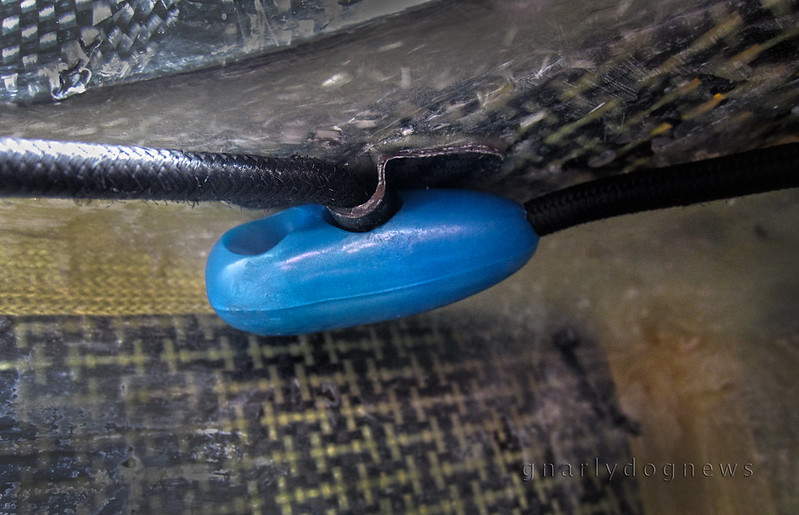
The bungee cord is attached to the underside of the coaming by little fiberglass saddles that I fabricated and bonded with epoxy glue. Alternatively small stainless steel saddles could be used instead.
I can tension the bungee with an olive cleat and while the backrest is firmly in place I can still access behind the seat to clear the pump from sand and debris.

foam backrest_4

The main advantage with this style of back band is that it does not end up under my butt when I enter the cockpit. I can slide from the back of the cockpit coaming rim and it will not get in the way, ever.
While some find the pod-style seats with no rear back band a great solution to this problem, I did not like that set up in one of my previous kayaks. I felt that I could not brace myself from sliding backwards when actively paddling and leg driving.

foam backrest_3


.

14 November 2013

GEAR: sea kayak sail set up options

I was now heading for the cliffs fast and frantically tried to depower my sail.
I had been sailing in following seas with increasingly stronger winds and having a ball.
My kayak was humming along and surfing from wave to wave; it was one of the most exciting days of a month long trip in the Swedish East coast archipelago.
I was in a borrowed kayak and loaded with a lot of gear and food, my kayak was tracking pretty straight.

FEKS high mount_gdn
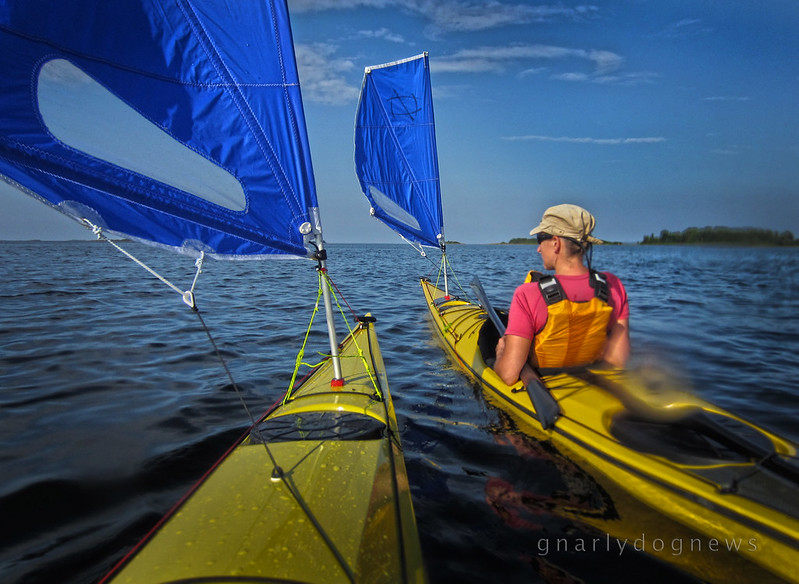
borrowed kayaks set up with Flat Earth sails and KariTec hardware

I let go of my main sheet, the rope that holds the boom in position and with the wind from behind the sail swung to the front. I felt relief as my kayak slowed down and I was travelling now at a much lower speed thinking I had avoided ending up against the cliffs.
I then let go of my up haul (the rope that holds the mast upright) and nothing happened. I tried to lower my sail altogether and stow it back on deck but that just would not happen; the wind kept on pushing my bow downwind and the kayak would not broach on the waves coming from behind! I continued to head to the cliffs…

FEKS high mount3_c
not actual footage of event
Desperately I pulled the main sheet again hoping to bring my sail around but the wind was too strong and the boom was just stuck in a forward position. I was not happy, actually a bit panicky to tell the truth; I have never experienced that before.

On my sails when the conditions become unmanageable I just simply let my uphaul rope out from the cleat, the kayak broaches pushed by the wave from behind and the sail falls into the water.
The forward momentum brings the sail close to the cockpit where I can collect it and secure it on deck: I have done it hundreds of times.
With the sail set up with the boom above the side stays, the boom could swing all the way around instead of stopping on the stays at about 90 degrees with the kayak. Once the boom is in the forward position I could not bring it back to me as the wind was exerting too much pressure on the sail; the mast stood up proud and solid.
Eventually, with monumental effort, great acceleration and strong sweep strokes I managed to bring my kayak around enough to let the sail fall into the water. I caught up with my paddling partner who was new to sailing; she was having the same problem as me and I helped her out of danger of the cliffs. It was an experience that I did not predict and did not want to repeat. However a few days later the same thing happened but this time I was in open waters and I had time to get myself sorted.

Things I learned from this experience:
- I prefer the predictability of my sail set ups: if the wind is too strong I can just drop my sail anytime
- While theoretically the full swing boom should make things easier in high winds it did not for me as I could no longer lower the sail.

I paid close attention to some sail set ups in my paddling circles and noticed somebody with an additional rope coming from the mast back to his cockpit. He had boom-above-3 stays set up and explained to me that the additional rope was to bring his mast down when sailing down wind. It made sense to me: he must have similar problems than me although he usually does not sail in stiff breezes.

FEKS_high mount2_gdn
sail set up with additional down haul rope

One question remains: to bring down the sail in a downwind situation he must use two hands to pull the rope back in?
That reminds me of V sails where one must actively pull the sail down instead of letting it just fall down on its own. It was one of the reasons that I opted out from those sails: I wanted a more efficient way of handling dicey situations.

I understand that my system of two side/back stays has a few problems:
- there is more pressure from the mast onto the deck of the kayak; decks need to be very stiff or reinforced internally
- the boom can not swing all the way around for de-powering in case of a stiff breeze, but as I found out that might not be a good thing?

The advantages:
- there is less pressure on the mast as the stays anchor higher up. I wonder how many mast would I have broken by now if I used the other system ( I do hear of people braking masts in higher winds)
- sail mounted lower therefore less healing (force of wind trying to tip me over),
- two less ropes to deal with on deck. On the 3 stays set up more ropes add to more chances of entanglement if tipped over and trying to roll back up? I know that occasionally I have to wiggle my paddle out of a loose stays before I scull my kayak if tipped over.

While there is an increased risk with ropes on deck I am used to them now and deal with them. However I rather not add any more than I have to.

These are my findings on sailing with both systems: 2 side/back stays and 3 stays.
I know that there is a strong following with the 3 stays set ups but I also hear that that is not recommended for winds that I usually enjoy sailing in.
I wanted to share my experience of sailing sea kayaks for ten years, the last 4 with Flat Earth.

.
28 May 2013

Review: carbon-fibre skeg by Norbert Gancarz

A carbon-fibre skeg is the ultimate bling aftermarket accessory for any kayak.
If however one considers a kayak just a tool and has little affinity with his/her craft then I don't think this skeg blade would excite them.
Just as some consider a car just a car and see no point in retrofitting it with performance accessories I am sure that to some a carbon-fibre skeg might seem an unnecessary replacement.
I don't care that much about my car but I will not say the same for my kayaks.

As all of my kayaks are rudder-less and incorporate an adjustable skeg for directional stability, I often wondered if the deployment of my skeg had as much effect on drag as when I would lower a rudder (it has been a few year since I have paddled an over-stern ruddered kayak).
In my Impex Kayak the skeg is a rather chunky HDPE blade (same material as the common kitchen chopping board); if I fully lower that skeg my kayak seem to slow down a bit and become a tad sluggish.
When Norbert Gancarz ( norbertga@o2.pl from Poland) offered me to test his latest creation, a carbon-fibre blade to retrofit the Valley skeg, I was keen to try it.

Norbert skeg_1

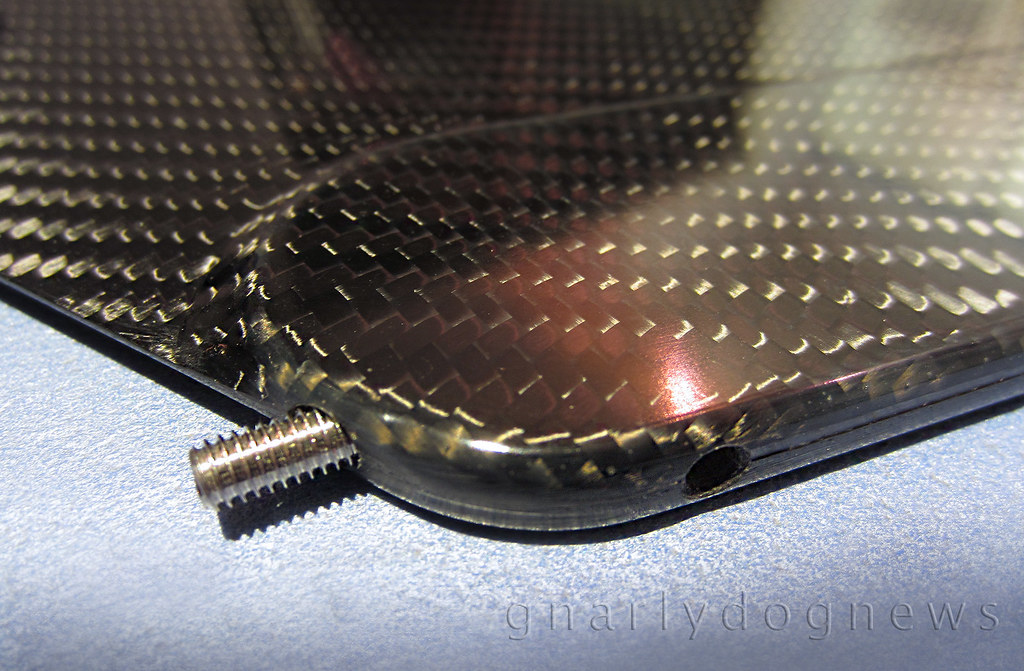
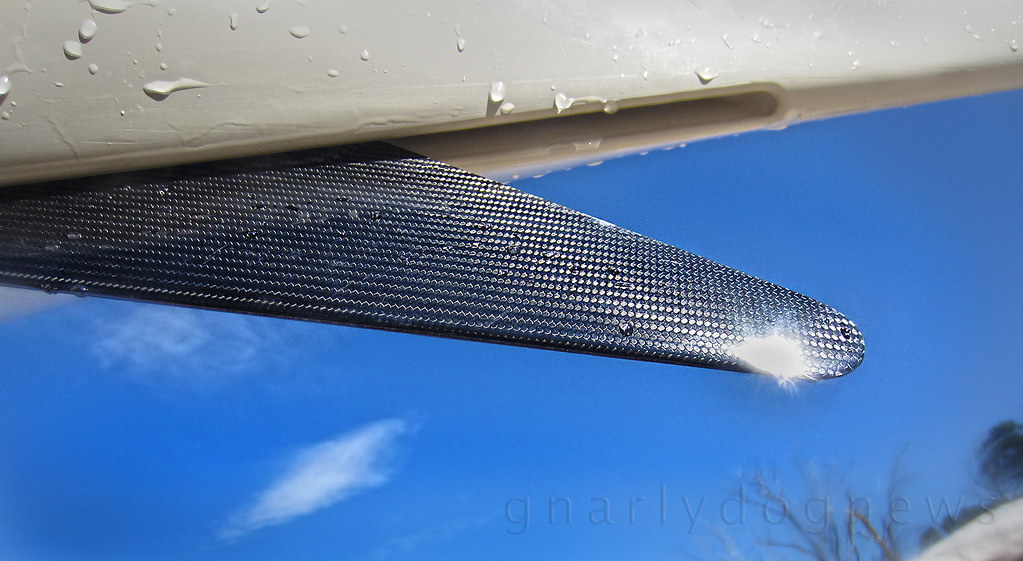
The skeg blade is of the exact outer shape as the VCP factory standard grey plastic one but this carbon skeg has features that the Valley skeg does not.
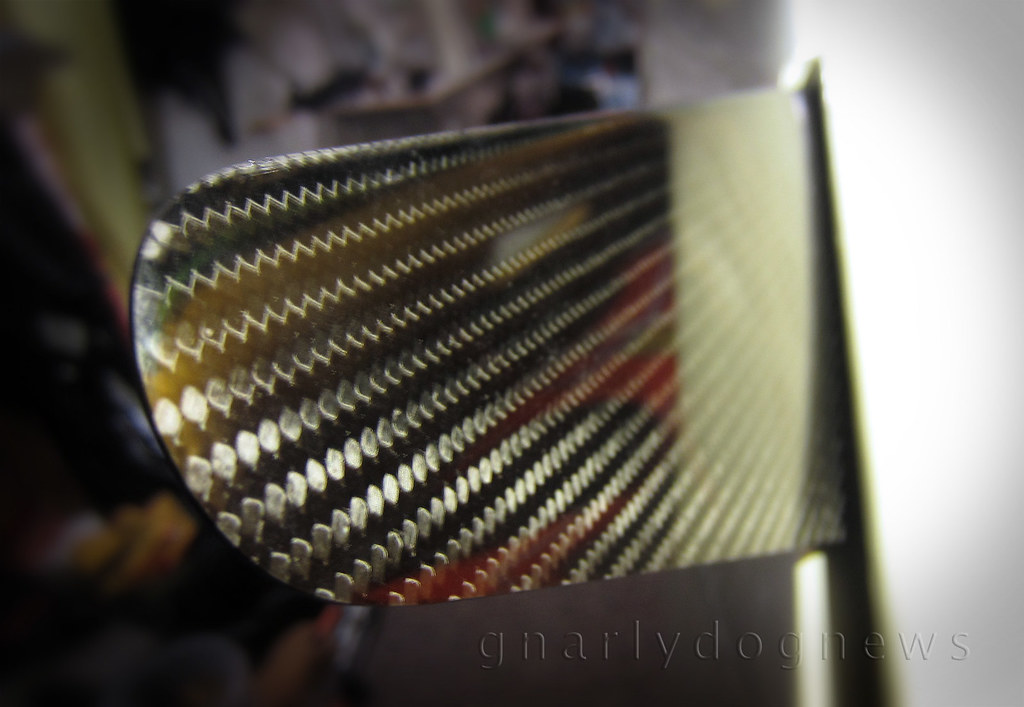
The blade is foil shaped like the wing of an aircraft with the leading edge thicker than the back of the blade. This shape minimizes turbulence and promotes an easy flow of water over the blade when the skeg is deployed. Less turbulence equals to less drag that leads to less effort and possibly more speed.
While speed has never been my goal, less effort is certainly welcome.

Norbert skeg_2

The skeg blade is a real work of art and the finish is incredible.
Somehow I felt that such a beautiful accessory looked out of place on the basic finish of the Nordkapp LV's skeg box but I was keen to find out if the blade would actually fit and how much effort the retrofit required. After all the existing skeg blade was still working fine...

Norbert skeg_5

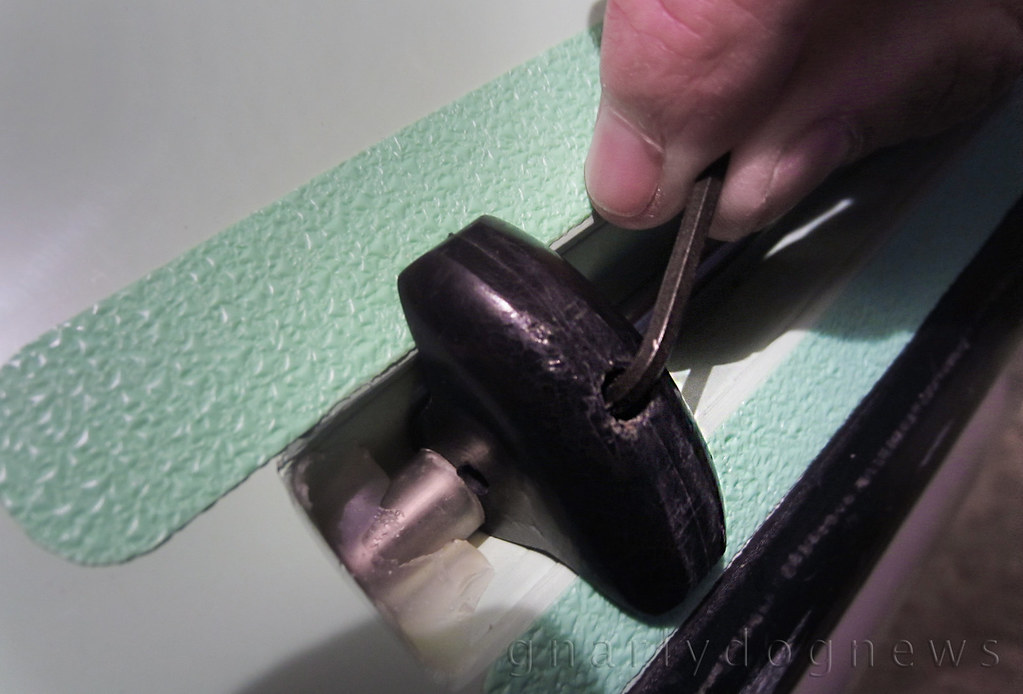
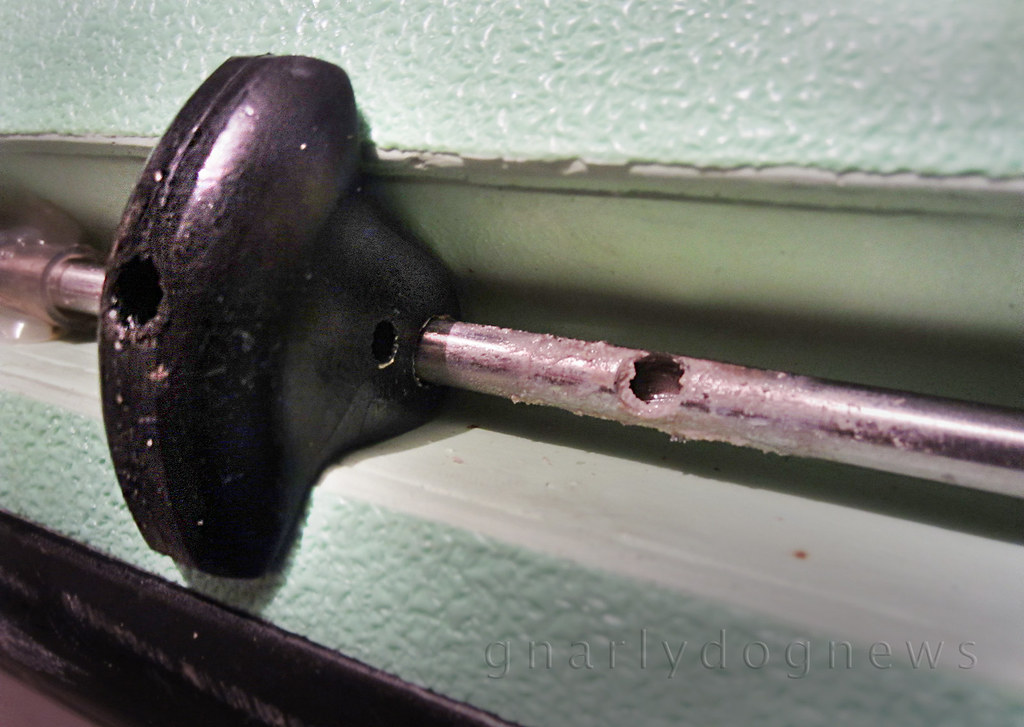
I inserted a 2.5mm Allen key (like the one you get with IKEA furniture, but smaller) into the skeg's control knob found next to the cockpit and tried to undo the grub screw. Initially it would not budge but a squirt of water dispersant (WD40) and a few minutes later the key turned and the pinch on the skeg cable was released.

Norbert skeg_6
salt built up under the skeg control knob,washes away easily...
The knob was free and now I could pull out the skeg blade past its normal maximum deployed setting; the wire came out easily.

Norbert skeg_7
factory VCP skeg blade removal

Norbert skeg_3

Norbert supplied me with the stainless steel wire that I had to cut as each kayak model has a slightly different wire length .
The carbon skeg has a very neat grub screw that pinches the cable that is inserted into blade (not show here).  I measured the length of my existing Valley skeg wire and cut the new one to length with a pair of diagonal cutters (a decent pair of plier would have done the same job).
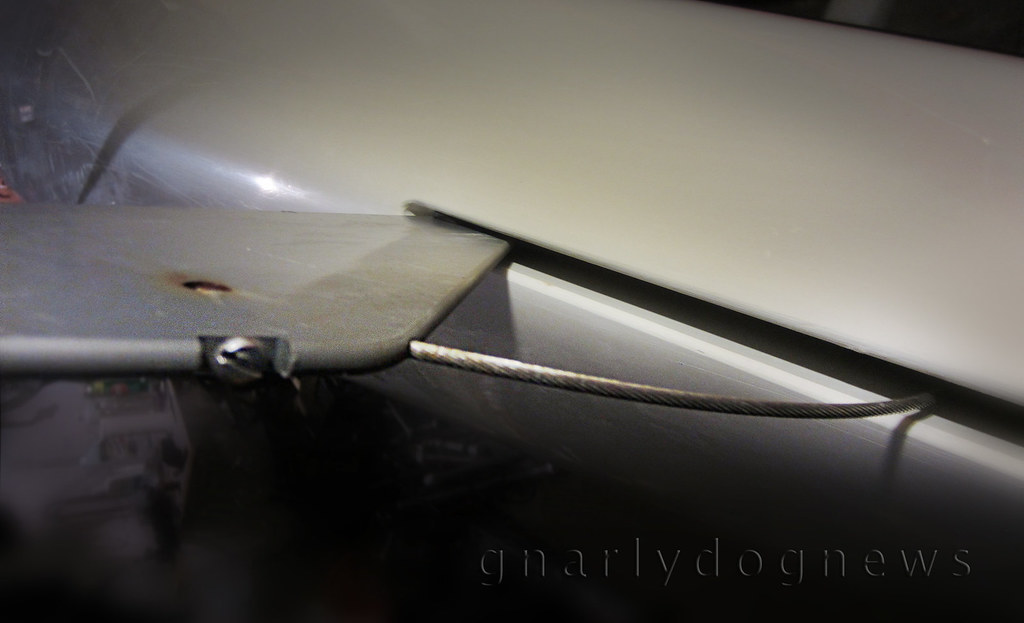
I fastened the grub screw on the carbon blade onto the wire, inserted the blade into the skeg box and easily wiggled the wire back into the housing all the way to the control knob. The skeg blade was sitting flush with the hull, all the way in the skeg box, before I aligned the knob over the hole in "slider tube" and secured it tightly with the Allen key. I made sure that the knob was in the "retracted" position or I would not be able to deploy that skeg all the way like before.

Norbert skeg_4

Norbert's skeg blade sits in the skeg box without any wiggle and the two little rubber washers on the pivot point offer just enough resistance to keep the blade in position preventing the skeg blade from creeping back up when the kayak is at speed (one of my kayaks does that and I am yet to fix it...).

But how does the skeg perform in the field, err water?
It seems to have a crisper feel with the lowering amount precisely translating to directional changes. There are no wobbles and no "skeg hum" as I have in some of my other kayaks when I speed down the face of a wave.

Norbert skeg_10

As for increased speed?
I can't attest to that as I don't have a GPS to measure precisely the speed of the kayak.
All I really want is to have the kayak on the beach, belly up, with the skeg standing up proud showing off that sexy carbon weave :-)

Norbert Gancarz can be contacted at norbertga@o2.pl
.

15 January 2013

DIY: paddle retention on kayak deck

.
A few years ago I came up with a great on-deck retention system for split paddles.
It was also just about then that I stopped using Euro style paddles and transitioned to Greenland paddles. The new style became my regular paddle and soon I totally abandoned the fat blades.
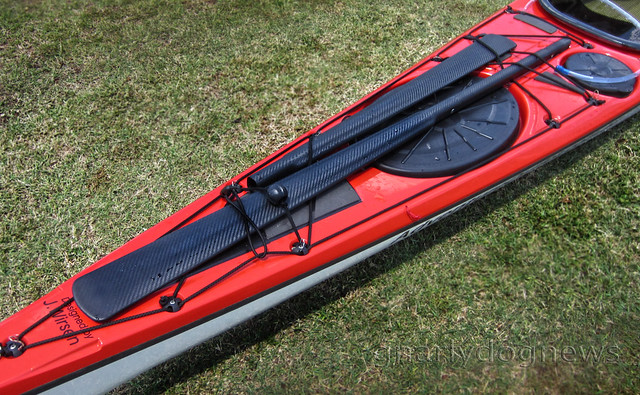
My spare paddle became a shorter version of the full length GP (also known as "storm") or a slip sectional full size one.
While the split Euro paddles fitted well on the front deck, I did not like carrying the Greenland storm on the front deck.
Some argue that a spare paddle should be readily available in case the main one (the one in the hand) is lost; in ten years it has not happened to me once. I also use a paddle leash most of the times so I minimize the risk of parting company with my paddle. It is a risk that I am now willing to take that if one day I will loose a paddle I will have to reach for the spare paddle behind me. Then again I often wondered if I would have the presence of mind to grab that half paddle in front of me anyway, in the heat of the battle.... probably not.
I am happy to carry my spare on the rear deck, to create an uncluttered front deck.

NLP on rear deck_2

The kayaks in my fleet all have bungee cord on deck for the retention of miscellaneous gear that one wants to access while on the water. Some kayaks have strategically arranged these bungee in view of carrying a spare paddle. The idea is to slide the paddle under the bungee and hope to retain the paddle.
My experience however shows that if the bungee is not highly tensioned those paddles tend to creep out in heavy seas and occasionally dislodge in surf.
Sliding the full length of the paddle under tensioned bungee is often tricky while I scratch the shiny gel coat (considering resale value).
I wanted a system that retains my paddle but would not require a slide.
On my expedition kayaks I devised a flat strap with a Fastex buckle.

paddle retention_4

It worked well; I could attach my split Euro paddle there with little fuss.
With the storm GP there is only one shaft (loom) and the buckle of the Fastex clip was not working well there: it would slide and become loose.
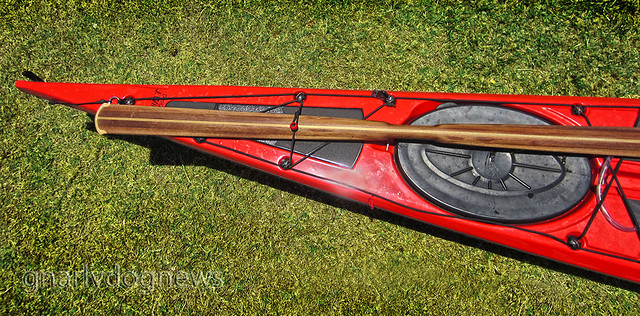
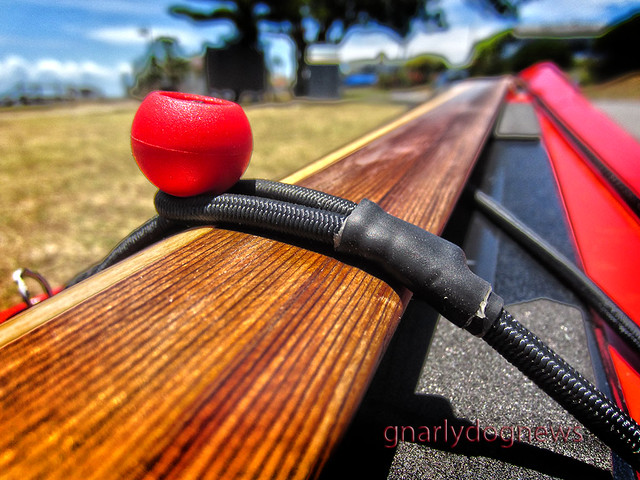
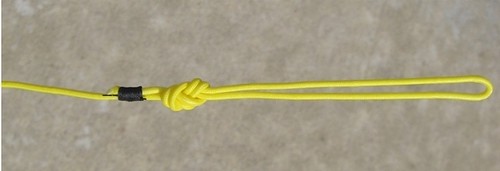
Borrowing the idea from my simple paddle leash I now use this system for my spare paddle retention.

paddle retention_2
laminated Western red cedar storm Greenland paddle by Greg Schwarz

paddle retention_1
heat-shrink over the bungee joint

Removing/attaching the paddle is very simple: I just pop the bungee loop off the little plastic ball.

paddle retention_3
retention system released

While the bungee retention system works very well for paddles I recently found out that it works also in anger when I need to attach something on the rear deck quickly.
One of my camera mounts failed in heavy seas and I had to stow it away as it was dangling in the water with my camera still attached (I did NOT loose that one this time!).
I had to jump in the water, take down the remaining mount and attach it to the deck, while bobbing up an down in waves (I was also happy to be wearing a PFD). The bungee and ball system worked very well allowing a swift attachment of the hardware that I would not be able to carry any other way.
Reentered and rolled, pumped the water out of the cockpit and I was sailing again on my way in minutes.

07 August 2012

DIY: replacement carbon-fiber seat in Valley

.
Seats in kayaks seem to be often a deal breaker: some folk won't buy a kayak if the seat is not comfortable for them. Some kayak seats seem to fit more paddlers than others but there are also some seats that cause a lot of grief and paddlers go to great lengths to fix them.
The most common complaint I hear and read about from sea kayakers is the dreaded dead leg syndrome; after a while on the water (sometimes as brief as half an hour) some paddlers start to feel pins and needles or loose the feel of the legs altogether.
I am one of them: I find a lot of sea kayak seats not suitable for me. Maybe is my chunky thighs that force me to extend my legs lower to make them fit or something but I find most seats too short and too "peaked" (high up front) for my anatomy.
One seat that I have removed from more kayaks than any other one is the Valley plastic seat and the current model seems to be just as aggravating as the previous one.
In Adventuretess' Nordkapp LV I removed the seat and replaced it with a DIY fibreglass one removing the back band and replacing it with a foam block.
Steavatron recently borrowed Adventuretess's Nordkapp LV (Sialuk) and was amazed by the difference in feel and stability of the kayak.
Within half an hour of paddling Sialuk, he politely asked me if a similar seat was possible to be had in his own Nordkapp LV.
I agreed that with his help we could fabricate one for this kayak too, and we might as well go "bling".

carbon seat4

The plastic VCP seat is easy to remove: 4 bolts on the outside of the coaming hold the seat in place.
Once the fsteners were removed the seat came right out but revealed a little problem; the edge of the seat has been "shaving" the hull and a few layers of fibreglass have already been carved away by the motion of the seat slightly swinging when paddling. If not caught in time it would have holed the kayak from the inside out (the same problem occurred in Sialuk).
Patching that divot was dead easy and we restored the hull to full strength.

carbon seat2

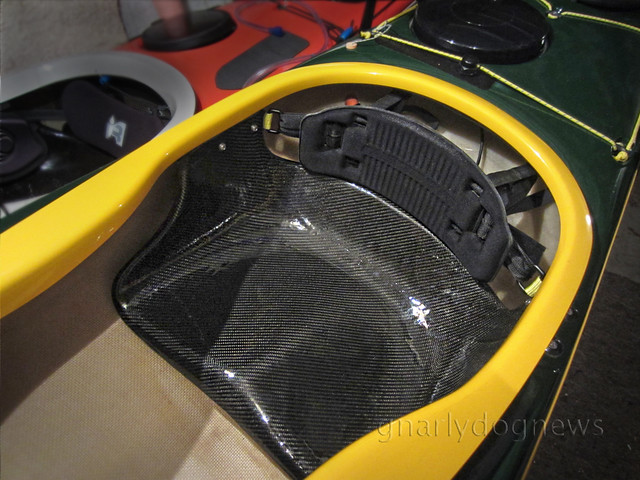
The new seat is made from a laminate of glass fibre, double bias carbon under the sitting area and a veneer of the oh-so-sexy twill carbon fibre on top, for looks of course :-)
The edges of the seat have been reinforced with Kevlar to prevent the typical cracking that I have experienced in other factory chopped-mat kayak seats.

carbon seat1

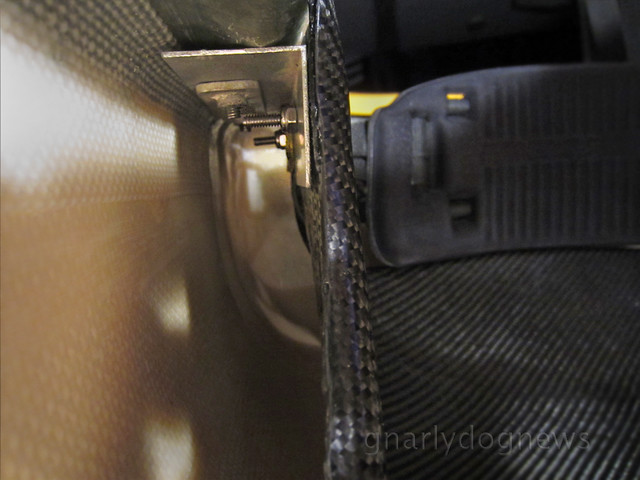
The new seat does not hang on its own but I used "L" brackets to support it. The original VCP hardware was re-utilized and new stainless steel bolts are anchoring the carbon seat to the bracket.

carbon seat3

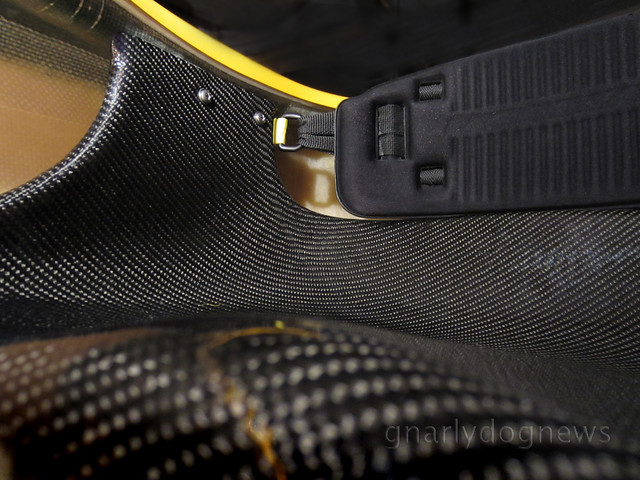
Stevatron was happy to reuse the original back band and hip pads. The back bands sling is attached to the seat with a short piece of webbing and a "D" ring. Existing straps firmly secure the back band to the rear bulkhead to prevent dislodgment when entering the cockpit.
After the maiden voyage Stevatron was happy with the position and height of the new seat and it was then finally secured to his kayak with a few dobs of polyurethane (Sikaflex) sealant to prevent any swinging and deliver a solid feel. In the event the seat would have to be removed for any reason a spatula will be inserted under the seat to break away those few spots of sealant.
Stevatorn finds the new seat a vast improvement on the stock VCP plastic one. The centre of gravity has been lowered and he finds that the Nordkapp LV has changed personality.
He is more confident on putting his kayak on edge and has gained stabilty when in textured waters.
Since the change and after a few paddles of several hours he no longer experiences the dead legs.

.

12 July 2012

GEAR: sea kayak sail_update

.
Several years of using sails on my sea kayaks has lead to refining my initial set up.
I no longer sew my sails but I still create my rigging, using custom made carbon masts.
On some narrower kayaks my sail set up was not as bombproof as I would like it to be where in a strong breeze (above 20 knots) the mast would not keep vertical and the little polymer base would deform under the lateral pressure of the wind. In a beam wind I would like to have my mast in a vertical position, making the sail more efficient and increase a bit of speed.
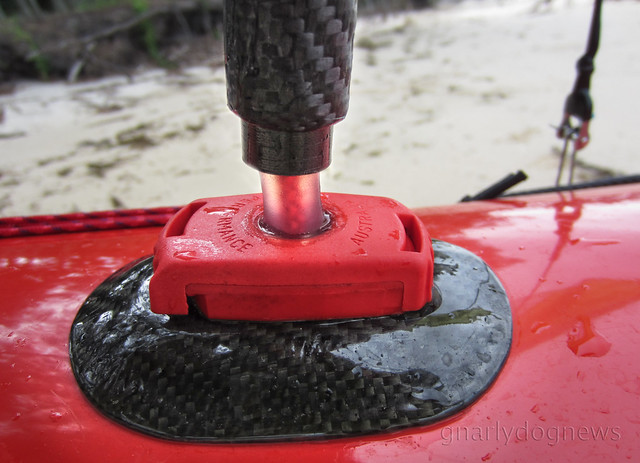
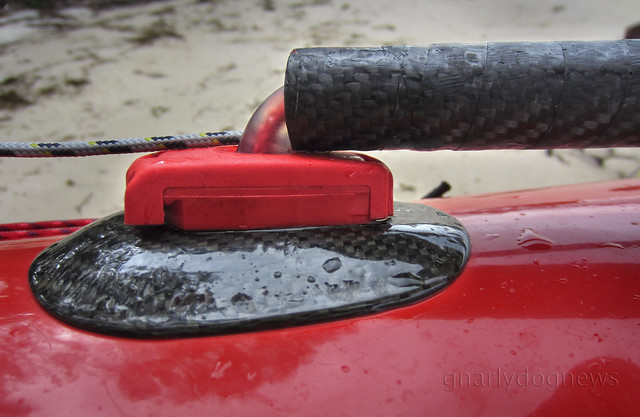
Mick at Flat Earth Kayak Sails has developed a brilliant way to reduce the down pressure on the flexible joint and is now shipping his sail with a new system where the mast contacts directly the removable fitting.
I want to use carbon fibre masts but I have been unable to find an off-the-shelf mast that would replicate Mick's system.
Not wanting to bond aluminum to carbon to create the oversize sleeve for the mast, the only way I could achieve what I wanted was to modify my existing masts to create the sliding foot sleeve.
mast base_sleeved_c
mast uphauled
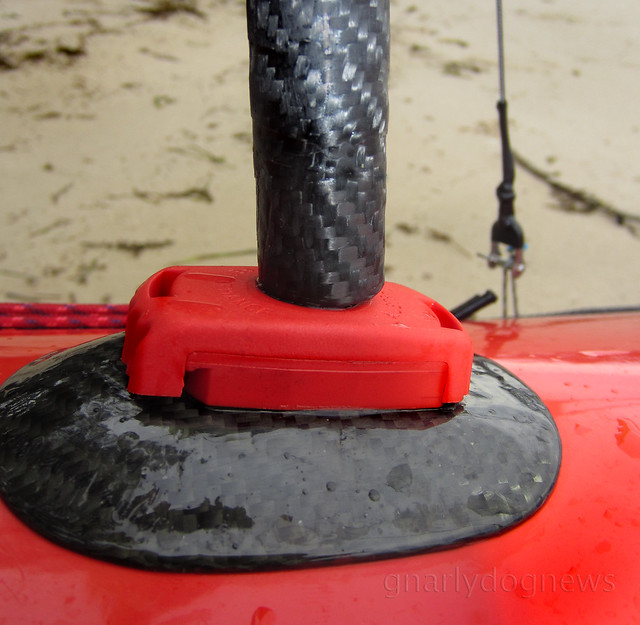
Instead of having a larger diameter mast running the whole length, I just made a short sleeve out of glass fibre tape wound around a tube of slightly larger diameter than my carbon mast. Once cured I bonded a the sleeve section to the base of the existing mast and covered it with carbon cloth for strength, and looks :-)
The sleeve section slides over a stubby base with the flexible polymer allowing the mast touch the actual hard surface of the red plastic base.
No load is now exerted on the polymer so it will no longer deform when the mast is uphauled and cinched down hard.
mast base sleeve_c
mast lifted for demo purposes
Of course the mast can still be lowered as before and when the sail is folded onto the deck the mast slides back up just enough to allow the flexible polymer do its job.

mast folded_c

To prevent the sliding mast and the stubby base come apart I have used a short piece of shock cord threaded internally holding the two together.

boom junction_c

I have also improved my anchor point for the stays on the mast.
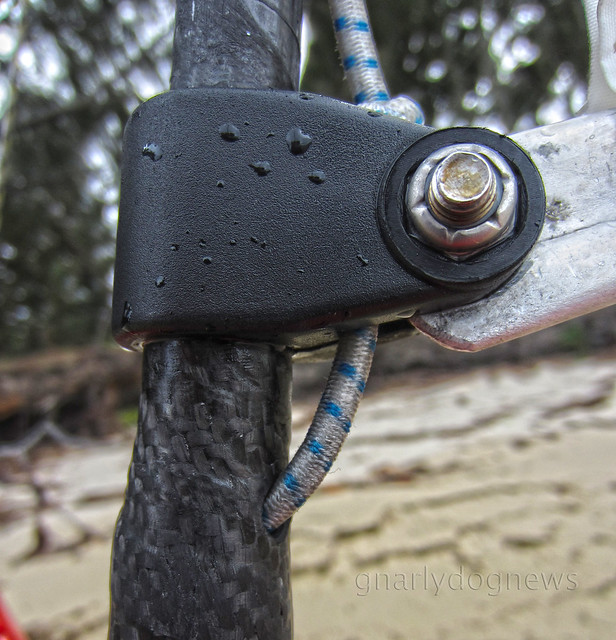
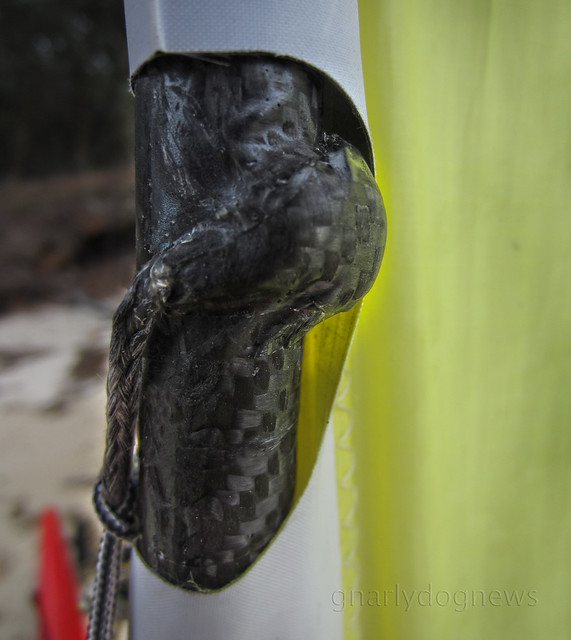
I no longer use a stainless steel ring riveted with a saddle to the carbon tube but I prefer the use of soft Dyneema core line bonded directly to the mast with a section of carbon fibre cloth.
The load is distributed better and there is no risk of cracking the thin carbon tube with the pressure of installing (pulling) a stainless steel rivet.
mast stays junction_c
mast rotated to show the carbon cloth anchor for the Dyneema cord
I have been using the new recessed anchors with great success, locating them right on the seam of the hull/deck to achieve a wider stance and a better load angle.
The stainless steel shackles are now heat shrunk (see warning below) to the Dyneema stays so they don't rotate when the sail is lowered on deck.

anchor and stays_c

The whole assembly, viewed from the bow.
on beach_c

WARNING:
update 04JAN13
Richard Sharp from SEQSK has this to say:
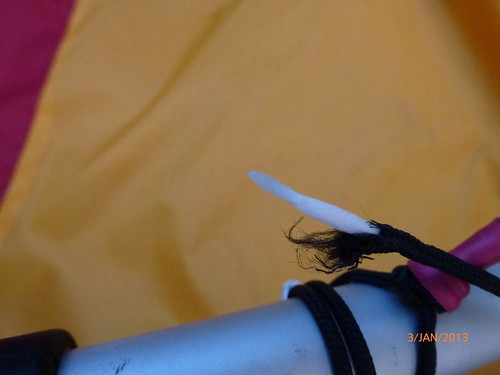
"I had the sail up in 20knots and got hit by a gust which tipped me in. It
was at that point that I noticed the sidestay had snapped. Finding it hard
to believe that this was possible given the breaking point of spectra, I
examined the break closely. It was then that I discovered that where it had
snapped the internal spectra cord was melted together. See the enclosed
photos."

P1010037

P1010038

It appears that the core has melted while the outer sheet remained OK.
Using a heat gun at close quarters causes the Dyneema/Spectra fibres to fuse and become very weak.
The melting point of Dyneema is much lower than the outer polyester (pictured here black) and no noticeable damage was visible from the outside.
He now prefers to use the heat shrink only over the loose end of the rope, not over the entire knot and apply very gentle heat for longer to allow the tube to shrink.

image001

20 March 2012

Outfitting a sea kayak

Here is a summary of the outfitting and modifications that I do to my kayaks.
Not all kayaks have the same amount of work done and some outfitting is not shown here.
Some kayaks have more work than this one but those modifications (camera mounts) are not relevant to general paddling.
Most of the work depicted here is only possible on a composite lay-up and I use exclusively West System for my fiberglassing.
I currently don't have any ruddered kayaks in my fleet so there are not details of previous modification done to rudders.
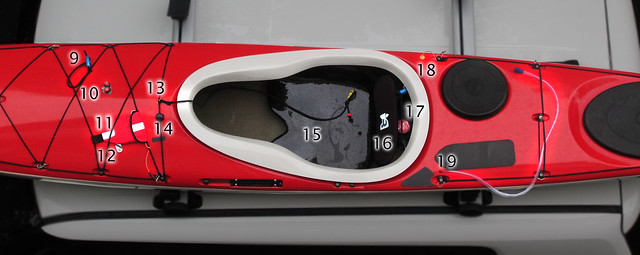
Here is on overview of outfitting of a recently acquired British style kayak.

Kadtzait on Lego_1

The numbers are referring to modification or additions that I have permanently attached to the kayak. Other items that are added for a particular outing are not depicted.
Each item that is light-blue has a hot-link pointing to the relevant article in GnarlyDog News.

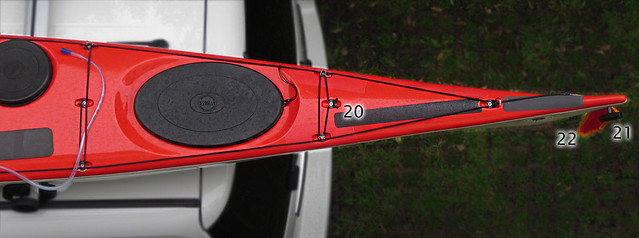
Kadtzait bow
Bow
1) retractable grab handle, replacing factory looped ones
2) pulley (block) for Flat Earth sail. Attached to deck anchor via Dyneema line
3) short tether line for quick anchor to piers (no article)
4) mast base for Flat Earth sail;  under-deck is reinforced
5) recessed anchor for side stays (sail). Dyneema loops
6) protective tape for mast/boom joiner (possibly scraping deck when sail lowered_no article).
7) 3M Dual-Lock fastener for removable compass (often removed when surfing).
8) pulley (block) for boom of Flat Earth sail. Secured with recess anchor and Dyneema loop

Kadtzait midship
Midship
9) bungee loop for stowing lowered sail
10) cam-cleat for trimming boom
11) slim profile tow-line
12) cleat for up-haul on sail
13) paddle leash (anchor point)
14) magnetic switch for bilge pump
15) replacement DIY fiberglass seat
16) replacement back-band: Immersion Research (no article)
17) electric bilge pump
18) bilge pump outlet, away from the cockpit to prevent water being pumped back in
19) drinking system (below deck)

Kadtzait stern
Stern
20)  protective "deck thread" tape for spare paddle (prevent scuffing)
21)  retractable grab handle
22) clip-on flag for car topping transport (removed before launch_no article)