Showing posts with label customizing. Show all posts

25 June 2015

Digital camera hand grip modification

.
I reached the limit of tolerance with my pocket compact digital camera as I realized my images were lacking sharpness when light conditions were not ideal.
Most of my images are displayed on monitors (web use) and only occasionally I print the very best pictures of mine.
While all images look great when displayed small things don't look so good once they are enlarged.
Add, low light and the tiny lenses of most compact cameras suddenly look a bit fuzzy.
If you believe that the images you take on your smart phone are good enough, then don't need to read any further: you are wasting you time.

I want better results for my photographic efforts but I refuse to schlep a large camera with me.
Weight and bulk are always my concern (some say, personal too :-) but gone are the days of toting around a large heavy camera.
If the subjects that I want to photograph would be within reach of a short walk away from the car I would worry less, but when I take my cameras in a backpack and lug it around for days in the back country, or it has to fit inside my kayak on extended trips, then size does matter.
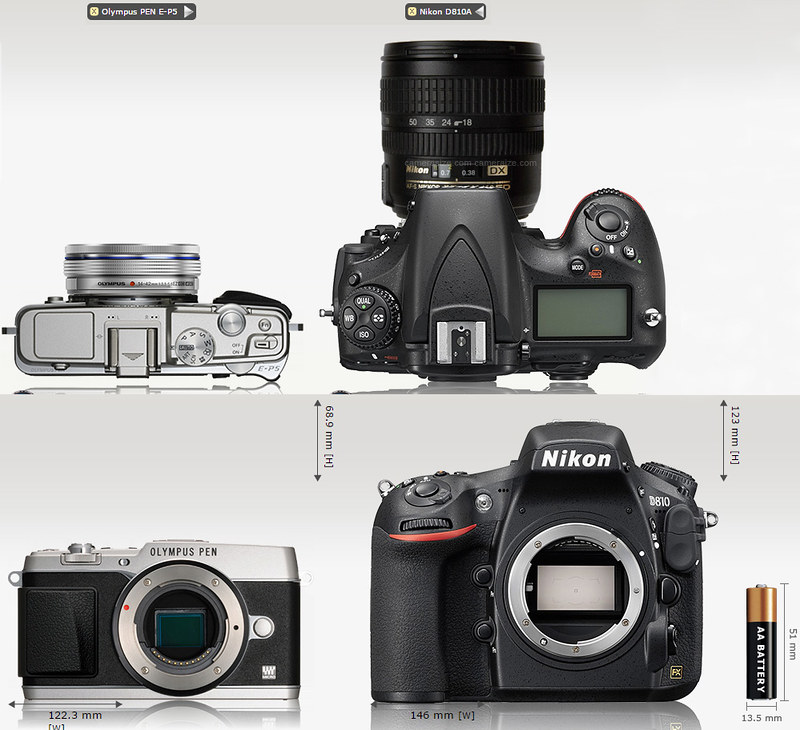
Oly vs Nikon_lens
Olympus camera and lens compared to Nikon, similar focal length, same f/stop
For my second trip to Scandinavia I wanted to have a higher quality camera, one that allows me to apply my skills and one that would reward my creativity. My intention was no longer to simply record my trip, I wanted images I would be happy to hang on my wall.

The Micro Four Thirds system of cameras is the perfect compromise for me: images are sharp and the cameras have features than no other system has, size being one of the major ones.
I can afford to have a camera body and a couple of lenses with me and not really feel it in my backpack, something I could not do with a lot of DSLRs.

But where the Micro 4/3 system excels it also poses some problems with users with slightly bigger hands: the hand grips are often a bit small.
As I started to attach larger/heavier lenses on my Olympus cameras I felt that the grip was a bit diminutive and I had to clutch the camera too tightly.
I could use their Pro models but that would defeat the idea of compact and light: I just wanted a better grip, not a bigger camera.
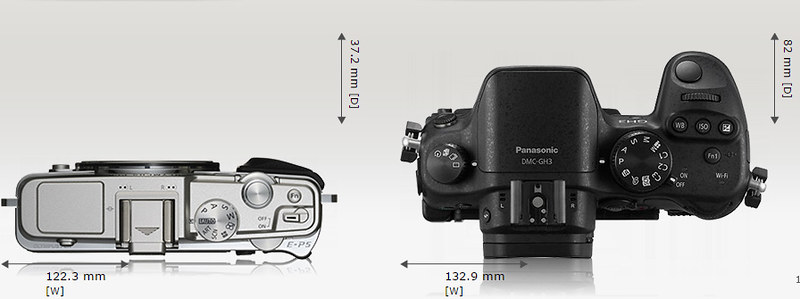
camera size comparison_3
same image sensor, different body, same image result
Commercially available add-on grips look too bulky (no need to have a base plate bolted to the bottom if one is not needed) and the glue-on aftermarket grips were not available for the camera I was using.
However those aftermarket grips looked really good and that prompted me to come up with my own DIY modified hand grips.
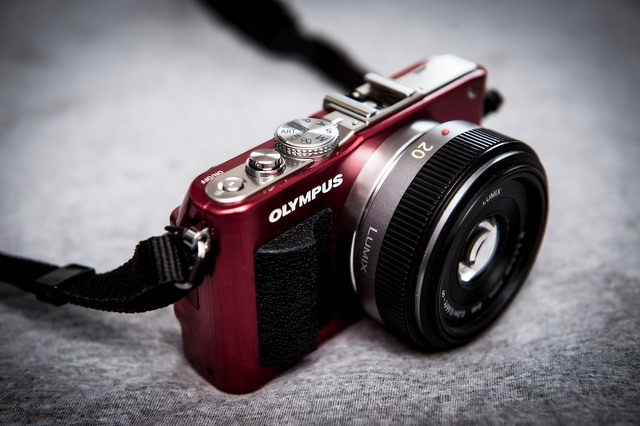
8653856259_d099d50b12_z
commercially available stick-on grip, here

I used Sugru, a silicon putty that feels like Plasticine but cures hard like rubber, sticks well and does not feel too slippery.
A small packet of Sugru contain enough material to shape a single grip if a large one is desired, or just enough for two smaller ones. Bright colors are available but I went with conservative black.
I have so far modified an Olympus E-PM2 (smallest of the M4/3 series) a couple of E-P5 and several E-M5.
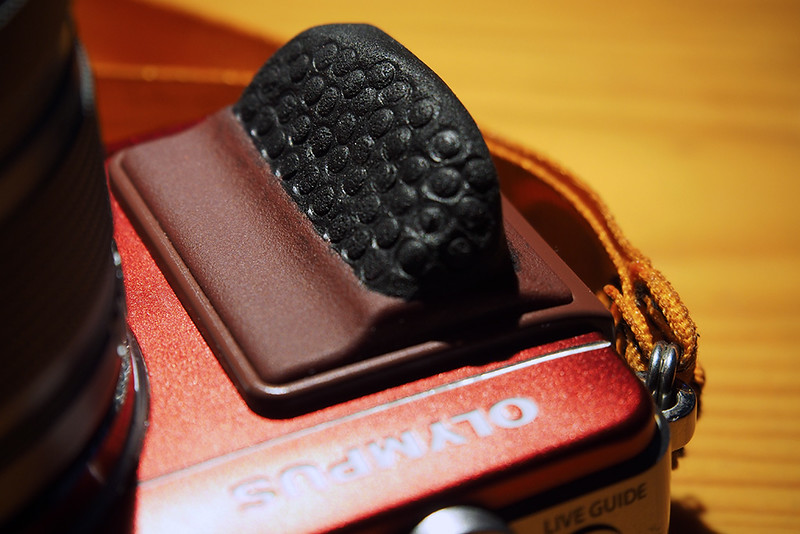
grip mod on PM2
Olympus E-PM2
Once the putty is kneaded and then firmly pressed onto the existing small protrusion where the fingers grip the camera, I shape the soft material with a small bladed knife to create a clean edge.
A moistened index finger keeps on shaping the putty until I am happy with the overall shape, then I run the back of the knife blade to create a perfectly uniform surface (not bumpy).
If the form of the grip is in its final shape I like to add some texture to enhance the surface and create more friction for my fingers.
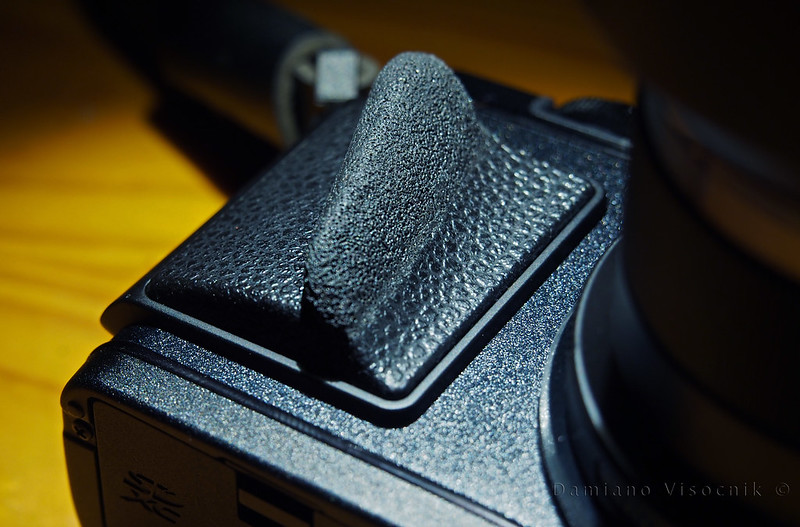
Sugru grip on P5_3
Olympus E-P5
Here I use a combination of pins, pen ends (to create little circles) and an old toothbrush for finer texture.
I try to achieve a look that matches the existing camera finish but I simply will never be able to replicate the faux leather surface.
Before I let the camera rest to cure I check that there are no bits of stray silicon putty on the grip, where I don't want it.
While the cured silicon does become hard like rubber it is not impossible to remove it mechanically but one needs to scrape vigorously to get it off.
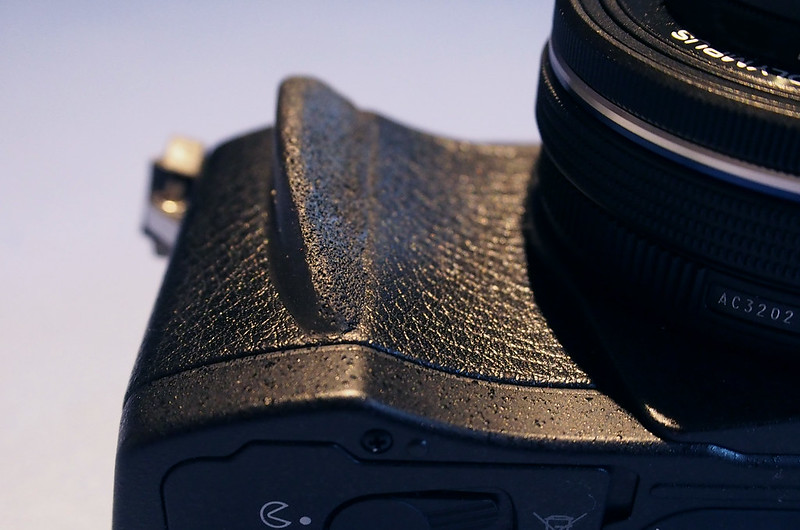
Sugru grip on M5_2
Olympus E-M5
I have seen some photographers push their fingers into the soft putty before it's cured to have an "imprint" look; I go for a more universal one where the grip is an extension of the original one and less fully-custom.
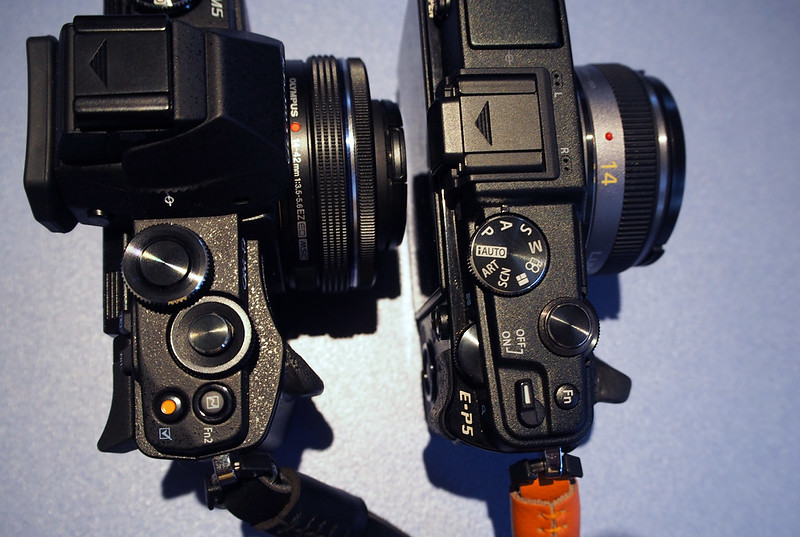
Sugru grip on M5_3
Olympus E-M5 and E-P5, modified grips

The grip on my Olympus cameras is now much more positive: my fingers don't have to clutch the body so tightly and the softer grip fatigues my hand much less when on longer photo shoots.

Photographing the sunset_c .

15 January 2013

DIY: paddle retention on kayak deck

.
A few years ago I came up with a great on-deck retention system for split paddles.
It was also just about then that I stopped using Euro style paddles and transitioned to Greenland paddles. The new style became my regular paddle and soon I totally abandoned the fat blades.
My spare paddle became a shorter version of the full length GP (also known as "storm") or a slip sectional full size one.
While the split Euro paddles fitted well on the front deck, I did not like carrying the Greenland storm on the front deck.
Some argue that a spare paddle should be readily available in case the main one (the one in the hand) is lost; in ten years it has not happened to me once. I also use a paddle leash most of the times so I minimize the risk of parting company with my paddle. It is a risk that I am now willing to take that if one day I will loose a paddle I will have to reach for the spare paddle behind me. Then again I often wondered if I would have the presence of mind to grab that half paddle in front of me anyway, in the heat of the battle.... probably not.
I am happy to carry my spare on the rear deck, to create an uncluttered front deck.

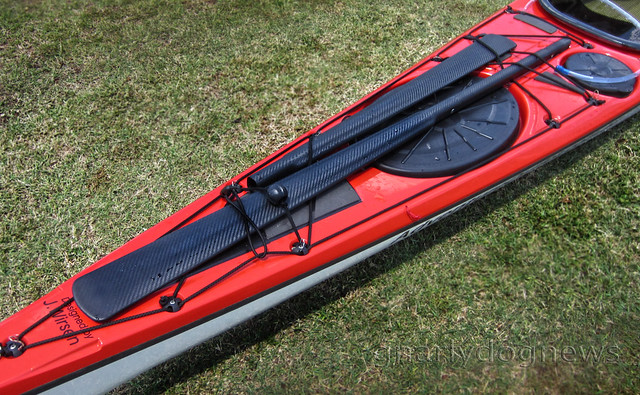
NLP on rear deck_2

The kayaks in my fleet all have bungee cord on deck for the retention of miscellaneous gear that one wants to access while on the water. Some kayaks have strategically arranged these bungee in view of carrying a spare paddle. The idea is to slide the paddle under the bungee and hope to retain the paddle.
My experience however shows that if the bungee is not highly tensioned those paddles tend to creep out in heavy seas and occasionally dislodge in surf.
Sliding the full length of the paddle under tensioned bungee is often tricky while I scratch the shiny gel coat (considering resale value).
I wanted a system that retains my paddle but would not require a slide.
On my expedition kayaks I devised a flat strap with a Fastex buckle.

paddle retention_4

It worked well; I could attach my split Euro paddle there with little fuss.
With the storm GP there is only one shaft (loom) and the buckle of the Fastex clip was not working well there: it would slide and become loose.
Borrowing the idea from my simple paddle leash I now use this system for my spare paddle retention.

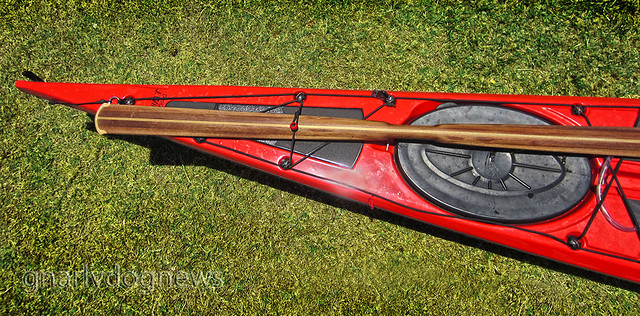
paddle retention_2
laminated Western red cedar storm Greenland paddle by Greg Schwarz

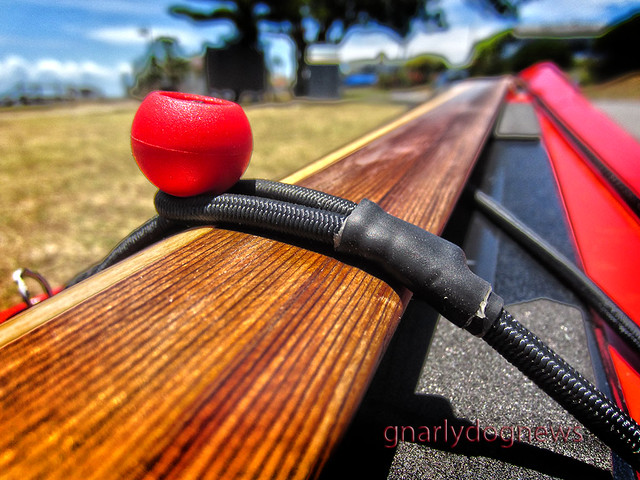
paddle retention_1
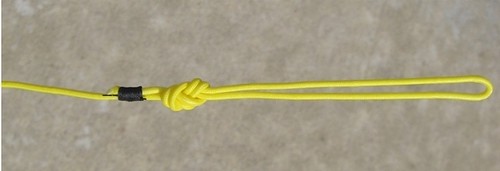
heat-shrink over the bungee joint

Removing/attaching the paddle is very simple: I just pop the bungee loop off the little plastic ball.

paddle retention_3
retention system released

While the bungee retention system works very well for paddles I recently found out that it works also in anger when I need to attach something on the rear deck quickly.
One of my camera mounts failed in heavy seas and I had to stow it away as it was dangling in the water with my camera still attached (I did NOT loose that one this time!).
I had to jump in the water, take down the remaining mount and attach it to the deck, while bobbing up an down in waves (I was also happy to be wearing a PFD). The bungee and ball system worked very well allowing a swift attachment of the hardware that I would not be able to carry any other way.
Reentered and rolled, pumped the water out of the cockpit and I was sailing again on my way in minutes.

14 December 2012

REVIEW: the best roof rack

I was shopping for a new car and since my current one had factory roof rails I was hoping that the existing roof rack could be transferred to my new wheels.
My search for a replacement vehicle was pointing towards a car that had no rails and I almost discarded that vehicle because of it.
I wanted the security of a seriously well anchored roof rack since I have seen one too many flimsy and ill fitting clip-on style roof racks fail. Transporting a kayak or two on a rack that is just secured by some kind of friction mount against the recess of the car's door is NOT my idea of safety.
Having kayaks come off the roof at high speed on the highway, where up lifting forces are greatest, is a terrible scenario, with possible consequences of causing somebody behind me to crash and possibly die.
Nah, I wanted a bolt-on serious racks.
The vehicle I eventually settled on offered no factory rails but my search for a decent roof racks revealed that some brands offer anchors that pierce the sheet metal of the roof and are permanently bolted to the car; I like that idea.
Some brands required drilling several holes into the roof of the car and installing a long flush "rail" to then accept a tower and roof rack.
Not exactly unobtrusive and maybe a bit esthetically questionable on some vehicles but the rail solutions allows for quick removal of the roof rack assembly.
On my previous car I had Rola roof bars that were clamped onto the elevated factory car rails.
The solution was good allowing me to transport two kayaks side-by-side in a lay-down position.

Rola nd Thule cradles (c)
Rola clamp-on bars on car with factory rails
I prefer that option since in the heat of summer a light high-end kayak (epoxy lay-up) can deform if transported on its side on a "J" cradles.
The contact area of the standard swiveling cradles is so much greater that the J cradle base, not to mention the security and sturdiness (no wobble).
One thing that really annoyed me with Rola rails was the noise that the rails created at highway speed.
When not transporting kayaks, to make my rails quiet, each time I would have to remove the kayak cradles and replace the rubber strip to cover the T slot in the rail: not exactly a swift and easy operation. I did that only twice when I planned a long drive (1000 miles) but, since I used the cradles weekly, I just left them on other times and put up with the noise.
Now, having to purchase a new rack system, I wanted something quiet.
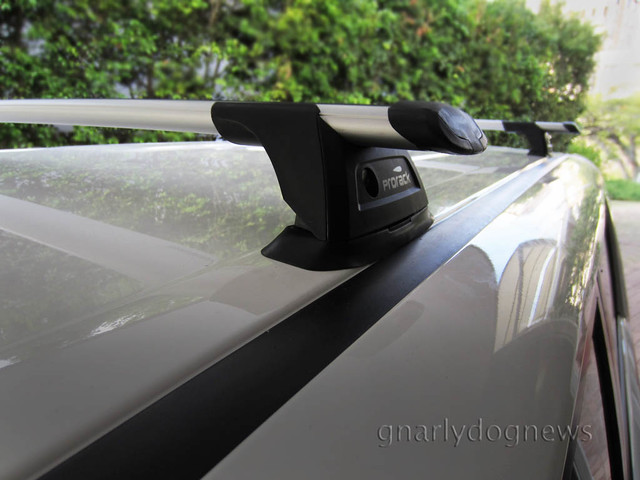
Whispbar from Pro Rack seemed the best solution guaranteeing a noiseless ride.
The rails are wing shaped to eliminate turbulence causing noise and they don't effect gas mileage, the feet are low profile and tapered to eliminate whistling.

Rukus rack1lr

I still remember those agricultural offerings that I used to sell when I managed a bicycle shop in USA: they remind me of a Meccano set where parts were just bolted together with no consideration to noise or aesthetics. They might have looked OK on a Jeep but I thought that they were so out of place on a streamlined modern car.
Whispbar was offering a permanent drill and bolt-on base for their modular rack system but my car was too new (and uncommon); there was no mention of compatibility.
I searched on the net for rail installs on the same car in USA and found some samples of similar set ups. While I was risking setting off the side curtain air bags I  drilled the roof of my car.
All went well and the small anchor pads were riveted solidly to the edge of the car's roof.

base stud_c
anchor pad and stud for roof rack mount
The rivets are high strength stainless steel and require a commercial style pop-riveter (tore apart my light duty one trying to pull the heavy duty rivets).
The base is now super solid and the rack can not accidentally come off no matter how fast I drive or how much crosswind there is.
There is no noise while I drive and I don't have to remove the cradles: the T slot rail has a built-in rubber strip that seals the void around the cradles. Simple but ingenious.

T-rail detail_c
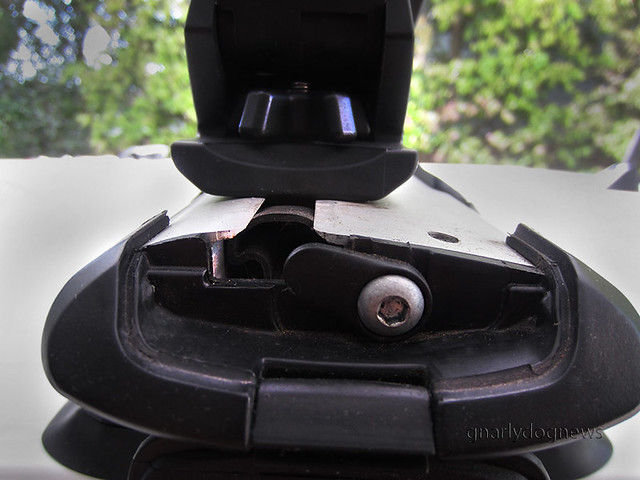
end of rail flap open to reveal T slot detail
The overhanging rails are wide enough to fit most vehicles and when the time will come to get a new car I will not need to shop for a new rack system. All I will need is 4 small metal pads to rivet onto the roof (also modular with door clips).

rack removed_c
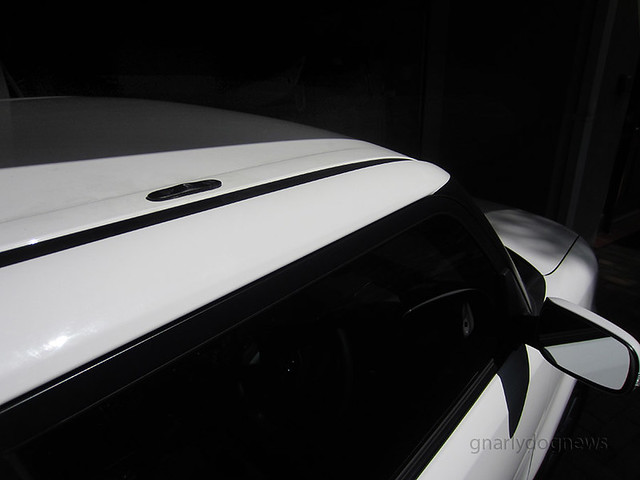
small anchor pad riveted to roof (rack removed)
The bonus part of riveting the pads is that the spread can be way greater than the typical between-the-doors clip-on racks. The kayaks sit much more securely (less pitching). I purposely spaced the bars to the length of a bicycle's wheel base. When I transport a bike I don't need a bulky (and expensive) bike carrier. I secure the fork to a simple block with a T bolt fitting that slides nicely inside the roof rack rail, The rear wheel is secured by an old school toe strap. Simple, light, quiet, aerodynamic and cheap. However I can't boast to the world: look, I am a bike rider :-)

While I was not satisfied with the Rola roof rails I was pleased with their kayak cradles.
I have tried several brands (Thule, Thule J cradles, Rhino, "no brand", custom foam blocks, Yakima) No other cradle offers me the ability of the swinging Rola cradles and the hinged pad that contours the hull better than a fixed one.

tilted cradles_c
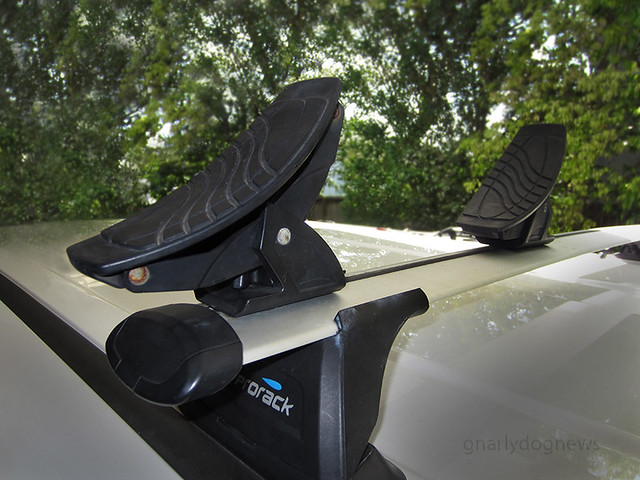
swiveling Rola kayak cradles
Rola cradles self adjust and never create a hard spot that can lead to hull deformation (in the summer heat).
Where Rola come short with their kayak cradles is the simple nut that is housed inside the thumb wheel. While their T bolt  is made from stainless steel the actual nut on the adjusting thumb wheel is mild steel. Not the best choice of material for hardware designed to transport salty kayak. Needless to say the mild steel nuts rusted and froze onto the studs. I had to split one plastic wheel and remove the frozen nut with a spanner.
When contacting Rola for a replacement part (thumb wheel) their  reply was:
"... You will need to purchase a new cradle. Part number 25-0069 - RRP $41.00..."

I felt insulted and I want point out here Rola's poor customer service policy.
Not only the rusty nut is a design fault but I find the way the problem was handled is sub standard. It seems that it was too difficult to send me a single thumb wheel and, if Rola manufacturing is done in Australia, how hard would it be to reach for one in the bin and ship it?
I am used to a different style of customer service where a design fault is addressed and remedy is offered.
I ended up sourcing the simple thumb wheel somewhere else ($2).
I generally prefer to deal with companies that offer to repair the faulty/damaged item instead of forcing me to buy a whole new unit while the old would be still perfectly functional with just a small part replaced.
I think that companies like Patagonia for example, where repair is high on the priority list, no matter who is at fault, base their success on an ethical approach to manufacturing and customer service.
Needless to say that they are also the leading brand when it comes to REAL green manufacturing policies and practices. But that will be a future post.

.
04 December 2012

DIY: keel strip

I am lucky that where I paddle the beaches are sandy. Landing my sea kayak, even with surf, poses very little chance of damage to the hull.
Sand is so much more gentle on gel coat than sharp rocks.
What I have discovered tho, that even if not gouging the hull's finish, sand is rather abrasive over time.
Dragging a loaded sea kayak to the water's edge can wear through the gel coat down to the laminate in a relatively short time.
gelcoat skid mark (c)
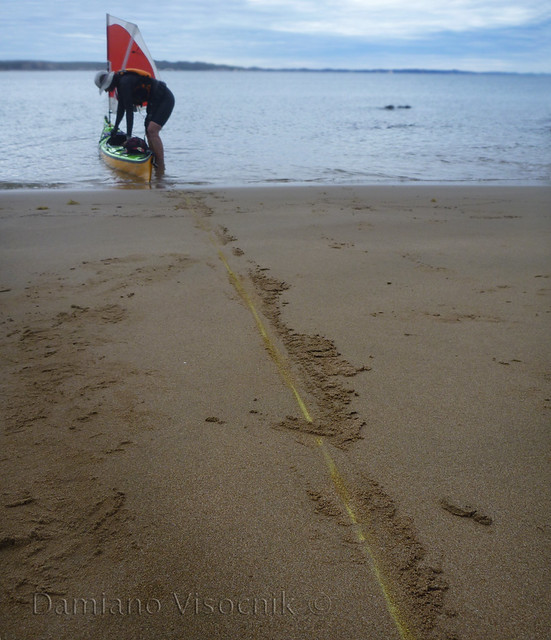
gel coat skid mark left by dragging the kayak
Typically I would take care of my kayaks by applying a resin strip (epoxy mix) to the hull. From bow to stern I lay UV stabilized epoxy (mixed with graphite and pigment) several layers thick to act as a sacrificial layer that every couple of years will need touching up. I prefer epoxy because it wears better (higher abrasion resistance) than gel coat; it takes longer to apply but I like the results. I won't describe here how to create a keel strip (there is plenty of very good info on the net) but I will say that it adds some degree of protection in areas of wear.
resin keelstrip_c
conventional resin (or gel coat) keel strip

On some kayaks the gel coat is very thick and it will take a while for sand to rub it off but on high end light kayaks the manufacturers try to keep the weight down and apply only a thin layer. Of course I could stop and exit the kayak before I hit the beach but often I launch and land in surf conditions where the most practical and safe way is to simply start/stop right on the wet sand. My light carbon/Kevlar hull was starting to show a bit of wear and I decided to try a new style of keel strip. I have heard of KeelEazy before but I have never seen a kayak with one. On my recent trip to USA I visited Kayak Academy in Washington's North West. Here I saw their entire fleet of rental kayaks covered with KeelEazy strip. I wanted to try some for myself. I decided I was going to cover part of the keel line, just the "pointy" areas where most of the abrasion occurs. The material resembles thick PVC backed with an industrial strength self adhesive glue.
The instructions were clear: clean the kayak's hull and apply neatly.
round edges_c
rounding the edge

I trimmed the edges to create a rounder corner to prevent peel-back once applied. I cleaned the hull with acetone making sure it would be really clean.
peel back_c
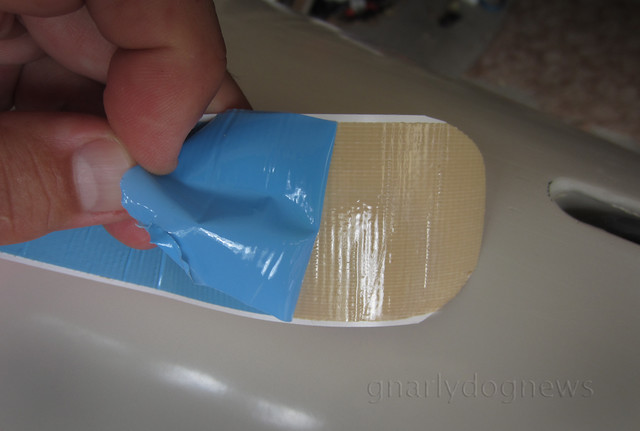
peeeling the adhesive backing

The glue on the KeelEazy strip is very strong and the blue protective backing is hard to get started
applying_c
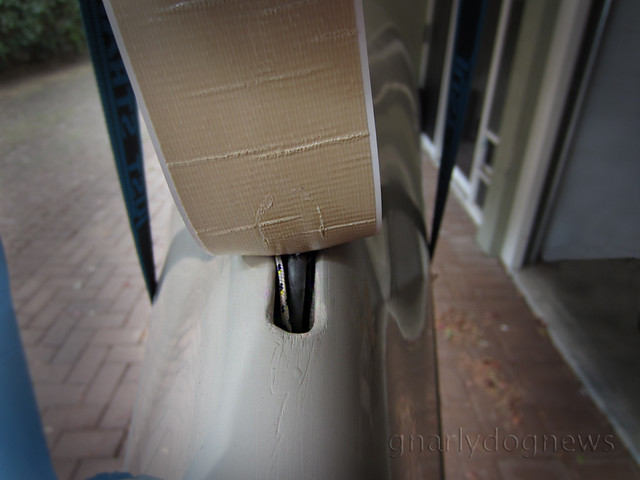
applying over skeg box

I carefully centered the strip over the skeg box opening and pressed down lightly to then check alignment. Once I was happy with the position I lifted the tape back up and pulled on it to stretch it slightly. The tape tends to then fall over the edge of the keel and contour the hull's shape. Around the bow and stern keel's curve I used a heat gun set on mild and softened the tape a bit while stretching it. It conformed over the curve perfectly without wrinkling. I applied the pressure of the palm of my hand and let it cool down.
trim skegbox_c
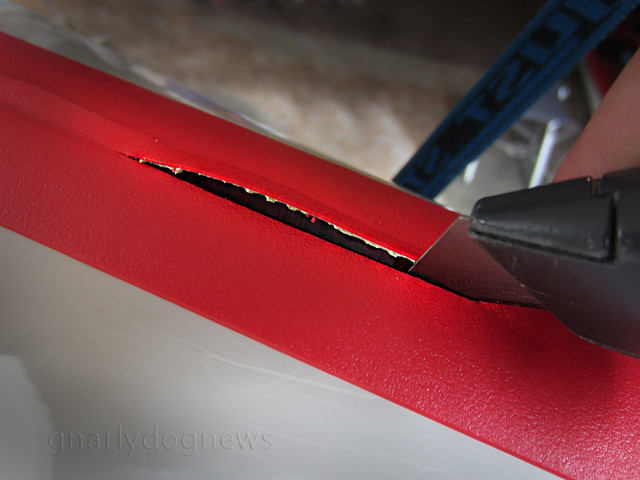
trimming back around skeg box

Around the skeg box I used a utility knife and trimmed away the strip over the opening of the skeg's blade leaving little tabs to push them into the recess.
skegbox detail_c
skeg box finished

The whole application of the KeelEazy strip took me less than an hour; a far cry compared to a typical "wet" application of a gel coat style keel strip. I have however my reservation over the effectiveness of the KeelEazy strip and I can see potential problems happening from a "half" strip. While the protection over the centre of the hull is not as critical, in retrospect I think a continuous strip might be a better solution and prevent the strip's leading edge from peeling back when dragged over a sandy beach. Time will tell if the strip is as effective as my resin ones.
finished curved_c
wrinkle free around curve

16 August 2012

REVIEW: SEA-LECT Designs footbraces

.
I paddle kayaks without rudders that use skegs for directional stability.
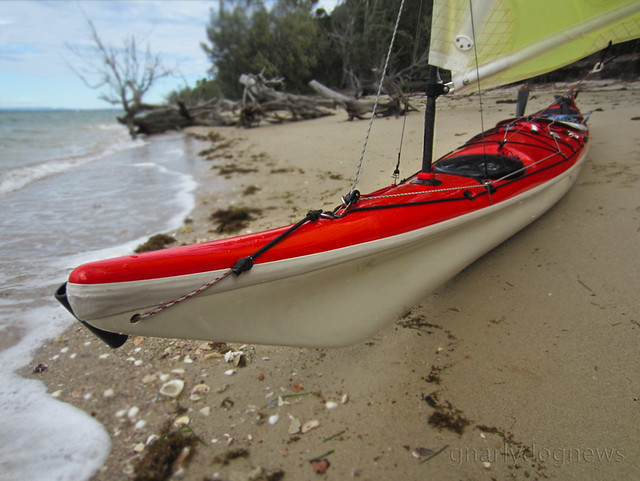
Most of the kayaks I own came with footbraces that are mounted on rails attached to the hull.
The footbrace pegs have sliding adjustment fore and aft to allow different paddlers' leg lengths fit correctly.
I find most footbraces' surface rather small offering me limited support for my feet, often creating a pressure spot. In trying to maintain a good paddle stroke I tend to have a positive pressure against the pegs, that after an hour or so results in discomfort.
Wiggling my feet around and repositioning them frequently indicates that the footbraces are under engineered for my requirements. In some of my kayaks I have modified the pegs where I have added a bar spanning from side to side creating a much larger platform with infinite foot positions.
The bar works very well for me but when it comes to adjust it for a different paddler it is pretty tricky.
The bar needs to have some adjustment in the mounting holes since the hull of the kayak is tapered.
Pulling back the bar for a closer fit usually requires a bit wiggling, hard pulling and occasionally cursing to get the corroded mechanism (aluminium against stainless steel fastens)  to slide.
In my latest kayak I have not installed my modification since several people borrow that boat and adjustment of the brace would be a pain.

When SEA-LECT Designs offered me to test their footbraces I was very excited.
The design on their website looked good and I awaited the arrival of a set of replacement footbraces.

SeaLect vs Yakima_1

As described on their website the SEA-LECT Designs footbraces are a direct swap for most brands.
I removed my Yakima rails bolts and installed the new fasteners in the same existing holes, no modifications needed.
I was even very impressed with the detail of the fasteners; the bolt comes with a cupped washer that is backed by rubber to ensure a positive seal so no leaks will occur.

SeaLect fastener

SEA-LECT Designs offers also footbraces that will mount on hull-bonded studs, not just through bolts.
There are a couple of fundamental differences with SEA-LECT Designs footbraces.
The adjusting mechanism is all corrosion free and is accessible from the cockpit, while seated in the kayak.

SeaLect footbrace_1

If I need adjustment (bring the pegs closer) I just grab the tab on the rotating rod, flick it 90 degrees upwards and relocate the peg, all on-the-fly, while on the water. I can do that with Yakima footpegs too, wiggling my foot behind the peg and hopefully finding the release tab, but only works when new. After a few months corrosion sets in and the adjusting mechanism becomes very sticky.
The surface area of the SEA-LECT Designs pegs is larger and gently curved to spread the load of the feet-pushing action.
Despite wearing paddling shoes I still find Yakima's sharp pegs edges dig into my feet a bit; SEA-LECT pegs are much nicer on my feet.

SeaLect vs Yakima_2
SEA-LECT Design on the left, Yakima on the right.
There is one thing I don't like about the SEA-LECT Designs pegs: the angle relative to my feet.
Maybe it's a personal taste but I found the pegs oriented too much forward: I kind of like them more square.
In the process to test them thoroughly and offer the manufacturer comparison feedback I added a little plate that I bolted onto the pegs surface, angling it backwards.
After an initial paddle of 10 miles I found the modified angle more to my liking.

.

07 August 2012

DIY: replacement carbon-fiber seat in Valley

.
Seats in kayaks seem to be often a deal breaker: some folk won't buy a kayak if the seat is not comfortable for them. Some kayak seats seem to fit more paddlers than others but there are also some seats that cause a lot of grief and paddlers go to great lengths to fix them.
The most common complaint I hear and read about from sea kayakers is the dreaded dead leg syndrome; after a while on the water (sometimes as brief as half an hour) some paddlers start to feel pins and needles or loose the feel of the legs altogether.
I am one of them: I find a lot of sea kayak seats not suitable for me. Maybe is my chunky thighs that force me to extend my legs lower to make them fit or something but I find most seats too short and too "peaked" (high up front) for my anatomy.
One seat that I have removed from more kayaks than any other one is the Valley plastic seat and the current model seems to be just as aggravating as the previous one.
In Adventuretess' Nordkapp LV I removed the seat and replaced it with a DIY fibreglass one removing the back band and replacing it with a foam block.
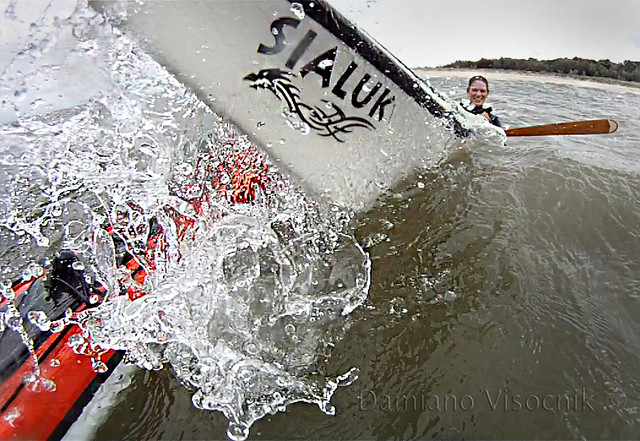
Steavatron recently borrowed Adventuretess's Nordkapp LV (Sialuk) and was amazed by the difference in feel and stability of the kayak.
Within half an hour of paddling Sialuk, he politely asked me if a similar seat was possible to be had in his own Nordkapp LV.
I agreed that with his help we could fabricate one for this kayak too, and we might as well go "bling".

carbon seat4

The plastic VCP seat is easy to remove: 4 bolts on the outside of the coaming hold the seat in place.
Once the fsteners were removed the seat came right out but revealed a little problem; the edge of the seat has been "shaving" the hull and a few layers of fibreglass have already been carved away by the motion of the seat slightly swinging when paddling. If not caught in time it would have holed the kayak from the inside out (the same problem occurred in Sialuk).
Patching that divot was dead easy and we restored the hull to full strength.

carbon seat2

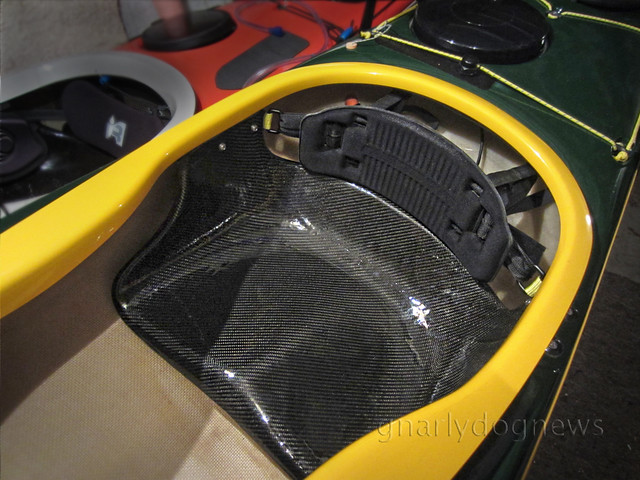
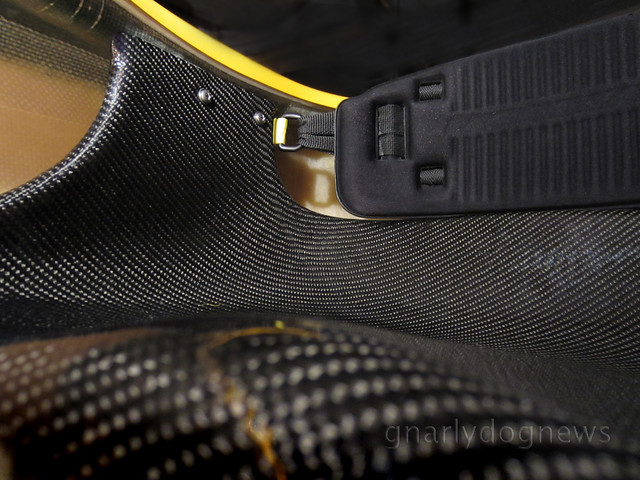
The new seat is made from a laminate of glass fibre, double bias carbon under the sitting area and a veneer of the oh-so-sexy twill carbon fibre on top, for looks of course :-)
The edges of the seat have been reinforced with Kevlar to prevent the typical cracking that I have experienced in other factory chopped-mat kayak seats.

carbon seat1

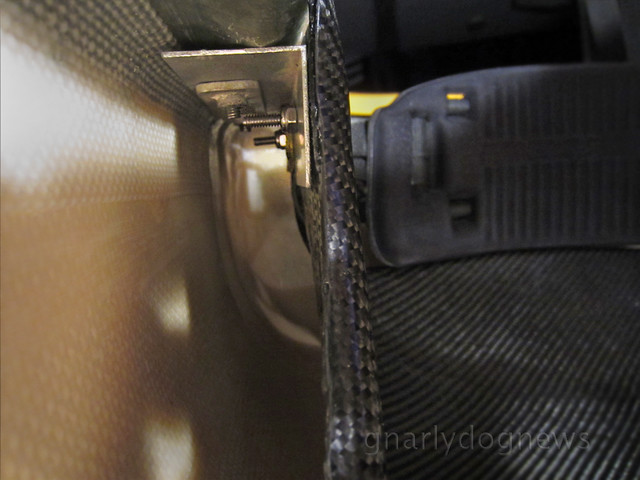
The new seat does not hang on its own but I used "L" brackets to support it. The original VCP hardware was re-utilized and new stainless steel bolts are anchoring the carbon seat to the bracket.

carbon seat3

Stevatron was happy to reuse the original back band and hip pads. The back bands sling is attached to the seat with a short piece of webbing and a "D" ring. Existing straps firmly secure the back band to the rear bulkhead to prevent dislodgment when entering the cockpit.
After the maiden voyage Stevatron was happy with the position and height of the new seat and it was then finally secured to his kayak with a few dobs of polyurethane (Sikaflex) sealant to prevent any swinging and deliver a solid feel. In the event the seat would have to be removed for any reason a spatula will be inserted under the seat to break away those few spots of sealant.
Stevatorn finds the new seat a vast improvement on the stock VCP plastic one. The centre of gravity has been lowered and he finds that the Nordkapp LV has changed personality.
He is more confident on putting his kayak on edge and has gained stabilty when in textured waters.
Since the change and after a few paddles of several hours he no longer experiences the dead legs.

.

31 July 2012

Naming that boat

There are very few other things that have evoked "personification" more than a sea going vessel.
Throughout history owners of all kind of boats have been naming her (yep, apparently boats are female... alluding at the changing moods? :-) with captivating, suggestive and exotic names.
Not sure if all paddlers share my attachment to a kayak but I feel being part of "her".
Is it the tight confined space that almost wears my body or is it the medium to deliver so much pure enjoyment that personifies an inanimate object made from fibreglass and resin?
Nevertheless I have named all my kayaks even if our "love" was brief at times.
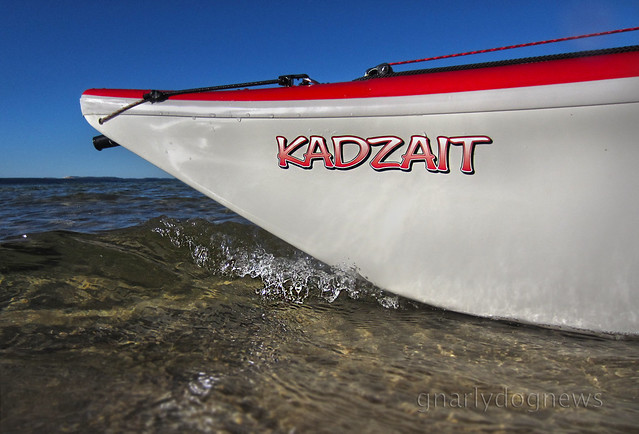
From "Wet Dream" (a name almost R rated) to Kadzait there have been 14 "girls" in my shed...

I think it's more personal to have a name to refer to, instead of the model that the manufacturer gave her (at one stage I had two of the same model).
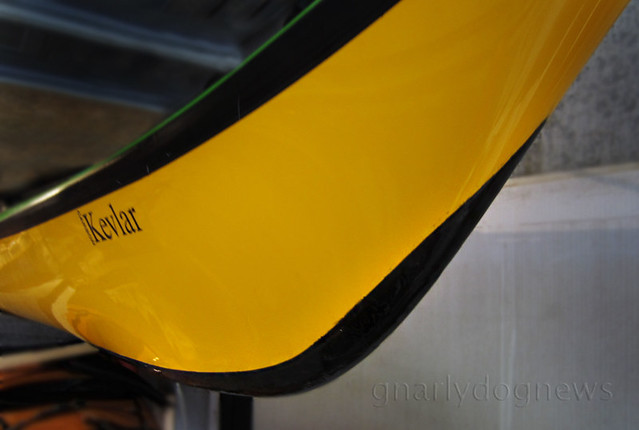
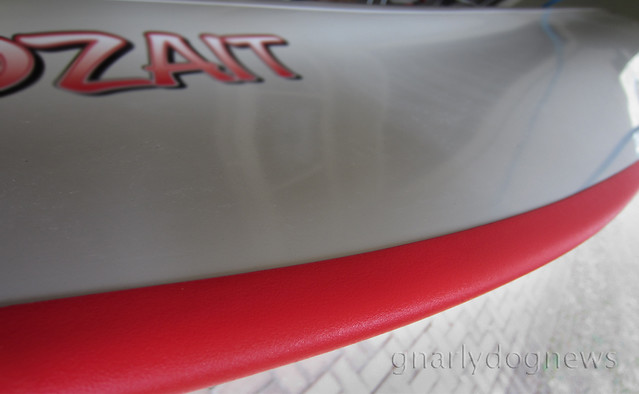
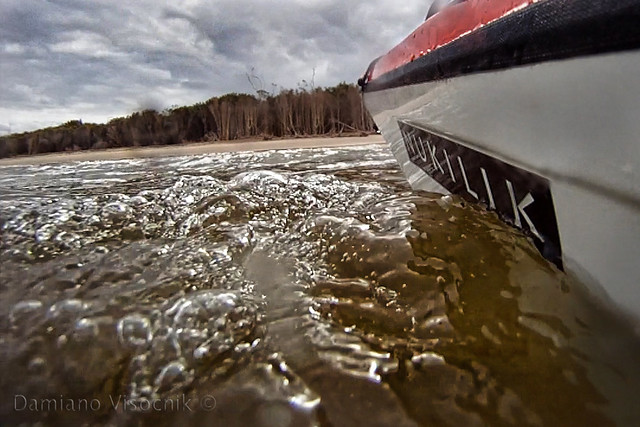
I like to display the name of my kayak on the bow, just under the seam line.

Nukilik bow_c

In the past I have come up with the logo for the name myself; using the imagination and electronic tools I would fashion graphics that would work on a sea kayak.
My designs have been so far monochrome; I would cut the logo out of cast vinyl and apply it to the gel coat.
Self adhesive cast vinyl is used for sign making and I would source mine from a local supplier but "flea Bay" seems to be a good source too.
I would trace the logo over the vinyl and with a very sharp hobby knife I would neatly cut out the desired shape. I limit my designs to be rather simple with few pointy edges and no fine lines. A cut-out vinyl sticker needs to have some body if used on the bow of a sea kayak or peeling of the material will occur.

tail surfing_1_c
I used clear vinyl to cover the complex shape of this logo
Recently I have had the urge to spice-up a bit my logos and with the recent purchase of (yet) another kayak I held back for a while. I could design my own logo in full color, maybe even with a drop shadow or something but the quotes I got to print a one-off were rather expensive.
Then I stumbled across Kayak ID, a guy that specializes in making just the very thing I wanted: logos for kayaks in "airbrush" look.
On his website he offers a very simple way to design your own logo in a few different styles.
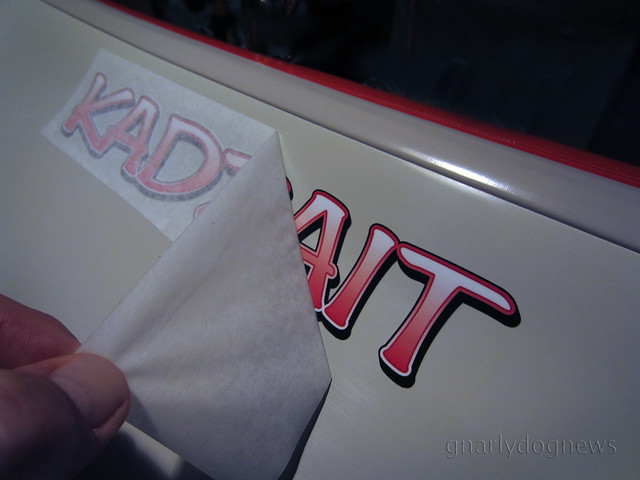
I asked Bob for a sample and he was happy to supply me one, with exact instructions on how to apply it without messing up.
The decal took a while to make and ship (California based company) but it was delivered in a very protective stiff cardboard envelop to prevent shipping damage.
Cleaned up my kayak as recommended and carefully applied the decal.

kykID decal_1

I think that these graphics look a lot more professional than my amateur efforts.

kayakID decal_Kadzait
.

12 July 2012

GEAR: sea kayak sail_update

.
Several years of using sails on my sea kayaks has lead to refining my initial set up.
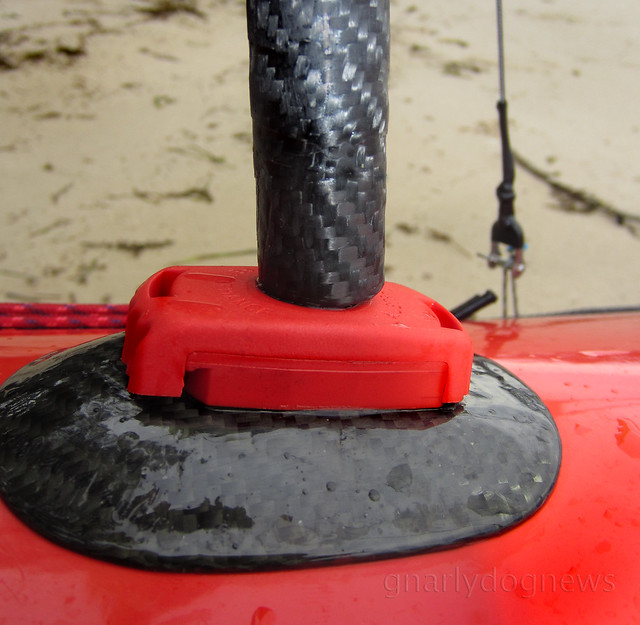
I no longer sew my sails but I still create my rigging, using custom made carbon masts.
On some narrower kayaks my sail set up was not as bombproof as I would like it to be where in a strong breeze (above 20 knots) the mast would not keep vertical and the little polymer base would deform under the lateral pressure of the wind. In a beam wind I would like to have my mast in a vertical position, making the sail more efficient and increase a bit of speed.
Mick at Flat Earth Kayak Sails has developed a brilliant way to reduce the down pressure on the flexible joint and is now shipping his sail with a new system where the mast contacts directly the removable fitting.
I want to use carbon fibre masts but I have been unable to find an off-the-shelf mast that would replicate Mick's system.
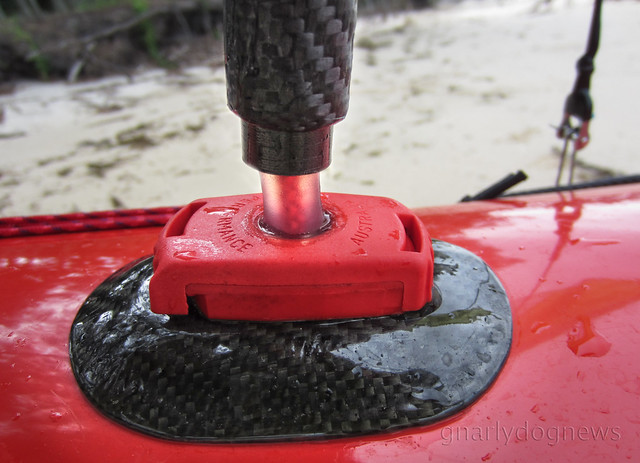
Not wanting to bond aluminum to carbon to create the oversize sleeve for the mast, the only way I could achieve what I wanted was to modify my existing masts to create the sliding foot sleeve.
mast base_sleeved_c
mast uphauled
Instead of having a larger diameter mast running the whole length, I just made a short sleeve out of glass fibre tape wound around a tube of slightly larger diameter than my carbon mast. Once cured I bonded a the sleeve section to the base of the existing mast and covered it with carbon cloth for strength, and looks :-)
The sleeve section slides over a stubby base with the flexible polymer allowing the mast touch the actual hard surface of the red plastic base.
No load is now exerted on the polymer so it will no longer deform when the mast is uphauled and cinched down hard.
mast base sleeve_c
mast lifted for demo purposes
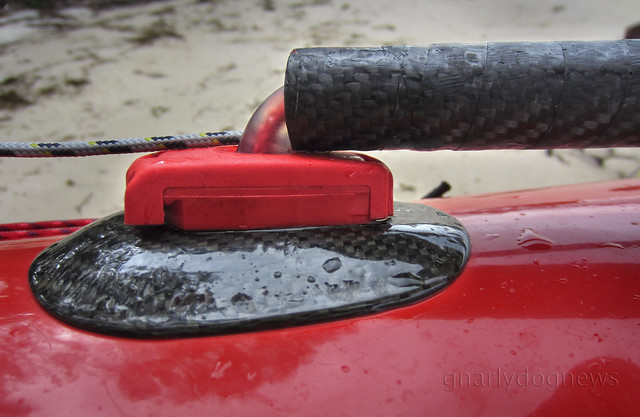
Of course the mast can still be lowered as before and when the sail is folded onto the deck the mast slides back up just enough to allow the flexible polymer do its job.

mast folded_c

To prevent the sliding mast and the stubby base come apart I have used a short piece of shock cord threaded internally holding the two together.

boom junction_c

I have also improved my anchor point for the stays on the mast.
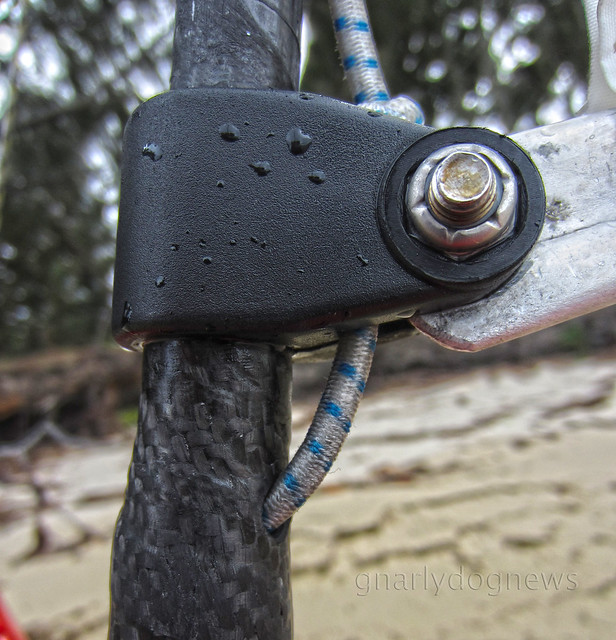
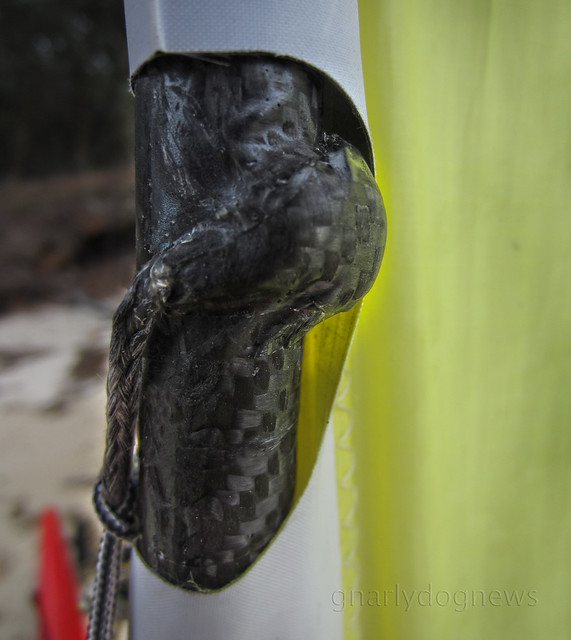
I no longer use a stainless steel ring riveted with a saddle to the carbon tube but I prefer the use of soft Dyneema core line bonded directly to the mast with a section of carbon fibre cloth.
The load is distributed better and there is no risk of cracking the thin carbon tube with the pressure of installing (pulling) a stainless steel rivet.
mast stays junction_c
mast rotated to show the carbon cloth anchor for the Dyneema cord
I have been using the new recessed anchors with great success, locating them right on the seam of the hull/deck to achieve a wider stance and a better load angle.
The stainless steel shackles are now heat shrunk (see warning below) to the Dyneema stays so they don't rotate when the sail is lowered on deck.

anchor and stays_c

The whole assembly, viewed from the bow.
on beach_c

WARNING:
update 04JAN13
Richard Sharp from SEQSK has this to say:
"I had the sail up in 20knots and got hit by a gust which tipped me in. It
was at that point that I noticed the sidestay had snapped. Finding it hard
to believe that this was possible given the breaking point of spectra, I
examined the break closely. It was then that I discovered that where it had
snapped the internal spectra cord was melted together. See the enclosed
photos."

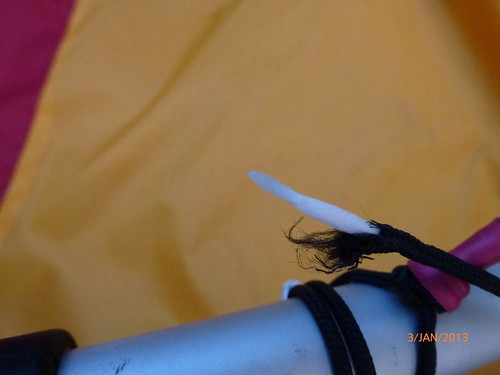
P1010037

P1010038

It appears that the core has melted while the outer sheet remained OK.
Using a heat gun at close quarters causes the Dyneema/Spectra fibres to fuse and become very weak.
The melting point of Dyneema is much lower than the outer polyester (pictured here black) and no noticeable damage was visible from the outside.
He now prefers to use the heat shrink only over the loose end of the rope, not over the entire knot and apply very gentle heat for longer to allow the tube to shrink.

image001

20 March 2012

Outfitting a sea kayak

Here is a summary of the outfitting and modifications that I do to my kayaks.
Not all kayaks have the same amount of work done and some outfitting is not shown here.
Some kayaks have more work than this one but those modifications (camera mounts) are not relevant to general paddling.
Most of the work depicted here is only possible on a composite lay-up and I use exclusively West System for my fiberglassing.
I currently don't have any ruddered kayaks in my fleet so there are not details of previous modification done to rudders.
Here is on overview of outfitting of a recently acquired British style kayak.

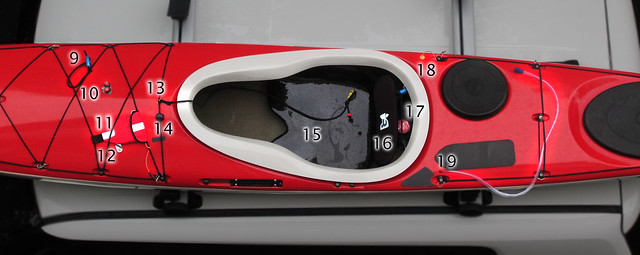
Kadtzait on Lego_1

The numbers are referring to modification or additions that I have permanently attached to the kayak. Other items that are added for a particular outing are not depicted.
Each item that is light-blue has a hot-link pointing to the relevant article in GnarlyDog News.

Kadtzait bow
Bow
1) retractable grab handle, replacing factory looped ones
2) pulley (block) for Flat Earth sail. Attached to deck anchor via Dyneema line
3) short tether line for quick anchor to piers (no article)
4) mast base for Flat Earth sail;  under-deck is reinforced
5) recessed anchor for side stays (sail). Dyneema loops
6) protective tape for mast/boom joiner (possibly scraping deck when sail lowered_no article).
7) 3M Dual-Lock fastener for removable compass (often removed when surfing).
8) pulley (block) for boom of Flat Earth sail. Secured with recess anchor and Dyneema loop

Kadtzait midship
Midship
9) bungee loop for stowing lowered sail
10) cam-cleat for trimming boom
11) slim profile tow-line
12) cleat for up-haul on sail
13) paddle leash (anchor point)
14) magnetic switch for bilge pump
15) replacement DIY fiberglass seat
16) replacement back-band: Immersion Research (no article)
17) electric bilge pump
18) bilge pump outlet, away from the cockpit to prevent water being pumped back in
19) drinking system (below deck)

Kadtzait stern
Stern
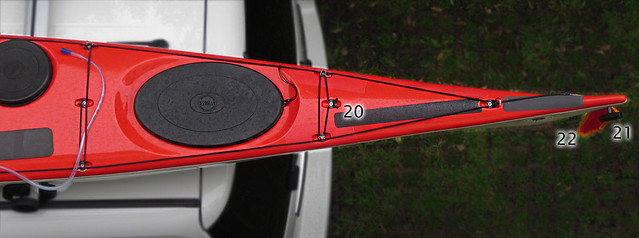
20)  protective "deck thread" tape for spare paddle (prevent scuffing)
21)  retractable grab handle
22) clip-on flag for car topping transport (removed before launch_no article)