As the air inside the hatches contracts and expands with the difference in temperatures from ambient air to water temperature while rolling a kayak, a non vented hatch will try to draw (or expel) air via the hatch cover. I have observed hatch covers bow alarmingly on a hot day and I have heard of damaged kayaks in some extreme cases. I sometimes manually pop the seal of the tight cover and "burp" the air to equalize the pressure that builds inside.
The same would happen when the hot air inside the hatch will suddenly meet cold water and contract: the hatch cover would flex inwards, possibly sucking water inside.
A simple solution is to drill a tiny hole in the bulkhead and let the air pressure exchange through that hole.
The problem with the tiny hole is that often is not large enough to exchange the air pressure swiftly enough.
If I enlarge the hole water would seep into the hatch compartment (even though not much) when the cockpit is flooded, like in a re-enter and roll.
As I tend to take the occasional swim while surfing (oh yeah, my rolls aren't that "bombproof" at times) the flooded cockpit would seep water into the day hatch and front compartment.
Toomas suggested to install Gore-Tex plugs on the bulkheads.
Intrigued by his suggestion I researched the plugs and found that the air permeation is rather high, at least three times that of of some factory drilled bulkhead went holes.
I purchased some plugs and proceeded to installed them.

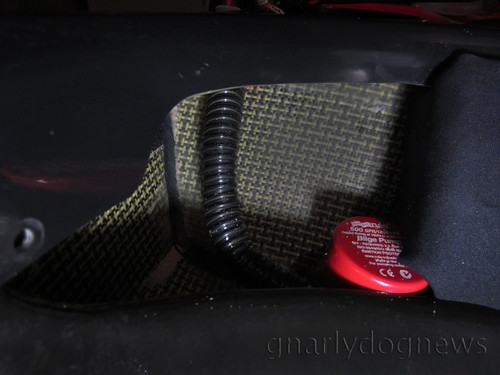
I selected a location in the rear bulkhead (cockpit) that was a midpoint from hull to deck.

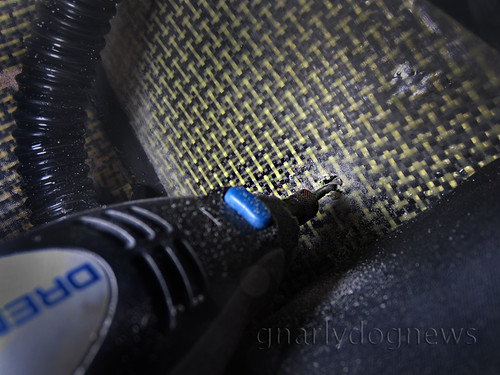
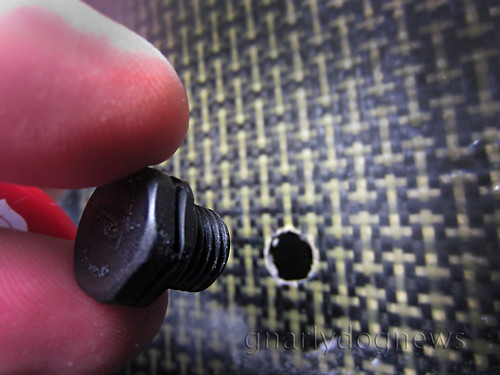
I used a high speed drill to make a hole in the carbon/Kevlar laminate (small size drill bit) to prevent fraying the Kevlar. I enlarged the hole to a size large enough to insert a round file.

I finished the edges with smooth long strokes of the file to minimize the fraying.

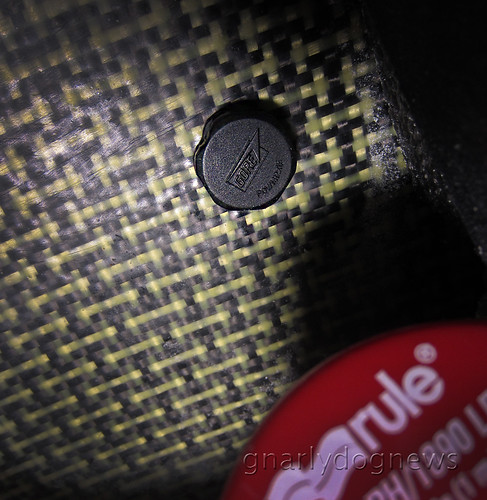
The Gore-Tex vent plug has an "O" ring that seals against the surface. A matching plastic nut was sourced (M12 -1.25 pitch). I used the nut of an electrical gland that fitted perfectly.

I found that the plug seals against water intrusion but allows ample venting of the bulkhead preventing the hatch covers from bowing. Installation was dead easy (20 minutes).
I also found that venting the hatches was only partially the problem; the real one is the dual density hatches expanding in the heat of summer to the point of becoming so loose to literally wobble on the rim.
Needless to say I am now sourcing "old school" hatch covers, made out of rubber, that stay put no matter what temperature.
.

Any chance you're going to release the source of these plugs mate?
ReplyDeleteCheers
Steve G
Steve, GnarlyDog News readers access this site from all parts of the globe so I didn't want to bother them with provincial details. I sourced mine by doing a Google search and the local supplier popped up: shapers.com.au
DeleteCheers for the link
DeleteYou could use a water dripper from a irrigation system,they can be closed or open and can easily be fitted with a nut and washer and a little sixaflex to help seal then jobs done...about 40 cents from any irrigation shop
ReplyDeleteGages, the "water dripper" is a valve that needs to be manually operated, right? So if I want to let the air out/in I have to twist the tap and open it.
DeleteWhat happens when I flood the cockpit (wet exit)? Water will go past the valve? Do I end up with a wet hatch?
your right but You can close it so low that air may travel out and water will just get past and I mean JUST .It would take hours to get a cup full.
ReplyDeleteAs my old man used to say the only thing that is water proof is a fishes bum :)
Thanks for this suggestion, we suffer greatly from this problem, moving boats from pool sessions at 70F to the outdoor Minnesota Winter air at -20F, last winter I seriously cracked the deck on my lightly laid-up Tahe Greenland because of this challenge, and now have an ugly hole, soon to be filled with one of these little plugs.
ReplyDelete